


Bdblazer1978
-
Posts
89 -
Joined
-
Last visited
Content Type
Links Directory
Profiles
Articles
Forums
Downloads
Store
Gallery
Blogs
Events
Classifieds
Everything posted by Bdblazer1978
-
Starting my B2C restoration.
Bdblazer1978 replied to Bdblazer1978's topic in Mopar Flathead Truck Forum
Thanks for all the replies. It explains a lot and also provides some more details for what I need to do to fix these areas. I'm new to metal fab with limited tools, so remaking parts that would have been pressed is going to be a slow process. Knock on wood, so far these are the only major rust areas I've found. -
Starting my B2C restoration.
Bdblazer1978 replied to Bdblazer1978's topic in Mopar Flathead Truck Forum
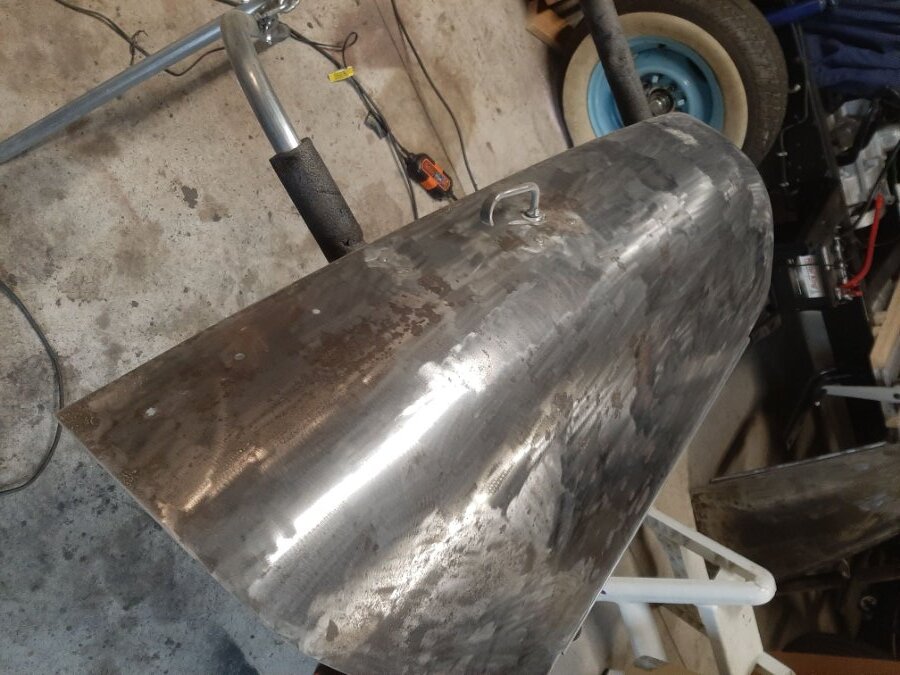
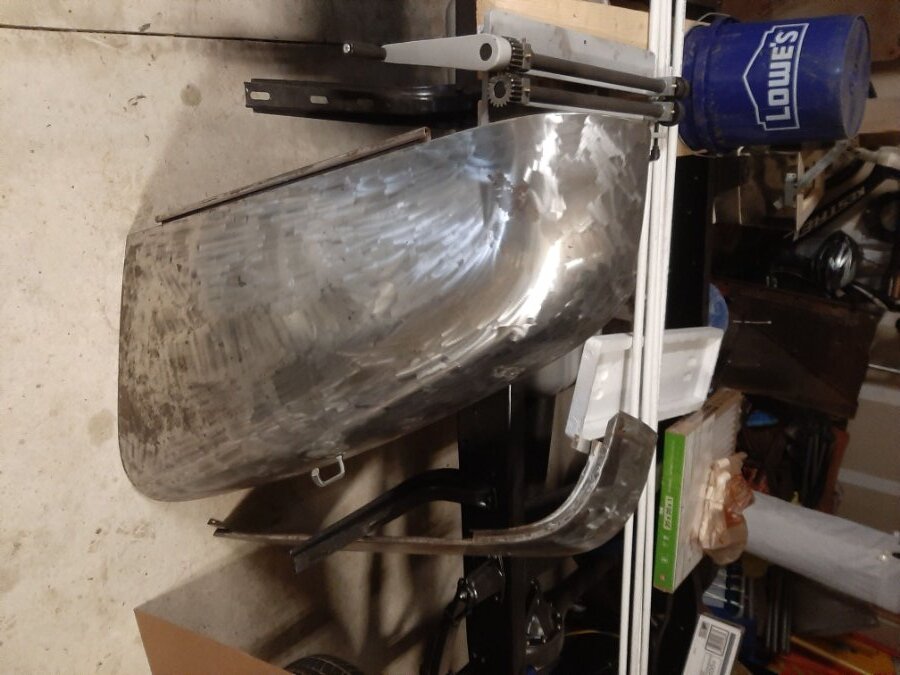
Started doing some metal work to try and get everything in primer before we move. While removing the paint on the truck, I realized someone had tried to do a repair in the past. After removing a LOT of body filler I got down to their "repair" and realized just how bad it was. 2 questions: 1) What was the reason for the 2 bolts going through the side to hold the mounting bracket? Did they provide some structural support? Why not just weld the bracket on and have a cleaner appearance? 2) Is the long flat rectangular piece of metal I'm pointing at supposed to be there? It looks like someone shoved it in there as part of their repair. It's along the long edge. Thanks


-
Mike, welcome to the group. I'm not sure what your asking for. Are you looking for help in rebuilding your bench seat? I just finished mine a few weeks ago. If you have specific questions or pics this page is really helpful.
- 1 reply
-
- 1
-

-
Starting my B2C restoration.
Bdblazer1978 replied to Bdblazer1978's topic in Mopar Flathead Truck Forum
The one with the horse head is from Freedom's Edge Brewing Co. in Cheyenne, WY. My wife likes to collect growlers from where we are stationed or visit.
-
Starting my B2C restoration.
Bdblazer1978 replied to Bdblazer1978's topic in Mopar Flathead Truck Forum
This is my first time, do you block on epoxy primer or a high build? This is just epoxy primer to cover the metal. I'm still trying to figure out all this bodywork stuff. -
Starting my B2C restoration.
Bdblazer1978 replied to Bdblazer1978's topic in Mopar Flathead Truck Forum
Finished the initial work on the hood. I learned I need to sand the body filler with a finer grit. I stopped at 180 and should have gone to 320, I'll fix it before I put the base on. At this point I just want to get everything in primer so it's safe to move in the next few months. My wife really wants her truck done when she let's me store parts in our dining room to warm them up.
-
Starting my B2C restoration.
Bdblazer1978 replied to Bdblazer1978's topic in Mopar Flathead Truck Forum
Took advantage of some nicer weather and mounted the cab to the frame. Realized that my "hard" left front mount is toast and needs to be replaced, going to have to find a hockey puck based on recommendations on this site.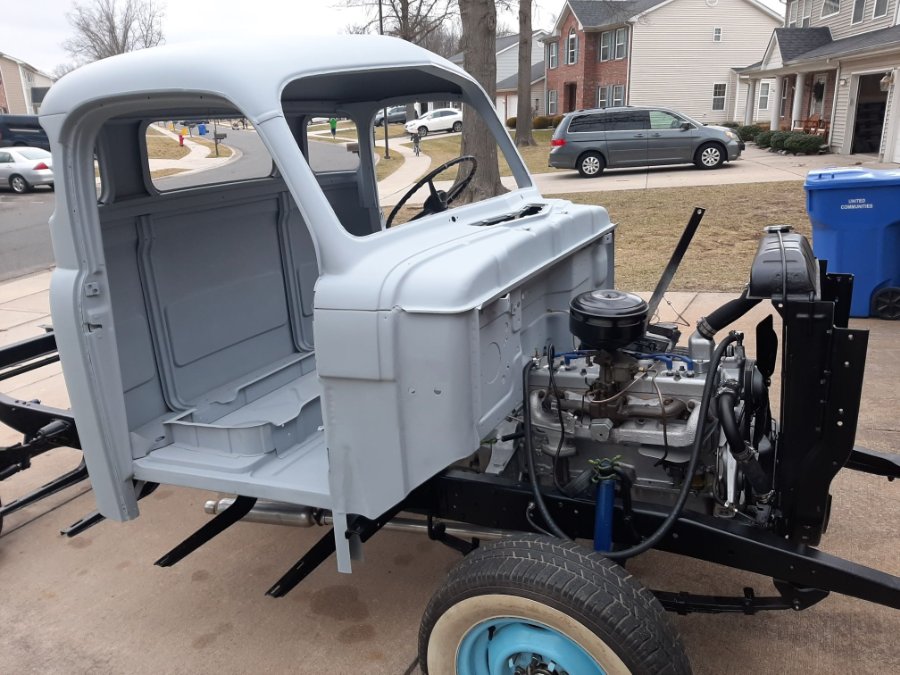
-
Starting my B2C restoration.
Bdblazer1978 replied to Bdblazer1978's topic in Mopar Flathead Truck Forum
On the cab, because the sandblaster used an etch coat, I'm using PPG Shopline 2K Primer Surfacer (JP202). For the rest of the truck since it will be going on bare metal I'm using PPG Shopline Epoxy Primer (JP375). These were the recommendations from the paint shop, I have no experience with either or any idea how they compare to others. To hold my plastic up, I wrapped it around a piece of pvc and screwed that to the ceiling. Seems to be holding up pretty well. Sorry to hear about you experience. When it rains it usually pours. -
Starting my B2C restoration.
Bdblazer1978 replied to Bdblazer1978's topic in Mopar Flathead Truck Forum
For the cab I had it sandblasted. I decided that with the size and all the angles and small spaces it was easier to have it blasted. I dropped it off on a Sat and got it back on Tues. For the rest of the truck I'm planning on prepping myself with stripping disks and wire wheels. The wiring was $1,039. That included wires for some extra lights and fuel pump, a chrome turn signal switch/relay, and a few other odds/ends. -
Starting my B2C restoration.
Bdblazer1978 replied to Bdblazer1978's topic in Mopar Flathead Truck Forum
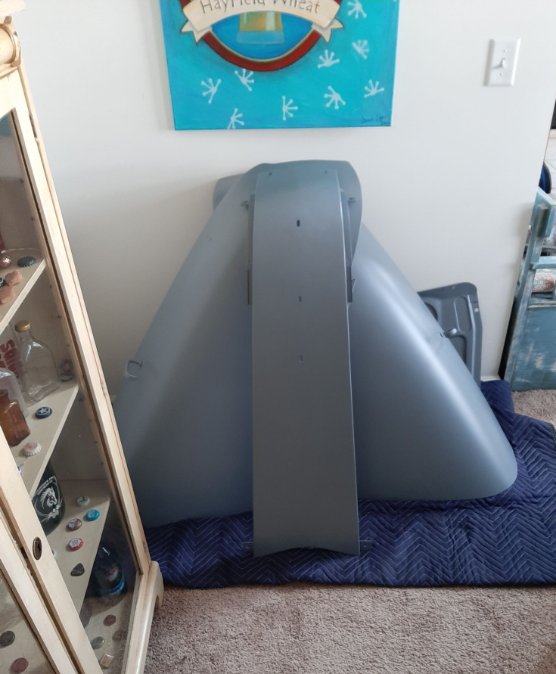
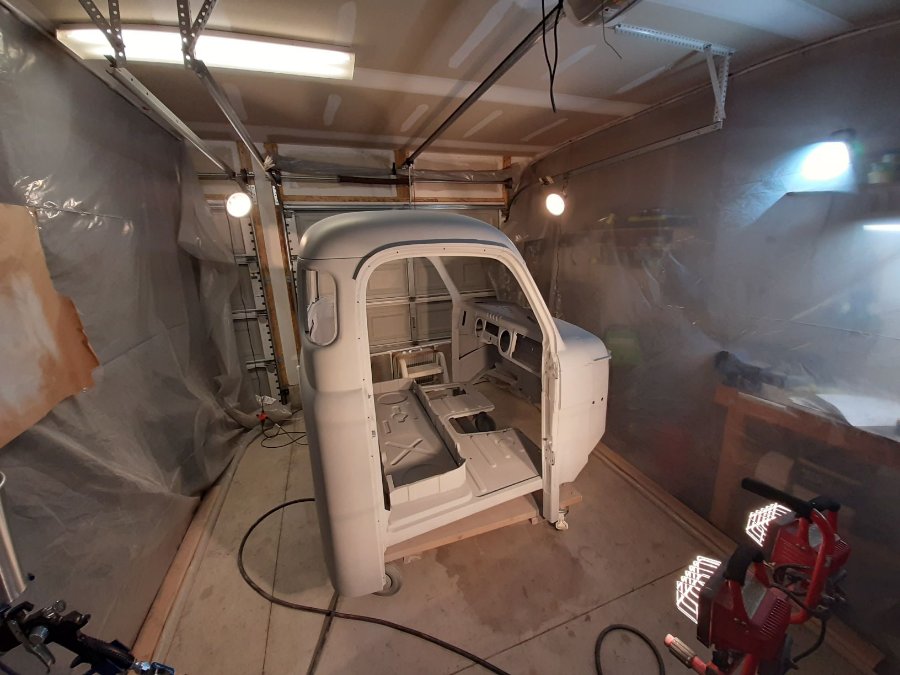
Set up a cheap spray tent in my garage to try and cut down on getting dust everywhere. Worked pretty well except for the fresh air fan being on the floor and pulling in cooler air. I was able to finish priming the cab, really happy with the results for this being my first time. There are a few spots on the roof that I'm going to have to do some additional body work before I put color on, but good enough for now. I plan on temporarily mounting the cab back on the frame this week to free up some garage space. Once I have a few smaller pieces ready, I'll try my hand at base/clear and then work the cab.


-
Just primed my cab today. Thanks for the inputs. I laid mine on its side and it was easy to step through the windshield to paint the roof. Also, can someone tell me how to adjust the photo? I tried rotating in the gallery and then re-posting, but it turns it sideways every time.


-
Starting my B2C restoration.
Bdblazer1978 replied to Bdblazer1978's topic in Mopar Flathead Truck Forum
I've been a little slow working on the truck this past month. Reupholstered the seat, turned out pretty well for not having a clue what I was doing. Removed a mouse's nest while I was at it. Also started stripping the hood, hopefully will try my hand at spraying primer next weekend. Another first, fingers crossed. And for Christmas I got my wiring harness from Rhode Island Wiring, it looks really good.


-
I had 2 items that came up when I installed the kit: 1) I had custom flexible brake lines made that had a banjo fitting on one end and the original bolt through frame fitting on the other. 2) The recommended calipers didn't fit my rims, so I ordered an adapter. I'm working on a B2C, so I'm not sure if that's what caused the differences. Overall very happy with the kit and the support while installing was great.
-
Ready to Start the Engine Build (what am I missing)?
Bdblazer1978 replied to billrigsby's topic in Mopar Flathead Truck Forum
Make sure you install the thermostat at the back of the head before filling the radiator. Meant temp gauge, not thermostat. -
Starting my B2C restoration.
Bdblazer1978 replied to Bdblazer1978's topic in Mopar Flathead Truck Forum
So the first drive was a blast. We live on a military base, so I was trying to figure out how I was going to explain what I was doing if I got pulled over. Started on the body work for the cab. Want to get that done and back on before we have to move this summer. First time doing any real body work, so my grinding skills are getting a workout.


-
Starting my B2C restoration.
Bdblazer1978 replied to Bdblazer1978's topic in Mopar Flathead Truck Forum
Took it for the first drive today. Transmission sounds good. Still need to do some work on the brakes and getting engine dialed in.
-
Starting my B2C restoration.
Bdblazer1978 replied to Bdblazer1978's topic in Mopar Flathead Truck Forum
Received my oil pump and after letting it soak in oil for a couple days, I put everything together. Ran through the same startup procedure to make sure I had oil pressure and then crossed my fingers. SUCCESS!!!! It started a little rough, but once I got everything dialed in its purring. -
Starting my B2C restoration.
Bdblazer1978 replied to Bdblazer1978's topic in Mopar Flathead Truck Forum
While waiting for the oil pump, my wife decided she didn't like the way original paint was coming out. As we were slowly wet sanding, we realized the previous owner had already removed too much and we were going to end up with a lot of bare metal. So we decided to strip and paint the entire truck. Sent the cab out for sandblasting and I'm pretty happy that there wasn't much rust.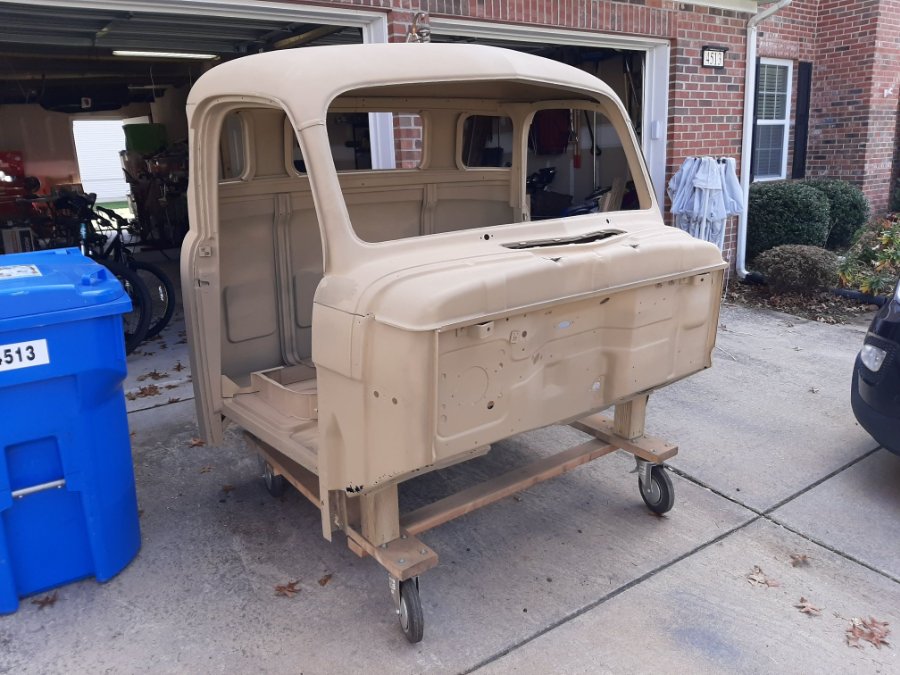

-
Starting my B2C restoration.
Bdblazer1978 replied to Bdblazer1978's topic in Mopar Flathead Truck Forum
Pulled the cam shaft out of the rebuilt engine and my spare engine. Never would have guessed that I'd use clothes pins during an engine rebuild.
-
Starting my B2C restoration.
Bdblazer1978 replied to Bdblazer1978's topic in Mopar Flathead Truck Forum
Not sure if the link will work. The group is called Flathead 6 engines. https://www.facebook.com/groups/194200864347464/?ref=share -
Starting my B2C restoration.
Bdblazer1978 replied to Bdblazer1978's topic in Mopar Flathead Truck Forum
So I posted about my oil pump on a Flathead 6 facebook page and had a handful of other people respond that their pump had failed. I was amazed that this is a recurring problem. I received my new pump, but before I install it I'm sending it out to have it gone through. I'm also pulling apart a spare engine I have to hopefully find a useable cam. -
Starting my B2C restoration.
Bdblazer1978 replied to Bdblazer1978's topic in Mopar Flathead Truck Forum
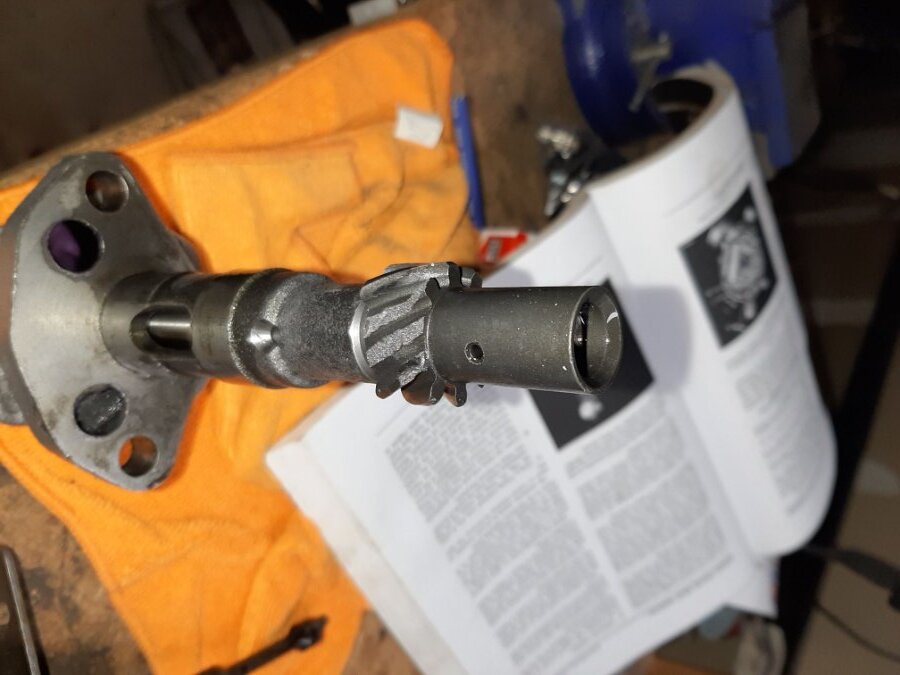
Looking at the cam, I have one tooth that has a nick out of the front (not sure if this is new) and another that looks like it drug along the oil pump. I'm planning on seeing if I can smooth them a little without tearing apart the engine. Then I'm going to put the new oil pump in and watch how the gears mesh. I'm hoping that I dont have to pull it all apart.
-
Starting my B2C restoration.
Bdblazer1978 replied to Bdblazer1978's topic in Mopar Flathead Truck Forum
Mine was brand new, the one I pulled out of the engine had a crack that wasn't repairable. It was a Melling M-37, the only brand I could find. I ordered mine from Summit Racing and they are sending a new one under warranty. -
Starting my B2C restoration.
Bdblazer1978 replied to Bdblazer1978's topic in Mopar Flathead Truck Forum
Thought I was making good progress but today hit a huge issue. Over the weekend I had everything together so I started walking through my first start checklist. Did an oil pressure check without any spark plugs, 10 lbs at cranking speed so I installed the spark plugs and proceeded to start it. After I realized my oil pump was off by one gear I adjusted it and it started for a few seconds before stopping. I figured I just needed to adjust the carb, and called it a night. Went to start it today and it just turned over. Started checking and realized I wasn't getting a spark. Turned the engine over without the distributor cap on and realized it wasn't spinning. I'm getting worried. Pulled the distributor and everything was ok with it. So I pulled the Brand New oil pump. It won't turn and when I was trying to start the engine it sheared off a couple teeth. Now I'm draining the oil pan to pull it and check for any other damage. I'm enjoying working on the truck, but days like today are frustrating.
-
On a side note, since it just happened to me. I had a leak between the collar the drain plug screws into and the pan. I think the sludge had plugged the hole, so when I cleaned it and put new oil in, it started to leak. I had to drain and pull the pan to fix it. You may want to install your plug, put a little oil in the pan, and let it sit overnight to verify no leaks before you install it. I was also told some pans leak near the bottom of where the dipstick goes in.
