


47Jim
-
Posts
82 -
Joined
-
Last visited
-
Days Won
1
Content Type
Links Directory
Profiles
Articles
Forums
Downloads
Store
Gallery
Blogs
Events
Classifieds
Everything posted by 47Jim
-
If you’re putting in a new head liner, I would seriously think about relocating the switch right by the rear drivers door post, that’s what I’m doing, that way you don’t have to reach all the way in and up there in the dark trying to find it, very very handy right there by your left ear.
-
I’ve got a ‘47 single wheel one ton, from what I understand there are two different one ton budd wheels for these, members of another forum were saying there’s one for single wheel (less offset) and a different one for duals with more offset. Does anyone know anything about that? I’ve never heard any confirmation or offset difference numbers. The main idea being, when looking for a spare, make sure it’s the same.
-
Here’s what I did for what it’s worth, all stock 6 volt with a one wire alternator and no more voltage regulator being the major change plus all the switches are new and generic, diagram includes wire gauge and numbers that correspond to the turn signal switch diagram bought the wire from Tons on eBay, fuse panel on Amazon, I located the panel where the VR used to be I replaced it one wire at a time because it was a custom harness and much easier for me to figure out, hopefully this will help a bit

-
Another forum has this in a file that requires microsoft office, wondering if anyone here has all this information in a different format, needs to include exact dimensions for the bed strip grooves, all cuts and measurements, everything. Thanks! Just got 5 extremely nice white oak boards and they were somehow already 9 foot long and 13/16 at a good price, getting very enthused about getting it going.
-
First hand terrible experience right here, got repros from DCM, my truck with the split hood lives outside, the cups seem to seal the plug whole decent enough, you remove the plug washer before installing Problem was the really really cheap boots not securing over the lip of the cup very well at all, felt like the boots were a wee bit too small, and this is right out of the box, when you finally felt get that lip all down around it, you can’t even think about touching the plug wire or an edge of the boot will pull off, I fought these things for a few months and now they’re off, in less than one year the rubber boots developed crack at the bend, as I’m working on this truck the whole time, they have been moved many times, but still I hate those things more than any repro part I’ve ever bought, never again!
-
Keith Barron has the best video I’ve found for installing and testing one of these, I couldn’t have done mine without it. my kit was from Andy and I guess I was fortunate that the spring operated correctly, you definitely could put it on backwards very easily but the torch test would quickly reveal it. I was overzealous in my tack welding and warped the shaft, once I cut that out, just whittled a new one out of a long carriage bolt the same diameter, tested with a torch, had to trim some corners on the plate just a bit, then good to go. I don’t know how to link the Keith’s Garage video but it’s easy to find, invaluable for fellas that have yet to do this repair
-
If it was mine and I was trying to save his paint job, I’d split the difference and paint the lower grill to match the fenders, that way you’re not repainting the whole truck, it’ll look more intentional, you’ll have some contrast, especially after you paint the orange/red inside the grill
-
Good deal! Always glad to be of service
-
Help! 1941 Dodge WC-1. Crank but no start.
47Jim replied to shane_thompson's topic in Mopar Flathead Truck Forum
I had this exact issue when reviving my 230, it was a bad/frayed wire in my starter. You mentioned the starter was fine until...how was it fine? Did you test it? did it crank faster before something you did? I got new cables from battery cables USA, super quick, easy and cheap and they are slick! -
Not finding the 6 volt electric fuel pump discussion
47Jim replied to 47Jim's topic in P15-D24 Forum
Thanks guys, just what I was looking for, wanting to do the minimum, mechanical does fine after startup, just the never ending cranking after sitting, just need a primer. -
I’m sure it’s here somewhere but I can’t dig properly to find it That’s where I’m at with my project, time to install an electric fuel pump on my stock 6 volt 230 with Langdon 2bbl carb best model? Best methods to reduce noise, ALL the stuff, surely this topic has been worn out someplace
-
Don’t know if my 47 will be the same, I know some things changed btwn 40-41 my door bottom has ten holes each side, just got this from DCM and the clips are very different than original but I don’t care because they work great, nice and tight and you can remove them and put them right back in, nice and tight again a dude on a FB post showed me his and it seems to work, can’t say if it’s pointed the right direction but it works
-
Dang it!! that was my best shot, I guess eBay it is...
-
Most 40's vehicles are this way, the 47 Fleetmaster I used to drive was the same, you can buy that little clamshell glass piece to put on the dash to help view traffic lights when up close, I think we have to consider history when thinking about the day to day original use of these trucks, they were primarily used on farms, gravel or dirt roads, not many stop lights in those old, small towns and not driven great distances either at a much slower pace than what we're used to today. Context is everything I think... The good news......there's nothing wrong with your seat.
-
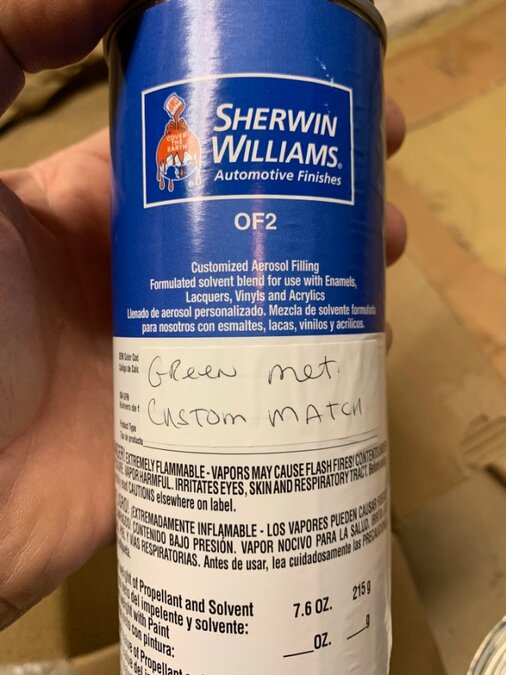
Here’s mine, faded 1970’s paint, pulled off a chunk and waxed the heck out of it for the match, had them add a little flattener to it to knock down the gloss, it’s still glossy of course but you just have to scuff it a little to match, you can see the rear fender is repainted, waiting to be scuffed up. Again the matching process works for any paint new or old and can be properly executed with time by a skilled professional


-
Have you checked with Steve at DCM? He’s got many many parts trucks
-
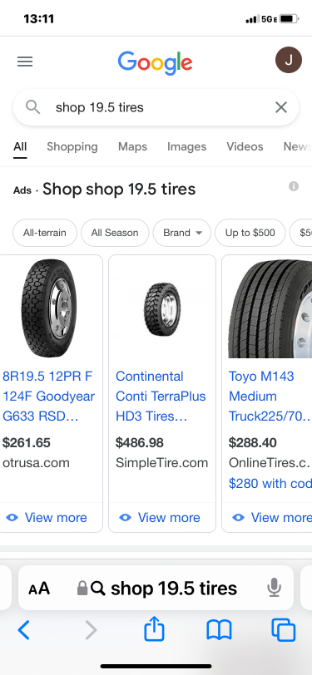
I don’t have a dog in this hunt since I have just a tiny one ton but has anyone considered going to 19.5? If tire availability is the main issue, also if going custom and using original centers seems much easier and tire choices in many different treads and sizes are readily available. Size difference wouldn’t even be noticeable for those wanting to keep a vintage look
-
I just did all this about six months ago at my local SW auto finishes store i have 40 year old paint I had matched, I got it in single stage acrylic enamel, that way I got some to spray on big sections and I had them put half of it in spray cans for small jobs, I’ll post some pictures tonight
-
Correct, any decent auto paint supplier should be able to do this, be prepared for what I call “modern labor “ meaning, some possible attitude from the counter guy heming and hawing about how tedious and time consuming it will be, they’re not used to dealing with walk ins but usually big account body shops that are usual customers, be steadfast and patient, some might be busy and want you to drop it off, be prepared for that, but make sure it’s exactly what you want when they give that final spray out, hopefully you’ll find some car people call in the evening if you have any questions. Jim
-
I was the paint matcher for SW here in Tulsa in the 90’s, I’m incredibly disappointed in your local paint shops customer service, paint is custom mixed and matched everyday at any decent paint store, it’s not that difficult No paint codes that originally were lacquer are transferable to modern materials, they all have to be custom mixed either starting with a scanner or just an experienced employee but it’s not that big of a deal, it’s done every single day You don’t need a giant panel to take for a match, any decent shop can work with something the size of your gas door on your minivan, as long as the color is clear, if it’s faded, polish it out with cleaner wax (Meguires) once it’s mixed then they spray it out on a piece of thick paper taped to a stir stick to compare, this sample is submitted for your approval and any changes are made until you’re happy and head out the door Call some shops in Cincinnati before driving out there, discuss their particular process for your needs, if you need, pick a shop and I’ll talk to them. Jim Heath 918-688-2232
-
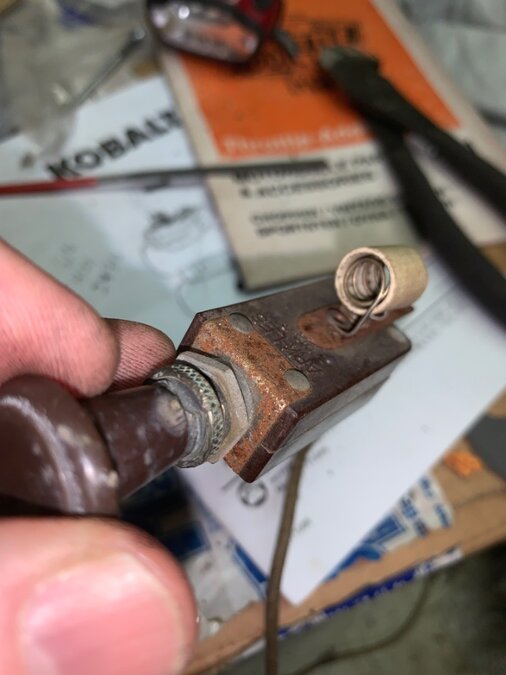
I don't see any broken edges or anything on the ceramic part, I guess that's all there is to it, all the ballast resistors I've seen were solid, that's why I thought something went in this one to touch the coil somehow, like a fuse or something. Got the motor up and running, if this switch looks complete, I'll clean it up best I can and see what it does with the motor. Thanks.
-
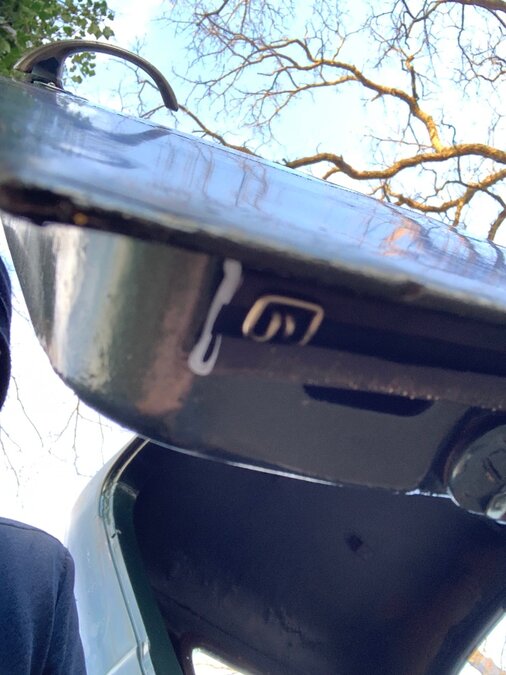
What goes in this hole? This is the switch that was in the truck, I have no idea if it’s original to the heater, optional, newer or what.
-
Darn this thing, you have to drill out the end rivets to pull coils out just to get to the wires, it turns fine and looks pretty good, I’m going to try to tape up the wires and give it some juice

-
Had an auto electric fella make a house call and he found one of the seven wires coming out of the new turn signal switch is dead plus my taillights aren’t making proper ground, so a little work to do, send the switch back to DCM and I knew about the ground issue, he helped confirm that that was the problem and not my routing All in all a major victory for me being my first re-wire job, once I get a working switch, it’ll be on the road
-
Well my old man shop can’t help on the motor going so far to say it’d be much easier to replace than to find someone to rebuild it soooo, I’m looking for a replacement Lostviking, you never posted a part number with that NAPA motor, you mentioned it was sourced for a 56 Chevy, that’d be 12volt also Anyone have a source for a 6 volt heater motor?

