


lostviking
-
Posts
687 -
Joined
-
Last visited
-
Days Won
6
Content Type
Links Directory
Profiles
Articles
Forums
Downloads
Store
Gallery
Blogs
Events
Classifieds
Posts posted by lostviking
-
-
Painted the weldment. Drilled and tapped the center of the jack to accept a 1/4-20. I'll add one to that sides die, after welding another 1/2 piece of stock to the die. After that it's time to pull the running board off and use it to locate the two dies. Once I know exactly where they need to be, I can weld the top die to the plate I have setup for it. That bolts to the top of the press. But before that I'll need to locate where the 1/4-20 hole for the bottom die. Not much really to do, but I need to get it right. I'll get the bottom one done and attached, then tack the top one so I don't have to be exact with that 1/4-20 bolts location.
-
 1
1
-
-
Finally got the last of the welding done today. Only screwed up once
") I was finishing the two angled supports from under the jack, and I forgot I hadn't finished the tack weld on the inside at the top. That's when I ran out of wire last time. I did a pretty darn good looking weld all the way down the outside, and then I noticed that the metal had expanded as I was going Nice warp towards the inside. I'm leaving it as a lesson to myself.
I was finishing the two angled supports from under the jack, and I forgot I hadn't finished the tack weld on the inside at the top. That's when I ran out of wire last time. I did a pretty darn good looking weld all the way down the outside, and then I noticed that the metal had expanded as I was going Nice warp towards the inside. I'm leaving it as a lesson to myself.
Taking it to work tomorrow to media blast the whole thing, then some primer and paint. Only final work is to weld the dies to their mounting plates. I need the whole thing together and the running board to line it all up. Then a couple tacks and I remove everything to finish weld. I have a plate that the top, stationary die is welded to, and that gets bolted to the stationary side of the press. Not sure what I'm going to do on the other side yet. I might just tack the plate to the top of the jack...the part that unscrews on the top of the jack. We'll see.
Almost ready to put some round back into my running board. It's been kind of fun building the tool.
-
OK, now do a web search for Dodge 1950 truck brake drum. You will see a number of possible sources.
-
Model and year would help people respond.
-
Unfortunately, zero progress. Life is funny sometimes. Multiple plumbing issues took over the whole weekend. Maybe I'll get time next weekend. I'd sure like to finish the tool and end this thread.
Hope you all had a better weekend.
Tim
-
Well, mine is a CA truck, but it's also a 46. The cards do look a bit different.

-
Moving along. I drilled some clearance holes at the top and tapped a 1/4 inch plate to mount the die for the inside contour. I'll weld the die to it, so I can remove it when I'm using this for something else.
I started to weld in the angled supports for the 4x4 inch base plate (that the jack is bolted to), at first my welds were looking pretty good, but then they started to not fillet...LOL, ran out of wire. Will have some more today, but might not finish the welds. Believe it or not, it was raining a bit in San Diego...I weld outside.
Put a couple pieces of cardboard from a legal tablet to simulate the running board thickness. I'll weld the bottom die to that piece you see in the picture, and then figure out how I'll keep it in place later. Almost.
-
1
-
-
Awesome.
-
Goofing around a bit on Labor Day. Mocked the parts together, just for grins. I did weld the top parts on the correct direction, like I said, and I put the short bottom plate on. The jack is drilled and tapped, but I need to put the clearance holes in the base. When I was trying to "fix" the backwards top section, I cut a piece to fill in the open end. Unfortunately I wasn't thinking, because that was the bottom part (under the jack). So, I had two extra 4 inch angles, welded them together...problem solved. Lots of welds to either finish or clean up, but I wanted to see it, so here goes.
Still missing are two angled supports on the bottom to keep that 4x4 plate from folding over.
-
So, ground the weld bead down to put the two vertical U-channel pieces on. That's the side the die sits on, not the jack. Welded them together, cleaned them up and chamfered the edges. Got it all lined up just perfect, then laid down some really nice looking welds.
It was on backwards.
Metal blade on the saws-all...welded it on the correct orientation. I need the welding practice anyway. Enough success for one day.
-
I don't have a TIG welder, just a MIG. Those aren't practice pieces, it's the base of the press.
-
I ground the edge everywhere there is a weld, so once it's flat there is still lots of weld. I like using sanding rolls for this, because they move a bit slower, like me
I only need to work on the "faces" of the two halves, so the metal is shaped without defects. Those parts were laser cut, and they weren't perfect. I'll hand fit them a bit to the undamaged running board as I go. I don't intend to reweld anything after the beads are ground down. The final amount will be taken off with a file. Slow but steady wins the race.
The first u-channel parts was a single weld. I moved around, so I was only welding an inch or so continuously in any one spot. The section to the far right, you can see a kind of dot in the middle, which is where the two welds meet.
Taking a couple extra days off next week after Labor Day, so I hope to get all the welding done.
-
Moving forward, slowly. We had a little rain and I weld outside...not that day. I was able to get the "tool" part of things welded together. No, not by me
Those beautiful welds were done by someone who knows what he's doing, and used TIG.
Just need a sanding roll or two on my Dremel to get the surface flat across the weld line.
-
1
-
-
I bought the kit from Vintage Power Wagons. It comes with the PCV valve, so it's the whole kit. This is, I believe, the same upgrade the military used on their trucks.
-
This will help with squeaks, but I doubt it will do much for ride quality. Mine rides like...an old truck. To get a better ride, and better handling I'm going with a Scott's Hot Rods IFS. It's a bit more expensive than a Fatman MII type unit, but you get what you pay for IMHO. I've had several trucks with leaf spring front ends. They all ride like they have leaf spring front ends.
-
You should probably clear up whether this is the one inside the frame, or the one the windshield presses against when you close it.
-
Been some delay due to a family emergency. But found time to do some more welds today. Stitched the U-channel side where the two pieces meet, and closed the ends where they meet. Before you say anything, these are welds from someone who has less than a dozen welds under his belt
I think it I could hold a straight line, they would look pretty good. Flux core, 140A 110AC welder. I'll take them.
That was not a continuous weld.
-
Have you ever owned anything with manual steering before?
-
I bought a power bleeder and used that today. Barely any bubbles, seems to be firm and less travel. I'll see after I drive it.
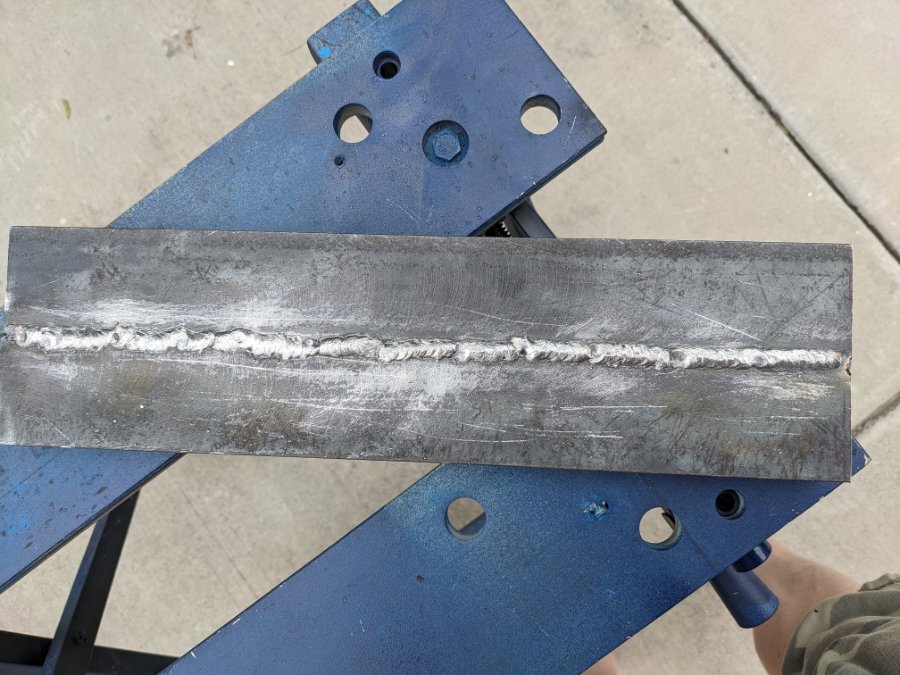
Welded the two bottom U-channel pieces together for the 6-ton press. Either I'm getting better, or my standards are getting lower. I stacked some dimes this time. Only blew the circuit breaker once too :). Looking at the ends, the metal is blue to the other side, so I'm thinking good penetration. I have a 140A welder which I was running around 120A on 3/16 metal. But I think at the corners of the metal it's thicker than that. Only did one side, the wife came home. I'll weld along the mating open edges next time. No pictures, but these are easily the best welds I've done.
-
Put both valves in today. Refilled the master and started pumping just to see. I've had pretty good luck with this truck doing that. I ended up with a firm pedal, and much less travel. I'll still bleed it, but I'll let it sit for now. For whatever reason it seems to purge most air if I just let it sit. Weird.
-
Picked up the metal this morning at Industrial Metal Supply. I need some of the saws at work to cut things. Welding as said next Saturday.
Since I was up off the couch, took the truck on another short jaunt around the neighborhood. Sure is nice to be able to do that again. I also picked up a 10psi and 2psi residual valve. I'm going to put those in and see if that shortens the pedal travel. It's firm, but longer travel than I'd like. The master is well below the wheel cylinders and calipers.
-
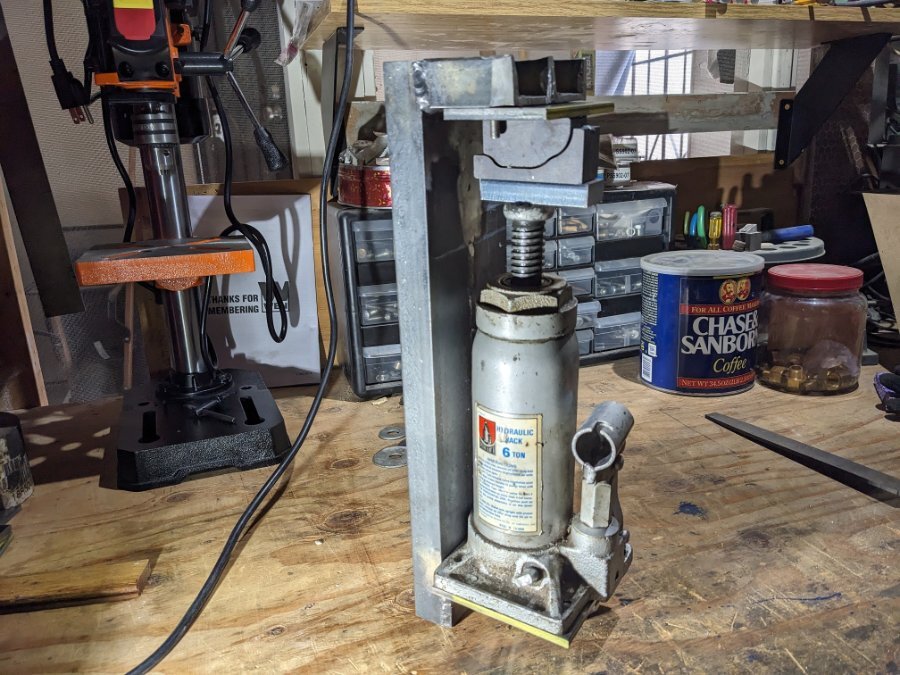
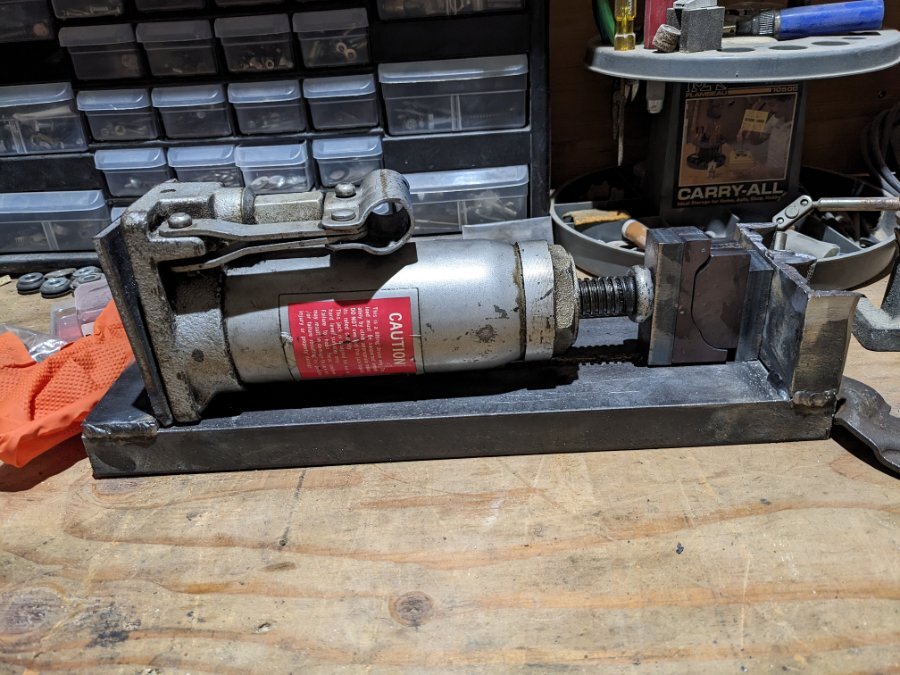
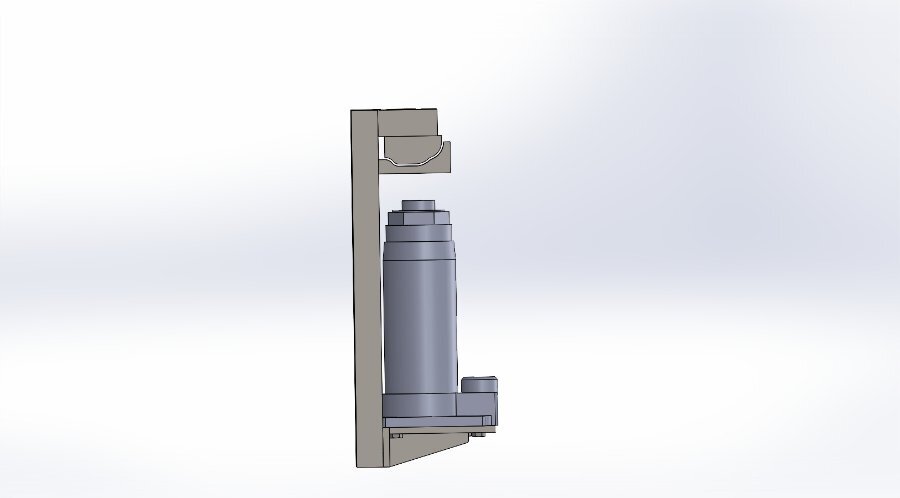
Yep, 6 ton bottle jack that I will drill and tap a few holes in the base off, then bolt it to the press. It is possibly over engineered, but it will serve me for more than this single use. The only things that are not clearly shown are how the die and the anvil are held in place. IDK yet
Picking up the metal this Saturday. It's made from 1x2x3/16 A36 steel U channel, and 1/4 inch A36 steel plates. I will cut everything up next week using some saws at work, then weld it the following weekend.
-
In order to fix a running board I "damaged", I needed to do a bunch of hammering and bending. That involved a sledge, several large C clamps and some pieces of wood. Oh, a rubber mallet
For a more gentle approach. With those tools, I was able to take my running board, with a side edge that was in places bent almost completely flat, and get it to a fairly close to original shape. More shaping is needed.
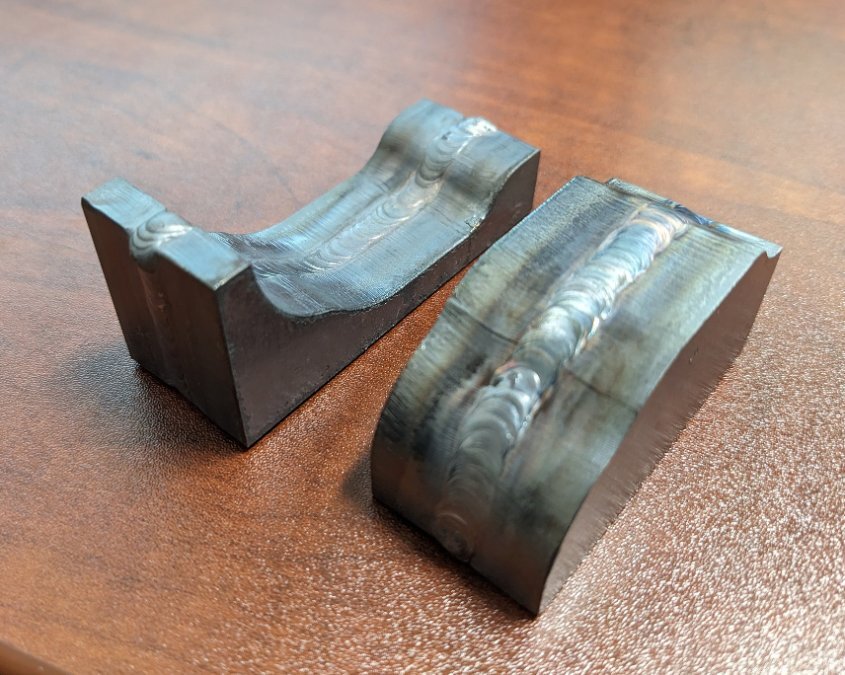
To get the edge restored, means putting two curved surfaces back where only flatish metal exists. I designed a tool. I had a set of dies/anvils made and I'm getting ready to weld up my new 6 ton press.
Here is what the die/anvil look like, and what the press will look like.

-
4
-
-
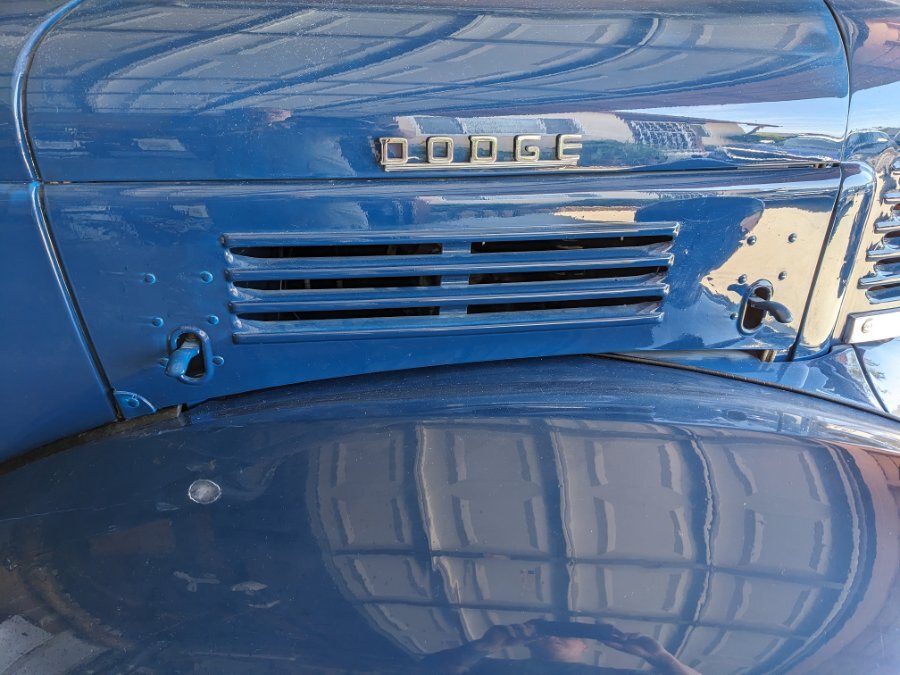
OK, so I'm not going to pull a Tom Brady, this is really the last in this thread, but there was one last thing I needed to do. The passengers side fender needed the correct parts.
Pulled it today, striped the felt crap off and attached the repop material I bought.
Needless to say, the fender fits correctly now and has a nice even gap at the bottom. No more rubbing when you try to open it
How to put the round back into a bent up running board edge
in Mopar Flathead Truck Forum
Posted
Can't leave well enough alone...put a thick washer a bit thicker than the running board into it and bent it") Enjoy your Sunday.
Enjoy your Sunday.