


Sam Buchanan
-
Posts
2,258 -
Joined
-
Last visited
-
Days Won
60
Content Type
Links Directory
Profiles
Articles
Forums
Downloads
Store
Gallery
Blogs
Events
Classifieds
Posts posted by Sam Buchanan
-
-
21 minutes ago, Booger said:
I suppose we need not worry about the simplicity of plain ol 30w motor oil anymore. Cuz ya cant find it. (lest not Yalmart no mo)
Not much reason to use straight 30W, 10W-30 is an excellent option readily available and reasonably priced. It has the same viscosity as straight 30W when hot but makes cold starts easier when it is similar to 10W. But 30W is still available, just takes a bit of effort (or place an order on Amazon).
-
You have a plastic fuel filter right next to the exhaust manifold......BAD IDEA!! You don't want that filter to fail and spray fuel on the manifold......
And in that regard you may be dealing with vapor lock due to fuel boiling in the line close to the manifold after the engine gets hot. Our modern ethanol-contaminated gasoline is more prone to vaporization than the older formulations. This would explain why the engine will run when primed but then run rough due to the uneven fuel delivery. An easy test would be to remove the fuel filter and insulate the line (or move it away from the manifold) and see if that makes any difference. Or maybe even better....a neoprene fuel hose that is secured so it won't be next to the manifold would probably be less apt to heat the fuel to vaporization. This is something easy to try, hope it works!
-
 2
2
-
-
5 hours ago, Sniper said:
Just because something is new doesn't make it better. I give you gangster rap as an example, lol.
Seriously, we drive 70+ year old cars.
That is not at all what I said. I'm just observing the lack of consistency of some who strenuously promote certain elements of the "old school" while adopting modern tech at the same time. But I respect the prerogative of owners to operate our old cars in whatever manner they wish.
My old car has an alternator, fancy transmission oil.......and bias ply tires.
")
-
9 hours ago, Booger said:
Heres the thing 49. Back in 49..
Your car used 30w (probably detergent motor oil) and the 3 sp manual tranny was a no brainer 80-90w and the rear end as well. So lets over engineer everything and decide what worked then is no good now.
Ok.......guess we ditch the 3000 mile oil change intervals, radial tires, 12v conversions and electric wipers................. ?
-
21 minutes ago, 46BulldogDodge said:
78% Nitrogen actually. ?
Dick Hultman
SW PA
46 WC & 57 FFPW
That must be for the name-brand air grease, I think the store brands are a little lower in N2 content. ?
-
1 hour ago, DJ194950 said:
Air grease.
Available most everywhere.. some locations have many additives but still works!
?
Be sure you get the air grease that is 70% nitrogen.
-
1 hour ago, Los_Control said:
You're just not cheap like me .... I get synthetic GL5 for about $20 a gallon .... GL1 at a specialty house is over $10 a quart ....
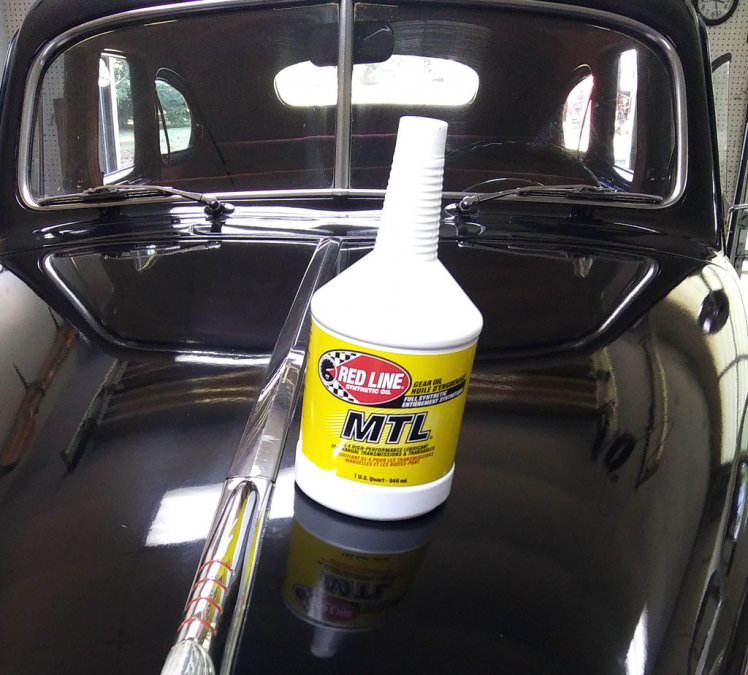
$10 a quart is a bargain......Redline is $23 per quart. But after putting up with a crunchy first to second shift until the tranny got hot, I consider the Redline to be a bargain since it totally fixed the crunchy shift. If I hadn't spent the money on Redline I would be reminding myself of my stupid thriftiness every time I heard second gear not engage smoothly. Now I congratulate myself for spending only $46 to fix this transmission! Would GL1 have worked as well? It might have....but at this point it doesn't matter.
It's a matter of perspective........
-
Redline MTL provides excellent service with no gear shift crunching in my manual transmission cars ('48 Plymouth, '69 VW, '74 TR6) with no concerns about corrosion of brass syncros in these transmissions. It is a little pricey but in my opinion an excellent value due to how it keeps these old trannys happy. The modern GL oil is too slippery in the my P48 and causes crunchy shifts when cold. The diff can use the modern GL oils.
-
2
-
-
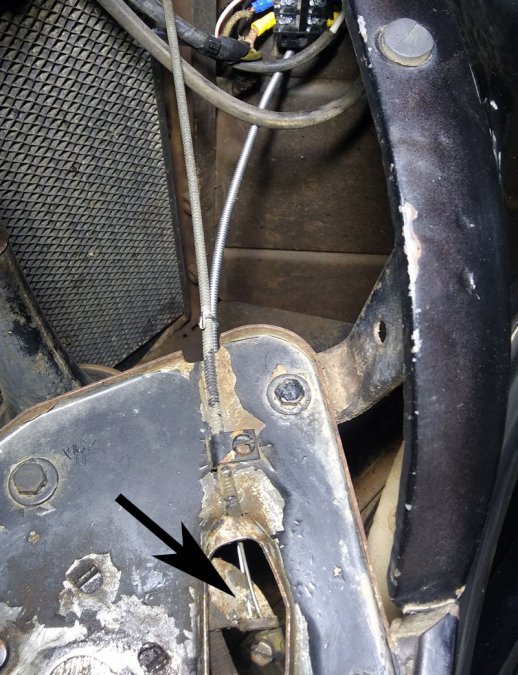
One a somewhat related note, we can have a bad day if the hood release cable breaks leaving us with no easy way to release the latch. Some have used a long bar to reach up behind the grill to bump the latch enough to free the hood but this is difficult for someone in a hurry or who has never used this trick.
I attached a second cable to the latch and ran it out into the fender well so I could release the hood by reaching behind the front wheel. This is an easy mod and a broken release cable will never be a concern. I got this idea after modifying my Triumph TR6....that hood is hinged on the leading edge and a broken release cable is a BAD deal with that car!

-
4
-
-
37 minutes ago, moparfun said:
I did this same swap a while back. Sorry I could't figure out how to bring the post up, maybe some knowledgable tech can help. The post is, Rear Axle Help, Dec. 27, 2022. I hope it helps.
https://p15-d24.com/topic/59124-rear-axle-help/#comment-635519
-
 1
1
-
-
2 hours ago, 38plymouth said:
I ordered a master cylinder rebuild kit from bernbaums and just pulled the master cylinder out of the car and there is some pitting inside. I've been hitting it with a hone but I'm not sure I'll be able to get it all out. Two questions before I have to spend almost $200 on a master cylinder and wait for shipping g. Is any pitting acceptable? And secondly what if I keep honing it to get 99% of the pitting out could I hone it too much? I can feel the pitting with my fingernail but it's not what I consider real bad. I really wanted to have the car put back together this weekend I had to pull the floor pan out to get the master cylinder out the easiest way. I do want it to be correct though and don't want to have to do this again.
There are places where budget decisions can be justified but brakes are not one of these. Spend whatever money is needed to put your brakes in tip-top condition, your lifespan might be altered by saving a few bucks......
And to address your question...in my opinion pitting in a brake cylinder is totally unacceptable.
-
1
-
-
First step is to make sure the clutch linkage is adjusted properly. Proper "play" is needed in the pedal and the over-center spring must be adjusted properly. There is a template in our Downloads section for making the tool to adjust the over-center spring. If this spring is out of spec the pedal won't function properly.
https://p15-d24.com/files/file/5-overspring_toolpdf/
This entry is also in the tech tips section:
"Clunky Clutch
For years after I got my P15 the clutch pedal would always make a loud "clunk" when you pressed it down. Clutch operation was fine, and throwout bearing free play was on the money. Adjusting the clutch overcenter spring did nothing to get rid of the noise. Finally, while replacing a master cylinder, I tore down the pedal assembly and clutch torque shaft. The balls of the torque shaft ride on spherical shaped split bronze bushings. On one side half of a bushing was missing. The clunk was the pivot ball rattling inside the remaining bushing. NAPA had replacement bushing inserts for about a buck and I was back on the road with a smooth and quiet clutch pedal." -
45 minutes ago, 61spit said:
What did you build? I have restored a few old tube and fabric aircraft over the years. A 1946 Cub, 1953 Tri-Pacer, 1959 Tri-Pacer and 1 metal - Cessna Aerobat. Never did any welding on any of them. A great art to watch someone skilled at it. Sorry, a bit off topic.
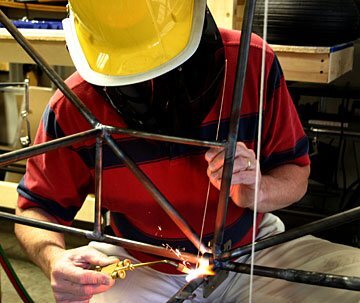
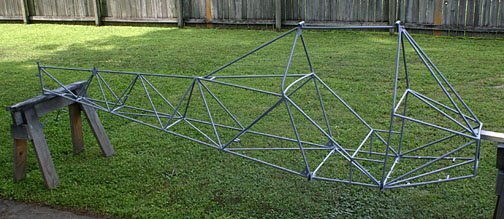
This was a Legal Eagle, a very light single-place. It was sort of an impulse build, I wanted to learn oxy-ace, gave me an excuse to build a fun little airplane.
Below is the first page of the feature article I wrote about building my Eagle in KitPlanes magazine.

-
text deleted
-
21 hours ago, Booger said:
Good points Sam. Inert gas methods are prefered for sheetmetal applications. And your oxy-ace set up can work but it tends to warp easily so not recommended. You can get by with a braze weld which requires less heat otherwise your burning through. With all process make sure your work is clean and fitted.
I learned gas welding so I could build an aircraft fuselage. The oxy-ace is only used on 4130 steel since it's best the joints are normalized with slow cooling. I use MIG with argon on everything else.
-
The good news is the tie rod adjustments are easy to make, maybe thirty minutes if you've never done it before.
The bad news is that after you see how easy it is to adjust the tie rods to center the wheel.......you will beat yourself up for driving the car for 25 years with a crooked wheel.....! ?
In regard to the adjustments, if the car is driving straight now, you can center the wheel without upsetting the current alignment. Adjust each side of the car exactly one turn, then drive it to see how much improvement you made. Keep tweaking it exactly the same amount on each side until the wheel is centered and you are good to go with no strings, etc needed. Just make sure you carefully note how the threads on each tie rod run so the toe-in won't be changed.
-
1
-
-
MIG is pretty much the norm for body work since it is fast and fairly tolerant of less then perfect technique. About twenty years ago I purchased a small, 110v MIG with a small argon bottle and it is one of the most useful tools in the shop even though I had no previous welding experience. Body rust repair, bracket fabrication, exhaust repair--it seems to be more valuable as time goes on and I realize how much it can be used. My technique has improved especially after learning gas welding.
I say all that to say this.......I highly recommend the hobbyist who is semi-serious about repair and wants to equip the shop to purchase a MIG welder. Don't bother with the gasless flux welder, the welder with an argon bottle yields far cleaner welds. You'll be surprised at how often you'll use it.
-
2
-
-
3 minutes ago, soth122003 said:
Easy check to see if the tranny mounts sagged. Jack up the tranny/bell housing about 1 inch and try to shift. If it shifts smooth your mounts have compressed/sagged. Linkage doesn't usually go out of adjustment unless you did some work on the clutch or tranny. The mounts however get compressed over time.
Joe Lee
Hey Joe, were these on their way to needing to be replaced?? ?
Yes, a linkage adjustment was needed with the new mounts......
-
 1
1
-
-
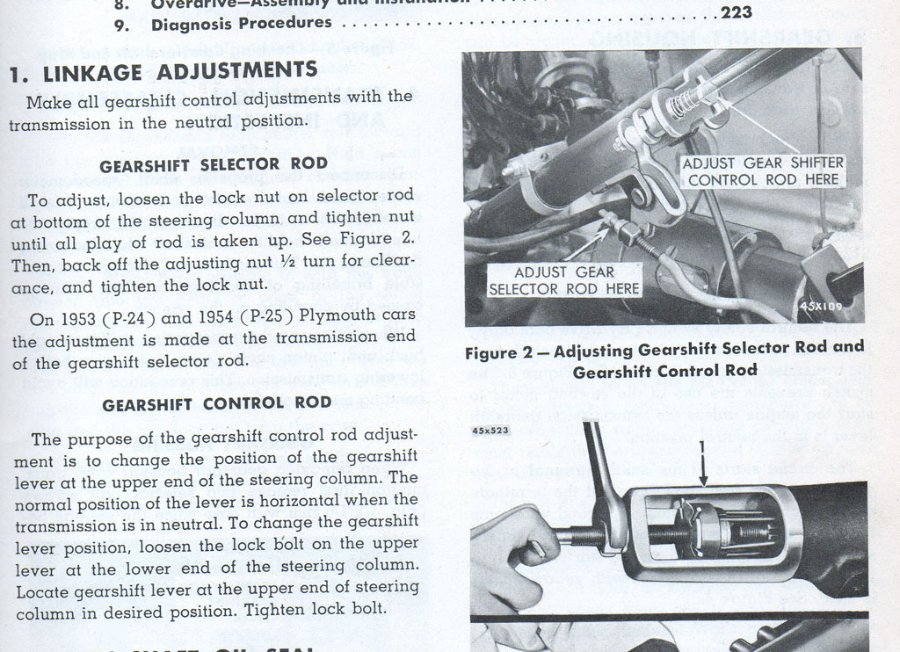
Gearshift selector rod adjustment should be what you try first.
-
1
-
-
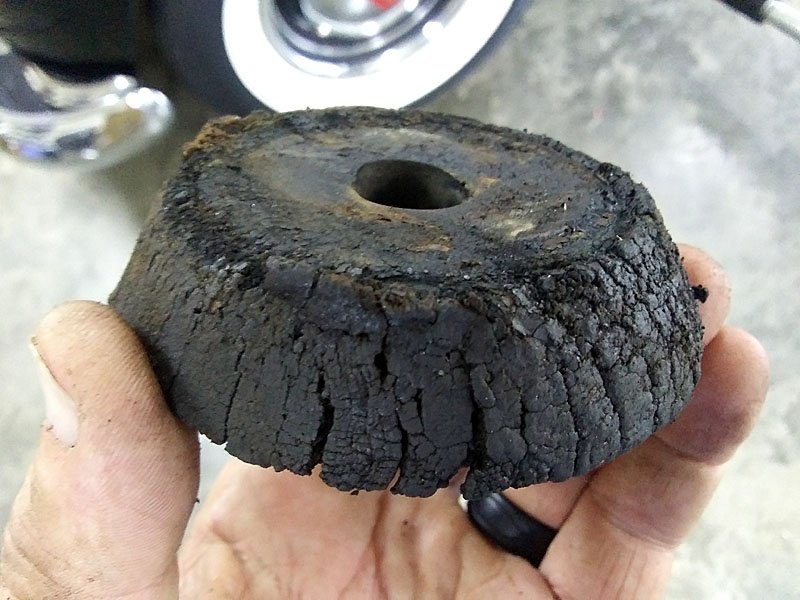
37 minutes ago, OUTFXD said:
Because it shows wear.
Thats the one. Pretty easy to access once I pulled the floor panel... again...
I have not adjusted the Clutch pedal. Never saw a need to. I will have to check on it!
I try to shift into reverse and it just stops moving at the point where it normally would shift out of Neutral. Fairly solid, Dosent feel bound up, Feels blocked off.
Dosent go into gear at all.
Yep, shift linkage adjustment……been there, done that. I had to make the adjustments after replacing the tranny mounts, that’s why I suspect yours have sagged.-
1
-
-
Carefully read the section in your Repair Manual on linkage adjustment and follow the procedure. If engagement has been getting progressively worse the transmission mounts may be degrading......or shot.
-
2
-
-
5 minutes ago, Booger said:
Back in the day (geezer) we 'tuned' these old cars by ear. Dwell meter?
Vacuum gauge? Turn the dizzy just so much. Play with mixture screw. And dont use Champion plugs
These are not Ferraris
Stop advancing the timing just before the engine pings while pulling that steep hill on the way to grandma's house.................
-
Your engine needs deworming!!
-
4 hours ago, Roofus said:
Bon, après avoir vérifié tout le circuit, je n'ai pas trouvé d'anomalie, mais en appuyant vraiment trés fort sur la pédale, celle-ci s'est brutalement enfoncée et est restée en bas, il s'avère que la tige de poussée du maitre cylindre s'est détachée de la pédale, car pas assez de filetage engagé…
Après avoir tout remis en place, j'ai constaté une fermeté inédite de la pédale, je suis allé faire un test routier et ça fonctionne maintenant parfaitement.
Je pense que le circuit n'était pas purgé correctement et que l'incident de la tige de poussée a fait remonter les bulles dans le réservoir.
Well, after checking the whole circuit, I did not find any anomaly, but by pressing really very strong on the pedal, it has suddenly sunk and remained at the bottom, it turns out that the stemMaster cylinder’s push detached from the pedal, because not enough hired thread…
After having put everything back in place, I noticed an unprecedented firmness of the pedal, I went to do a road test and it now works perfectly.
I think that the circuit was not purged properly and that the thrust stem incident raised the bubbles in the tank.
Excellent! We know what you are describing. ?
Make it go go go...
in P15-D24 Forum
Posted
Don't think that would explain the engine restarting when primed through the carb and then running rough.