


Dennis Detweiler
-
Posts
243 -
Joined
-
Last visited
Content Type
Links Directory
Profiles
Articles
Forums
Downloads
Store
Gallery
Blogs
Events
Classifieds
Everything posted by Dennis Detweiler
-
I already have some cupro nickel ordered. Not sure if I want to replace both front lines or just add some to the old lines. The old lines seem to be in good condition, but I want to move both front lines (left and right) back a little farther to put the flexible lines to each caliper behind the caliper instead of the original position in front of the caliper. That position would be better located for more clearance in turning.
-
Thanks Sharps40
-
Does it make any difference if some brake lines on the car are difference sizes? Does it matter to the function/feel of the master cylinder in this case? My rear brake lines are 3/16 and the front is the original 1/4. I'm in the middle of replacing the original master cylinder with a dual reservoir Wilwood. I may have to add some 3/16 brake line extensions onto the original 1/4 lines or just replace all of the front lines. I have front disc brakes and shoes on the rear.
-
suggested master cylinder conversion 1939 New Photos
Dennis Detweiler replied to Dennis Detweiler's topic in P15-D24 Forum
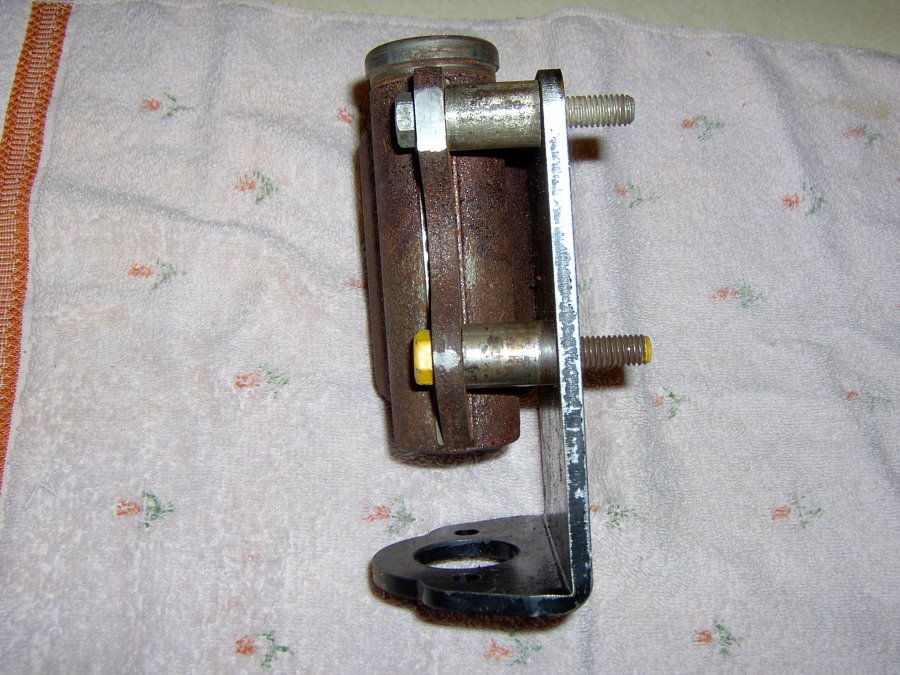
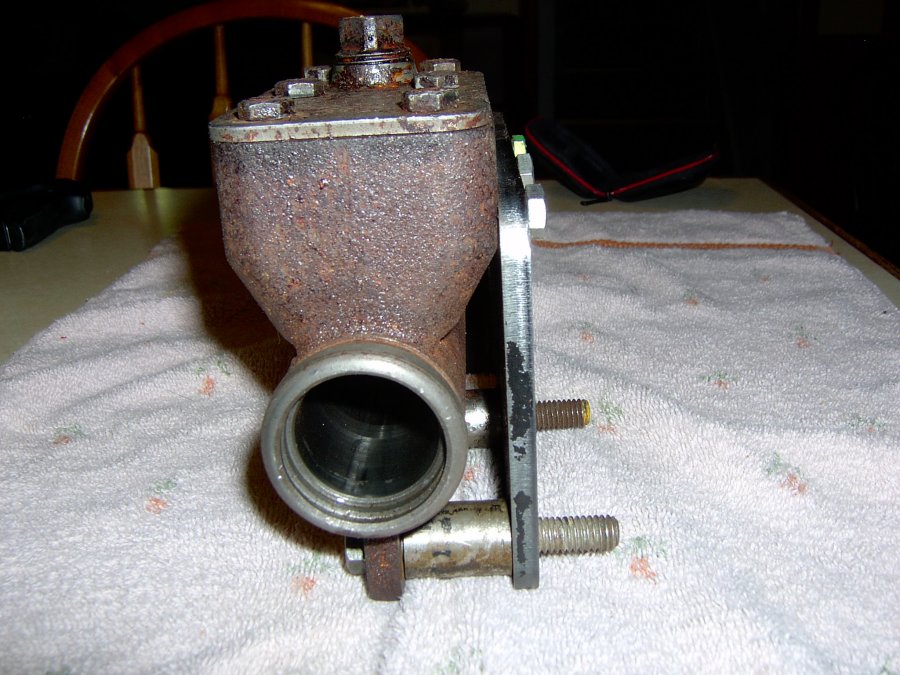
More photos. I can see already that I'll have to shorten the spacers to accommodate mounting the old master cylinder to the frame. The spacers will be between the frame and the new plate.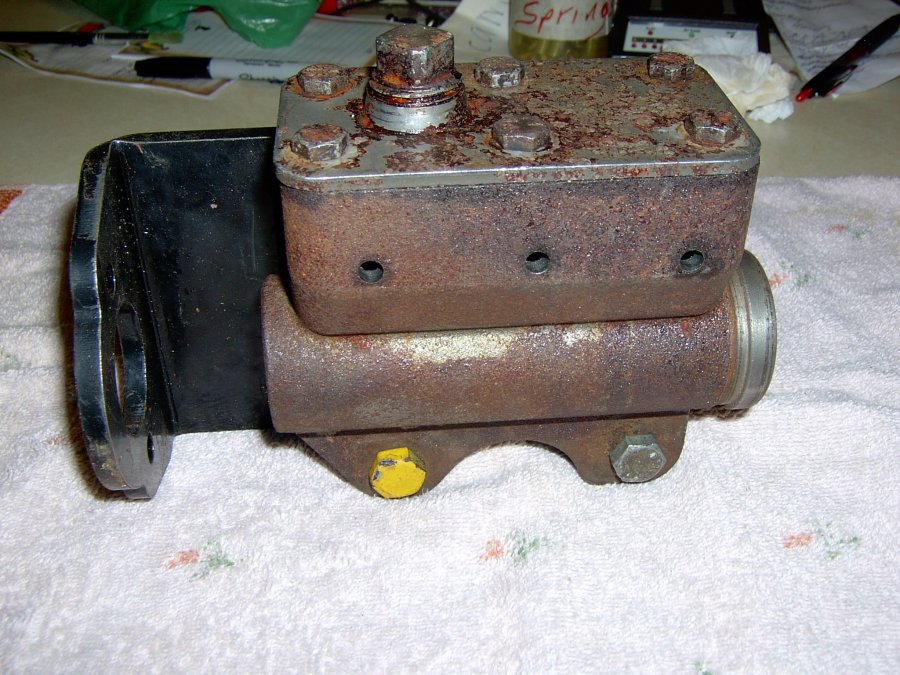
-
suggested master cylinder conversion 1939 New Photos
Dennis Detweiler replied to Dennis Detweiler's topic in P15-D24 Forum
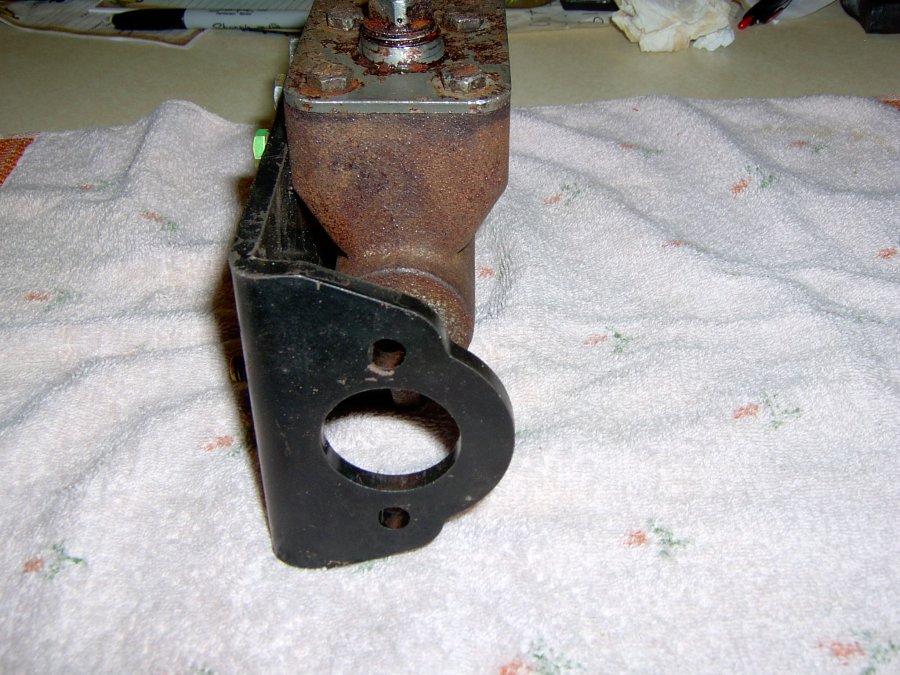
Some photos of the Adapter sold by Scarebird for Wilwood Master Cylinder use. It lines up perfectly behind the original master cylinder. I need to use countersink flat head screws 1/4 X 1 inch to replace the three in the photos. The brake pedal passes too close to the plate to allow for regular bolt heads. I tapped the old Master Cylinder, but will still use lock washers and nuts on the inside of the reservoir. I made 1 1/16 long spacers between the original mounting holes and the new plate. I will still need to do some cutting on the new plate to clear the clutch arm. I'll keep you posted. More photos in next post....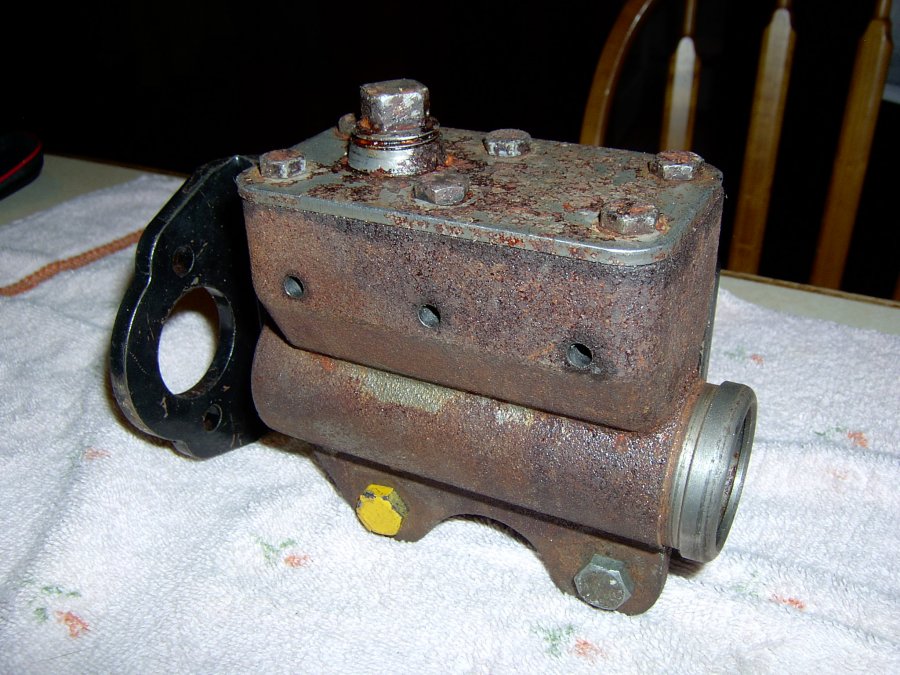

-
suggested master cylinder conversion 1939 New Photos
Dennis Detweiler replied to Dennis Detweiler's topic in P15-D24 Forum
I had to remove the steering gear and send it to Nixa Missouri for restoration so, just now getting around to finding a location for the new M/C mount. The plate from Scarebird looks like it will likely mount on the side of the original master and the new master will mount behind the gutted old one. A new and longer pushrod will travel through the old master to reach the new master. I'll try and remember to take a few photos as it progresses. -
I haven't gotten around to installing mine yet. I was looking at and measuring another old original 39 master cylinder that came with the car when I bought it. The Scarebird mount won't be a simple bolt-on process. I'll have to add some kind of spacer to make it line up with the brake pedal. However, I won't know how much modifying I'll have to do to it until I remove the floor board and have a good look. I don't know how much modifying it would take on a 49
-
Looks like my 39 Plymouth when I bought it. Previous owner crimped new to old and some old had no insulation, so he taped it up. Some crimps came loose. I re-wired one wire at a time and also used an original schematic for confirmation. I bought 4 spools of 4 different guage wires, soldered and used heat shrink tubing on all connectors. I added separate relays for dim and bright lights and horn. I also added 2 fuse panels/blocks, one for "always hot" circuits and one for ignition circuits. I also added 3 braided grounds (body, frame, engine). When finished, I made a new wiring schematic showing fuse panels, wire gauges and routing. The next owner won't have a problem locating wires and connections in an upgraded system. Lights are halogen and bright. Horn is loud. Charging system is great. I used wiring harness tubing to protect all wires. It's a long tedious process, but worth it.
-
My 39 Plymouth....after buying a nos two wire guage and getting my my original guage working, I couldn't get either guage to register more than 3/4 full or empty while showing 1/4 of a tank. That scenario is after buying the proper new sending unit. So, I set it to show 3/4 of a tank when full and on empty when it is actually empty. I tried everything to remedy the problem. I also purchased a nos 38 guage, but it requires a single wire sender. The car has all new wiring and I retraced and retested the fuel tank wiring and all is good. If anyone knows why I'm getting 3/4 accuracy, let me know.
-
Yes, I installed a new stock single reservoir master along with the front disc conversion and new shoes and wheel cylinders on the rear. I bled the system using two methods and ran a quart of brake fluid through it. I just didn't like the feel of the pedal. I initially installed new shoes and wheel cylinders on the front also, but didn't like the feel of it either. Hopefully, the Wilwood dual master will feel more trustworthy and solid. These old cars are heavy and I want to stop. I'll be replacing the original brake lines also.
-
I used the Scarebird disc kit. Converting to Wilwood master cylinder this Spring.
-
Why not a duck call? Baseball cards and clothes pins for a flapping sound? Are the old Thrush glasspacks still in production?
-
aftermarket radio and speaker installation
Dennis Detweiler replied to bluefoxamazone's topic in P15-D24 Forum
I picked up an INLAND AM transistor radio on ebay for my 39 Plymouth. Model vwx-100 (6v). It has a switchable ground on the back. It measures: 1 3/4 high X 7 wide and 4 deep. However, my original radio is currently out of the car, but looks like it has been repaired with some new capacitors, but the speaker is shot and too difficult to remove, so someone just added speaker outlet wires to it. I'll be testing it when the weather permits me to get back into the garage. I may or may not need the INLAND radio. -
suggested master cylinder conversion 1939 New Photos
Dennis Detweiler replied to Dennis Detweiler's topic in P15-D24 Forum
Hi Danny, I won't be able to work on the 39 until the weather warms up. It's in my unheated detached garage. I'm in Iowa and knee deep in snow this Winter. -
suggested master cylinder conversion 1939 New Photos
Dennis Detweiler replied to Dennis Detweiler's topic in P15-D24 Forum
I settled on the Scarebird mount and the Wilwood 7563 master. The original master mounts in front of the brake/clutch pedals. Hopefully, I'll be able to bolt the adapter mount to the original frame location and still line up with the brake pedal, but doubtful. If not, I'll have to make some modifications. -
Ah-so
-
I'd rather have too many fuses than not enough. I've seen too many cars short out and wires burn. Sometimes the whole car. A fuse block with everything on separate fuses is easier to narrow down a specific electrical problem if a fuse blows. It also keeps components like a radio from being completely destroyed. Mark, the photo of your old wires is why I gutted mine and installed all new wiring. Fire trap. After I purchased my 39, drove it home and had a good look at the wiring, I was lucky it didn't burst into flames on the way home. I also soldered all of my terminals onto the new wires. New wires, individual fuses, no crimps, no worries. all lights are bright, horn is loud, radio works good.
-
I bought the modern 4 post electronic 6v relays on ebay.
-
I rewired my 39 Plymouth from scratch by making a schematic first. I don't understand the 4 prong switch on your schematic? My "relay" is 4 prong, but a modern relay. #86 to horn button, #87 to horn, #85 to fuse panel, #30 to B on voltage regulator which also goes to the battery and incorporates a 20A fuse between the voltage regulator (B) and the relay terminal (30). My horn works without the ignition turned on, as does all cars. I upgraded my whole re-wire project using two fuse panels (one is hot and the other works only with the ignition), utilizing 11 fuses (separate circuits). I also used 8, 10, 12 and 14 guage wires, depending on the load required. I also used two separate relays for the headlights (high beam and low beam). The original 39 schematic only had a fuse on the light switch and a fuse on the horn.
-
1K or 2K Enamel Over Rustoleum Auto Primer
Dennis Detweiler replied to Bingster's topic in P15-D24 Forum
As an old and former auto body and paint repairman, it's usually advisable to use the same brand of paint and primer for proper adhesion. I'm not sure about the modern day Rustoleum products, but years ago they contained fish oil which is also a rust inhibitor, but also required a similar base for a top coat. Possibly fisheye eliminator added to the finish coat would suffice? Maybe the ingredients has changed over the decades and it won't make any difference. An up-to-date auto body repairman should know. A sealer over the primer before top coat may also be advisable. . -
Will a 1 inch bore dual master work well with a disc front conversion and stock drum rear?
-
I found a youtube video that showed a proven method. Apply 3m black weatherstrip adhesive to the door and brush it out with a 1/4 inch artist brush and let it tack up. Then, brush a second coat over the same area and apply the weatherstrip. It will tack onto the door with very little slipping or movement. The video suggested applying it to the weatherstripping in the same manner before applying the weatherstripping to the door. I found it to be too messy and just applied the two coats of adhesive to the door with great results. I only applied it 3 feet at a time so it wouldn't dry out before making all the way around the door. Worked great!
-
I installed a Scarebird brake kit on my 39 Plymouth. Bolted on with no problems. However, my car already had 15 inch wheels on it with radial tires. The spindles are one inch wider spacing. My rear end is stock, but already had wheel adapters. My next and final project is to install a dual master kit from from Wilwood 260-7563 which has remote reservoirs, 1 inch bore and line connections on the bottom of the master. I'm looking at Scarebird master adapter which looks like I'll be able to drill and mount to the original master mount. This master adapter is made to mount the Wilwood master. I should be able to keep the original brake pedal.
-
Change a 39 Ply Business Coupe (P8) to a floor shift
Dennis Detweiler replied to Richard Cope's topic in P15-D24 Forum
I bought a boot for my 39 from Bernbaum. -
Change a 39 Ply Business Coupe (P8) to a floor shift
Dennis Detweiler replied to Richard Cope's topic in P15-D24 Forum
I already did this to my 39 because of a worn cable end and not enough left to make it adjustable to shift into 1st and reverse. You have the parts correct. All that's needed is the top shifter and the proper plates. You got it. I've been debating whether to remove the column shifter or just leave it intact and fix it into the reverse/2nd gear position. I don't know what option it could be used for?
