Leaderboard


Popular Content
Showing content with the highest reputation since 04/12/2024 in all areas
-
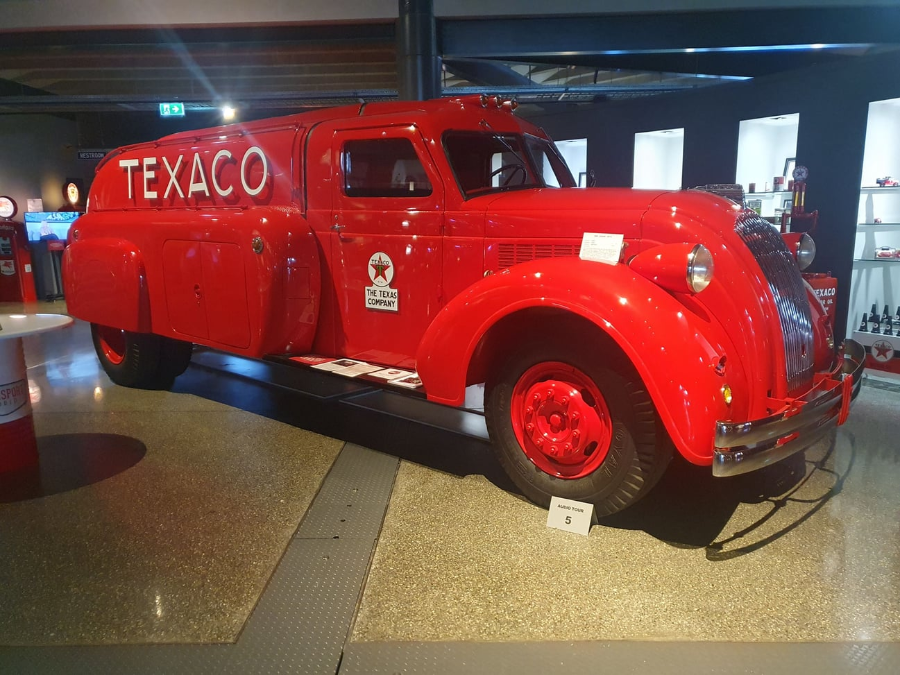
Just installed a Red Crown Gasoline light in our carport to go with the truck. I am pretty happy with the results.
 7 points
 -
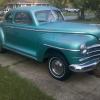
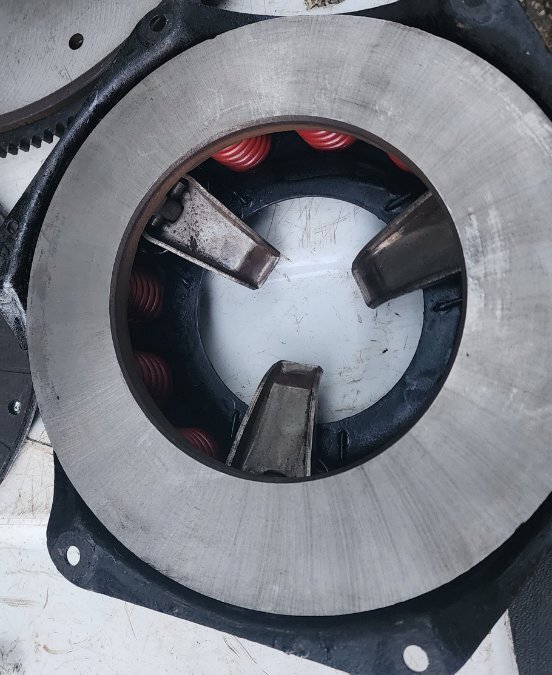
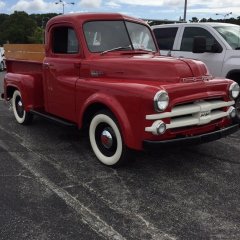
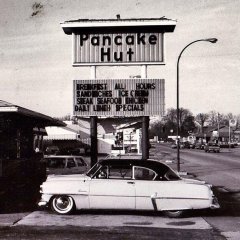
My Great Grandfather, and guessing my Great Grandmother with the '55 Dodge (I'll be inheriting this summer) and what I believe is a '55 DeSoto. The truck was my Great Grandfather's then my Uncle's, and then my Parent's, and soon to be mine. My Dad just told me that he is getting too old to work on too many toys, and he is giving it to me. It is in a little worse shape than here, but pretty much original. I'll post pictures of it's current state, in the correct area, when I get it out of the barn, but from what I recall it definitely will need a gas tank and fuel pump, amongst other things.
 6 points
 -
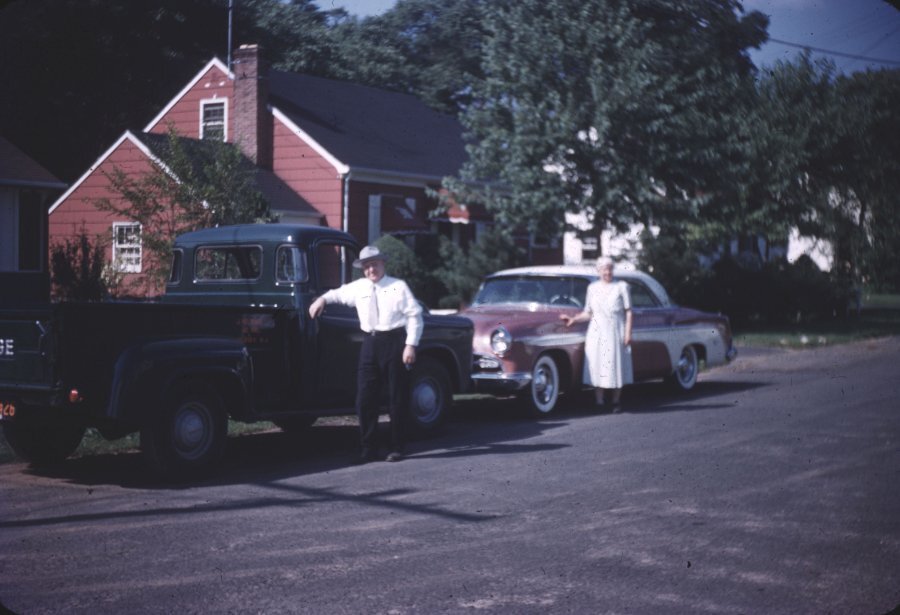
Also had them flip the flywheel starter ring.
 4 points
 -
I have an admittedly tight focus on the KT Keller cars, so that's what I research and play with. It's all about having fun after all and those are the ones I like. I am a huge fan of Overdrive transmissions because they don't really change the charm of the cars and actually add to it. When you put one in your car your speedo will be off at all speeds because the speedometer pinion gear was selected for a 4.1 ring and pinion. The good news is you can swap out the pinion from your old three speed to the O.D. and all will be back to normal ( assuming your speedometer doesn't need service ). But what if you changed the rear end ratio or the tire size? I don't advocate changing rear axles because I don't see much to be gained there. You can easily change the differential carrier ( aka 3rd member ) in a Plymouth if you want another ratio. Where I live there's lots of open road with highway speeds of 55 to 70 so optional ratios, tires and O.D. go well with my Plymouth. My P17 Coupe came with 6.40-15 tires ( modern equivalent 195/75/15 ) and a 3.73 final drive ratio so the speedometer pinion would be a 17 tooth gear ( p/n 652-848 ) for an example. Chrysler designed the pinions to use the same 6 tooth gear on the output shaft so you only need to change one gear to correct the speedometer. One thing you find out right away is selecting speedo gears is not an exact science. You can get close and you might hit it right on the button but you more likely will be over or under by 2 or 3 mph. That's why the Highway Patrol has an enforcement tolerance. So let's look at tires first 6.40 15 = 195/75/15 standard tire for a P17 6.70 15 = 205/75/15 standard tire for a P18 7.60 15 = 225/75/15 an optional size tire Final drive ratios 3.90 very common on long wheelbase cars 3.73 standard ratio on many optional on all 3.54 optional Chart of ratios & tires vs speedometer pinions 3.90 6.70 15 17 tooth pinion 3.73 6.40 15 17 tooth pinion 3.73 6.70 15 16 tooth pinion 3.54 6.70 15 16 tooth pinion All 7.60 15 16 tooth pinion So you can see you're not going to get an exact reading but you can get close enough to avoid a ticket. The part number for the 16 tooth pinion is 652-846. I have found that if you have the number for an obscure part the parts house will look to find it in their inventory but they are likely to blow you off if you just say "I need a 16 tooth speedometer gear." Happy hunting!3 points
-
Yup, between 65 and 70. When I had earplugs in, I tended to go faster, haha....3 points
-
Another vote for making your own. It’s like a puzzle to solve. You screw a few up. You learn. You get better. Building and shaping your first ever 3 ft line across the left rear axle housing? Order two 25 ft rolls of 3/16” brake line tube. 😄2 points
-
preformed and then curve and bent to fit a box for shipping, you better off making your own tailor fit set.......2 points
-
with all due respect, items needed to exact this repair is common at any hardware store or big box building supply, TSC etc that one can walk in, get the item, pay and immediately got to work repairing. While mail order from many companies and sites are MOST BENEFICAL when you dealing/needing bulk quantity, I have to state IN MY OPINION this is not the best option for this particular thread. Heck if it boils right down to it, one can find where a person may park a chevy/gm product and find where these have fallen off and free for picking up. Ok so the last part is a joke...maybe real at times, but still intended as a jab/joke.2 points
-
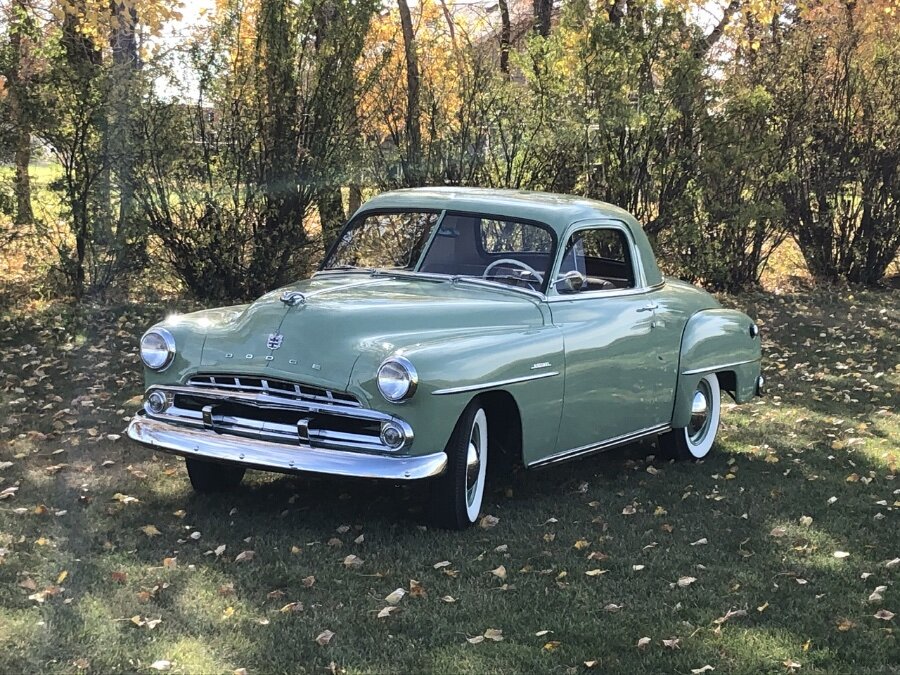
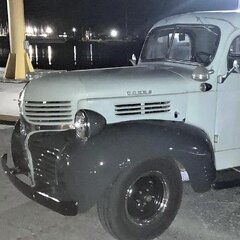
SURVIVOR: saw this Dodge between Lake Graham and Newcastle2 points
-
Likely not a "factory" accesory, more likely a mass produced catalog or dealer option, these aren't listed in the Accesories section of the manuals.2 points
-
Just use a torch to get the plug red hot....that oughta bust the rust loose................. 😲 🤣2 points
-
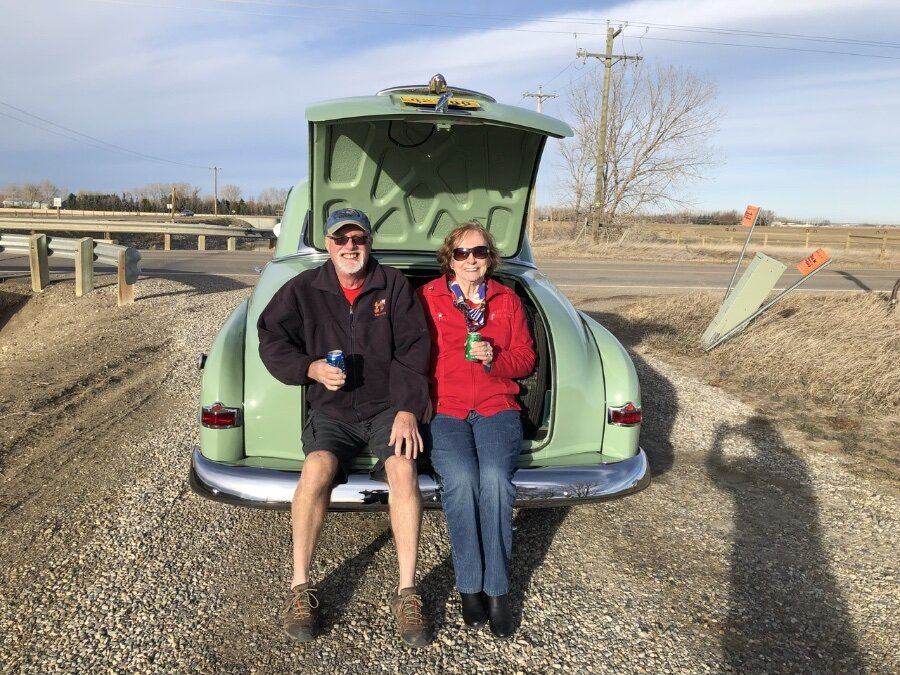
John-T-53, thanks for all the pictures. I’m sure a lot of us would like to make the tailgate and BBQ. Just not practical for most. However, your pictures really let those of us who can’t make it live vicariously through your pictures. The most and best of the bunch! I would love to bring this old girl to the BBQ but it involves border crossing (not a problem with a passport) and a three, four, or possibly five day drive depending on weather and lack of problems. It doesn’t have a tailgate but does have the next best thing…..a big butt trunk.

 2 points
 -
you may be onto something Sniper, I am going to say a rolling wheel gathers no red paint.....2 points
-
See now a song comes to mind I see a black wheel and I want to paint it red Apologies to The Rolling Stones2 points
-
I use the in my opinion a lot because most of my unsolicited comments are just that, an opinion and in no manner saying good bad or indifferent....but just as I see it. The fact I will then state the whys and wherefores of my opinion is to say that it is not just a whim or silly notion and give some background, color and size ratio etc...technically I could care less one way or the other what anyone chooses to do as it is not my car no more than if a person likes or dislikes what I do with mine. Big hobby folks, I will admit at one time it would rankle me see what some folks may do...but hard lesson to learn is JUST NOT MY BUSINESS....the red wheels, there is NO WAIVER here......lol2 points
-
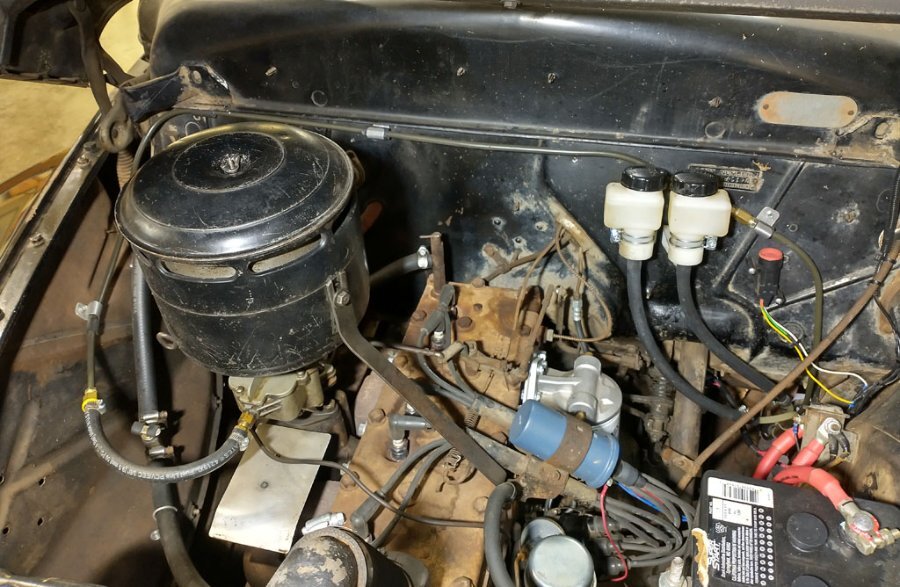
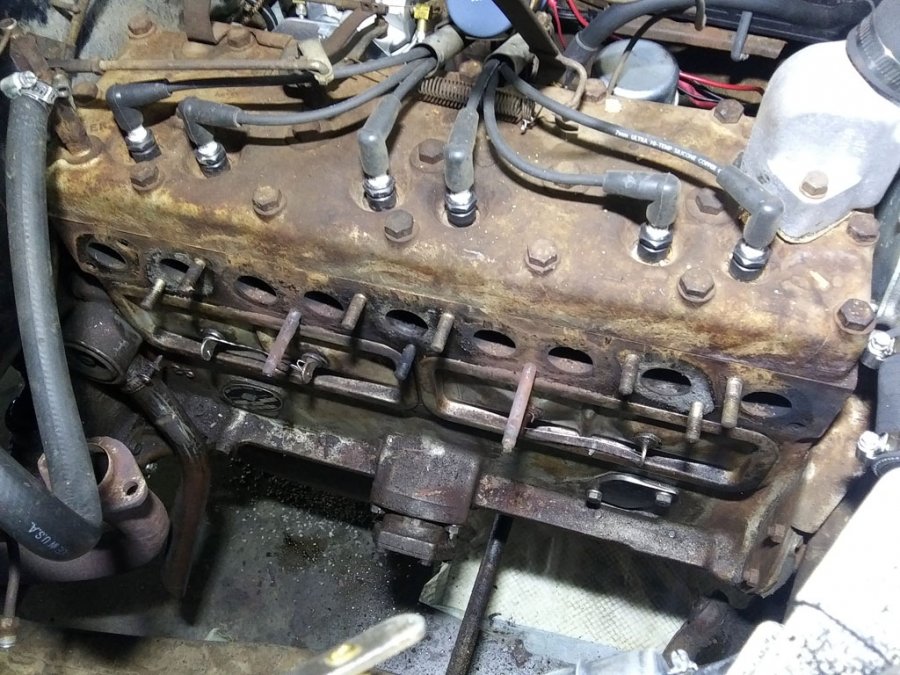
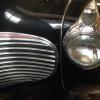
•pinched tube on intake manifold appears to be the vacuum source for the vacuum windshield wiper motor •intake manifold appears to have a partial PCV setup •spark plug wires appear a little on the long side...universal sets with 90° boots can be sourced2 points
-
I dunno, call me a snob but I's rather spend my tool money on real quality tools. Like Starret or Mitutoyo. Yeah, they cost a bit more but are definitely quality tools.2 points
-
1 point
-
1 point
-
It’s good to learn with these old bombs. When you get that perfect double flare you’ll then realize that you forgot to put the nut on. Oops . I enjoy making up my own fuel and brake lines. I agree with Plymouthy Adam’s, you’ll have to reshape them anyway after unpacking them.1 point
-
The engine pictures are current, but it's not done under the hood. Planning on using a fuel block and hard lines. I set that up before I was able to find the right fittings to use on the hard lines. The filter is in a temporary position. As an update, I have been able to put some of the stainless on the strips that are on the glass. Slow going and hard on the hands.1 point
-
Here's a possibility. I wonder if the Dodge rod bolts have threads that are cut, while the Pontiac rod bolts have rolled threads. Rolled threads are formed by dies that displace (smash) the material into the shape of threads, without removing any material. This results in threads that have larger outside diameter than the adjacent shank section of the bolt. On the other hand, cut threads are just that - they are made by cutting material away to achieve the thread shape, so the threaded section diameter will not be any larger than the diameter of the adjacent shank. It's kind of hard to tell from your photo, but it looks like that might be the situation. If so, then accordingly, the Dodge rod might be made with smaller bolt holes to snugly fit its cut-thread bolts, but the Pontiac bolts, with their rolled threads are too large to fit. I have a couple of Dodge 230 flathead rods at home, along with their bolts, and I can tell you that the threads in those bolts have the appearance of being cut, which surprised me, since I have seen other Dodge flatheads that have the appearance of having rolled threads. I have no reason to think that those are not the original bolts, and perhaps they were early rods that used cut-thread bolts. I could take some measurements and photos of those rods and bolts some time in the next few days and we can see if they match the dimensions of your bolts. We can also see how thin my other rods are (the ones that used rolled-thread bolts) in the wall between the bolt holes and the bearing saddles. I remember them being pretty thin. We might find that you have room to ream out the bolt holes in your rods to accommodate the slightly larger Pontiac bolts, or some aftermarket bolts, such as those from ARP. From the strength and durability (fatigue) standpoint, the bolts containing rolled threads are very much preferred. I believe virtually every manufacturer uses those types of rod bolts nowadays and have for many, many decades. I remember seeing early rod bolts from other engine makes that used cut-thread bolts, but I think most everyone moved away from that type of design long ago.1 point
-
The drag links I'm familiar with had one end with cotter pin and slot cut into the end that a wide screwdriver blade or drag link socket fit into for adjusting and the other end would be a tie rod style. If the end that has play is similar to the tie rod style Sniper put up, replacement is your needed. If the other style, I believe some replacement sockets and cup, spring may be available. Post a pic of the bad end if you can.1 point
-
VINTAGEPIC: saw this Dodge on the FB1 point
-
I think I’m a year with the electric 6V boost pump in Chrysler. No complaints. It will push through vapor lock. I have done so with it. I do like it spliced into ignition switch (wire to fuel gage). Then I cannot leave it on when I park the car. I have left the heater blower and AM radio on by accident. They were wired to direct non-switched power sourced. Dead battery the next morning. A sure way to ensure premature death of an otherwise good 6V battery.1 point
-
Hopefully this post skirts the rules...i have been unsuccessful finding arm rests. My last hope is that someone can send me one for templating and I can ship it back. A friend suggested making them out of wood. But the shape is fairly complex and I'm not a good woodworker. If anyone has any other suggestions, my ears are open. Attached is a pic i found online. Thanks, Andrew
 1 point
 -
for the most part our Home Depot, Lowes, TSC and local hardware stores carry a fairly good selection of hardware....NOW THEY DO NOT have everything....and SAE fine stainless does fall in that DOES NOT HAVE But I do have a company locally that has a better selection and prices and will sell 1 or a thousand with the same courteous service. Cannot say that for a certain main stream specialty store that by the way went tits up in this area due to the poor management and over the top gouging prices. For many folks the TSC by the pound hardware is a pretty good deal when you look at. I was not saying ordering on line was out of the question, sometimes it is the only means to an end on some very special hardware......and I have ordered in my fair share, I do however give the locals a chance to fill the order first so not to have stop/delay a segment of a build/process. Common sense stuff folks, nothing more.1 point
-
Last year redid the wood bed of my truck. Some of the carriage bolts and nuts I was able to reuse by just a quick brush and repainted them (the heads only) with the POR15 Black Glossy Paint. I used it on my bed strips as well and all these parts were steel. I looked online for hardware, E-bay, Ace, Grainger to name a few after taking inventory on what I needed that was not salvageable for hardware. I found the best prices for what I needed at Menards online. Based on prices everywhere I decided to go with hot zinc dipped hardware and added the sizes for carriage bolts, washers and nuts to my online cart. Menards will pull your order and have it waiting for you at the pick-up counter but they charge extra for that, so I printed my online cart list and went down and grabbed them myself.1 point
-
Same here. If you decide to delete the mechanical pump you might consider modifying the fuel line inside the engine compartment to get it away from the exhaust manifold. Here is how I ran the line across the upper firewall and over to the carb.
 1 point
 -
SURVIVOR: saw this Dodge between Lake Graham and Newcastle1 point
-
Pro tip. If you have a bunch of transmissions and go hunting through them for the proper gear to match the 3.73 you swapped into your coupe make sure you reinstall all the wrong ones correctly. Otherwise later on when Dad goes to install one of those in place of the OD he's not selling with the 50 Plymouth bad things will happen to the new owner. Like the tail housing exploding....1 point
-
we made the license plate holder. thank you for your help.

.jpg.f4c004ce50392a06bcf909c47d9c64ef.jpg)
.jpg.e9ed57b0c8e1daa5e6184be3e41cf22f.jpg)
.jpg.929b3cff080c9f7aa05dbd0e04367066.jpg)
.jpg.44d8f71aea232de5107681660fd6575a.jpg) 1 point
1 point -
The pilot bushing is an oilite bushing DO NOT USE SANDPAPER on oilite bushings DO NOT REAM an oilite bushing READ https://oilite.com/best-machining-practices1 point
-
Weren't the new motors stamped right after they bolted them to the frame (so that you have the matching numbers on the motor and the frame)?1 point
-
That number doesn't come up in my 51 Mopar parts book so it looks like your 49-50 only is right. I just inherited a bunch of Dads books I'll see if he has a 50 Plymouth parts book1 point
-
WINNER WINNER CHICKEN DINNER Thanks for tip Los. I pulled the sender and measured the gas level, it was at 2 1/2" in an 8" deep tank, which matches the fuel gage reading of about 1/4 tank of gas. Looking in the tank from the sender hole I couldn't see any water, but it was probably back by the tank drain, and the drain plug is stuck and I can't remove it. The one thing I didn't do last fill up was to put Stabil in the tank. It keeps the gas good and also helps with condensate. When I measured the gas level, I stirred the gas in the tank then I smelled the gas. It didn't smell bad, but it smelled weak. The strong smell wasn't there. It smelled lite, like half of the normal gas smell. I have new fuel filters on the way to replace the one before the prime pump at the tank and the one before the carb and when I change them, I'll take another crack at removing the drain plug and hopefully know for sure about the water in the tank. So tune in next week for another exciting episode of "As the Wheel Turns". Joe Lee1 point
-
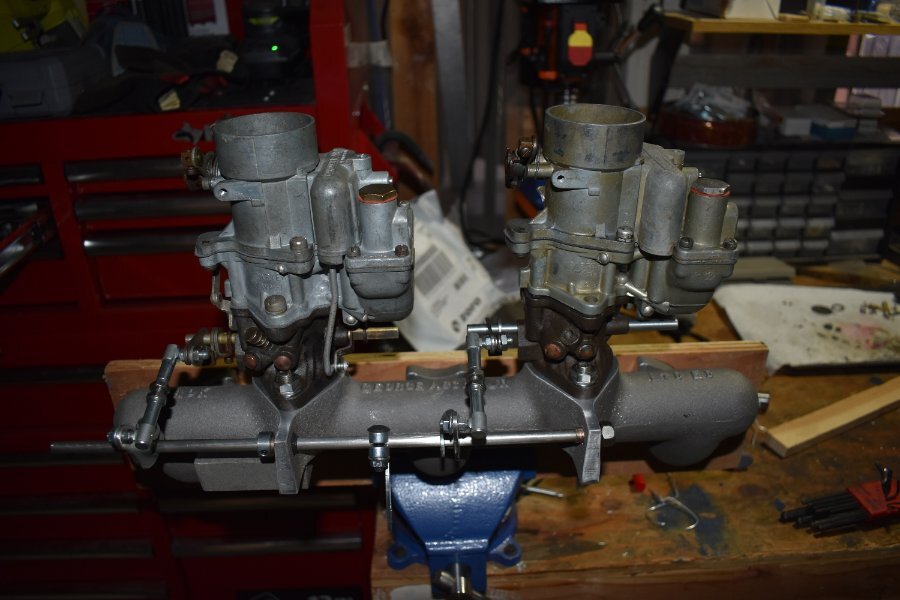
When I stopped developing my AoK clone intake, it wasn't because I thought it was a bad idea. In fact I also stopped working on an adapter plate for the 833 transmission. I did that because I found out from Tim Kingsbury, that George Asche might have some plates still available. He did, so I bought one. He actually did a new run of them so I got one that was just finished. In talking with Robert, one of his sons, about the plate I tossed out a question I thought I knew the answer to...were there any AoK intakes still available? I was shocked when he told me they might have one I could buy. I sent them a check the very next day In all it's glory, here is where I am with it. I'm just getting started mocking up the linkage. George will do that for you, and it would most likely be better. I'm using my Carter WA-1's though and George prefers the B&B. Besides the fact that I like to do my own tinkering. I drilled the tabs for the linkage rod a bit over and epoxied 5/16 oilite bronze bushing in place. I used the rod as a jig to get them in the right alignment, using my digital angle finder and some wire to pull the rods until is was as close to perfect as I can get it. I still need to add a threaded hole to locate the bell crank, which I'll take off my stock manifold. The right carb is just lightly bolted back together for the photo. I am taking it into work tomorrow to use one of our mills to drill for the custom bushings I'm making for the throttle shaft. The machine shop manager (We are an electronics company in simple terms) is helping me plan. I'm going to redo the bushings from some oilite bronze they have at .375 dia. I don't think the cast iron base has the wall thickness to go that far, so we will take a look and go with something that has more like a .020 wall thickness. We make cryogenic equipment (physics instruments) primarily, although I work on our SEM/AFM fusionscope project team. Anyway, I have liquid nitrogen I can use to freeze the bushings and after we heat the cast iron the plan is to have about a .0005 interference fit. Pretty tight sounding, but our guy's do tighter than that. I'll hone the bushings to size from my initial .3105 reamer. Should be fun. You never find cool things, if you don't ask. I don't know if there are any more intakes available or not. The truth is, if you don't have to pay for anything but the raw materials (machine yourself, welding is free) you can do a pretty good job of imitation using the design I started. But it won't have George Asche Jr's name on it. Miles of smiles here.
 1 point
 -
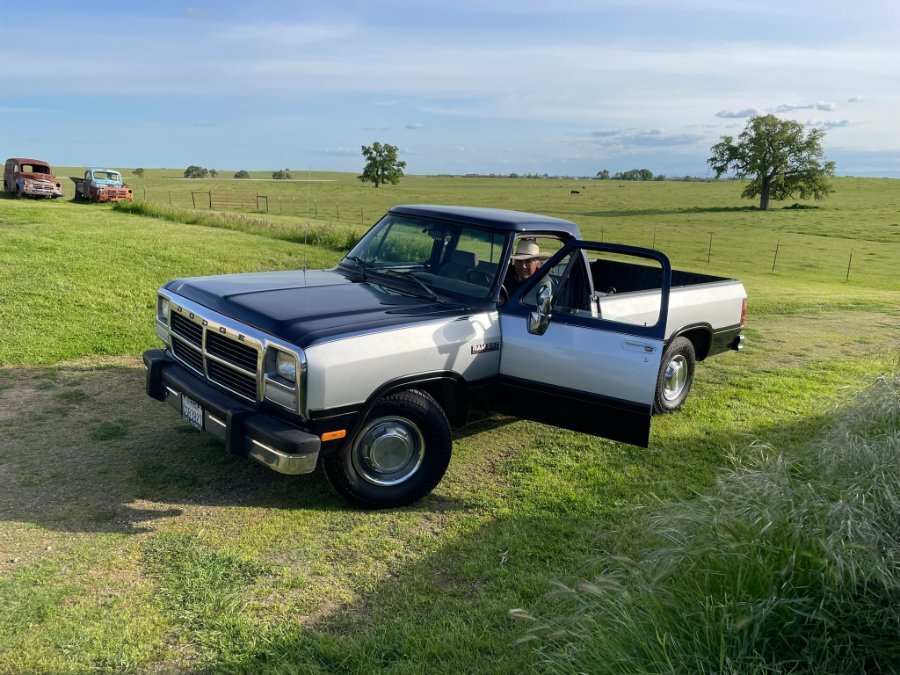
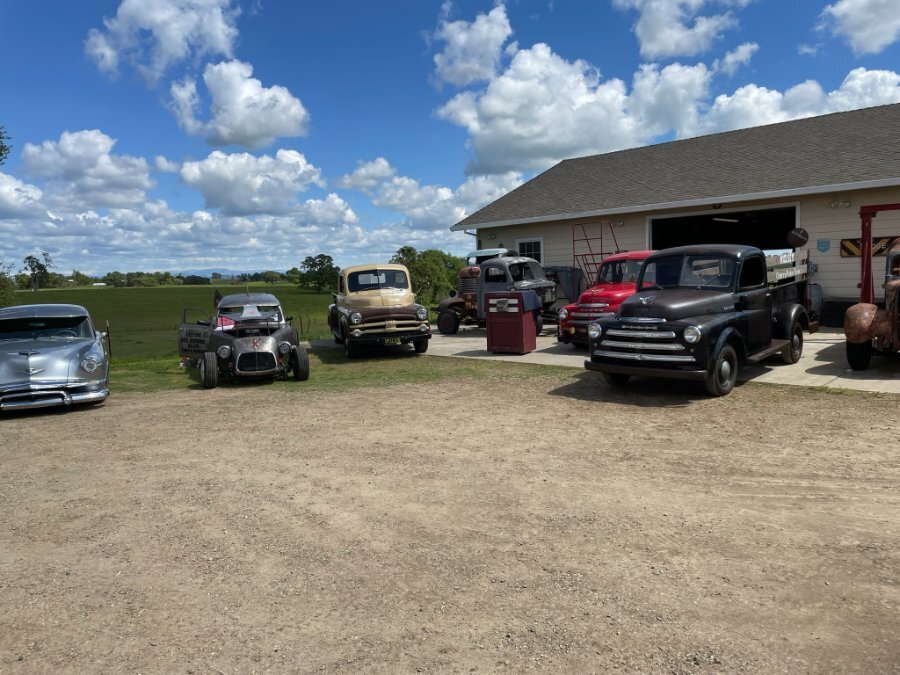
"OD" as he's known, about to head out in his '93 Cummins, back to Escalon. There was also a similar or equal year truck that showed up, a dualie (no photo, unfortunately). The two owners connected, and an exchange of parts is planned in the near future. Heading back down the 101 for the return trip.... F the 5.

 1 point
 -
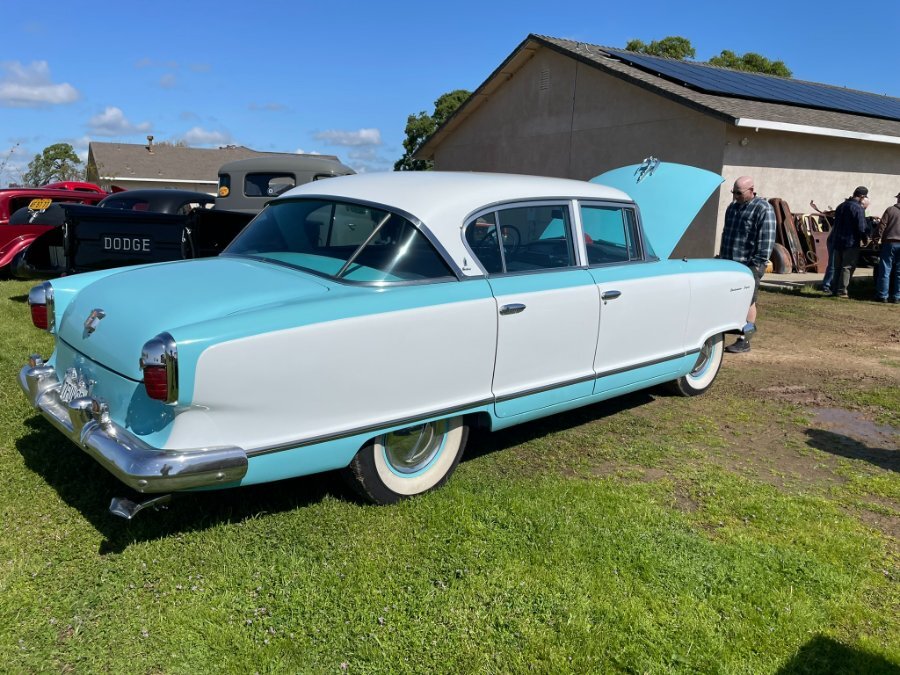
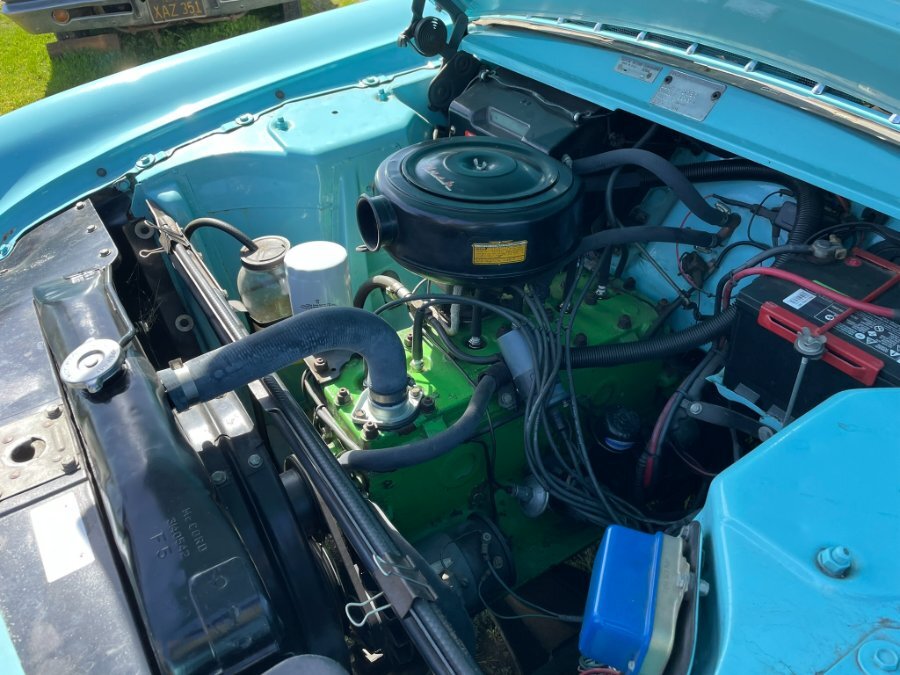
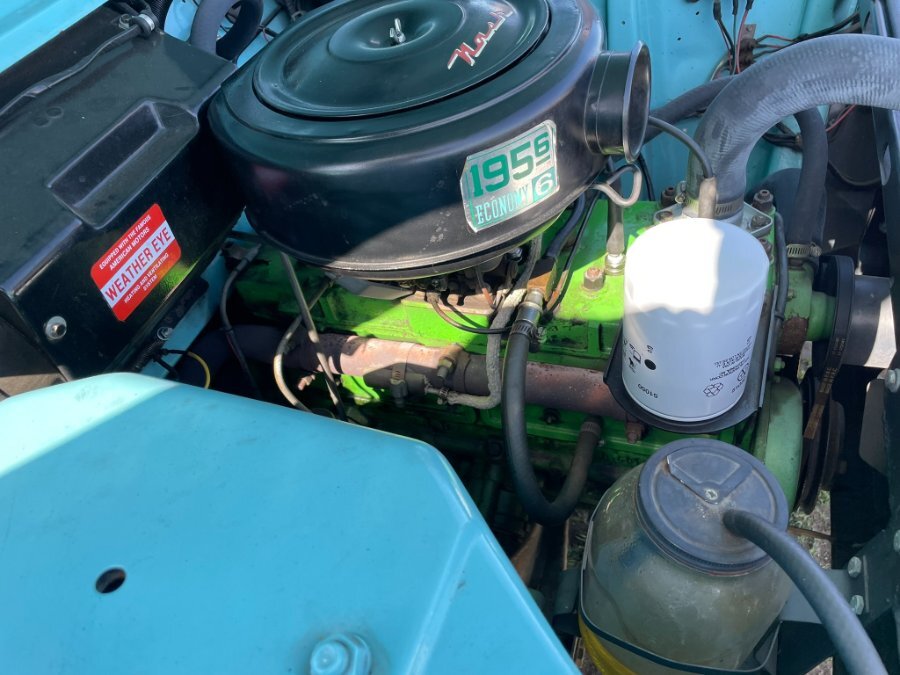
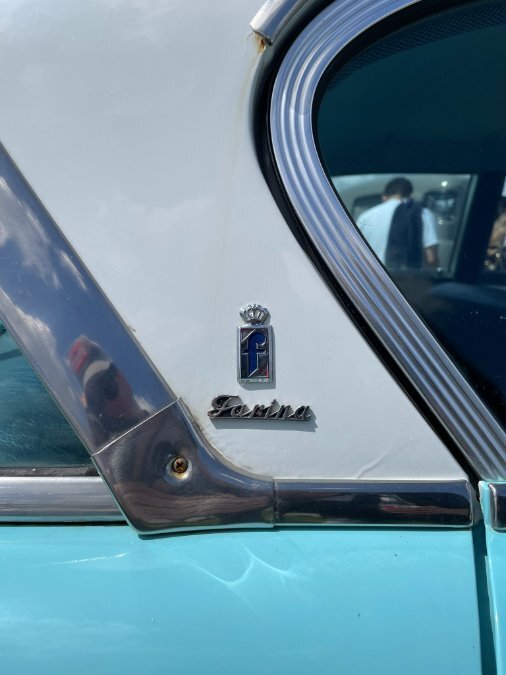
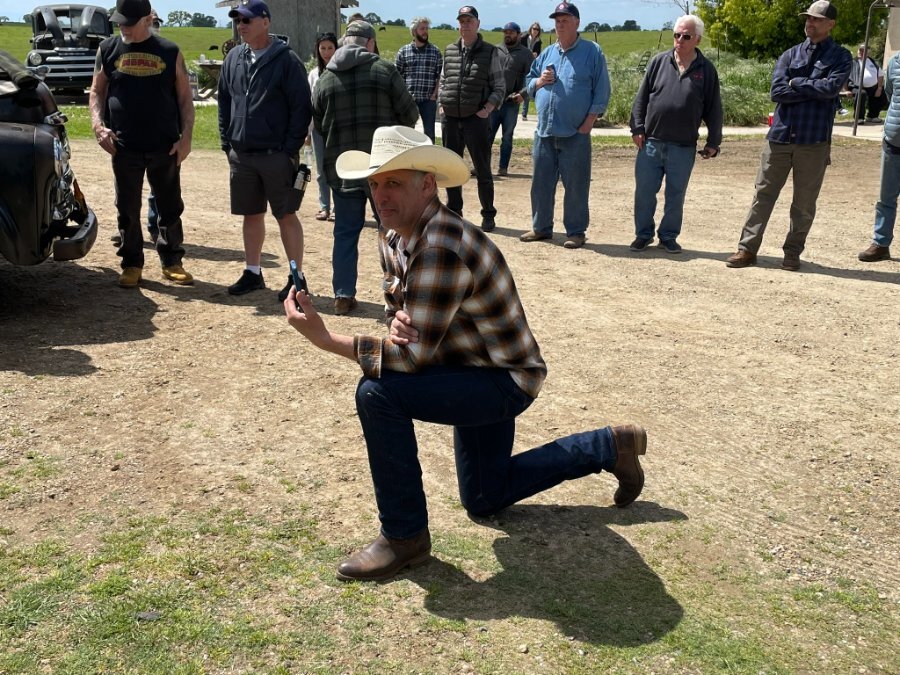
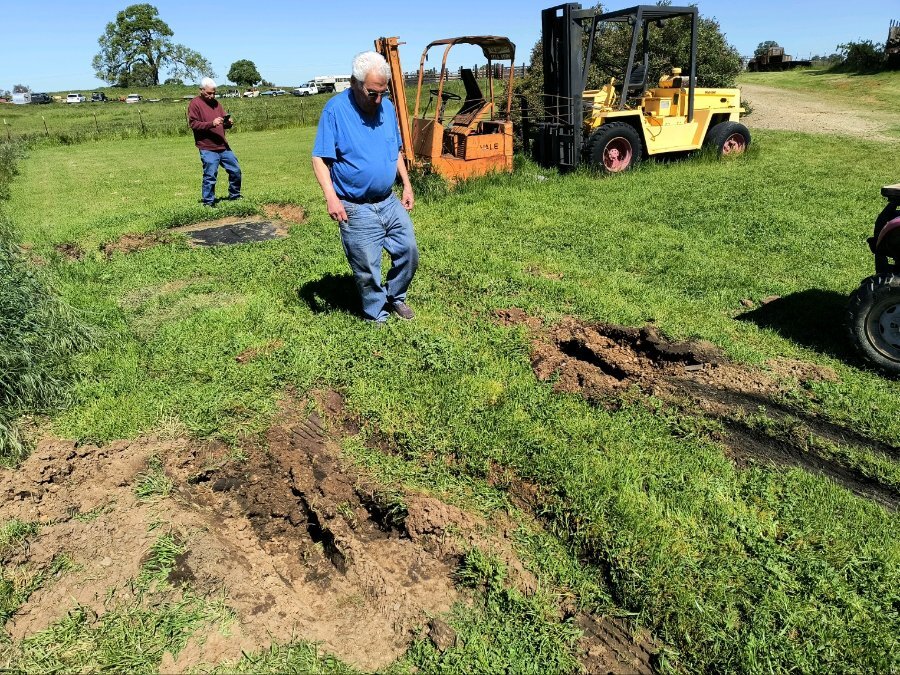
We always get at least one or two orphan makes at this event each year. Jim's brother's silver Kaiser showed up again, and below is Charlie's '55 Nash, with body design by Pininfarina of Torino. I really enjoyed this car. AMC's thrifty 195-6. Note: no intake manifold. The exhaust "manifold" is just a steel pipe with cutouts bolted to the block. "Brendt" strikes a pose. Best of show award Really hope to see this COE on the road next year! The aftermath of Joe's Motorhome debacle on Sunday.... photo credit: @48Dodger


 1 point
 -
There is a youtube channel I watch sometimes ..... guy is a pretty fair mechanic and has interesting content. What he uses is bar oil for chainsaws. He thins it down with paint thinner then uses a pump up garden sprayer to apply it. The paint thinner evaporates leaving the sticky oil. Then he drives the vehicle down a dirt or gravel road and coats the fresh oil with a layer of dust ..... just helps give the oil a protective layer to keep it in place. This is what he does to his daily drivers, not sure he would do it to a classic car ... that he would not drive in the winter. I like the idea because it is cheap, easy to do, and it is not permanent. He says he needs to repeat the process after about 3 years .... If he needs to work on it he has a lift and can just raise it up, pressure wash it to clean it and when finished just apply more. Compared to spraying undercoating on that is permanent and a pita to get rid of .... I would choose this method if I needed it .... Texas I do not need it.1 point
-
Oh sure, just as he finally got it properly broken in you went and got a new one. Gonna take lots of work to break in the new one, lol.1 point
-
That pipe could be for wipers or other vacuum operated equipment? To determine what is and what's not original, it is best to find some vintage illustrations, such as from the owners' or repair manuals. Here are some of the things I see on the pictures: bed is likely not original or modified, rear view mirrors do not look period correct. Obvious - turn signals, side markers, etc. Interior appears to have been redone. Under the hood: is that a DIY PCV setup? You might want to check the original fuel bowl next to the pump, it needs to be cleaner. The heater outlet has been welded shut I see the vacuum advance next to the ignition distributor but do not see a vacuum line going to it, is it still there? Also, is this engine original to the truck (does the number match the frame)? The red color seems a bit unusual. Also, either your brake or clutch pedal is out of alignment, they should be the same height.1 point
-
Ray, where is your original post? This one? Just reply to it with all your updates.1 point
-
Small lights will probably look better, and I would experiment with different placement options. Also, try stepping farther away from the car to get some pictures with less geometrical distortion. Moreover, I've noticed that you are running a 1939 Penna plate. I actually do the same, but for 1940. However, this is sort of nonsense because cars manufactured in the 1939 or 1940 would not have their plate expiring in the same year 😋1 point
-
Andy's brackets look like the ones on my car as well (and similar to what's available on eBay for $20).1 point
-
Hmm, looking at Andy's post I see something that might work Yeah, it's listed as a fog light bracket, but it looks like it would clamp to those bumper brackets and a piece of angle iron bolted to the top would let you mount a plate? No, I wasn't looking for anything like this, I was looking for add on fog lights, lol.1 point
-
I looked at the license plate mount this afternoon, and tried to get the old plate off to be able to get a decent picture. It isn't quite as I remembered. The center (vertical) bracket hooks under the bumper, and the center bumper bolt passes through it, securing it to the bumper. Then there is a horizontal c channel bracket fixed to it (welded?), with long slots, to accommodate various mounting points for the different shapes of license tags used during that era. This is the best I could do, as the tag mounting bolts are rusted fast, and just turn on the back side. (I could have broken the tag off, but didn't want to ruin such a perfect license plate.... )
 1 point
 -
I don't know the specific number but the carb on my '48 P15 is perfectly happy with the pump with no need for a regulator or return line. The Carter pump is the full-time pump on my car, here is the mechanical pump: 😁
 1 point
 -
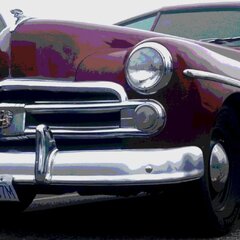
SURVIVOR: spotted this '52 in Jacksboro...it's had some work done but this was the only time I saw it at the old fillin station that I've motored past several times in the last 6 months1 point
-
I had taken the tires and rims off my 39 Desoto to do some checking under the car. I also have the lug bolts and are all right hand treaded. Did my checkout put the rims and tires back on the car used the t-wrench to tighten the bolts and both rear wheels. Thought they were on tight enough took the car for a ride around the block and then heard the wheel noise. stop the car in my neighborhood saw the bolts were loose. walked home got my t-wrench and tighten them up. So we all have had some issues with not tightening the lug bolts. So now when I put the car back on the ground I retighten all the bolts for all the wheels that had been removed. Lesson learned once but never twice for this issue again. Rich Hartung desoto1939@aol.com1 point


.thumb.jpg.21da29dadd149e36b996d66cc1dc3edd.jpg)