
Leaderboard


Popular Content
Showing content with the highest reputation since 04/17/2024 in all areas
-
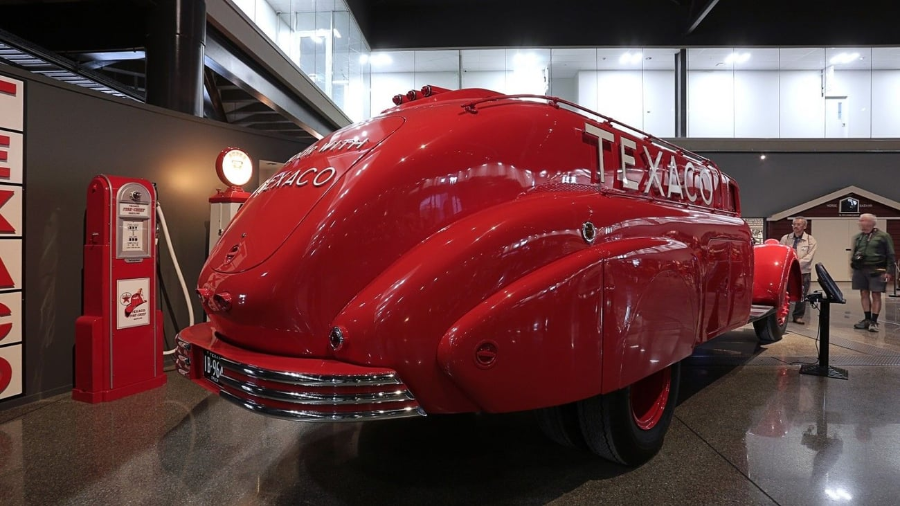
Just installed a Red Crown Gasoline light in our carport to go with the truck. I am pretty happy with the results.
 8 points
 -
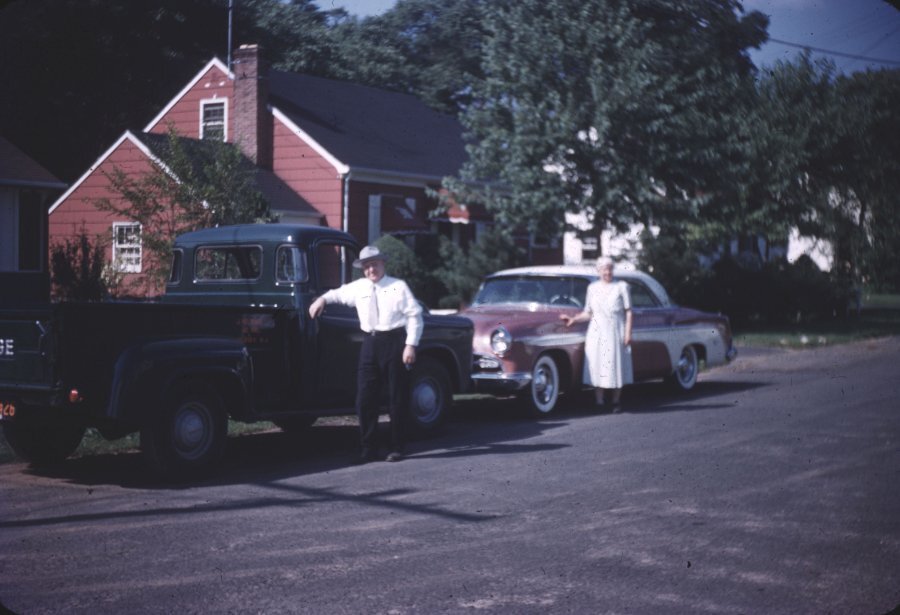
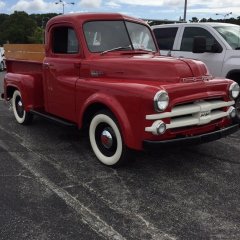
My Great Grandfather, and guessing my Great Grandmother with the '55 Dodge (I'll be inheriting this summer) and what I believe is a '55 DeSoto. The truck was my Great Grandfather's then my Uncle's, and then my Parent's, and soon to be mine. My Dad just told me that he is getting too old to work on too many toys, and he is giving it to me. It is in a little worse shape than here, but pretty much original. I'll post pictures of it's current state, in the correct area, when I get it out of the barn, but from what I recall it definitely will need a gas tank and fuel pump, amongst other things.
 6 points
 -
The dimmer switch might have corrosion on the contact points. Press the dimmer switch several times to clean the contacts. Check the fuse for the light switch might be blown. Go to the headlight junction block and use a test lamp to see if you have current flowing to the connection block. If you have power to this section then your lights might be toast. Pull a headlight bulb disconnect the wire connecter then test with a 6 volt battery charger to see if they light up. If they light up then check each connecter at the base of the bulb to see if you have current flowing to the socket. Also could be a grounding issue or maybe the bulbs are bad. Just basic diagnostic procedures. Rich hartung desoto1939@aol.com2 points
-
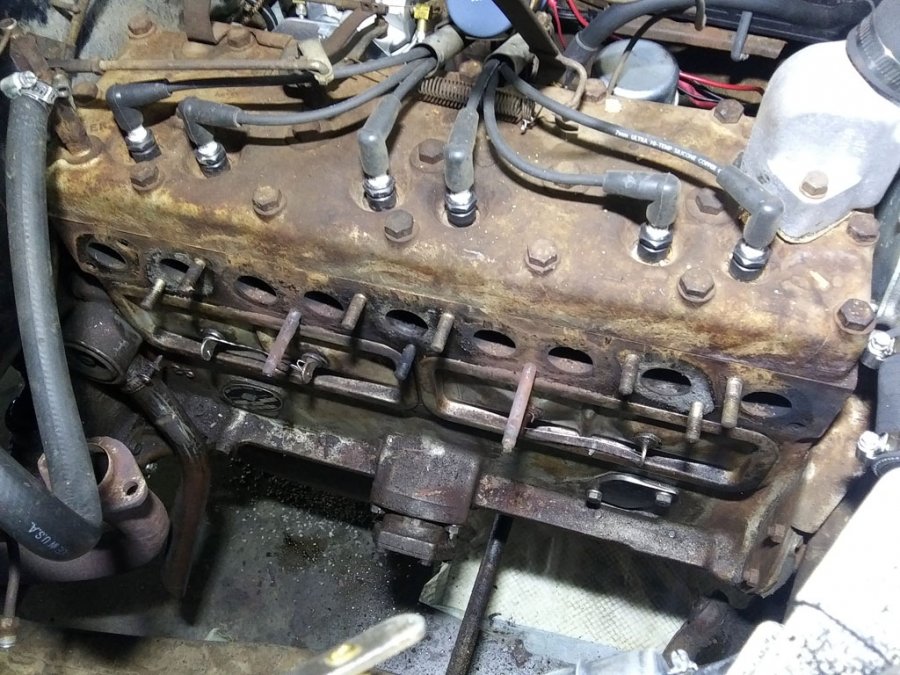
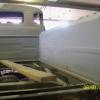
The filter is far from the headers. The pipe that it is close to is an intake runner, and when the engine is running those runners stay very cold. That's why I built it like that. Cold air is denser and allows more power to be made. The long runners introduce a ram effect on the intake charge and produce more power. This was a question about installing the windshield and rear window.2 points
-
I like aluminum paint, it dries without any buildup. Check the inside of the tires for any tags, that could eventually rub a pin hole in the tube. I wiped the inside of the tires and the tubes with corn starch with a cloth. It doesn’t need a lot. I paint the bead of tire with rubber lube, so the bead slides easily on the wheel as it sets, you can put the lube on the wheel seat to ensure a soft seating of the bead. The flap doesn’t need any lube. Set the opening of the lock ring opposite the valve stem. I have a special hammer/mallet with a duck bill on the other side. I use the rubber part to tap the lock ring into place as I fill the tire slowly by adjusting the pressure on my regulator. This assumes that your rings are clean and no cracks, they have been painted and the notch in the wheel where they lock is perfectly clean. I’ve trashed wheels and rings that had been beaten with metal hammers. The lock ring ends should be almost touching when done correctly. Any questions, ask, it is a risky job even if you’ve done it before. These are 16” wheels, but the same design as the 20” wheels that I have. Once the bead is set and the lock ring is secured properly, I let the air out and refill with the valve core installed to eliminate any tube wrinkles. After you get it to pressure, you can bend the valve stem for access when the wheels are on the truck. If there is anything you don’t understand, ask. Rick D.

 2 points
 -
Another vote for making your own. It’s like a puzzle to solve. You screw a few up. You learn. You get better. Building and shaping your first ever 3 ft line across the left rear axle housing? Order two 25 ft rolls of 3/16” brake line tube. 😄2 points
-
preformed and then curve and bent to fit a box for shipping, you better off making your own tailor fit set.......2 points
-
Here's a possibility. I wonder if the Dodge rod bolts have threads that are cut, while the Pontiac rod bolts have rolled threads. Rolled threads are formed by dies that displace (smash) the material into the shape of threads, without removing any material. This results in threads that have larger outside diameter than the adjacent shank section of the bolt. On the other hand, cut threads are just that - they are made by cutting material away to achieve the thread shape, so the threaded section diameter will not be any larger than the diameter of the adjacent shank. It's kind of hard to tell from your photo, but it looks like that might be the situation. If so, then accordingly, the Dodge rod might be made with smaller bolt holes to snugly fit its cut-thread bolts, but the Pontiac bolts, with their rolled threads are too large to fit. I have a couple of Dodge 230 flathead rods at home, along with their bolts, and I can tell you that the threads in those bolts have the appearance of being cut, which surprised me, since I have seen other Dodge flatheads that have the appearance of having rolled threads. I have no reason to think that those are not the original bolts, and perhaps they were early rods that used cut-thread bolts. I could take some measurements and photos of those rods and bolts some time in the next few days and we can see if they match the dimensions of your bolts. We can also see how thin my other rods are (the ones that used rolled-thread bolts) in the wall between the bolt holes and the bearing saddles. I remember them being pretty thin. We might find that you have room to ream out the bolt holes in your rods to accommodate the slightly larger Pontiac bolts, or some aftermarket bolts, such as those from ARP. From the strength and durability (fatigue) standpoint, the bolts containing rolled threads are very much preferred. I believe virtually every manufacturer uses those types of rod bolts nowadays and have for many, many decades. I remember seeing early rod bolts from other engine makes that used cut-thread bolts, but I think most everyone moved away from that type of design long ago.2 points
-
with all due respect, items needed to exact this repair is common at any hardware store or big box building supply, TSC etc that one can walk in, get the item, pay and immediately got to work repairing. While mail order from many companies and sites are MOST BENEFICAL when you dealing/needing bulk quantity, I have to state IN MY OPINION this is not the best option for this particular thread. Heck if it boils right down to it, one can find where a person may park a chevy/gm product and find where these have fallen off and free for picking up. Ok so the last part is a joke...maybe real at times, but still intended as a jab/joke.2 points
-
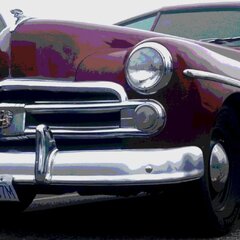
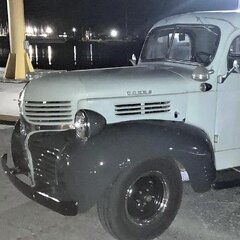
SURVIVOR: saw this Dodge between Lake Graham and Newcastle2 points
-
By turning the ignition on and then off you did the same thing the points do when opening and closing, letting the coil fire a plug, and if a gas mixture is in that cylinder when it fires it'll rock the engine. That's my guess.2 points
-
Hopefully this post skirts the rules...i have been unsuccessful finding arm rests. My last hope is that someone can send me one for templating and I can ship it back. A friend suggested making them out of wood. But the shape is fairly complex and I'm not a good woodworker. If anyone has any other suggestions, my ears are open. Attached is a pic i found online. Thanks, Andrew
 1 point
 -
In Canada I think Marine marked gas is still ethanol free. That’s what I run in my old cars. Illegal, yes. Lock me up! Hide behind pump so cashier cannot see. Show up with a legal gas can. Cashier will check that you have a gas can. All good. Fill gas can. Stuff fuel nozzle in your car. Proceed to slam all you can in there. Cashier is too distracted with other customers. Pay for your gas and leave. All good! Or go directly to jail. Lol.1 point
-
I speculate that pre ww2 bolts were more likely to be cut but with the advancements in the military equipment, i.e. planes, etc, stronger threaded fasteners were needed. Just a thought. dan...1 point
-
I have not seen a paint that would hold up to the effect of Dot3 fluid.....powder coat may stand up but would be in my opinion stained at minimum. Most areas you cncerned with are likely not subject to ease of powder coating either. Go DOT5 or forever be ye careful.1 point
-
All Mopar flat sixes (and 8's) can from the factory with Valve seats (hardened). NO need to change anything but maybe timing if you have been running a higher octane gas. They have No problem running non leaded gas- never did! 😁 DJ1 point
-
My P15 had developed a habit of occasionally going dark between high-beam and low-beam switching which made me wonder if the switch was going to totally die soon. A really dark road and the proximity of deer meant the car was more likely to pull this little trick. I replaced the dimmer switch and now the lights are reliable. I was pleased to see Rock Auto carries the switch in the Standard brand which is usually a good bet for aftermarket. I had to replace the old bullet connectors on the harness with ring terminals but that was a minor blip to get a new switch. https://www.rockauto.com/en/moreinfo.php?pk=445771&cc=1486874&pt=4340&jsn=3901 point
-
That's great news! No need to PM, you can just post them here, I am sure everyone would appreciate these, for reference 😀1 point
-
maybe we need two forums, one for the DIY and one for the Pay as you Go crowd......😀 Never seen the logic of coming here for info and ending the thread with pass this along to my mechanic....if they are a mechanic, he/she should already know if not what to do, but at least how to find the info for themselves and not get watered down third party hearsay.1 point
-
I suspect that engine noises are best troubleshot from under the hood/underneath the car. Have someone step on the gas and listen 😉1 point
-
Stainless steel is more brittle and work hardens easier and it does rust. Not better on many fronts.1 point
-
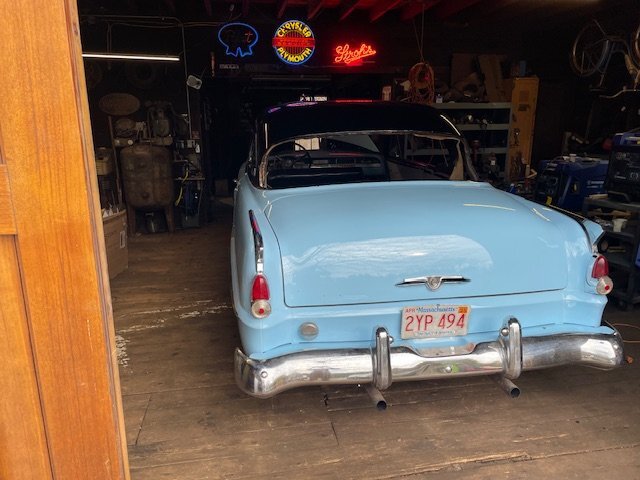
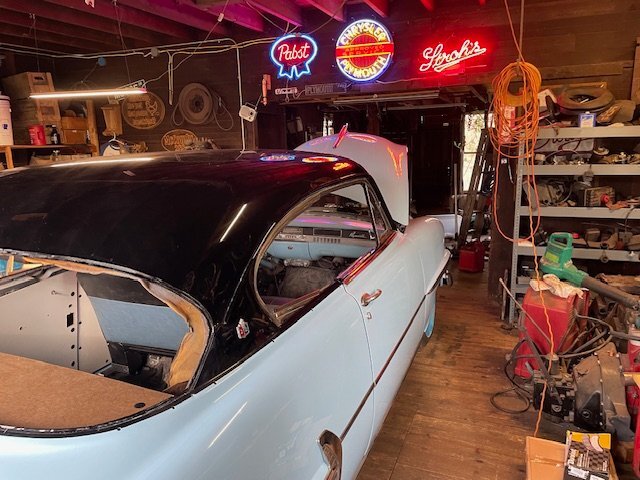
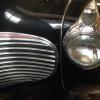
I haven't posted in a while, but there is at least one other thread about this car. I have owned it since December 1989. It is my first car, got it when I was 17. Two years ago I had a fire under the hood. Not big enough to cause a lot of problems, but enough that I decided it was finally time to do a mostly full "restoration." I disassembled everything, stripped most of it, then took it to a good paint shop. Picked it up last December, and now have it mostly put back together. I have driven it around the block, and hoped to drive to my local glass shop to have the windshield and rear window installed professionally. When I talked to him about doing the job, he seemed enthusiastic, and knowledgeable. I dropped off all the parts(windshields, weatherstripping, and stainless) yesterday waiting for a call telling me to bring the car. Went by the shop this morning and he told me he wasn't sure how to do it and afraid to try. I've got the manual and instructions, and have read everything about it, and now have the weatherstrip installed on each of the glasses. Question for anyone who has done this on a 53-54 car. Do I need to put the stainless on before I rope the windshield(or rear window) per the manual? I've built a stand to hold the window vertical, which makes it a bit easier, but it's still quite difficult to get the stainless in place. How hard is it to install the stainless after the windows are in place? Thanks for any info.


 1 point
 -
I recently replaced the windshield in the '69 Beetle. A bottle of KY Lube from the local drug store turned out to be a superb windshield molding lube. It also triggered several off-topic comments from bystanders......1 point
-
Most of us don't have a cage to use when airing lock ring wheel/tire combos. I'm one of those without. Haven't done one in a while but when dealing with them , I put the wheel on backward, ring toward the inside before airing to higher pressures. Seat ring first with just a few psi in the tube. Might not be possible on all axle/frame/wheel combos but works on some. RuGlyde on the beads, corn starch in tire and on tube. Dad used to wrap a chain around the tire and thru all the wheel holes to retain all the pieces 'just in case'. Never seemed particularly safe to me. A local tire shop operator in my home town was killed by one of the two piece widow-makers when I was a little kid. Hearing the description in adult conversation made me very cautious my whole life.1 point
-
Are your rims actually rusty on the inside? Mine were pretty clean (original paint, too), so I just washed them and that's it. The tubeless tires use soapy water for mounting. Since we have tubes, I just used the good old tire talc powder. Both on the tube and inside the tire (spread it around with a piece of cloth, etc). Do not use organic baby powder for automotive tires 🤣 You don't have to worry about setting the bead, etc. Your biggest concern should be how to not pinch the tube in between the tire and the rim. Also, make sure that you have the correct-size tubes. One of my old tubes had a fold in it. When I put the tires on, I inflated them to around 10 psi, just to hold shape, and then pushed around the sidewall, on both sides, to make sure that the tube was nicely seated in the middle of the rim.1 point
-
1 point
-
I've heard a rumor that flathead replacement fuel pumps have a half-baked machined pin installed 🤔1 point
-
It’s good to learn with these old bombs. When you get that perfect double flare you’ll then realize that you forgot to put the nut on. Oops . I enjoy making up my own fuel and brake lines. I agree with Plymouthy Adam’s, you’ll have to reshape them anyway after unpacking them.1 point
-
What is Petronix saying about this when ya ask'm about this prob?1 point
-
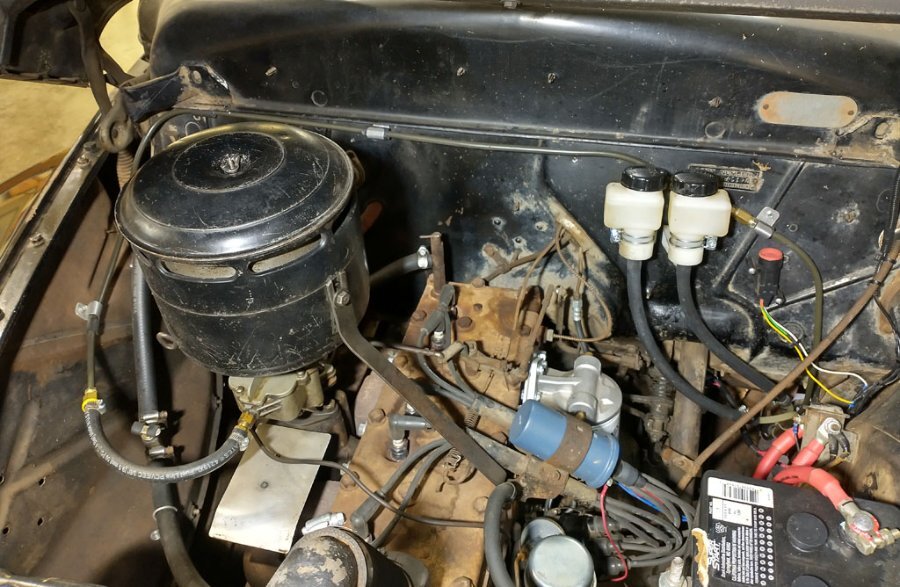
The engine pictures are current, but it's not done under the hood. Planning on using a fuel block and hard lines. I set that up before I was able to find the right fittings to use on the hard lines. The filter is in a temporary position. As an update, I have been able to put some of the stainless on the strips that are on the glass. Slow going and hard on the hands.1 point
-
And when you turn the key back off, the current flow is interrupted1 point
-
Interesting question.......those mount on a flat surface which may or may not work where the chassis upper shock spot is on the 1940-48 mopars, also the lower mopar mount is basically pointing to the rear of the car....these mounts when attached to the chassis have the "pin" pointing more or less at 90 degrees to the frame........but usually the upper & lower shock eyes can be turned at 90 degrees to each other...........I'm curious whether they may work.........andyd1 point
-
VINTAGEPIC: saw this Dodge on the FB1 point
-
SURVIVOR: saw this Dodge between Lake Graham and Newcastle1 point
-
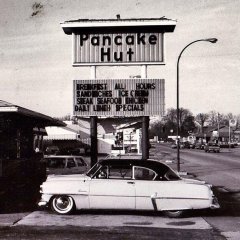
Sorry for the off-topic, but this reminds me of the add I saw on Craigslist: 🤣
 1 point
 -
I think I’m a year with the electric 6V boost pump in Chrysler. No complaints. It will push through vapor lock. I have done so with it. I do like it spliced into ignition switch (wire to fuel gage). Then I cannot leave it on when I park the car. I have left the heater blower and AM radio on by accident. They were wired to direct non-switched power sourced. Dead battery the next morning. A sure way to ensure premature death of an otherwise good 6V battery.1 point
-
I consider points a switc0h. Open, close, on, off. Ignition switch on, ign switch off. Logic tells me my previous post is a possible scenario and every electrical circuit in the truck is available when the key is on.. I don't know whether or not Pertronix would or could respond similarly. How repeatable is this condition? Now that it's sat for a while will it do it before starting the engine or does it have to be run for a while. Will it do it after sitting for ten minutes or a half hour? Will it do it a second time, turning the key on and off immediately after it does it?1 point
-
I went to Tractor Supply this past weekend, for the second time in my life. That is all, carry on ship's work.1 point
-
I did.1 point
-
Never saw the points firing a plug when turning the key 🙄 Is this a stock setup, besides the ignition? Are you running an electric fuel pump or any other things connected to the ignition switch?1 point
-
for the most part our Home Depot, Lowes, TSC and local hardware stores carry a fairly good selection of hardware....NOW THEY DO NOT have everything....and SAE fine stainless does fall in that DOES NOT HAVE But I do have a company locally that has a better selection and prices and will sell 1 or a thousand with the same courteous service. Cannot say that for a certain main stream specialty store that by the way went tits up in this area due to the poor management and over the top gouging prices. For many folks the TSC by the pound hardware is a pretty good deal when you look at. I was not saying ordering on line was out of the question, sometimes it is the only means to an end on some very special hardware......and I have ordered in my fair share, I do however give the locals a chance to fill the order first so not to have stop/delay a segment of a build/process. Common sense stuff folks, nothing more.1 point
-
Last year redid the wood bed of my truck. Some of the carriage bolts and nuts I was able to reuse by just a quick brush and repainted them (the heads only) with the POR15 Black Glossy Paint. I used it on my bed strips as well and all these parts were steel. I looked online for hardware, E-bay, Ace, Grainger to name a few after taking inventory on what I needed that was not salvageable for hardware. I found the best prices for what I needed at Menards online. Based on prices everywhere I decided to go with hot zinc dipped hardware and added the sizes for carriage bolts, washers and nuts to my online cart. Menards will pull your order and have it waiting for you at the pick-up counter but they charge extra for that, so I printed my online cart list and went down and grabbed them myself.1 point
-
Same here. If you decide to delete the mechanical pump you might consider modifying the fuel line inside the engine compartment to get it away from the exhaust manifold. Here is how I ran the line across the upper firewall and over to the carb.
 1 point
 -
and as such when it is no longer original (as in not broken on assembly) toss these for some fresh hardware preferably stainless steel, BUT if you are a purist, and must stay with the stock stuff break out the molasses and let the big dog eat, weld the breaks, chase the threads and when completed apply for social security......enjoy a few pancakes while soaking your nuts and other hardware1 point
-
SURVIVOR: saw this Dodge between Lake Graham and Newcastle1 point
-
Mark does an excellent job explaining the inner working of the doors. Check it out. 1941 Plymouth Restoration (#13) The other videos in his series are also very well done. You can tell he was an educator.1 point
-
I don't know the specific number but the carb on my '48 P15 is perfectly happy with the pump with no need for a regulator or return line. The Carter pump is the full-time pump on my car, here is the mechanical pump: 😁
 1 point
 -
That is a great calf hauler! love the scenery…… cool find1 point
-
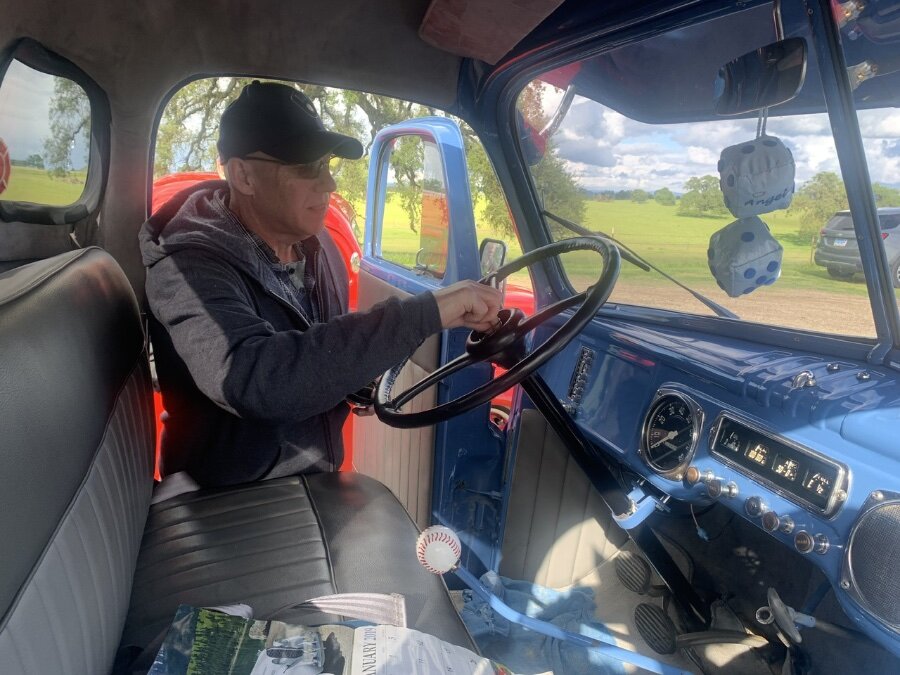
Pre BBQ and Merle has already been seen working on someone else’s truck Lol, and we have collectively solved the “ b-series” horn button removal scenario Ggdad1951 (with beer) John T53 (flannel left hand try) Merle (left of 48 dodger holding down the steering wheel)
 1 point
 -
So I am watching Roadkill and they are in Darlington. In the museum, Freiburger points out his favorite exhibit, the winner of the first 500 mile race. A 1950 Plymouth.1 point


.thumb.jpeg.28cb36506a6b17cd30e7d4a22504384d.jpeg)
