Leaderboard


Popular Content
Showing content with the highest reputation since 04/12/2024 in Posts
-
Just installed a Red Crown Gasoline light in our carport to go with the truck. I am pretty happy with the results.
 6 points
 -
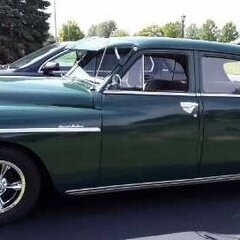
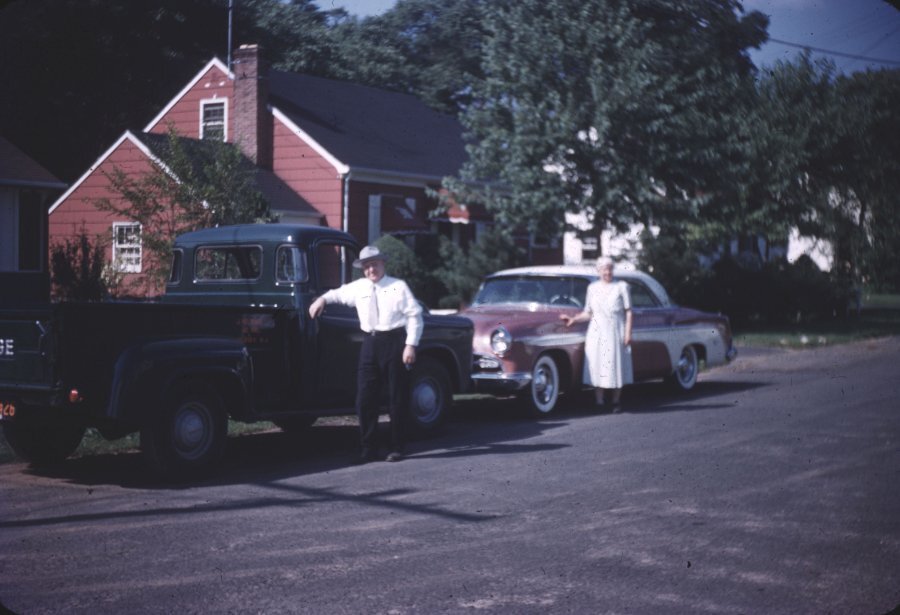
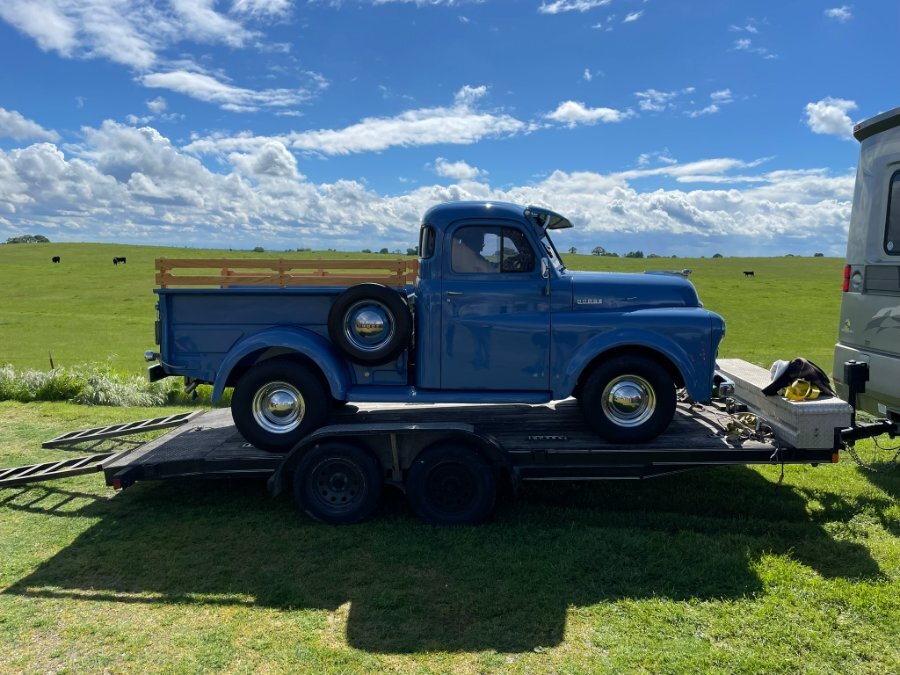
My Great Grandfather, and guessing my Great Grandmother with the '55 Dodge (I'll be inheriting this summer) and what I believe is a '55 DeSoto. The truck was my Great Grandfather's then my Uncle's, and then my Parent's, and soon to be mine. My Dad just told me that he is getting too old to work on too many toys, and he is giving it to me. It is in a little worse shape than here, but pretty much original. I'll post pictures of it's current state, in the correct area, when I get it out of the barn, but from what I recall it definitely will need a gas tank and fuel pump, amongst other things.
 5 points
 -
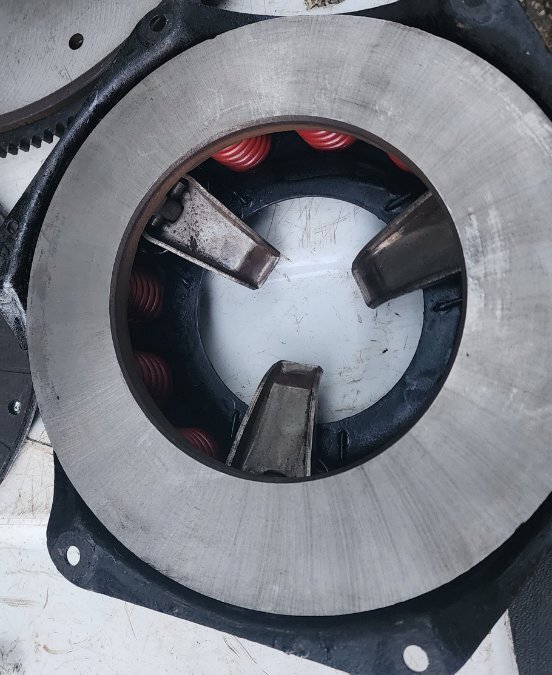
Also had them flip the flywheel starter ring.
 4 points
 -
I have an admittedly tight focus on the KT Keller cars, so that's what I research and play with. It's all about having fun after all and those are the ones I like. I am a huge fan of Overdrive transmissions because they don't really change the charm of the cars and actually add to it. When you put one in your car your speedo will be off at all speeds because the speedometer pinion gear was selected for a 4.1 ring and pinion. The good news is you can swap out the pinion from your old three speed to the O.D. and all will be back to normal ( assuming your speedometer doesn't need service ). But what if you changed the rear end ratio or the tire size? I don't advocate changing rear axles because I don't see much to be gained there. You can easily change the differential carrier ( aka 3rd member ) in a Plymouth if you want another ratio. Where I live there's lots of open road with highway speeds of 55 to 70 so optional ratios, tires and O.D. go well with my Plymouth. My P17 Coupe came with 6.40-15 tires ( modern equivalent 195/75/15 ) and a 3.73 final drive ratio so the speedometer pinion would be a 17 tooth gear ( p/n 652-848 ) for an example. Chrysler designed the pinions to use the same 6 tooth gear on the output shaft so you only need to change one gear to correct the speedometer. One thing you find out right away is selecting speedo gears is not an exact science. You can get close and you might hit it right on the button but you more likely will be over or under by 2 or 3 mph. That's why the Highway Patrol has an enforcement tolerance. So let's look at tires first 6.40 15 = 195/75/15 standard tire for a P17 6.70 15 = 205/75/15 standard tire for a P18 7.60 15 = 225/75/15 an optional size tire Final drive ratios 3.90 very common on long wheelbase cars 3.73 standard ratio on many optional on all 3.54 optional Chart of ratios & tires vs speedometer pinions 3.90 6.70 15 17 tooth pinion 3.73 6.40 15 17 tooth pinion 3.73 6.70 15 16 tooth pinion 3.54 6.70 15 16 tooth pinion All 7.60 15 16 tooth pinion So you can see you're not going to get an exact reading but you can get close enough to avoid a ticket. The part number for the 16 tooth pinion is 652-846. I have found that if you have the number for an obscure part the parts house will look to find it in their inventory but they are likely to blow you off if you just say "I need a 16 tooth speedometer gear." Happy hunting!3 points
-
Yup, between 65 and 70. When I had earplugs in, I tended to go faster, haha....3 points
-
with all due respect, items needed to exact this repair is common at any hardware store or big box building supply, TSC etc that one can walk in, get the item, pay and immediately got to work repairing. While mail order from many companies and sites are MOST BENEFICAL when you dealing/needing bulk quantity, I have to state IN MY OPINION this is not the best option for this particular thread. Heck if it boils right down to it, one can find where a person may park a chevy/gm product and find where these have fallen off and free for picking up. Ok so the last part is a joke...maybe real at times, but still intended as a jab/joke.2 points
-
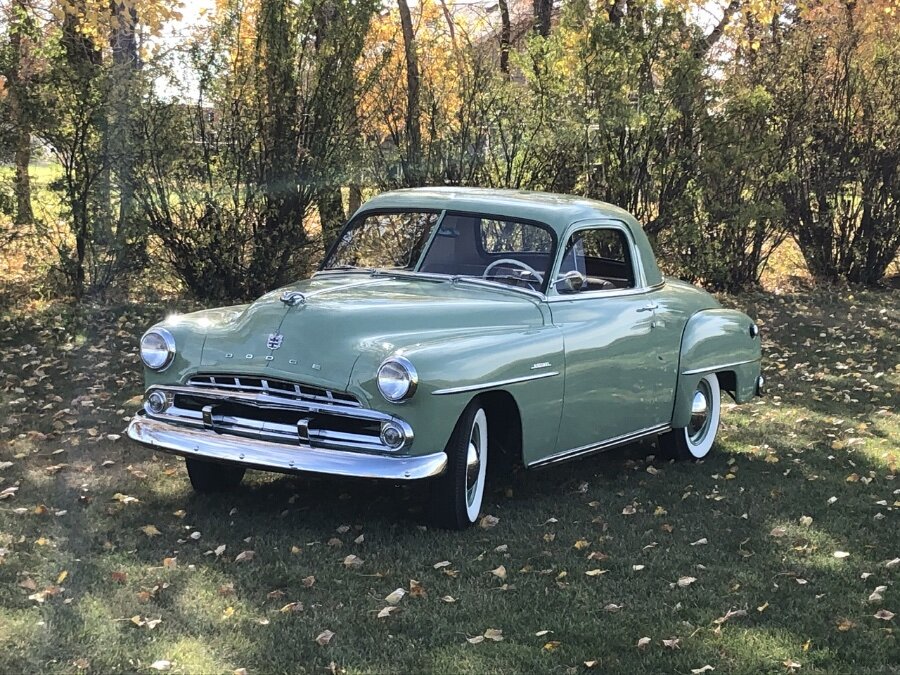
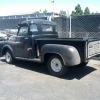
SURVIVOR: saw this Dodge between Lake Graham and Newcastle2 points
-
Likely not a "factory" accesory, more likely a mass produced catalog or dealer option, these aren't listed in the Accesories section of the manuals.2 points
-
Just use a torch to get the plug red hot....that oughta bust the rust loose................. 😲 🤣2 points
-
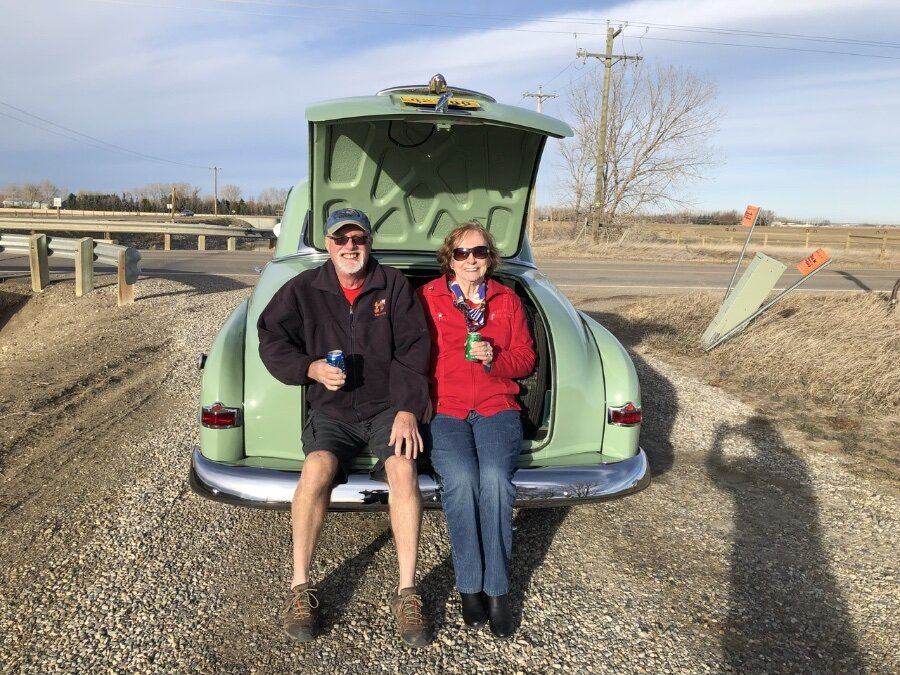
John-T-53, thanks for all the pictures. I’m sure a lot of us would like to make the tailgate and BBQ. Just not practical for most. However, your pictures really let those of us who can’t make it live vicariously through your pictures. The most and best of the bunch! I would love to bring this old girl to the BBQ but it involves border crossing (not a problem with a passport) and a three, four, or possibly five day drive depending on weather and lack of problems. It doesn’t have a tailgate but does have the next best thing…..a big butt trunk.

 2 points
 -
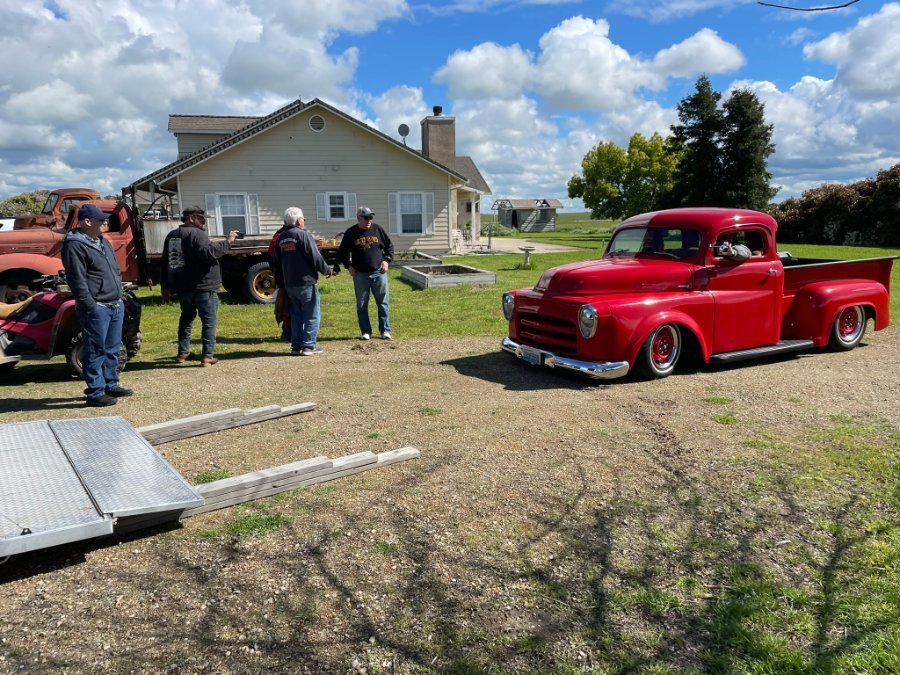
you may be onto something Sniper, I am going to say a rolling wheel gathers no red paint.....2 points
-
See now a song comes to mind I see a black wheel and I want to paint it red Apologies to The Rolling Stones2 points
-
I use the in my opinion a lot because most of my unsolicited comments are just that, an opinion and in no manner saying good bad or indifferent....but just as I see it. The fact I will then state the whys and wherefores of my opinion is to say that it is not just a whim or silly notion and give some background, color and size ratio etc...technically I could care less one way or the other what anyone chooses to do as it is not my car no more than if a person likes or dislikes what I do with mine. Big hobby folks, I will admit at one time it would rankle me see what some folks may do...but hard lesson to learn is JUST NOT MY BUSINESS....the red wheels, there is NO WAIVER here......lol2 points
-
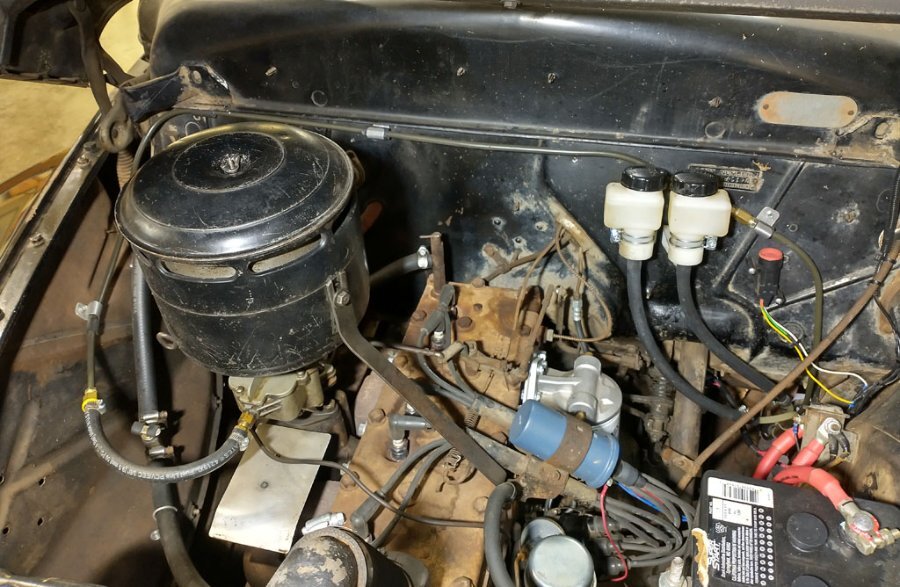
•pinched tube on intake manifold appears to be the vacuum source for the vacuum windshield wiper motor •intake manifold appears to have a partial PCV setup •spark plug wires appear a little on the long side...universal sets with 90° boots can be sourced2 points
-
I dunno, call me a snob but I's rather spend my tool money on real quality tools. Like Starret or Mitutoyo. Yeah, they cost a bit more but are definitely quality tools.2 points
-
I would check how far away they move the shock from the frame. i do like that mounting surface. I been thinking about my 1948 Desoto.1 point
-
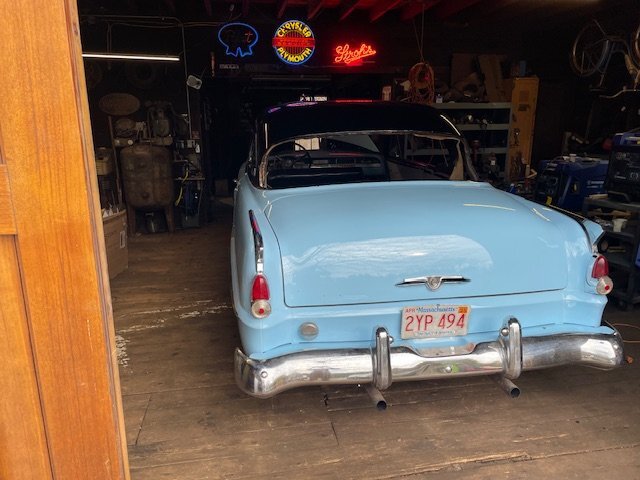
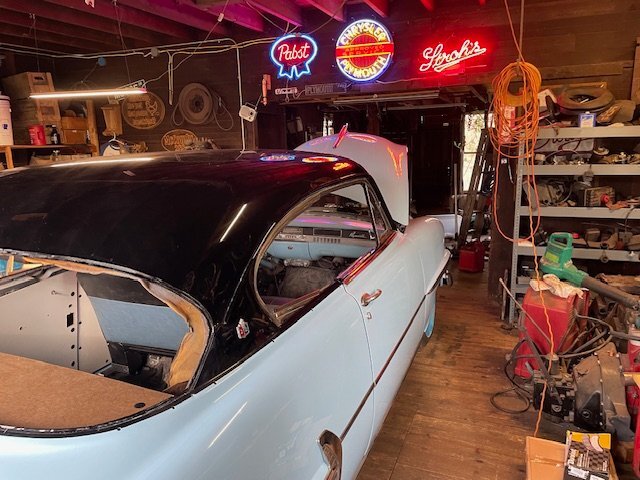
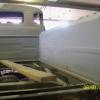
I haven't posted in a while, but there is at least one other thread about this car. I have owned it since December 1989. It is my first car, got it when I was 17. Two years ago I had a fire under the hood. Not big enough to cause a lot of problems, but enough that I decided it was finally time to do a mostly full "restoration." I disassembled everything, stripped most of it, then took it to a good paint shop. Picked it up last December, and now have it mostly put back together. I have driven it around the block, and hoped to drive to my local glass shop to have the windshield and rear window installed professionally. When I talked to him about doing the job, he seemed enthusiastic, and knowledgeable. I dropped off all the parts(windshields, weatherstripping, and stainless) yesterday waiting for a call telling me to bring the car. Went by the shop this morning and he told me he wasn't sure how to do it and afraid to try. I've got the manual and instructions, and have read everything about it, and now have the weatherstrip installed on each of the glasses. Question for anyone who has done this on a 53-54 car. Do I need to put the stainless on before I rope the windshield(or rear window) per the manual? I've built a stand to hold the window vertical, which makes it a bit easier, but it's still quite difficult to get the stainless in place. How hard is it to install the stainless after the windows are in place? Thanks for any info.


 1 point
 -
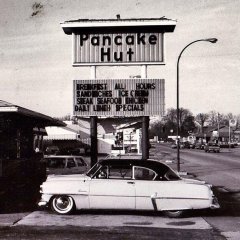
Sorry for the off-topic, but this reminds me of the add I saw on Craigslist: 🤣
 1 point
 -
Ok. Here is the Summit Racing listing of electric fuel pumps (2000+ hits related to fuel pumps): https://www.summitracing.com/search?SortBy=BestKeywordMatch&SortOrder=Ascending&keyword=electric fuel pump Most of the pumps have fewer than ten reviews except the......wait for it.......Carter pumps, the most common which have hundreds of reviews averaging at least 4.5 stars. Here is the search return for just Carter pumps and related stuff: https://www.summitracing.com/search?SortBy=BestKeywordMatch&SortOrder=Ascending&keyword=carter electric fuel pump If you want to look elsewhere you might check into Bosch, AC Delco, Airtex and Walbro but I have no personal experience with them. I've run Carter rotary pumps on two vehicles over the past 15 years with no failures. But the one on the Plymouth might die tomorrow.....1 point
-
Never saw the points firing a plug when turning the key 🙄 Is this a stock setup, besides the ignition? Are you running an electric fuel pump or any other things connected to the ignition switch?1 point
-
Same here. If you decide to delete the mechanical pump you might consider modifying the fuel line inside the engine compartment to get it away from the exhaust manifold. Here is how I ran the line across the upper firewall and over to the carb.
 1 point
 -
By turning the ignition on and then off you did the same thing the points do when opening and closing, letting the coil fire a plug, and if a gas mixture is in that cylinder when it fires it'll rock the engine. That's my guess.1 point
-
For the speedo pinion seal, I found a Honda #91204-HB3-004, is a perfect fit.1 point
-
Sorry. I have a very old relative who is also into telling "stories" most of which never happened and are obviously so absurd to be even remotely plausible. I try to nod and let most things pass by, for the 101st time I am hearing it, but after a certain while I still tend to get irritated when the level of shenanigans reaches a certain limit 😆 Is that a factory accessory or a DIY? 🤔1 point
-
HEET is 99% iso-propyl alcohol and would most likely be useful only if using non-ethanol gasoline. If the tank has ethanol-laced gasoline in it, the ethanol is already absorbing moisture that is in the gas (that is why ethanol-contaminated gasoline is nasty stuff....corrosion city). The amount of ethanol in a few gallons of E10 is far more per volume than what is in the red plastic bottle. It does work well with gas-fired camp stoves, however. Update: Since last fall my TR6 has been stored in a temporary enclosed garage (Harbor Fright) and this spring it has presented a couple of yips which I have wondered might be due to water condensing in the tank because of the outdoor storage. Los Control got me thinking about this, so why not. I added the appropriate ratio of HEET to the tank just in case there was still some moisture in the tank. Yep, a sniff test confirmed HEET is good ol' alcohol (no taste test...). I figured it wouldn't hurt anything to add it since the tank already has E10 in it.1 point
-
Thanks for the pics @John-T-531 point
-
Been a few years since I replaced the glass in my '48 P15 front door but I'm pretty sure I recall that piece slips off the stud. Most likely yours is rusted to the stud, may need some solvent and persuasion....maybe some heat?1 point
-
Mark does an excellent job explaining the inner working of the doors. Check it out. 1941 Plymouth Restoration (#13) The other videos in his series are also very well done. You can tell he was an educator.1 point
-
I like the mounting on the rear of the bumper. It looks slicker than the factory mount on our car.1 point
-
we made the license plate holder. thank you for your help.

.jpg.f4c004ce50392a06bcf909c47d9c64ef.jpg)
.jpg.e9ed57b0c8e1daa5e6184be3e41cf22f.jpg)
.jpg.929b3cff080c9f7aa05dbd0e04367066.jpg)
.jpg.44d8f71aea232de5107681660fd6575a.jpg) 1 point
1 point -
Well, I was able to locate a simi local clutch shop to resurface my flywheel, pressure plate and provide a clutch disk. Hopefully this will provide years of service.

 1 point
 -
I would go for the smaller ones myself. Looks like they weren't really offered from the dealer? Accessories as aftermarket? My grandfather (William Riding) sold Plymouths and Desotos in central California in the late 30's , early 40s. Maybe yours???
 1 point
 -
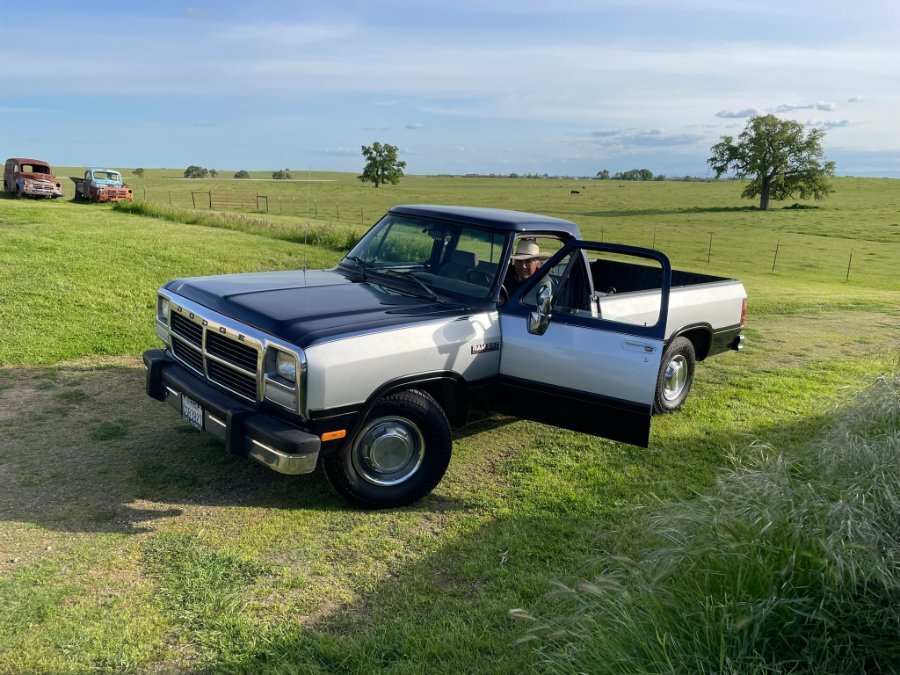
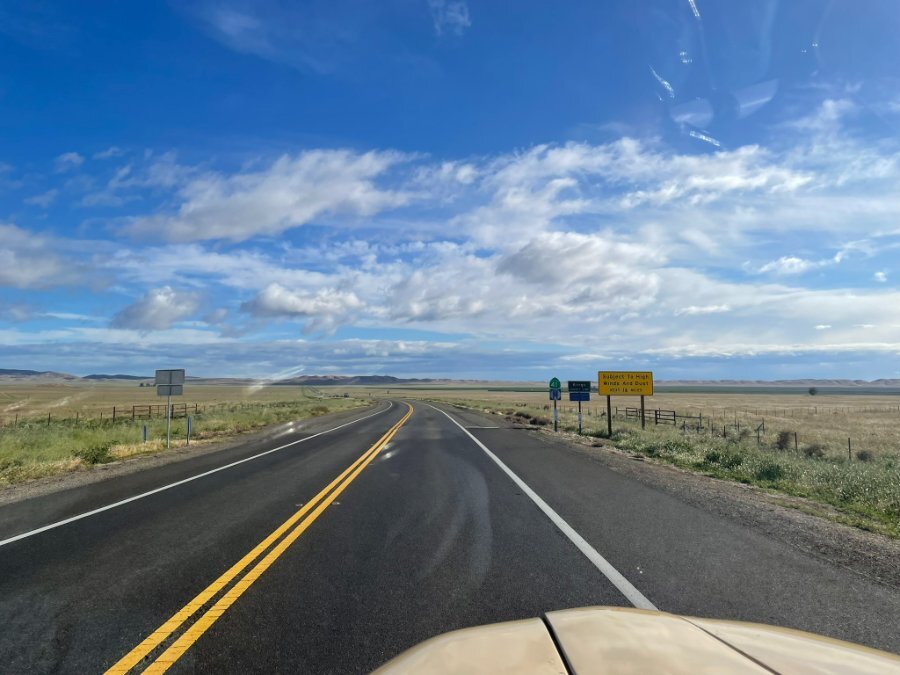
"OD" as he's known, about to head out in his '93 Cummins, back to Escalon. There was also a similar or equal year truck that showed up, a dualie (no photo, unfortunately). The two owners connected, and an exchange of parts is planned in the near future. Heading back down the 101 for the return trip.... F the 5.

 1 point
 -
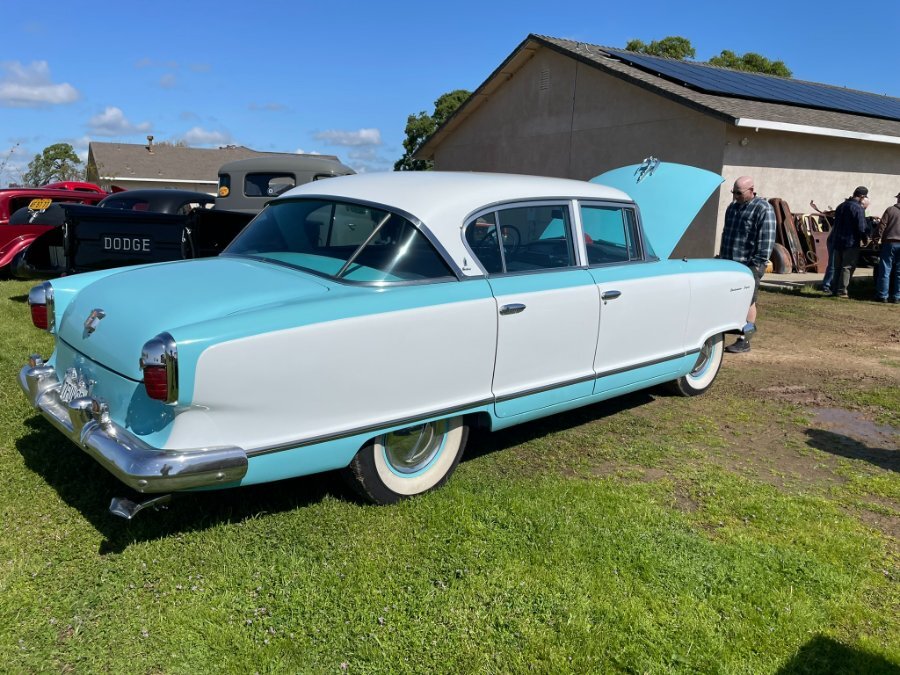
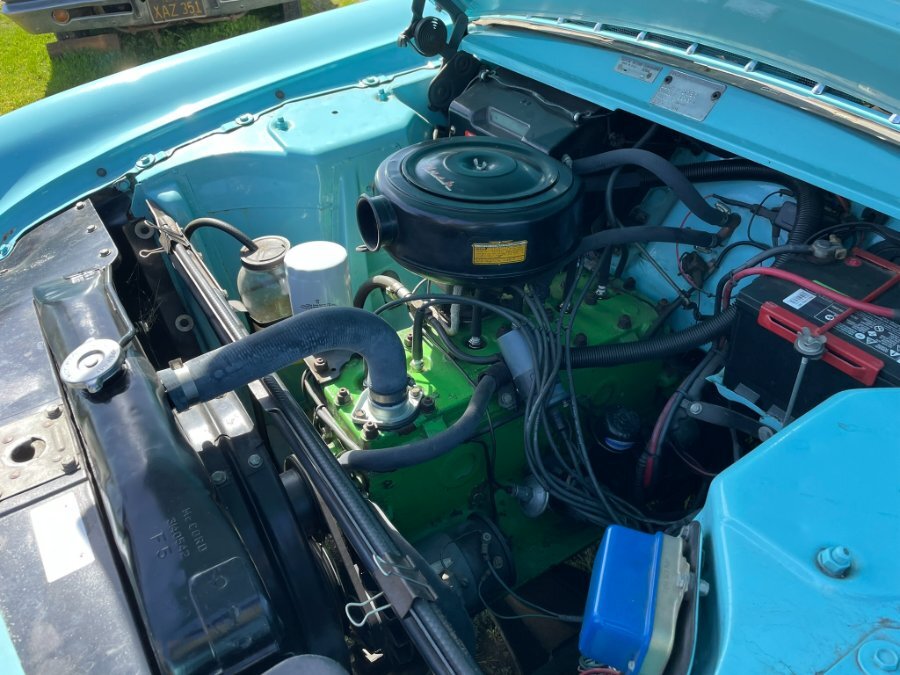
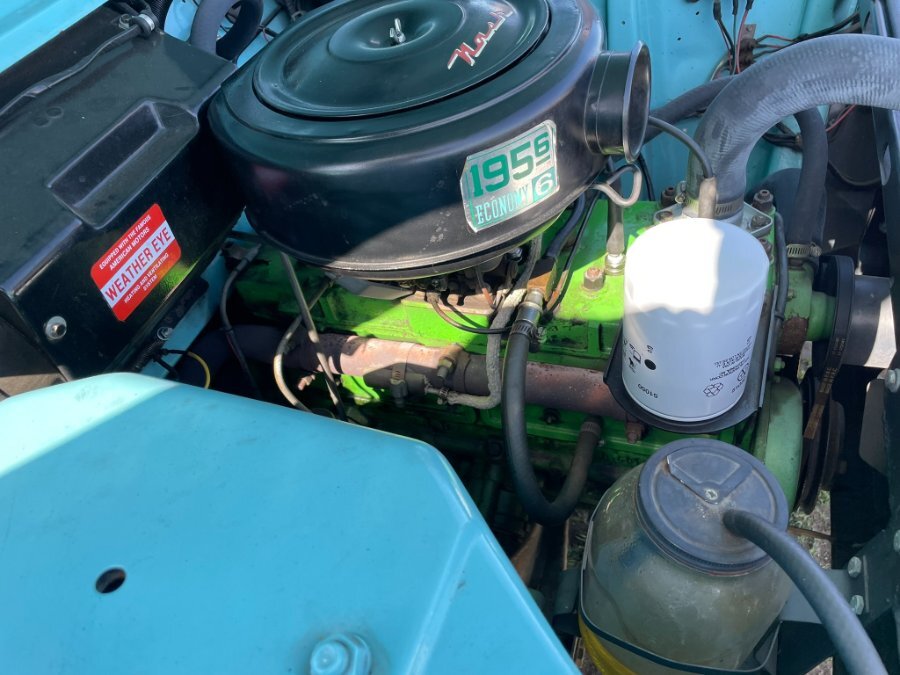
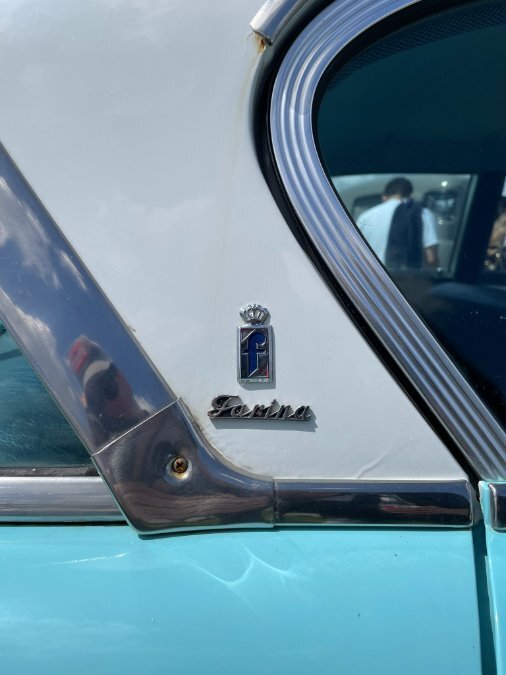
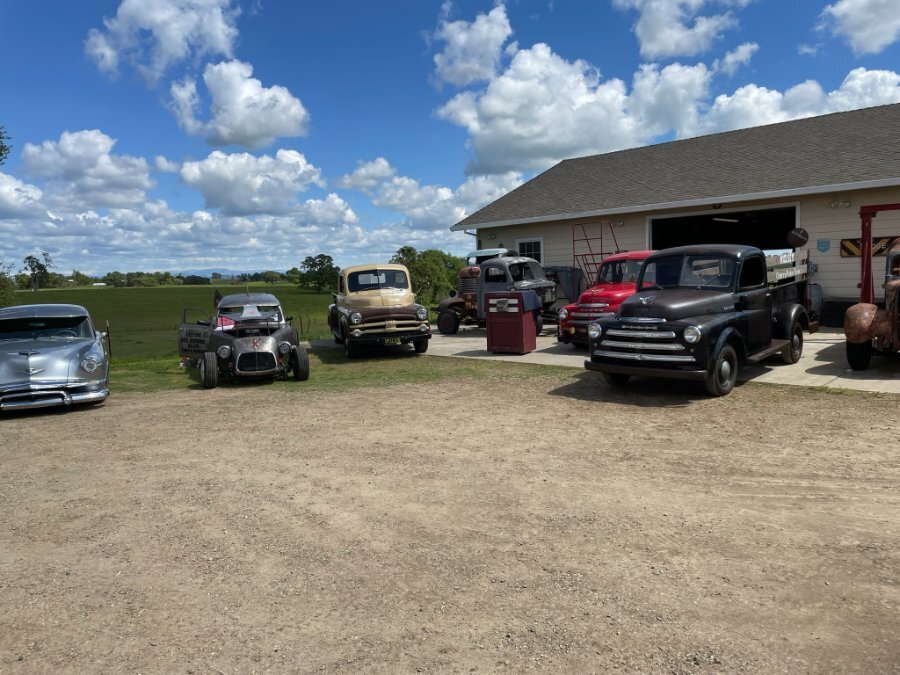
We always get at least one or two orphan makes at this event each year. Jim's brother's silver Kaiser showed up again, and below is Charlie's '55 Nash, with body design by Pininfarina of Torino. I really enjoyed this car. AMC's thrifty 195-6. Note: no intake manifold. The exhaust "manifold" is just a steel pipe with cutouts bolted to the block. "Brendt" strikes a pose. Best of show award Really hope to see this COE on the road next year! The aftermath of Joe's Motorhome debacle on Sunday.... photo credit: @48Dodger


 1 point
 -
Here's my pics.... Heading out of SLO county on the 41.... "El Puto Cinco" Joe's Truck awaiting its dismount Bud's Truck just having rolled out of the trailer


 1 point
 -
Almost certain that was a 218 car.. Once you "rod" it go all the way. But for sure get you a service manual for all necessary specs and diagrams1 point
-
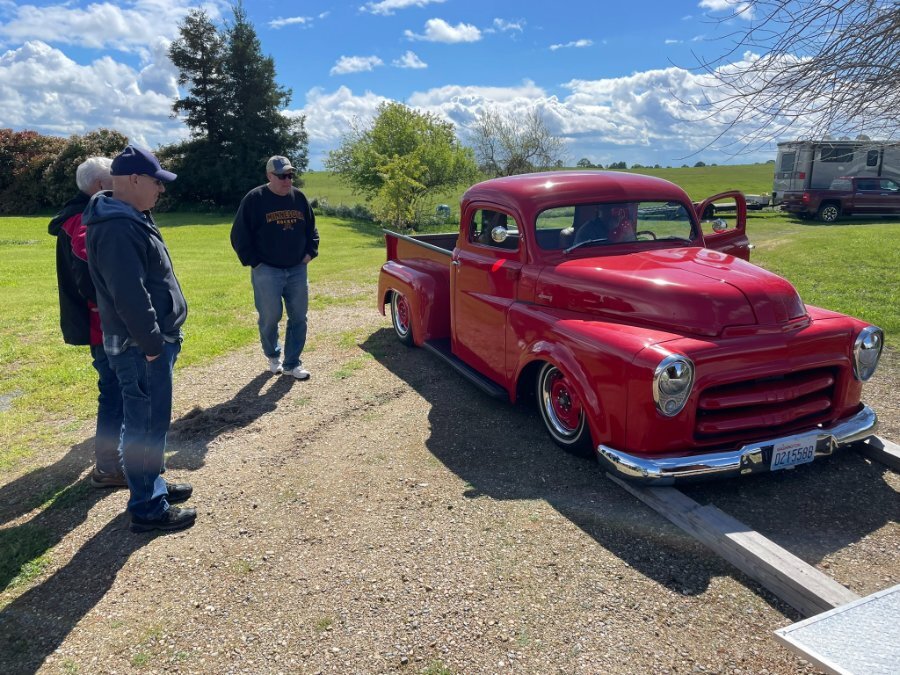
this is in line to big aux lights go better with big standard lamps.....you have the opportunity to make a fellow hobbyist happy, line your pockets and do your car justice at the same time...but again...just my opinion.....this guy needs to lose the whore red wheels and go with body color either primary or secondary color will look better than this stark red.....again my opinion.....nothing says you cannot paint a car ugly....lol
 1 point
 -
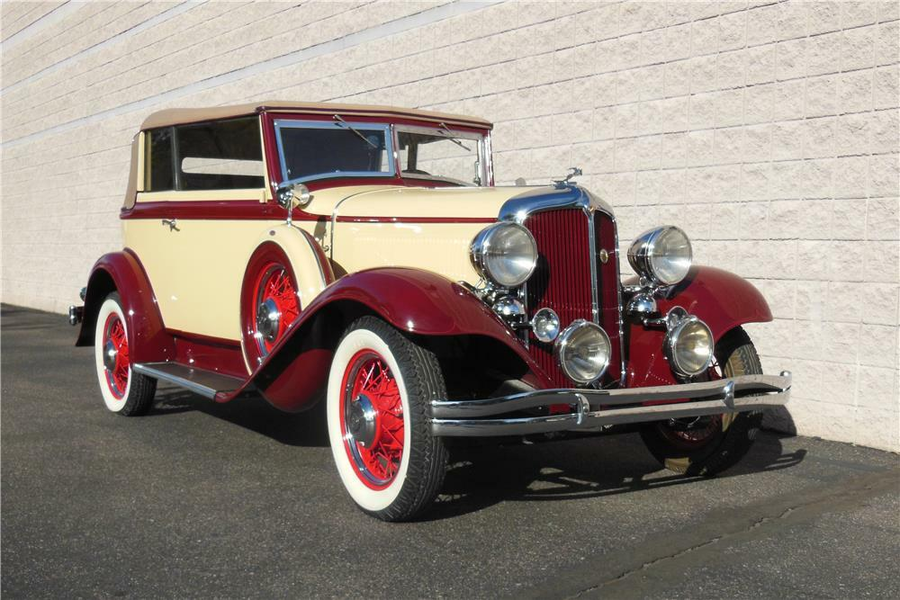
Dan: Sealed beam headlights were first introduced in 1940 and mandated by the Govt. There were a few exception that still used bulbs. For MoPar from 1940-48 the cars and truck all used the 4030 Sealed beam bulb that did not have the aiming tips. From 1949-56 still 6 volt they used the Autolite Bullseye bulb and still no aiming tip. In 1956 the 6v 6006 sealed beam was first produced and these had the aiming tips so that the BEAR headlight machine could be used to adjust the light instead of aiming the lights against a wall and manually adjusting the light. More of a true system to get everyone's lights in sync. The 6006 6v bulb is now used as the primary headlight bulb for cars and truck from 1940 to around 1956 for cars that had 6volt system.s Rich Hartung1 point
-
@keithb7 Sounds good. I'll get that micrometer and wait for a good day weather-wise to do it.1 point
-
Ivan: Thanks for the input. I was thinking of moving the big lights outward to have them between the regular headlights and the bumperettes so that the gril would be more visible and to improve the esthetics of the front of the car. More like the small light that you see when looking at the car on the right and then will have to reposition the Pa tag. Rich Hartung1 point
-
Small lights will probably look better, and I would experiment with different placement options. Also, try stepping farther away from the car to get some pictures with less geometrical distortion. Moreover, I've noticed that you are running a 1939 Penna plate. I actually do the same, but for 1940. However, this is sort of nonsense because cars manufactured in the 1939 or 1940 would not have their plate expiring in the same year 😋1 point
-
Andy's brackets look like the ones on my car as well (and similar to what's available on eBay for $20).1 point
-
Hmm, looking at Andy's post I see something that might work Yeah, it's listed as a fog light bracket, but it looks like it would clamp to those bumper brackets and a piece of angle iron bolted to the top would let you mount a plate? No, I wasn't looking for anything like this, I was looking for add on fog lights, lol.1 point
-
Second that thought. Never saw a plug blow apart on a flathead till I had three Champion plugs do it over two days. Switched to AC and never had another issue, same with the NGK which I also use in all my small engines, ATVs and motorcycle.1 point
-
That is a great calf hauler! love the scenery…… cool find1 point
-
SURVIVOR: spotted this '52 in Jacksboro...it's had some work done but this was the only time I saw it at the old fillin station that I've motored past several times in the last 6 months1 point
-
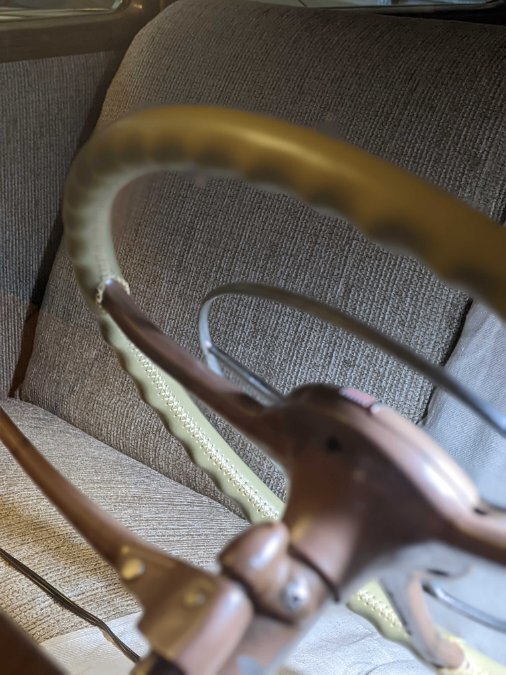
Here is another small thing to brag about: I installed a leather cover onto the steering wheel The original objective was to protect the old plastic. It is still in very good condition (only minor cracks) but the perimeter is obviously worn. I wanted to cover the whole wheel (including spokes and horn button) with thin ivory leather. My wheel is brown, but I like the ivory color instead. However, I've quickly realized that I have no idea where to get the proper matching color leather, etc., to do this right. So I decided to experiment with just the universal cover strip, first. Bought this one. Size XL1, according to the provided chart. The leather is soft and stretchy, but way more thicker than I expected. The color turned-out to be not quite as I expected either, and the original holes were too far apart. I was planning to do a hidden seam, first, but with this kind of leather it was not technically feasible so I did a cross stitch instead. I punched more holes, trimmed the sides, and put it on. The stitching took a very long time. I am not sure whether or not I like it, at this point, but given the amount of time spent, I am definitely keeping it for a while 😂

 1 point
 -
My turn was when I was a dumb 21 year old kid .... I was moving a 10' x 60' mobile home to a piece of property I leased .... It was sitting in a park for many years and had to dig it out to get wheels on it. .... plan was to tighten them while in the air, pull it out of the hole then tighten all lug bolts .... I forgot. Driving down the freeway at 35-40 mph and watched the trailer tire pass me up, cross the medium and 3 lanes of oncoming traffic .... it was a adventure chasing it down. I'm no longer a dumb 21 year old kid, I'm 62 this year1 point
-
How many times do you want to pull the transmission? Once with a good throwout bearing twice or maybe more with the noisy one?1 point
-
Your P15 must have the up to 1948 bell housing with the four round hole vents. This 1942-1948 housing has two drilled 5/16" X 18 tpi threaded holes to mount the clutch torque shaft pivot bracket. 1949 and later bell housings with the top big rectangular vent don't have those two left side drilled/tapped holes. This is because the pivot shaft bracket is mounted to the underside of the bell housing via a plate bracket on the 1949 and later Plymouth bell housings. I think Hollander and the parts books are wrong on saying all 1942 thru 53 housings are interchangable. You can use a 1942-48 "early style" bell housing on 1949 and up Plymouths but you cannot use a 1949 and later bell housing on a 1942 thru 48 plymouth.
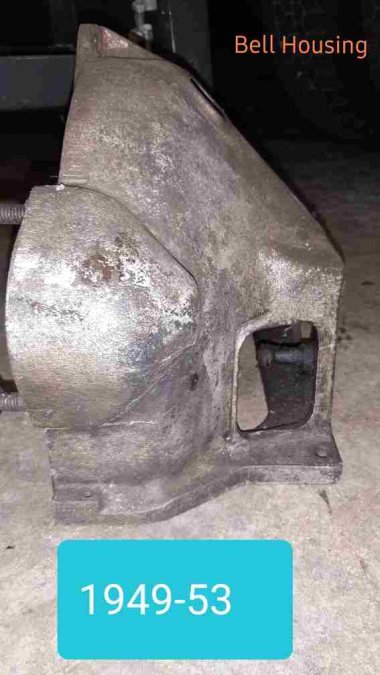 1 point


.thumb.jpeg.28cb36506a6b17cd30e7d4a22504384d.jpeg)
.thumb.jpg.21da29dadd149e36b996d66cc1dc3edd.jpg)