Leaderboard


Popular Content
Showing content with the highest reputation since 04/11/2024 in all areas
-
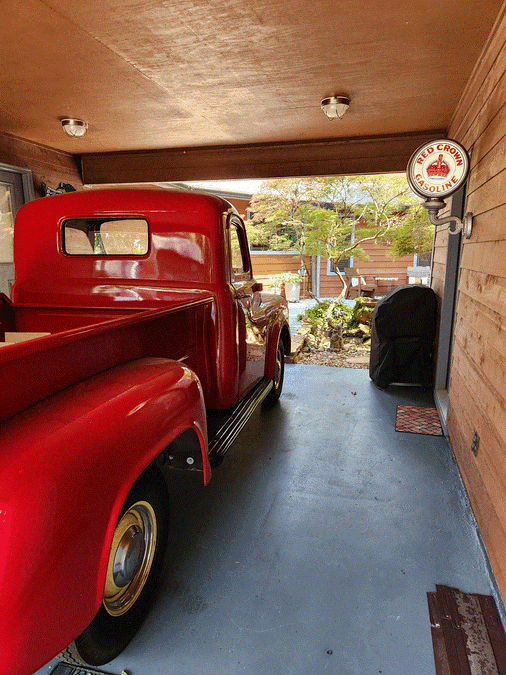
Just installed a Red Crown Gasoline light in our carport to go with the truck. I am pretty happy with the results.
 5 points
 -
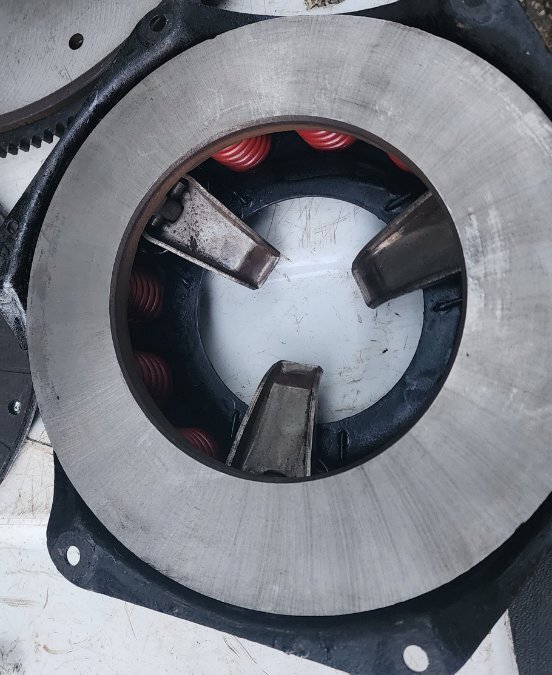
Also had them flip the flywheel starter ring.
 4 points
 -
I have an admittedly tight focus on the KT Keller cars, so that's what I research and play with. It's all about having fun after all and those are the ones I like. I am a huge fan of Overdrive transmissions because they don't really change the charm of the cars and actually add to it. When you put one in your car your speedo will be off at all speeds because the speedometer pinion gear was selected for a 4.1 ring and pinion. The good news is you can swap out the pinion from your old three speed to the O.D. and all will be back to normal ( assuming your speedometer doesn't need service ). But what if you changed the rear end ratio or the tire size? I don't advocate changing rear axles because I don't see much to be gained there. You can easily change the differential carrier ( aka 3rd member ) in a Plymouth if you want another ratio. Where I live there's lots of open road with highway speeds of 55 to 70 so optional ratios, tires and O.D. go well with my Plymouth. My P17 Coupe came with 6.40-15 tires ( modern equivalent 195/75/15 ) and a 3.73 final drive ratio so the speedometer pinion would be a 17 tooth gear ( p/n 652-848 ) for an example. Chrysler designed the pinions to use the same 6 tooth gear on the output shaft so you only need to change one gear to correct the speedometer. One thing you find out right away is selecting speedo gears is not an exact science. You can get close and you might hit it right on the button but you more likely will be over or under by 2 or 3 mph. That's why the Highway Patrol has an enforcement tolerance. So let's look at tires first 6.40 15 = 195/75/15 standard tire for a P17 6.70 15 = 205/75/15 standard tire for a P18 7.60 15 = 225/75/15 an optional size tire Final drive ratios 3.90 very common on long wheelbase cars 3.73 standard ratio on many optional on all 3.54 optional Chart of ratios & tires vs speedometer pinions 3.90 6.70 15 17 tooth pinion 3.73 6.40 15 17 tooth pinion 3.73 6.70 15 16 tooth pinion 3.54 6.70 15 16 tooth pinion All 7.60 15 16 tooth pinion So you can see you're not going to get an exact reading but you can get close enough to avoid a ticket. The part number for the 16 tooth pinion is 652-846. I have found that if you have the number for an obscure part the parts house will look to find it in their inventory but they are likely to blow you off if you just say "I need a 16 tooth speedometer gear." Happy hunting!3 points
-
Yup, between 65 and 70. When I had earplugs in, I tended to go faster, haha....3 points
-
Thanks sniper and DJK for digging up info. And here's my two cents about electric pumps. First off, I love 'em! And here's why: When one of my vehicles has been sitting for a long time, I don't have to waste precious battery capacity cranking the motor to get fuel up to and in the carb. I also put a electric switch in the supply line to the pump so that, in Autumn when I'm putting cars to sleep, I can turn off the switch and keep running the motor until it dies. This does a good job of draining the carb, reducing varnish build-up. Yes, I could use a gas additive (and I often do), but with lots of cars and equipment, and full gas tanks in each, that's lots of Stabil! And, in regards to leaving the mechanical pump in the line, I've done that numerous times, but one thing to consider is this: if you do that and the rubber diaphram of the mechanical pump fails, you'll get raw gas going into your crankcase and diluting your oil... and not know it!3 points
-
with all due respect, items needed to exact this repair is common at any hardware store or big box building supply, TSC etc that one can walk in, get the item, pay and immediately got to work repairing. While mail order from many companies and sites are MOST BENEFICAL when you dealing/needing bulk quantity, I have to state IN MY OPINION this is not the best option for this particular thread. Heck if it boils right down to it, one can find where a person may park a chevy/gm product and find where these have fallen off and free for picking up. Ok so the last part is a joke...maybe real at times, but still intended as a jab/joke.2 points
-
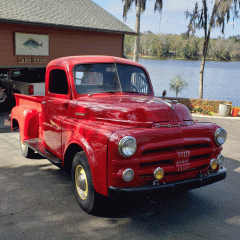
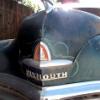
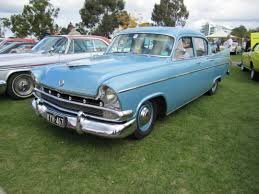
SURVIVOR: saw this Dodge between Lake Graham and Newcastle2 points
-
Likely not a "factory" accesory, more likely a mass produced catalog or dealer option, these aren't listed in the Accesories section of the manuals.2 points
-
Just use a torch to get the plug red hot....that oughta bust the rust loose................. 😲 🤣2 points
-
John-T-53, thanks for all the pictures. I’m sure a lot of us would like to make the tailgate and BBQ. Just not practical for most. However, your pictures really let those of us who can’t make it live vicariously through your pictures. The most and best of the bunch! I would love to bring this old girl to the BBQ but it involves border crossing (not a problem with a passport) and a three, four, or possibly five day drive depending on weather and lack of problems. It doesn’t have a tailgate but does have the next best thing…..a big butt trunk.

 2 points
 -
you may be onto something Sniper, I am going to say a rolling wheel gathers no red paint.....2 points
-
See now a song comes to mind I see a black wheel and I want to paint it red Apologies to The Rolling Stones2 points
-
I use the in my opinion a lot because most of my unsolicited comments are just that, an opinion and in no manner saying good bad or indifferent....but just as I see it. The fact I will then state the whys and wherefores of my opinion is to say that it is not just a whim or silly notion and give some background, color and size ratio etc...technically I could care less one way or the other what anyone chooses to do as it is not my car no more than if a person likes or dislikes what I do with mine. Big hobby folks, I will admit at one time it would rankle me see what some folks may do...but hard lesson to learn is JUST NOT MY BUSINESS....the red wheels, there is NO WAIVER here......lol2 points
-
•pinched tube on intake manifold appears to be the vacuum source for the vacuum windshield wiper motor •intake manifold appears to have a partial PCV setup •spark plug wires appear a little on the long side...universal sets with 90° boots can be sourced2 points
-
I dunno, call me a snob but I's rather spend my tool money on real quality tools. Like Starret or Mitutoyo. Yeah, they cost a bit more but are definitely quality tools.2 points
-
Rmon...........Can I throw a curved ball into the ring...........lol............in 1973 I installed a 318 Poly V8 in my 1940 Oz Dodge.............at the time there were no instructions available nor did I have much in the way of outside help but I could weld and use a tape measure so I had a go.........I was 19 and basically did a few things more than once but I still have the car & its Poly V8.........now you have a 1954 Plymouth.......did you know that in 1957 Chrysler here in Australia introduced what they called a Chrysler Royal..........it was based on the 1953/54 Plymouth body and chassis with 1955/56 front & rear fenders attached.............the interesting thing that you need to be aware of is that the Chrysler Royal for the 6 yrs of its use in Australia from 1957 to 1962 had a 313( essentially the same as the 318) Poly V8 which is basically the same block as the 1966 onwards 318/340 & 360 V8's that mopar used and in fact these later engines are in fact not as wide nor as heavy as the earlier 313/318 poly and also use a much lighter transmission............your best bet would be to get as late an LA series Mopar V8 & trans that you can, also a later rear axle from either a mopar or something else that fits & a disc brake conversion for the front and have at it ..........I've attached 3 pics of the Oz Chrysler Royals showing that 1953/54 Body shell....each in these cars was available with a 313(318) Poly V8 and cast Iron Torqueflite push button trans.......also a couple of pics of my 1940 Dodge 4dr Sedan & the 313/318 Poly V8 thats lived there for 51yrs now........regards from Australia.......Andy Douglas


.jpg.2ad4c606e3fa10cf0f255b4a0154bfb9.jpg) 2 points
2 points -
Second that thought. Never saw a plug blow apart on a flathead till I had three Champion plugs do it over two days. Switched to AC and never had another issue, same with the NGK which I also use in all my small engines, ATVs and motorcycle.2 points
-
Champion spark plugs...ran them for years in everything from V8s to single cylinder lawn and garden equipment...then in the late 90s, they needed to be replaced more often from electrode wear, and by the mid aughts they were blowing apart in the small engines, larger engines were fouling and hard to start in cold weather. Switched to AC Delco on big engines and NGK in small and haven't had a lick of trouble since.2 points
-
I looked at the license plate mount this afternoon, and tried to get the old plate off to be able to get a decent picture. It isn't quite as I remembered. The center (vertical) bracket hooks under the bumper, and the center bumper bolt passes through it, securing it to the bumper. Then there is a horizontal c channel bracket fixed to it (welded?), with long slots, to accommodate various mounting points for the different shapes of license tags used during that era. This is the best I could do, as the tag mounting bolts are rusted fast, and just turn on the back side. (I could have broken the tag off, but didn't want to ruin such a perfect license plate.... )
 2 points
 -
Interesting question.......those mount on a flat surface which may or may not work where the chassis upper shock spot is on the 1940-48 mopars, also the lower mopar mount is basically pointing to the rear of the car....these mounts when attached to the chassis have the "pin" pointing more or less at 90 degrees to the frame........but usually the upper & lower shock eyes can be turned at 90 degrees to each other...........I'm curious whether they may work.........andyd1 point
-
I think I’m a year with the electric 6V boost pump in Chrysler. No complaints. It will push through vapor lock. I have done so with it. I do like it spliced into ignition switch (wire to fuel gage). Then I cannot leave it on when I park the car. I have left the heater blower and AM radio on by accident. They were wired to direct non-switched power sourced. Dead battery the next morning. A sure way to ensure premature death of an otherwise good 6V battery.1 point
-
Same here. If you decide to delete the mechanical pump you might consider modifying the fuel line inside the engine compartment to get it away from the exhaust manifold. Here is how I ran the line across the upper firewall and over to the carb.
 1 point
 -
By turning the ignition on and then off you did the same thing the points do when opening and closing, letting the coil fire a plug, and if a gas mixture is in that cylinder when it fires it'll rock the engine. That's my guess.1 point
-
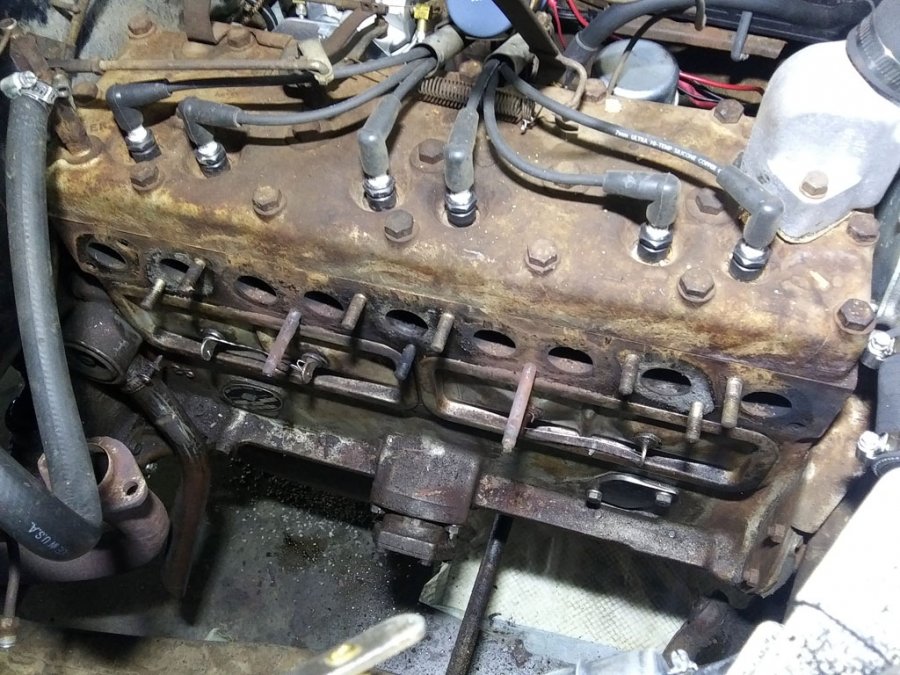
well, .008 is within factory specs..just at the upper end..you can ride as is..and monitor this and address should it change...or go the added step to reduce this now while you are working this issue. The problem with many values and ideas expressed here is they do not reflect the values and standards of the engineers and it was well known, Chrysler aligned the company with the best engineers out there. Some folks just like to yell out, close enough and throw in the towel as it may be labor intensive.1 point
-
Pro tip. If you have a bunch of transmissions and go hunting through them for the proper gear to match the 3.73 you swapped into your coupe make sure you reinstall all the wrong ones correctly. Otherwise later on when Dad goes to install one of those in place of the OD he's not selling with the 50 Plymouth bad things will happen to the new owner. Like the tail housing exploding....1 point
-
I like the mounting on the rear of the bumper. It looks slicker than the factory mount on our car.1 point
-
WINNER WINNER CHICKEN DINNER Thanks for tip Los. I pulled the sender and measured the gas level, it was at 2 1/2" in an 8" deep tank, which matches the fuel gage reading of about 1/4 tank of gas. Looking in the tank from the sender hole I couldn't see any water, but it was probably back by the tank drain, and the drain plug is stuck and I can't remove it. The one thing I didn't do last fill up was to put Stabil in the tank. It keeps the gas good and also helps with condensate. When I measured the gas level, I stirred the gas in the tank then I smelled the gas. It didn't smell bad, but it smelled weak. The strong smell wasn't there. It smelled lite, like half of the normal gas smell. I have new fuel filters on the way to replace the one before the prime pump at the tank and the one before the carb and when I change them, I'll take another crack at removing the drain plug and hopefully know for sure about the water in the tank. So tune in next week for another exciting episode of "As the Wheel Turns". Joe Lee1 point
-
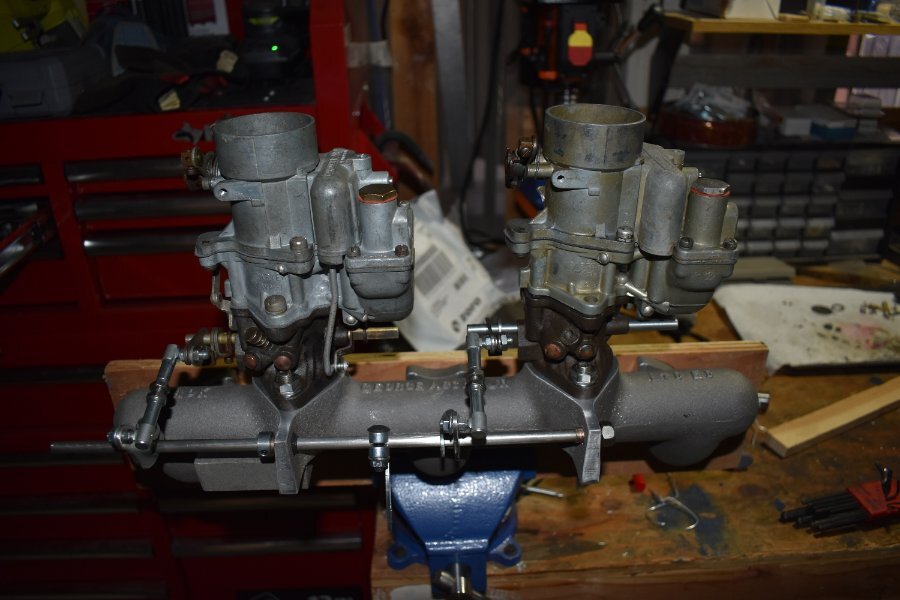
When I stopped developing my AoK clone intake, it wasn't because I thought it was a bad idea. In fact I also stopped working on an adapter plate for the 833 transmission. I did that because I found out from Tim Kingsbury, that George Asche might have some plates still available. He did, so I bought one. He actually did a new run of them so I got one that was just finished. In talking with Robert, one of his sons, about the plate I tossed out a question I thought I knew the answer to...were there any AoK intakes still available? I was shocked when he told me they might have one I could buy. I sent them a check the very next day In all it's glory, here is where I am with it. I'm just getting started mocking up the linkage. George will do that for you, and it would most likely be better. I'm using my Carter WA-1's though and George prefers the B&B. Besides the fact that I like to do my own tinkering. I drilled the tabs for the linkage rod a bit over and epoxied 5/16 oilite bronze bushing in place. I used the rod as a jig to get them in the right alignment, using my digital angle finder and some wire to pull the rods until is was as close to perfect as I can get it. I still need to add a threaded hole to locate the bell crank, which I'll take off my stock manifold. The right carb is just lightly bolted back together for the photo. I am taking it into work tomorrow to use one of our mills to drill for the custom bushings I'm making for the throttle shaft. The machine shop manager (We are an electronics company in simple terms) is helping me plan. I'm going to redo the bushings from some oilite bronze they have at .375 dia. I don't think the cast iron base has the wall thickness to go that far, so we will take a look and go with something that has more like a .020 wall thickness. We make cryogenic equipment (physics instruments) primarily, although I work on our SEM/AFM fusionscope project team. Anyway, I have liquid nitrogen I can use to freeze the bushings and after we heat the cast iron the plan is to have about a .0005 interference fit. Pretty tight sounding, but our guy's do tighter than that. I'll hone the bushings to size from my initial .3105 reamer. Should be fun. You never find cool things, if you don't ask. I don't know if there are any more intakes available or not. The truth is, if you don't have to pay for anything but the raw materials (machine yourself, welding is free) you can do a pretty good job of imitation using the design I started. But it won't have George Asche Jr's name on it. Miles of smiles here.
 1 point
 -
Hunkering down around the fire whilst a cell passes overhead.... and opinions being expressed over which (wet) wood pieces to burn...lol


 1 point
 -
There is a youtube channel I watch sometimes ..... guy is a pretty fair mechanic and has interesting content. What he uses is bar oil for chainsaws. He thins it down with paint thinner then uses a pump up garden sprayer to apply it. The paint thinner evaporates leaving the sticky oil. Then he drives the vehicle down a dirt or gravel road and coats the fresh oil with a layer of dust ..... just helps give the oil a protective layer to keep it in place. This is what he does to his daily drivers, not sure he would do it to a classic car ... that he would not drive in the winter. I like the idea because it is cheap, easy to do, and it is not permanent. He says he needs to repeat the process after about 3 years .... If he needs to work on it he has a lift and can just raise it up, pressure wash it to clean it and when finished just apply more. Compared to spraying undercoating on that is permanent and a pita to get rid of .... I would choose this method if I needed it .... Texas I do not need it.1 point
-
For several years I was hounded about getting a dog. Pun intended. Didn't want to do it. Not because I don't like dogs but because I do like dogs. I get too attached. I finally relented and on a Saturday morning and we took off on a two hour ride - one way - to pick up a basset hound puppy. That was eight years ago. Daisy is my buddy now. She hurt her back a few days ago and it was after hours. And the vet we usually use was going to be out of town for the Easter weekend and wouldn't be back until Monday. So I found an alternate local vet and took her in yesterday. OK I'm almost to the point of this post. I expected it to be a thousand dollars when I went back to pick her up. But I'll pay that - I don't skimp on medical stuff when it comes to people or pets. That's just one of the things that has to be done. BUT the bill was only 500 dollars - still not cheep. Now being of the old car mind set that means that I have 500 dollars left over to get some parts for the 47 P15. Not sure I'll get away with that😂 PS: I expected spinal problems in an old dog. But turns out it's only a pulled muscle. Really good news.1 point
-
Oh sure, just as he finally got it properly broken in you went and got a new one. Gonna take lots of work to break in the new one, lol.1 point
-
The factory front plate mount for our D24 is similar to what Eneto-55 shows. It clamps onto the front of the bumper via one of the bumper bolts. Which just happens to be in the center of the bumper. For consideration, Maine requires two license plates, too, but allows for the use year-of-manufacture plates for antique cars. Maine only issued one license plate in 1948, so it is legal for us to display only the rear 1948 plate. The car does have to be registered as an antique, though. Might that work in Idaho?1 point
-
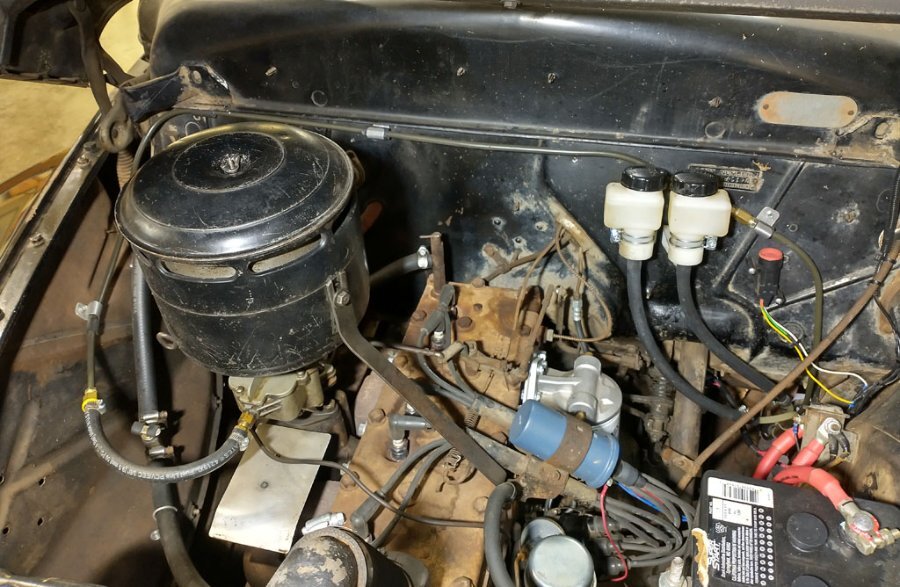
That pipe could be for wipers or other vacuum operated equipment? To determine what is and what's not original, it is best to find some vintage illustrations, such as from the owners' or repair manuals. Here are some of the things I see on the pictures: bed is likely not original or modified, rear view mirrors do not look period correct. Obvious - turn signals, side markers, etc. Interior appears to have been redone. Under the hood: is that a DIY PCV setup? You might want to check the original fuel bowl next to the pump, it needs to be cleaner. The heater outlet has been welded shut I see the vacuum advance next to the ignition distributor but do not see a vacuum line going to it, is it still there? Also, is this engine original to the truck (does the number match the frame)? The red color seems a bit unusual. Also, either your brake or clutch pedal is out of alignment, they should be the same height.1 point
-
Ray, where is your original post? This one? Just reply to it with all your updates.1 point
-
Small lights will probably look better, and I would experiment with different placement options. Also, try stepping farther away from the car to get some pictures with less geometrical distortion. Moreover, I've noticed that you are running a 1939 Penna plate. I actually do the same, but for 1940. However, this is sort of nonsense because cars manufactured in the 1939 or 1940 would not have their plate expiring in the same year 😋1 point
-
OP's first post mentioned flaking on the bottom shell of # 6 so I don't think he's going to be able to just leave them alone and since the engine was stuck he may need to go further in depth. The visual inspection is the start. How far the OP needs to go can be determined later. You've led a sheltered life. There's a lot of things that were done to salvage engines years ago that people shudder at today.1 point
-
Andy's brackets look like the ones on my car as well (and similar to what's available on eBay for $20).1 point
-
Hmm, looking at Andy's post I see something that might work Yeah, it's listed as a fog light bracket, but it looks like it would clamp to those bumper brackets and a piece of angle iron bolted to the top would let you mount a plate? No, I wasn't looking for anything like this, I was looking for add on fog lights, lol.1 point
-
@keithb7 has a great YouTube video on this. His electric pump is on a hidden switch. Faster starts, a backup if mechanical pump dies, and I think solves any vapor lock issues...it's on my list as well.1 point
-
The Champion story is very sad. My other parts bane were GM hvac blower motors. The ground wire is riveted thru the steel case, but they also put it through this cardboard insulator board. Totally unnecessary, and eventually the cardboard wears and shrinks, resulting in a loose ground wire. I have fixed three of these and they always failed the same way. If you split the motor you can drill the rivet, remove the offending cardboard, and repair it with a screw and nut, staked tight.1 point
-
https://www.amazon.com/Anytime-Tools-Micrometer-Precision-Machinist/dp/B0045UZGSC/ref=sr_1_4? You want a set like this.1 point
-
In the downloads section there is an article about swapping a 318 into a 51 Plymouth. Might give you an idea though most, if not all, of the suppliers mentioned are out of business.1 point
-
I don't know the specific number but the carb on my '48 P15 is perfectly happy with the pump with no need for a regulator or return line. The Carter pump is the full-time pump on my car, here is the mechanical pump: 😁
 1 point
 -
Rmon, Welcome to the site. Sometimes you will get information directly answering your question and sometimes fodder ( I'm guilty of both) but stay and learn. I have not swapped out an L-head motor for any other type motor but I did use the search function on this site to pull up topics for you using the phrase " Engine Swaps" in the advanced search function on the site and came up with what should be some good reading and information regarding your question using the link here Showing results for '"engine swap"' in topics. - P15-D24.com and Pilot-house.com. Here is a file to using the search feature on this site. How I Search PD15-24 (1).pdf1 point
-
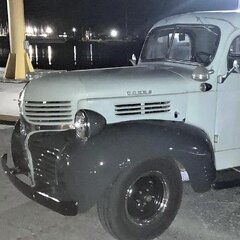
That is a great calf hauler! love the scenery…… cool find1 point
-
My turn was when I was a dumb 21 year old kid .... I was moving a 10' x 60' mobile home to a piece of property I leased .... It was sitting in a park for many years and had to dig it out to get wheels on it. .... plan was to tighten them while in the air, pull it out of the hole then tighten all lug bolts .... I forgot. Driving down the freeway at 35-40 mph and watched the trailer tire pass me up, cross the medium and 3 lanes of oncoming traffic .... it was a adventure chasing it down. I'm no longer a dumb 21 year old kid, I'm 62 this year1 point
-
I remember doing the exact same thing (finger tightening lug nuts) on my first car. Got out of the driveway and the tail gave a little wiggle, which I thought was odd. made it another 300 yards and the rear gunner side of the car suddenly dropped. I softly applied the breaks while looking over my shoulder twords the trouble area to see my right rear tire bounce passed me, over q guardrail and into a blackberry bush. After an adventure extracting the tire. I could find nothing broken and realized I had not tightened the lug nuts. I ended up buying a new set of lug nuts to replace the ones that fell off. So dont feel like you have a monopoly on dumb mistakes. We all do it!1 point
-
I had taken the tires and rims off my 39 Desoto to do some checking under the car. I also have the lug bolts and are all right hand treaded. Did my checkout put the rims and tires back on the car used the t-wrench to tighten the bolts and both rear wheels. Thought they were on tight enough took the car for a ride around the block and then heard the wheel noise. stop the car in my neighborhood saw the bolts were loose. walked home got my t-wrench and tighten them up. So we all have had some issues with not tightening the lug bolts. So now when I put the car back on the ground I retighten all the bolts for all the wheels that had been removed. Lesson learned once but never twice for this issue again. Rich Hartung desoto1939@aol.com1 point
-
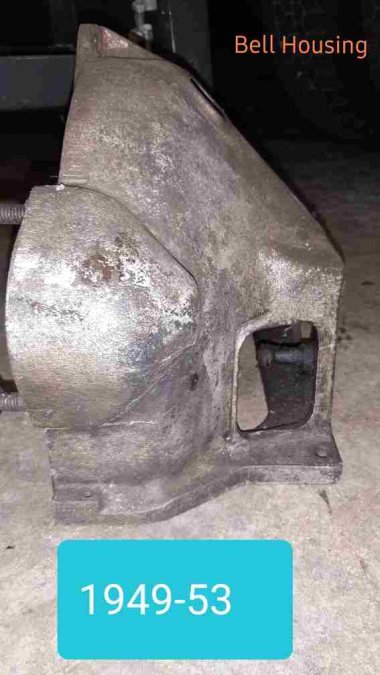
Your P15 must have the up to 1948 bell housing with the four round hole vents. This 1942-1948 housing has two drilled 5/16" X 18 tpi threaded holes to mount the clutch torque shaft pivot bracket. 1949 and later bell housings with the top big rectangular vent don't have those two left side drilled/tapped holes. This is because the pivot shaft bracket is mounted to the underside of the bell housing via a plate bracket on the 1949 and later Plymouth bell housings. I think Hollander and the parts books are wrong on saying all 1942 thru 53 housings are interchangable. You can use a 1942-48 "early style" bell housing on 1949 and up Plymouths but you cannot use a 1949 and later bell housing on a 1942 thru 48 plymouth.
 1 point