Leaderboard


Popular Content
Showing content with the highest reputation on 03/14/2023 in all areas
-
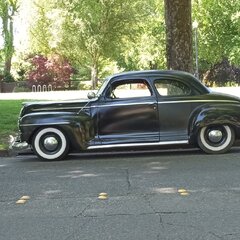
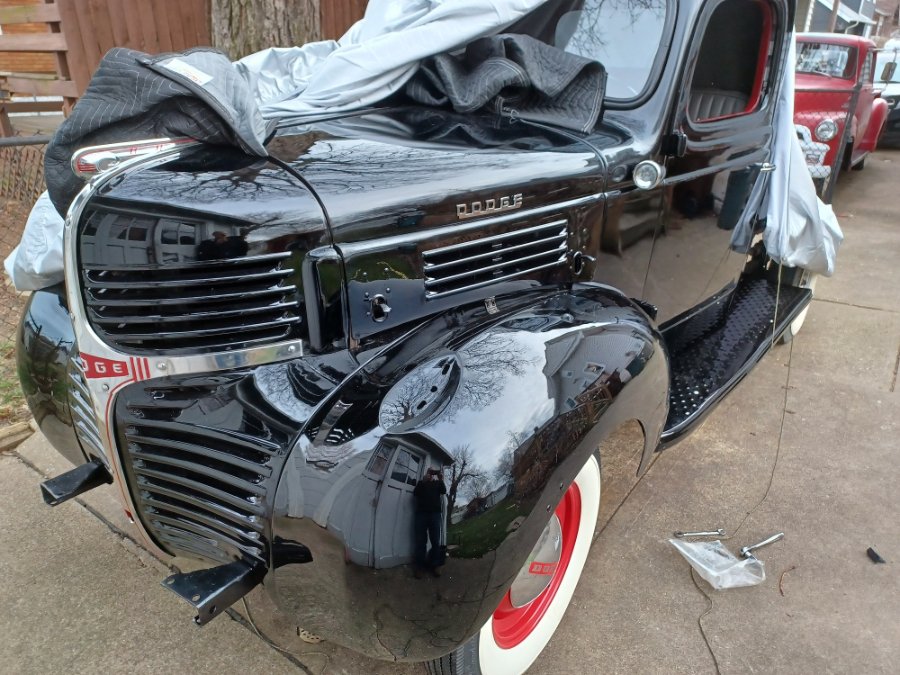
Fresh out of paint. In the process of re-assembling.
 6 points
 -
Current Nissan Europe TV commercial for the Juke...
 3 points
 -
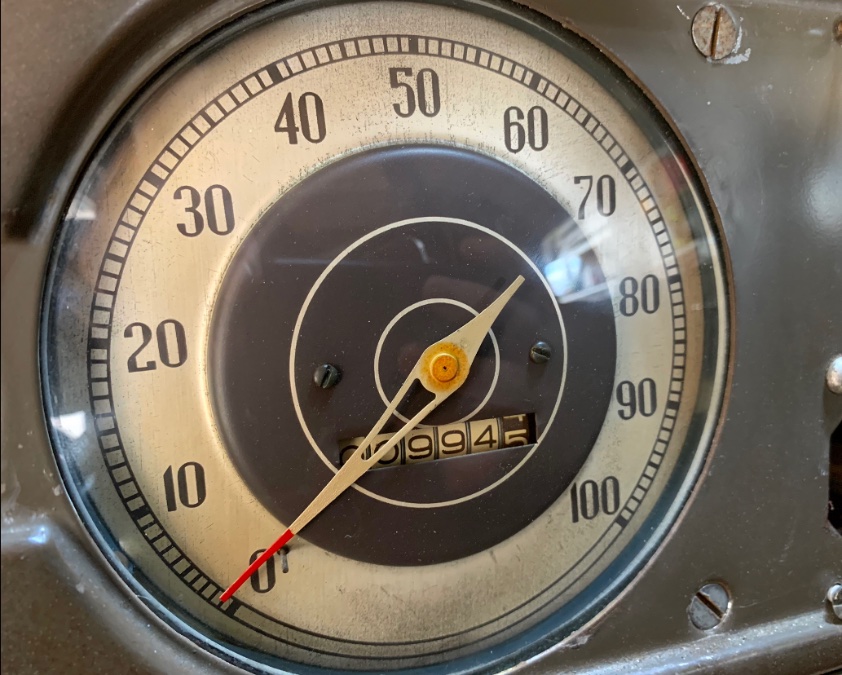
After a road test…Smooth! The needle is working better than ever. No jumping around anymore between 5-20 mph. Steady-eddy now. Happy with the results.3 points
-
Maybe the generator repair shop might give you a good deal on an alternator. My alternator was assembled by a local auto electric shop. Change some innards and it's 6-volt Positive ground. And put the right pulley on it.2 points
-
Had a very slight drip from the tank plug on my ‘52 Plymouth. Kept tightening it but still leaked. Ran the tank low enough to make sure it would fit into the 2 clean 5 gallon pails I had. That plug gasket was the 1 rubber fuel related item I never replaced, the ethanol blend fuels finally ate it away. No big deal removing the plug unless like mentioned earlier that the metal might be “soft”. As far as getting rid of the old/bad gas, get some containers and write “GAS” on them, fill them up, put them in the back of your pickup and drive to Walmart. Park your pickup with the tailgate down, go shopping for an hour or so and when you come back the containers will be gone and the bad gas is no longer your problem.2 points
-
This is our Miss Daisy on the film set of Das Boot Season II . Filmed in Liverpool England 2019
 2 points
 -
That one will work, there aren’t any alternators specifically for our cars. Pulley alignment is achieved with the adjustable bracket. Wiring is a non-event, just one wire that connects to the BAT terminal on your old regulator. The armature and field wires aren’t used. Someone posted about how to lightly mod the alternator so it fits on the original bracket, think it involved grinding a slot into the mounting boss.2 points
-
Here is the pdf of how to prep a new oil pump. Sounds like the new manufactured ones need a little love, but nothing you can't do on a kitchen table in an hour or two.2 points
-
No I used an aerosol spray lube on the cable. Pulled inner drive cable right out. Sprayed adequate lube down cable hole. Also sprayed some on the cable itself when I fed it back down the hole.2 points
-
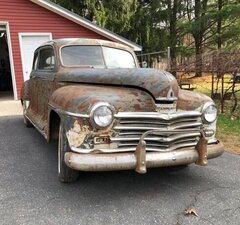
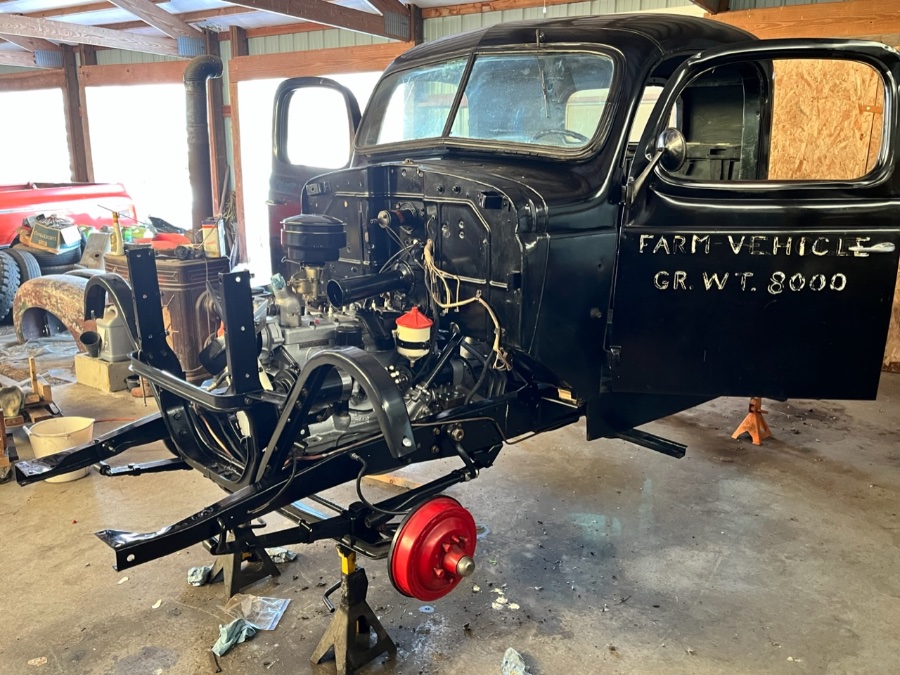
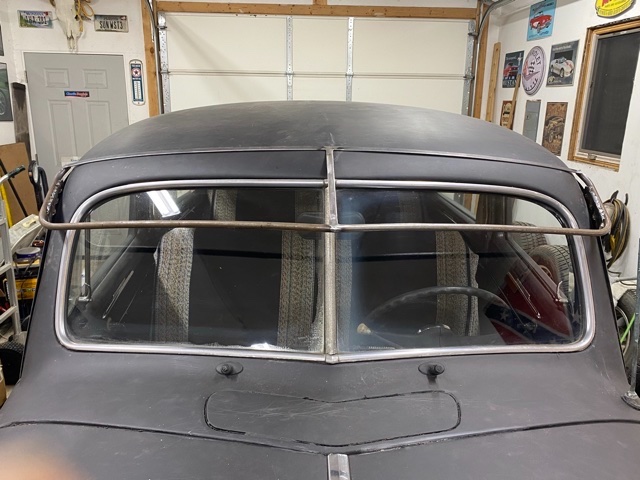
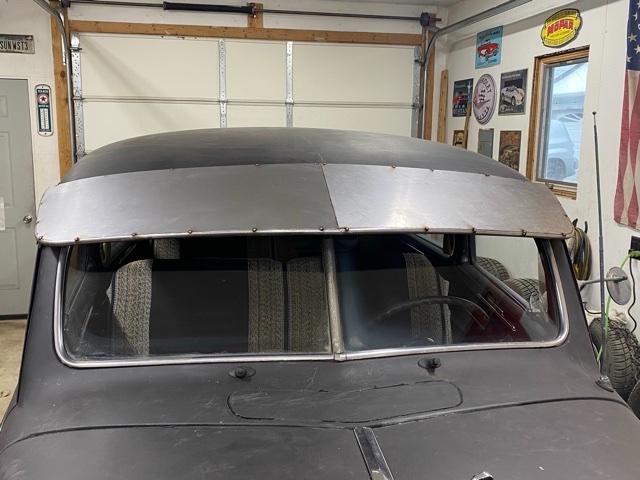
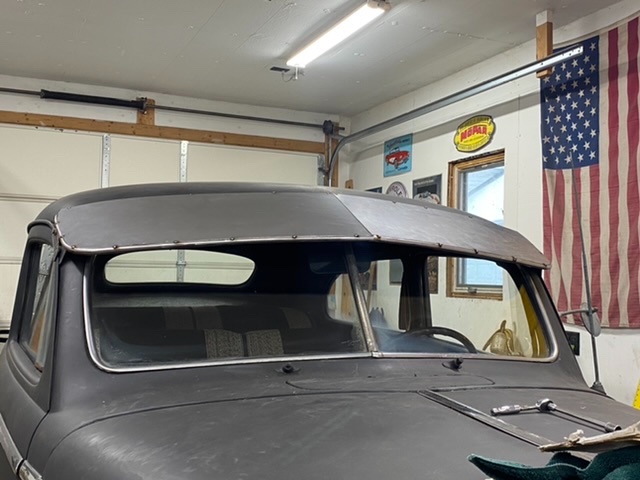
Here is where I am on my restoration.

 2 points
 -
Hey guys , my name is David. I live in the Bay Area, CA and just wanted to introduce myself and my car. I have a 1951 Plymouth Cranbrook 2 door coupe that I have been working on since 2019. It's an original Texas car that was shipped over here by the previous owner around the late 2000s and it sat in the previous owner's driveway for the next 10 years. I purchased it around May of 2019 and got her running in a day! She already had a 283 SBC and a 3 speed manual in her. The entire drivetrain was actually out of an early 60s nova. That was then. NOW, she is a totally different car. I ended up gutting the entire drivetrain and made a lot of modifications that I'm sure some of you will appreciate. The drivetrain is now updated. Still driven by a SBC but now it has a 350 4 bolt main, nice lumpy cam and worked up heads. I made the car an automatic, I personally like it better for cruising, but I did drive it to the good guys show with the 3 speed manual, and boy, was she roaring. Since she's an automatic now, I went with the floor shifter offered by Gennie Shifters. I'm actually hoping to get it in the mail today, so that's the next upgrade. The rear end is out of a 80's notchback Mustang and it's got 4.11 gears w/ posi. Fun stuff!! I'm sure most of you know the infamous front shock conversion on these platform cars. The original front shock were so damn short. so I bought some shock mounts from Jegs that were meant for a 1951 Ford and welded them to the frame. The shocks I'm running in the fronts now are actually rear shocks off of a 1987 C20 RWD. So they are MUCH bigger with a wide range of absorption. Someone who owned it previously also torched the front springs to achieve that lowered stance, but sacrificed hugely in the driveability department. so I replaced those old springs with new factory springs. She rides AMAZINGLY. like a boat. Now, since I did the SBC conversion the "right" way, the steering box was in the way of where the mount is suppose to go. So I did what any of us would do, and swapped in a Power Steering Rack and Pinion. I thought of doing a Camaro Sub-Frame Conversion, but after doing some research, it was easier to just fab up the mount and weld those in place. Now, in terms of the accessories, because the SBC is so close to the front frame (drivers side lower), it interferes with me putting the power steering pump on the 350 because it usually goes not the front lower drivers side. So again, I did what any of us would do, I decided to go with Electric Power Steering Conversion. And it really wasn't all that complicated. I went with the pump that was offered in 2008 - 2010 Volvo s60 (I think?) and custom made a bracket for it under the hood. then I ordered some nice p/s lines off summit that were the correct length and Voila! Less stress on the engine and I can turn my wheels with the engine off. Other than that, the car is otherwise stock. Exterior-wise, it's a normal Cranbrook, short of the flame job. I'm in the process of getting my interior redone. Oh, I also had to replace the floors and I didn't see any reproduction floors available for these, so I just made them and welded them in. It wasn't perfect by any means, but better than before. I'll try to post more pictures in the future but this is my car now. She's a little dusty from sitting. but I plan to driver her everyday this summer. Thanks for reading my post. Hope to meet some like minded folks.

 1 point
 -
I had some bounce problems with the needle on my speedo and at the time read on the forum about lubricating the cable. I used the white Lithium grease on mine just over 2 1/2 years ago now and it has worked great. Not saying it is the right thing just what was mentioned at the time. Good job Keith, small parts scare my big hands also. Dave1 point
-
While I am certainly the type to try and DIY as much as I can I do understand that a man's got to know his limitations. In my case if it goes beyond a loose nut or bad brushes I pretty much take a generator to a repair ship and let them sort it out.1 point
-
Welcome to the group! Your car doesn't resemble my '48 P15 much but I appreciate the fabrication skills and problem solving required to mod it. Nice ride!1 point
-
There isn't much too it. 2 hinges at the top of the back and then to pins at the bottom front corners. The two pieces interlock at the back/bottom but aren't connected beyond that.1 point
-
Agreed, and suggest that one should always add a vacuum reservoir to the system. With check valves of course to allow the wipers to run on the saved vacuum when engine/pump vacuum is lower that the reservoir level.1 point
-
I don't have a video , only more words . The bottom has to come out first . You say that can pull up on one corner of the bottom , but both corners of the bottom must come up . If it is stuck down . try prying the stubborn front corner up with a screwdriver , that is the only way . After that it is simple , move the seat bottom forward a little and you will see the two ' hooks ' that fasten to the back , so you just unhook it . After that , the seat back has two pins to slide out .1 point
-
It sounds like you're giving up on the generator. I think it can still be saved.1 point
-
Thanks!! I ordered the parts- very inexpensive. Is this the vacuum plate you were referring to for the WW Stromberg? NOS Stewart Warner South Wind Heater No. 46 Vacuum Kit OEM Chevrolet Ford Dodge I like the idea of NOT drilling into my manifold!1 point
-
Yeah but, I'm an idiot!1 point
-
This topic and link has been posted many times, even in your previous threads on this subject. ? https://www.ebay.com/str/HowardEnt?_trksid=p2047675.l2563
 1 point
 -
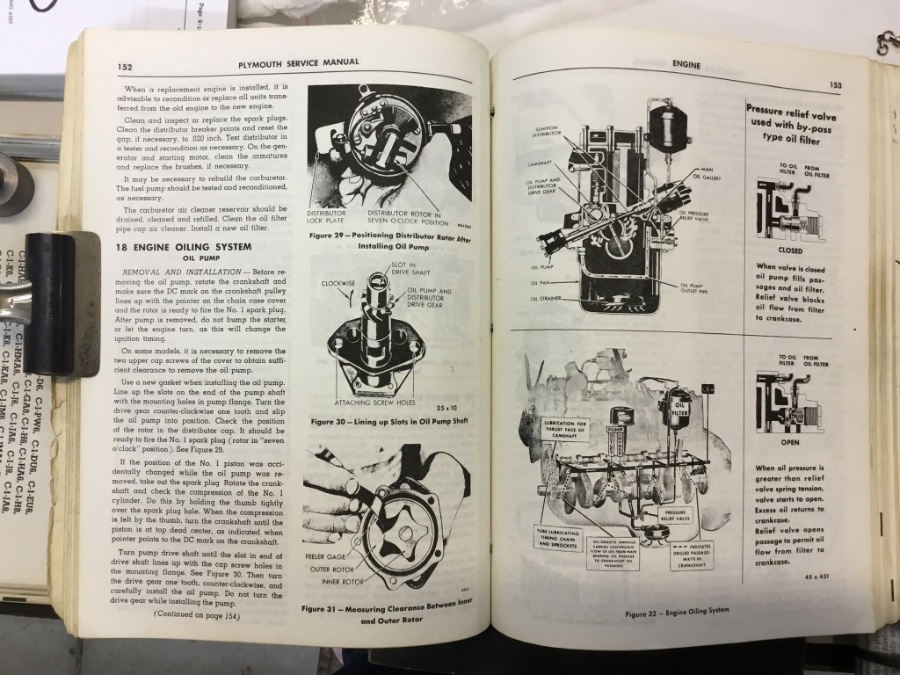
I would only use a Melling M-37 pump. I would prime it in a can of oil you are going to use on start up and index the pump as indicated in the service manual. Most recently Marcel had an oil pump gear failure. The gist of it is, a few aftermarket repops of these oil pumps are inferior.
 1 point
 -
additional information - flathead oil pump conditioning1 point
-
Alternatorparts.com Sells kits to convert your core or complete alternators. You specify v belt width.1 point
-
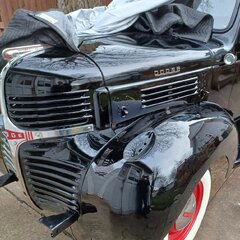
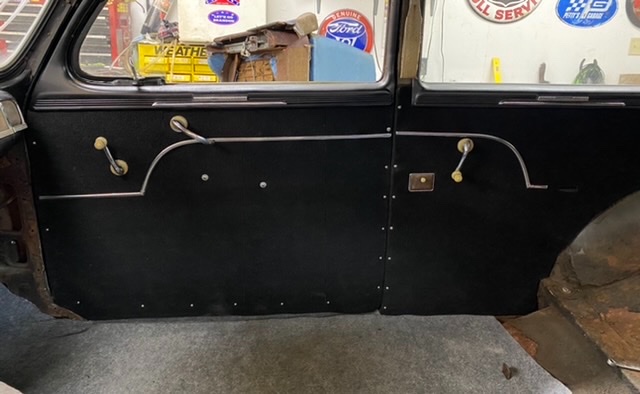
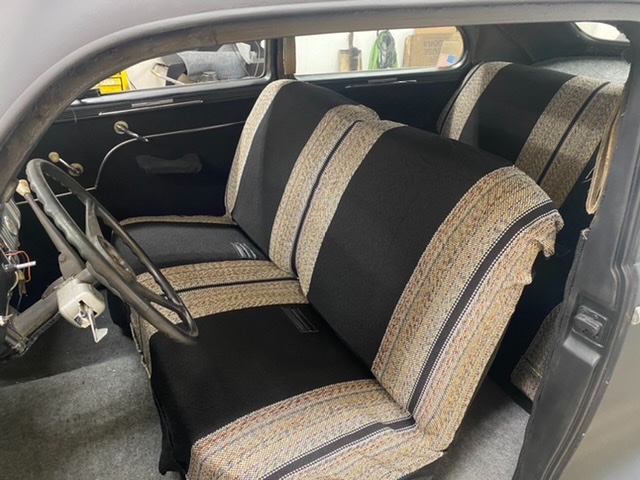
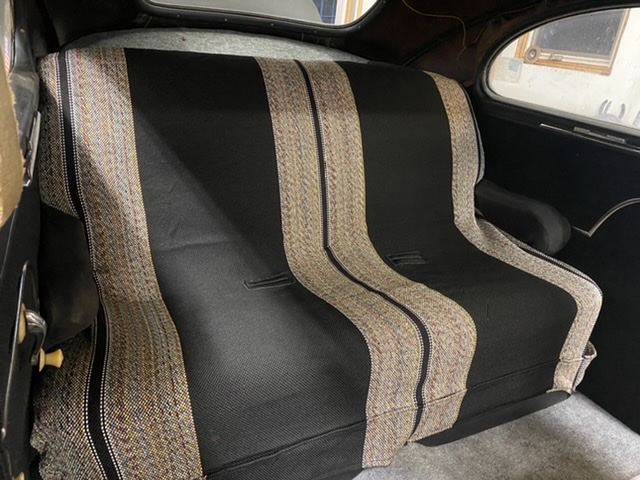
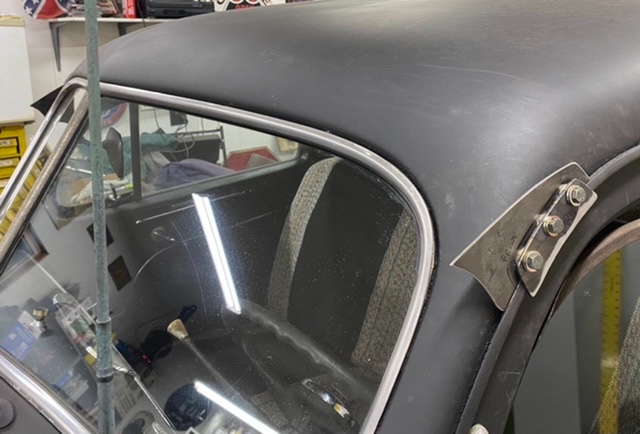
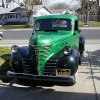
Haven’t been on here in while so just wanted to add a few photos of the recent progress to my ride. This past summer I redid the interior for under $150. Some Marine carpeting and cheap seat covers from Amazon made fairly easy work of the refresh. Recovered the factory door panels and made some kick panels. My current project is a custom built windshield visor. Still in progress with this one. I made some clamps that attach solely to the drip edge so no need for drilling anything. Easily removable. She also won a trophy at a local car show over the summer.


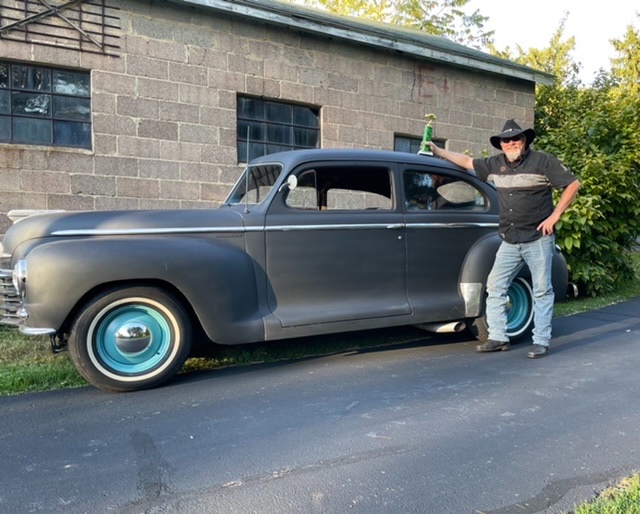 1 point
 -
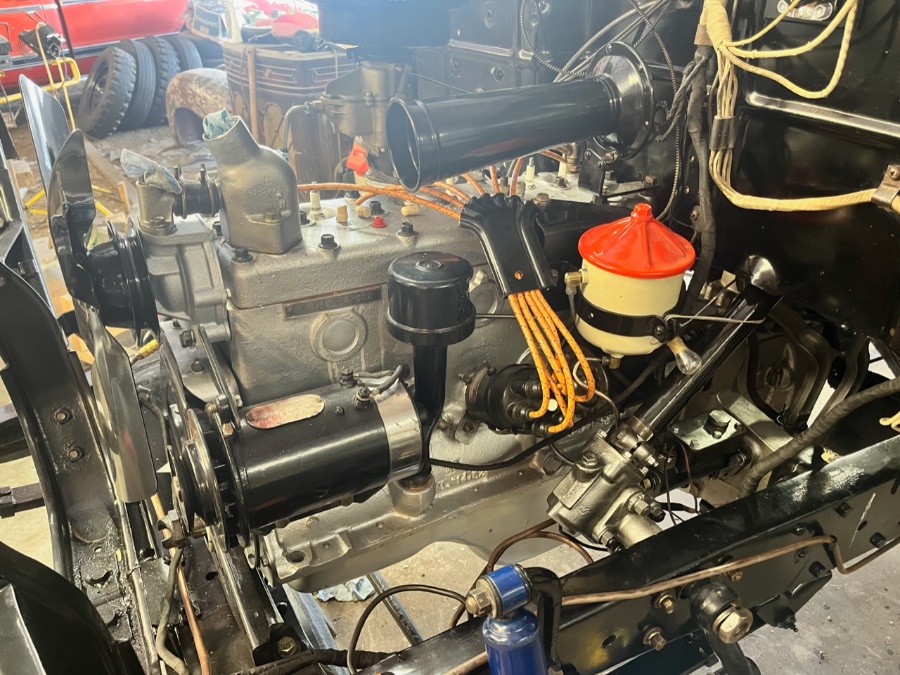
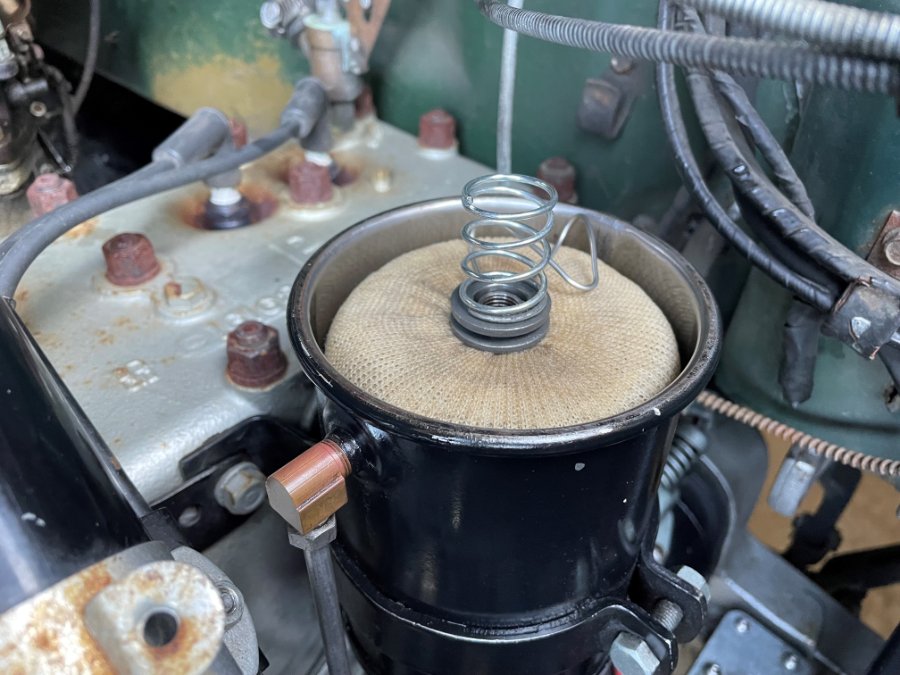
I performed an oil change and had the opportunity to insert one of the Baldwin filters that I bought off Fee Bay last year. Fits great, and the gasket fits too. Despite missing the inner "dome", it seems to work fine so far. One thing that is missing is a seal at the top of the element, which would allow unfiltered oil to flow to the outlet. To mitigate, I installed two steel washers with an I.D. equal to the shaft diameter, with an o-ring sandwiched in between them, compressed by a spring as shown. Maybe it might do something...
 1 point
 -
Been some concerns with replacement oil pumps. Check out Freewheeling Tony Smith for proper oil pump prep.1 point
-
Thought I’d follow up. I oiled up areas of the speedo mechanism that I could reach. I used 3in1 oil. I removed the glass. Cleaned it up inside. Painted the tip of the needle red again. I spun it up on the drill. Seemed good. I pulled the cable, lubed it up again. Reassembled all and lifted the rear wheels. I took it up to 40 mph in top gear. No noise. It looks better. All seems good. Off we go, cruising again soon.
 1 point
 -
Pack it with petroleum jelly and bolt it on. The new one that is. The old one was shot.1 point
-
I'd guess there was some damage internally in the old pump, possibly the cause of the break. it's not supposed to "catch".1 point
-
Yup when I rewired mine I pulled the whole dash! It needed painting anyways but it was certainly easier to make all those connections on the bench1 point
-
Pretty much, but don't forget to seal up the road draft tube and dipstick tube as well.1 point
-
To be honest, I think the fan will just turn slower than normal.1 point
-
Sniper, in truth the ambulances of the period brought the equivalent of a bowling ball bag to place the decapitated heads. No roll bar and a high chance that a roll would do head damage front and back. My grand parents kept my dad seated between them....as in no rumble seat. This was 1934
 1 point
 -
I was watching Hot Rod Garage yesterday. They had a turbo Buick Regal that was leaking oil under acceleration. They used a smoke machine to find it. I think when I get my 230 built I will use a smoke machine to look for leaks before I install it. Might be a good idea for any engine build. Heck, it might even be a good idea to test your trans too.1 point
-
How much choke you will need is going to be dependent on where you live and when you drive it. Winter in Minnesota is going to need more choke than summer in Tucson.1 point
-
Thanks so much for your extensive and excellent research on these different oil filters and decals that are used on our Dodge trucks. Most just quickly clean the filter housing ..paint them and on it goes. I learned a lot on these filters. Thank you for this excellent informative post!1 point


.thumb.jpeg.28cb36506a6b17cd30e7d4a22504384d.jpeg)