Leaderboard


.thumb.jpg.d599d4c13e08899474e0348bd9baed3b.jpg)

Popular Content
Showing content with the highest reputation on 11/22/2021 in all areas
-
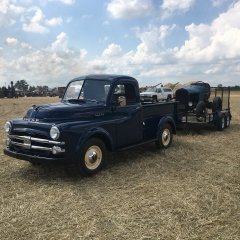
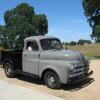
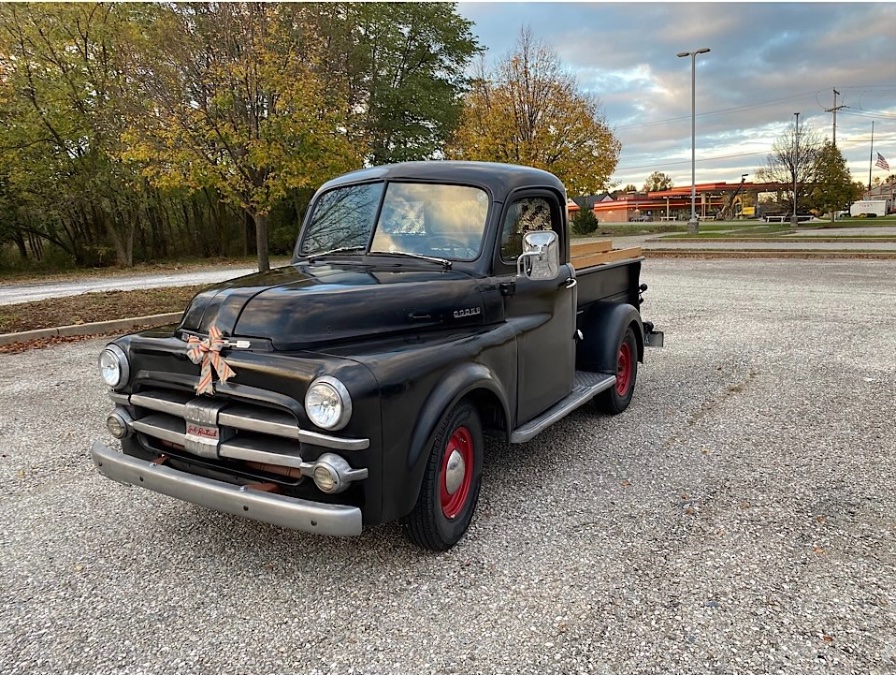
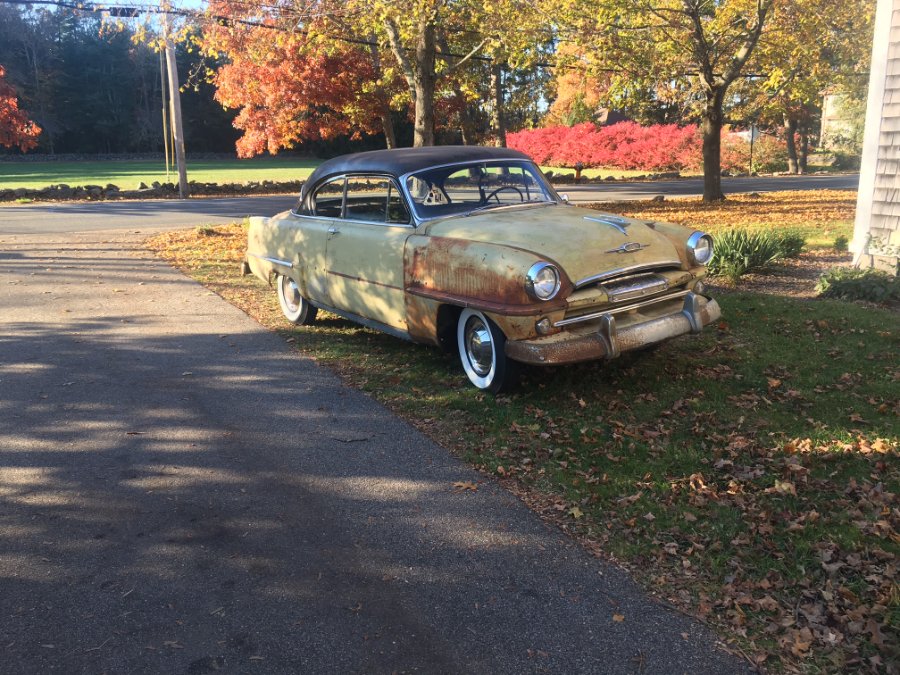
Hey folks, as stated in the title I recently purchased a ‘53 Dodge B3B. I don’t really have a lot of experience in this but have been been some research and planning. Appears like the previous owner put a fair amount of work into it already. I’m sure I’ll have a bunch of questions and know there’s a lot of good info on this site. Thanks in advance for your patience.
 3 points
 -
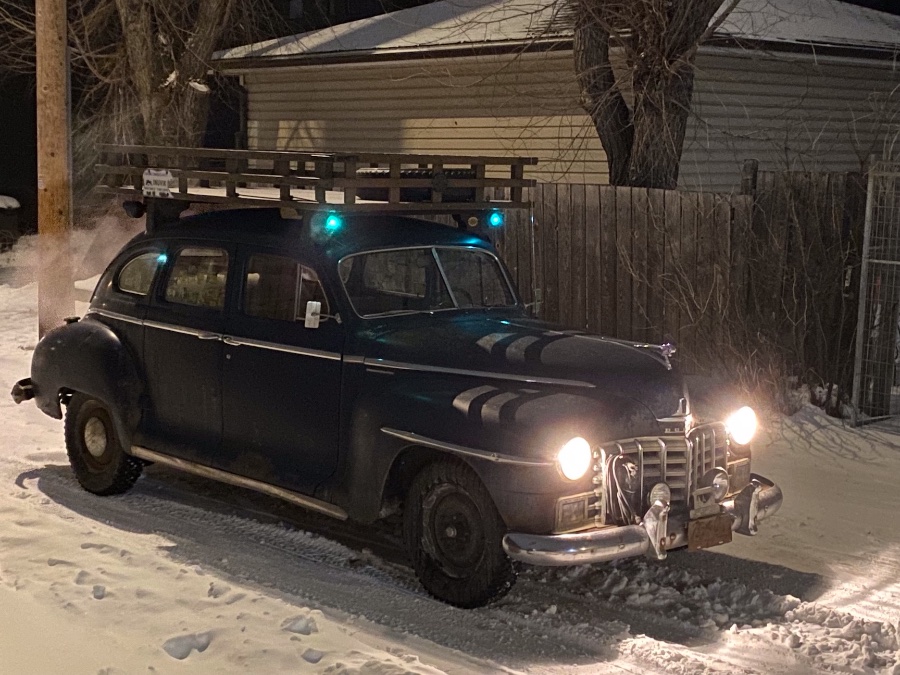
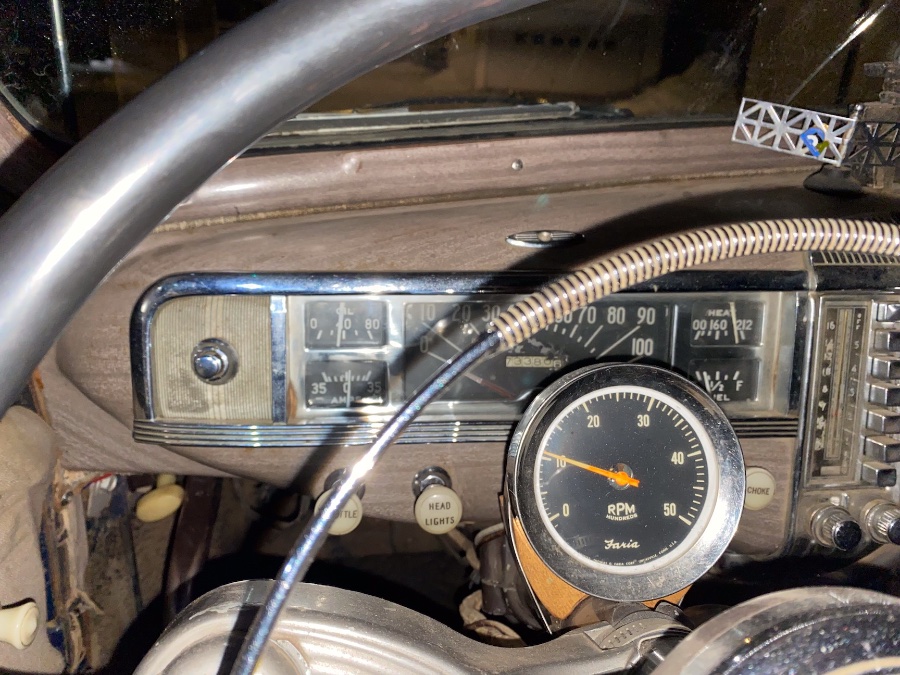
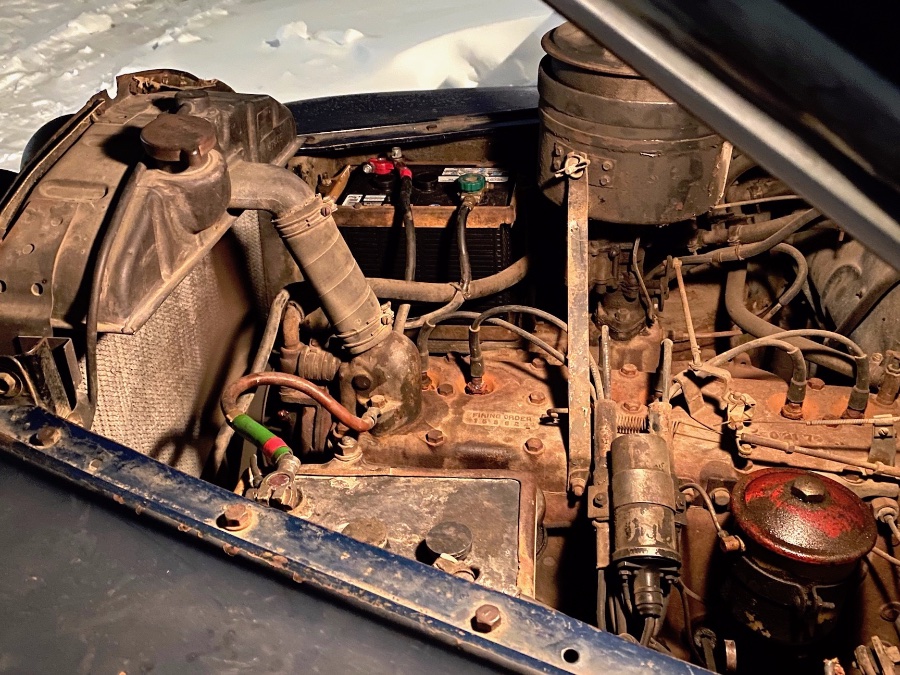
I recently rebuilt the roof rack on my '47 D25, which with mission creep, entailed going through not only the rack lighting (signal, marker and hit brake light), but replacing the long-dead second battery and cleaning up various connections throughout the charging and lighting circuits. The generator got new brushes a few years ago; the regulator was set up by an independent auto electric shop around the same time. All is functioning well now, and some readers might be interested in the real-world performance of this factory charging system... Photos were taken yesterday evening, with the following electrical loads: — headlamps on high beams (H6006 halogen 6-volt) — two heater fans on full (the factory heater and a second, identical, heater installed 10 years ago prior to an Arctic road trip) — four marker lights (front greens are visible, red rears were obstructed) The ammeter showed discharge at idle of course, but reached 'cross-over" at about 1,00 rpm and positive charge at higher speeds. I find this very satisfactory — even with the additional non-factory loads the generator keeps up at 20 mph or faster. No inclination here for an alternator or 12-volt system (no 12-volt loads either!) The second battery was installed 11 years ago in parallel with the factory battery as a reserve for camping and longer road trips. It can be isolated as needed.
 2 points
 -
My full time employment era ended today. I won't be actually retired until 11/30, but today was my last day of actually getting up and going in to work. I will be on vacation thru the 30th. It has been 49 years since I last had no full time schedule to fulfill. Looking forward to more garage time, maybe more me time and definitely more us time with my wife. First grandchild due to arrive in February too!2 points
-
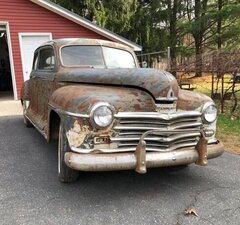
2 more pics from when I went to check it out.
 2 points
 -
My 1941 plymouth with the stock 201 cube engine had the neoprene seal instead of the stock rope seal but the previous owner had installed the neoprene seal without either of the 2 different shaped side seals..........I had a full Best brand gasket set but had to order the rope seal separately and then after teardown found I didn't need it as it had the neoprene seal and that really wasn't the issue...................lol................after installing the correct side seal it still had a small leak but no way like it was previously.......so I'd suggest checking first or order all 3 types of seal to have on hand b4 teardown..........lol.............andyd2 points
-
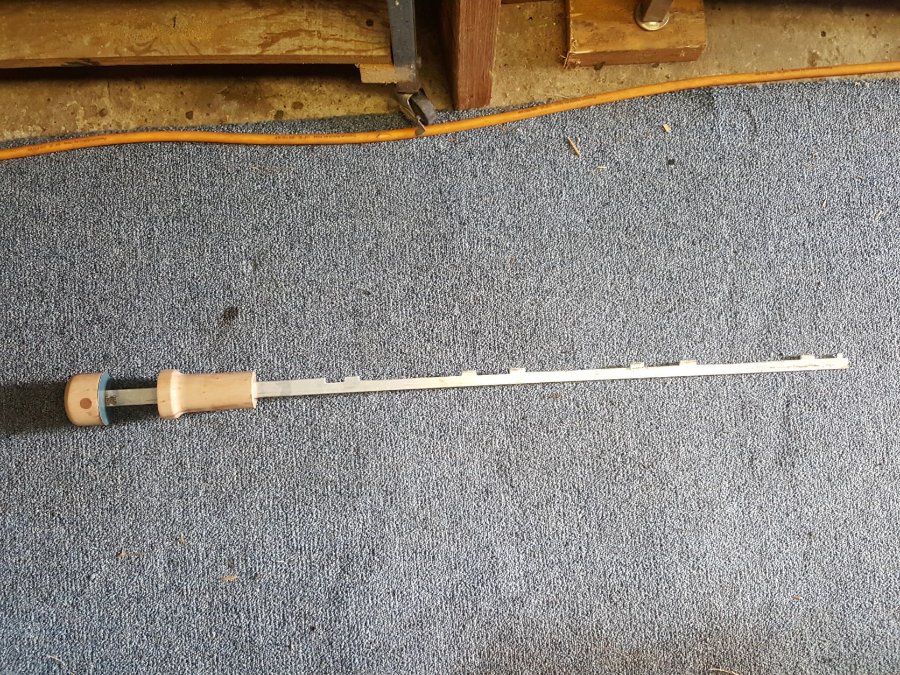
The bar is aluminium and the wood is turned from a piece of pear. It utilizes the slide bar method. Against the fixed piece of wood I epoxied a small piece of body steel taken from my parts car. On the sliding piece I screwed in 3 wood screws. So it will withstand a lot of blows. It was matched up for the long block tube (25" ) I've never seen the tube for a short block so I don't know if the teeth will line up for those tubes or not.
 2 points
 -
Almost complete Lockheed brake job tool set...
 2 points
 -
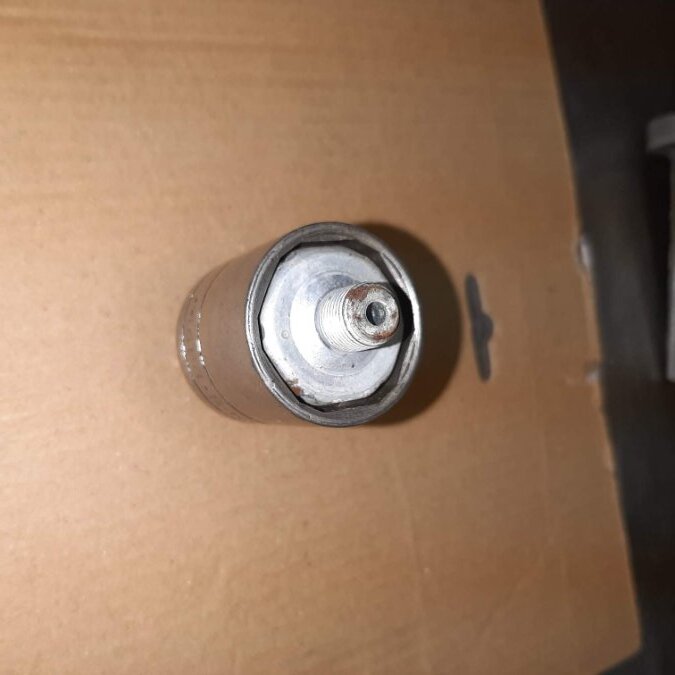
Brake light switch socket...
 2 points
 -
host not working.....deleted Austin returning.mov1 point
-
host not working...deleted.. Austin run 30.mov1 point
-
To bring this to a rest, I finally got the transmission put back together and installed Friday night. I took it for a drive Saturday morning, and all is good. I only replaced the bad stop ring and both bearings on the main shaft. The transmission shifts smooth again, and it is quieter with the new bearings when the truck is sitting at idle. It always had a slight noise at idle from the transmission, but now all you can hear is the engine. It was very straight forward and easy to repair, I just couldn't find the time! Since I bought a spare stop ring, I think I'll repair my spare transmission this winter. It has the same problem and is already halfway disassembled.1 point
-
additional information - grille trim cap1 point
-
Ah, stainless on that style of grill bar are super rare, so.... But yah, might need to dismount and bend some bracketry around to get them to align. Should actually be a little cover strip at the seam.1 point
-
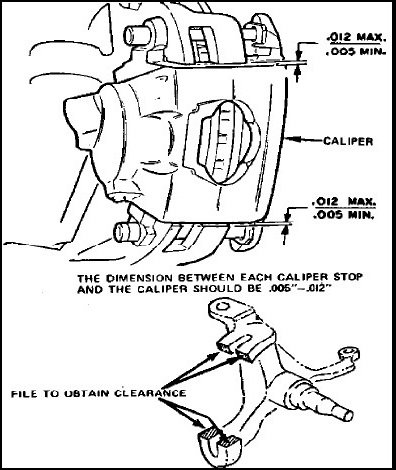
I finally found the info, from a GM technical service bulletin. 0.005" minimum, 0.012" maximum clearance between the caliper and the caliper mounting bracket. That info would have been nice to have had in the Rusty Hope instructions, as would the caliper mounting bolts torque spec, 28 ft/lbs (GM TSB info) and the 5/8-18 bolt torque (Fastenal, zinc plated grade 5 bolt), 144 ft/lbs. Still trying to find the brake hose banjo bolt torque spec for the GM metric calipers the kit uses. It appears to be 32 ft/lbs but my source is kinda shaky there, internet hot rod forum. I have no GM products nor any GM literature so I can't double check anything.
 1 point
 -
Congratulations on reaching retirement! One of those things that make you go "hmmm". Some don't know how they're going to get there, some (like me) had a plan from the start. Some figure it out about halfway through. Some don't ever figure it out. The "congratulations" in my book is that you figured it out...hopefully on your terms...now you get to enjoy your idea/plan for retirement...not mine, "the man's", your neighbor's, etc.1 point
-
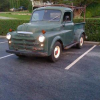
welcome! Solid PH truck! Do I see Stainless grill bars or are those painted/chromed?1 point
-
Don't be self conscious about not having quarter windows. It's still a Pilothouse. The original purchaser was just cheap. I bet there are fewer trucks without the corner windows ...that's what I keep telling myself anyways ? Either way, you got a good looking truck.1 point
-
There is an interesting article on Hemmings dealing with how to splice wire. Which Wire-Splicing Method Is the Strongest? The article is interesting, but while it deals only with splicing, the comments have some very helpful information (at least in my estimation) that go on into crimping practices, wire wrapping practices, etc. I have copied some comments into a Word document, and may (as I get time, and if there is interest) post some excerpts.1 point
-
additional information - Pilot-House definition1 point
-
Congratulation on your "new" '53. It looks like a great truck that was pretty well taken care my the previous owner. Enjoy ! John1 point
-
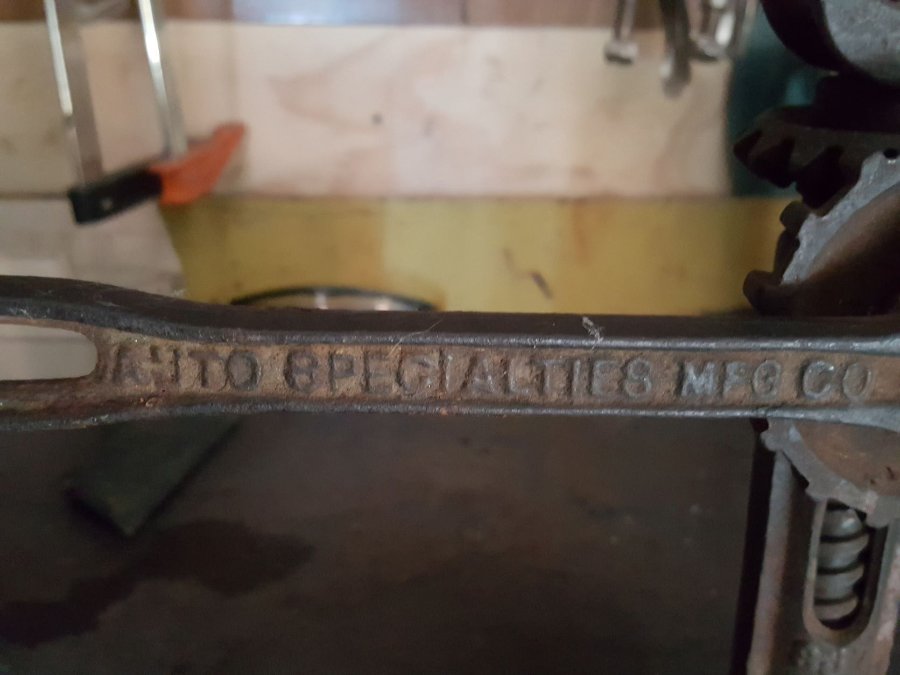
No markings on the ratchet or any of the pieces? The extension reminds me of SK stuff1 point
-
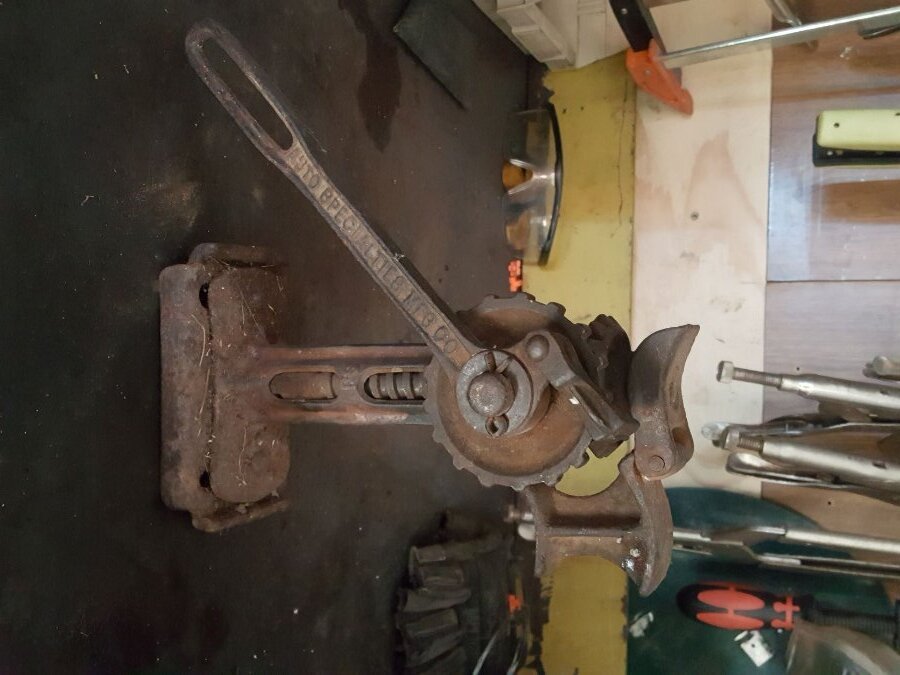
Now I know that these car jacks aren't exactly rare, and I'm sure a few of you guys own one. It's my understanding they were made for the Model T Fords. It's one of the best jacks I own. Super useful and even though the arm is less than a foot long it will lift my 48 Chrysler with little effort. It's really cleaver how it changes direction and it can easily be used horizontally.
 1 point
 -
With this modification I am able to use the stock shock mounts. That was a deciding factor.1 point
-
I left the Land of Evil on December 31, 2012. Kept a variety of part time jobs until this year(Six Flaggs train operator and school bus driver) until this year when I was determined to be in too bad a condition to drive the bus. So now I am at home most of the time especially with winter beginning to show its face. Still better than the Land of Evil. And although I no longer have weekends to look forward to, I also no longer have Mondays to dread.1 point
-
For me that's a maybe. Along with the question of whether to solder a crimped connection. If the crimp connector is tinned, I'll usually tin the wire, crimp it, and then heat the joint up from the end of the wire (like you suggested) until the tinning on both pieces melts and melds together. Typically I use tinned crimp on ring terminals and handle them that way. For most "weather pack" and similar connectors, I don't tin, nor do I heat and solder the pieces. Oh, and if the connector (ring terminal or whatever) is tinned and it has some kind of plastic insulation on it, I always remove the insulation and I always use heat shrink in place of the (usually colored) insulation that came on the connector. That type of splice shouldn't be in a section that flexes or vibrates, it should be in a section that's supported at both ends, hopefully to fixed positions. If I'm replacing wiring at a connector using a "pigtail," I'm always try to harvest one from a pull it yourself yard, and run the wiring all the way back past the first tie down/support. If the termination is old, corroded or broken, I take some extra so I can crimp new termination on the end with the connector. If it's something old and/or rare, and I can't harvest one, I make what I can with new wiring and try to match wire colors as close as possible. I agree. And I guess maybe I should share the story of how I got on the aircraft spec/NASA spec wiring. Back in the mid to late 1980's, I used to race sports cars with the SCCA in the southeastern US. There was a group of us, typically 5 to 7 cars, with driver(s) and a few floating "crew" guys who traveled together and paddocked together. We'd help each other out, and for the "endurance" races, we might team up together to run a car or a few, not all of them, so we'd have "relief drivers" available. That was mandatory in the races longer than 3 hours, and just a good idea in the shorter 2 and 3 hour "endurance" races. These were mildly modified race cars based on production street cars. Some "Improved Touring," and some prepped beyond that to "production" or "GT" rules. Nearly every race weekend, there would be one guy chasing some kind of electrical gremlins in his car. It was a different guy, different car most weekends, but the problems afflicted almost all of us. Most of us would try and help out and find the source of the usually "intermittent" problem that either killed the thing or made it run poorly and cut out. There was one guy in our group who never had any electrical issues with his car (and rarely even tried to pitch in and help out). One day I asked him what the deal was with his car being so reliable and never having problems (hoping not to jinx him). He explained that his day job was aircraft maintenance (mechanical) for an airline (I actually knew that), and whenever he needed any electrical work done on his race car, he had one of the service/repair electricians from work come to his shop in his basement and help him or just do the electrical work on his race car. Well, I eventually met the electrician and had him come look at my race car and tell me what I needed to do to make it as reliable as the other guy's car. Basically, he told me I'd have to rewire the whole thing. Actually he told me he'd have to rewire the whole thing and do it "like they did things at work, on the big jets." Several cases of beer and several steak dinners later, we actually did completely rewire my entire race car, and he taught me how they did it on the big jets. He even gave me a copy of their manual when a new edition came out one year. After that, I almost never had any electrical gremlins in my race cars. Since then, I've been a believer in those standards. My old book from that airline is a bit shop worn and outdated now, and about 10 years ago or so, I discovered that NASA document online, which cover the same basic standards and practices with a few minor differences, and when anyone asks about this topic, I refer them to that.1 point
-
John, are you going to drive the truck up?1 point
-
Yeah I’d be interested in hearing what Fat Man’s response is to the broken adjuster. As far as the steering arms, I just rotated the spindles stop to stop and compared that to the distance the Cavalier rack moved lock to lock. I came up with 1-3/8” shorter arms and it seemed to work. I simply made the arms from 1”x1” mild steel bar stock bent to the same angle as the factory arms. Got a 7 degree reamer from eBay on the cheap for my ball joint holes and of course careful measurements for the mount holes. Being mild steel I welded a bit of extra material around the holes and left them cool slowly. Dressed them up with a flap wheel. I couldn’t bend them in my 20ton press without heat so I’m pretty sure they’ll hold up. As for the backing plates they came from Scarebird Classics in New Mexico if I remember correctly. Remove the stock drums from the hubs and turn them slightly smaller to fit in the rotor. Rotors are from Ford Probe, calipers from El Dorado and pads from S10. Was pretty simple really. Sorry these are the latest pictures. I’ve been slacking. Lol


 1 point
 -
Did you readjust the brake shoes after replacing the wheel cylinders? It sounds like there may be too much clearance. You can pump them out with a couple of pumps, but then when you let them fully return you need to pump them back out to get good contact again.1 point
-
Far out, man! Will plan on camping again.1 point
-
here is a page from my MoPar Terminal, Cables catalog telling that all mopar used 1 guage battery cables. Also note that thes cable also had a metal spring covering besides the cloth covering over the metal cable. The spring was used to protect the cloth covering and to prevent the cloth covering from getting cut and then causing a shot. This was especially important when the batteries were located under the fron seat and just under the driver and the cable then got routed to the appropriate connections on the car. I have only seen one original cable like this and it was for sale by Frank Mitchell and it was not cheap but remember it was NOS and original not repro like what we get from the MoPar vendors. Rich Hartung desoto1939@aol.com1 point
-
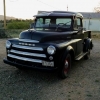
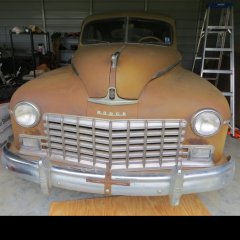
Now with bumpers
 1 point
 -
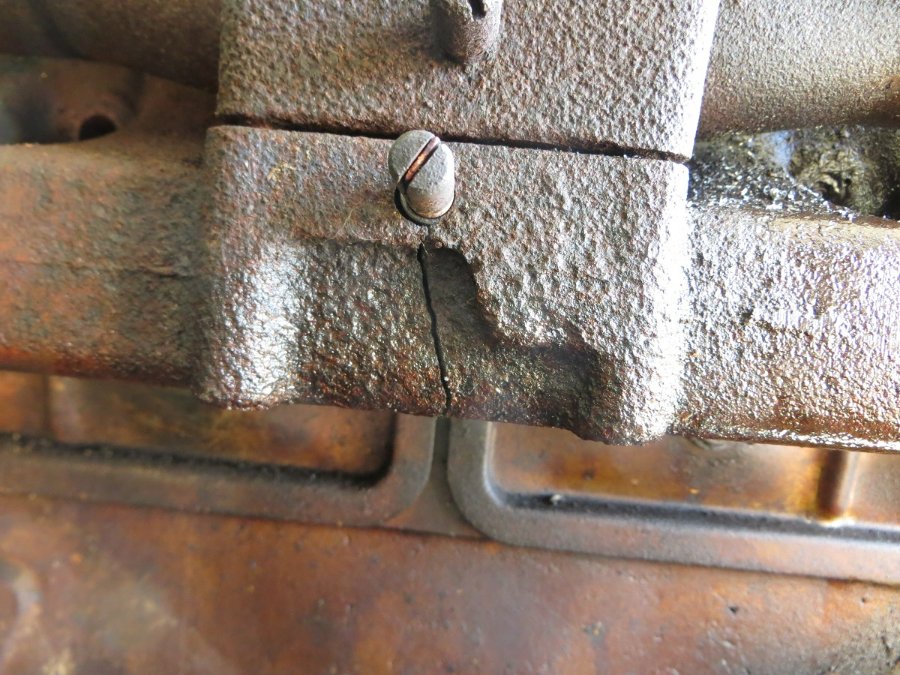
Turned into a **** show today..taking the manifolds off...and all the bolts came off except that LAST ONE. Never does. So, I finally go my drill out to drill the head off, so the manifold could be pulled off. With the bolt head off...NOOOO, we ain't gonna come off. Well, I found that you cannot pry even lightly on cast iron..it popped right at the intake heater. Anyway, I found it was already cracked on the front tube. Last insult, the bolt was still stuck in the last remaining header fragment. Tapping, turning, etc...still broke off with about a 1/2 " sticking out. Crap. Well on the bright side maybe I'll put dual headers on it. Plus with the intake, there was only one bolt holding the exhaust manifold to the intake. The rest were already broke off


 1 point
 -
AND.......did he vote both in Tennessee and Indiana.....inquiring minds want to know....1 point
-
Changed the oil and filter in the Zekemobile today. Bought one of the sock type filters and was able to get it into the canister after I spread oil on the sides - but stilll a tight fit. The filter element I put in last time was the metal type and it was not correct for the model I have. Here's my question: The oil pressure used to be about 25 while at idle and normal engine temp and about 40-50 while driving. With the new filter, the pressure is 40 at idle and about 50 at fast idle. (Didn't have time for a drive today). Used 10W-40 both times. Is this okay or do I have a problem? Zeke1 point
-
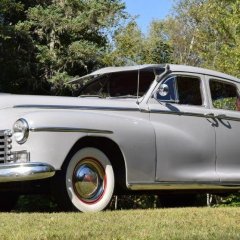
Maybe this time. The NY might be disassembled by then....0 points