Leaderboard


Popular Content
Showing content with the highest reputation on 07/28/2021 in all areas
-
It's not a spacer that goes there... It's actually another 3/16" thick mounting bracket for the shifter linkage bell crank /pivot. You probably still have this piece/assembly all still together? In a box, bag etc?
.JPG.c03ffabed95795789e17b087bb301a12.JPG) 2 points
2 points -
2 points
-
When I stripped my block down and pulled my freeze plugs, I had it on the engine stand flushing with the hose, and pressure washer at every entry point I could hit. Rotated to different angles, and saw more crud come flowing out. After finally getting the water tube out, I took it off the engine stand and stood on front and back with spacers under it and continued the flush process. Ultimately, I think I flushed it 8-10 times before crud stopped coming out and water was semi clear.2 points
-
Couldn't find much about adding AC on trucks or old Mopar in general. Ordered the Old Air CAP-300 under dash complete kit which should be shipping this week. I'll be switching out my 12 volt generator with a 140 amp alternator. This will future proof if I need to add an electric fan later. Since my L6 did not come with a fan shroud I do not know if I will have the air flow through the condenser. It sure does have some pull on the front of the rad (55-59 K series 3 row). I'll try one of the universal fan shrouds before I go electric. I did request the trinary switch just in case I want to do a relay driven pusher fan later. I have a two groove alt pulley if I need to drive the compressor off the alt. When it gets into the upper 80s it simply isn't enjoyable to drive this truck, looking to change that.
 1 point
 -
That is a steering correction. From my understanding, it is to help wheel returning to center and to help with wander at 60 mph.1 point
-
Thankfully Ace Hdwre is the closest thing to a mom and pop store you can find now. What an asst of fasteners! and you dont have to buy a full bag of something you dont need or doesnt fit. I suppose if your a real miser you can take back what didnt fit. dont worry if your like me youll drop those little ones. I get 2 of everything1 point
-
The trouble with that is the modern parts aren't always better than the original stuff.1 point
-
1 point
-
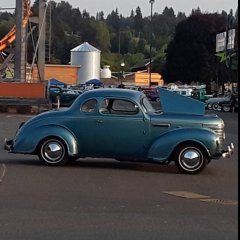
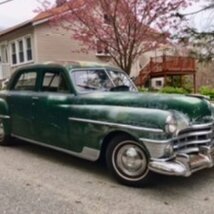
Julie, Welcome, and nice looking truck.1 point
-
Yep....that's your ornament, and a good price to boot. Looks like the front bolt broke off in the deal there. Take it to a Engine Machine shop and they'll clean it out for you. Or maybe you get lucky and its not stuck in there to tight. 48D Side note: Turn signals were available for certain models going back before the 50's. The mandate (law) was in 1955. The signals you have are aftermarket for the 1950's....maybe not the lens. So....feel free to play around with your signal deal cuz what you have isn't factory. I always take the signals off the top of the front fenders, and use the running lights on the nose piece as the turn signals. The Signal Stat 900 Sigflare is common (you might have one already), and older year turn signal/brake light brackets. Use to be pre 1955 trucks had one light for brake indication, so finding a passenger side bracket was tough. Now they are made for both sides.1 point
-
DOT-5 is silicone based brake fluid, DOT-5.1 is glycol ether based brake fluid...Dot-5 is not compatible1 point
-
I have admit there’s somethings I do not know and won’t knowingly send you down the wrong path. I will tell you my experience. My Suburban and my Coupe came with 3.73 gear sets. My research found that the 8.25 axle had many ratios but the lowest numerical one is 3.54. Now that is not a big change but it is noticeable if you’re towing a trailer or other heavy loads. My Coupe is the lightest Mopar of 1949 and I don’t intend on towing a trailer so I am going to put that ratio in it for a trial. I have already installed an R10 Overdrive so this car will really have some highway gears! So where do you find 3.54 gears? The default answer is eBay because it is so easy to shop. The differential carrier I got was from a 1956 Dodge and I paid $250 delivered for it. Somebody challenged me on that so back to eBay I went and found 4 potential candidates at one wrecking yard. You only had to ask one question to know what you were buying, does the donor car have an automatic transmission? If yes push “Buy it now” Happily in looking at the ads I saw a 6 volt positive ground Delta Mark 10 ignition box. I wrote to the seller and they said they would sell it to me. Since I know a guy who can test and repair them I bought it. My repair guy said he had only seen one of them in 10 years! I think he was looking in the wrong place. Lol Anyway, I do not have any experience in trucks or pre-1949 Mopars (with the exception of the 1940 and later transmission. I know you can get an optional ratio for second gear the old time hot rodders liked). Again if it uses the same carrier gasket then it will fit. If the axle splines don’t fit, then change the side gears to the ones from your old differential. Hope that helps. Please report back and you will be expanding the knowledge base.1 point
-
past, I know of a guy who, who knew a guy, whom had a ornament..... LOL 1097255
 1 point
 -
Yes on the drum install before. I had the parking brake drum, lever and linkage installed before I put the transmission in the truck. drive line= just stick it in there but, make sure all the needle bearings are clean, lubed and present as you go when I took my latest one apart, there were a few missing needles and it started to show wear (and slop) Also, I loosen the carrier bearing, installed the transmission end of the drive line and then put the carrier back in place. Might not be needed but, I made me happy to do it that way ?1 point
-
Yes, the rate of advance is adjustable, not the total advance. If you look at the 9.5 stamp on the arm there is a stop to the right of that, which can;t be seen in teh pic, that limits the total advance. Somewhere I have a listing of various cans and their max advance.1 point
-
When i check plugs now, i bump the ground electrode on my workbench. If you inspect plugs like i have seen in every single picture for my entire life, you are doing it wrong. Electrode down and a light bump on a bench or something solid. If the center electrode is loose it will close gap and short out. then remove plug and hold it up. Yup,gap is open as electrode has fallen back into place. A freaking nightmare if you dont look for it. 30 years as a mechanic, never saw one, until 3 years ago. Saw 3 on 3 different occasions. Champion spark plugs are no longer something i will install.1 point
-
215/75/151 point
-
Any modern mopar vacuum canister with the hex shape after the vacuum nipple is adjustable. I recently learned this in another mopar specific forum.1 point
-
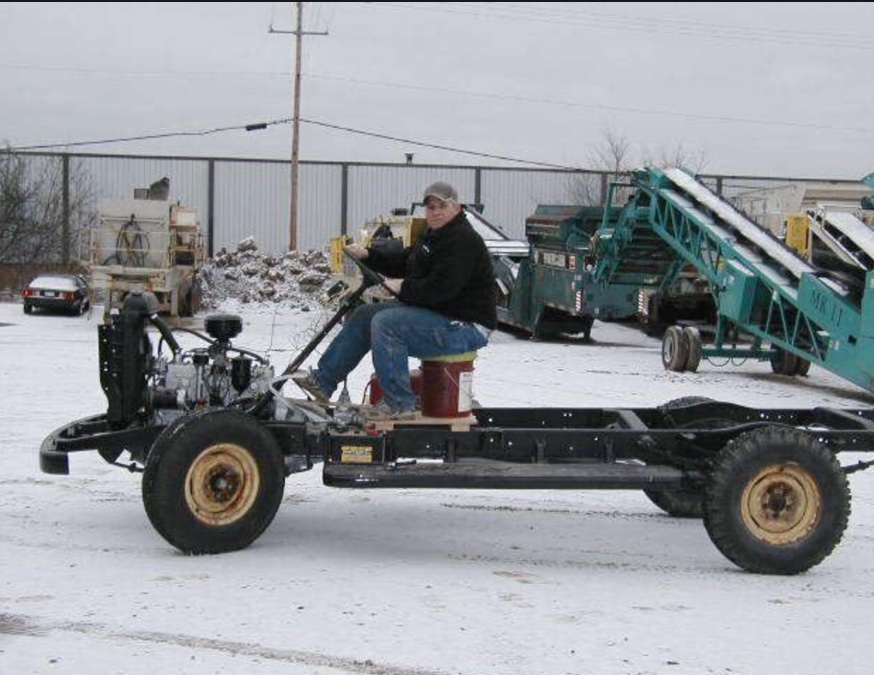
Saw one of these in a scrap yard in an old mining town in Arizona. Unique vehicle purpose built for urban delivery. Power unit separates from Unibody shell for service and maintenance. Seated or standing driving positions. Draw back is top speed was <40 mph. In an auto museum near us I'd a similar vehicle powered by a Franklin drive train in the rear very similar to the Tucker car. Six or eight bolts out and the complete unit dropped out for service. Thei literature suggested purchasing one or two spare power units so that you wouldn't need to have trucks out of service for maintenance and repair. When work was necessary, you would drop the power unit, sub in one of the spares while work was done to the drive line independent from the vehicle. https://www.txclsx.com/index.php/product/1948-marmon-herrington-delivr-all/1 point
-
while a foreign make, this pic was sent to me...Morris chassis and cab and special build body as one off as I understand it in NZ....very bold look and very utilitarian...these cars in wagon/van concept from factory never had a one piece roof as shown...just a different car from a different time and a different country...but so much a likable beast. the D24 wagon that never was...................1 point
-
I decided to try and retrofit a brand new $17 vacuum canister from O'Reilys to my extra distributor and was able to get it to fit. I bent over the rod on to itself, then cut off the end and drilled a new hole for the plate's peg to fit through. Drilled new mounting holes on the cannister too. The plate engages properly when I suck on the end of the cannister. This cannister is 9.5 distributor degrees stamped on it. Looking through different distributor vacuum advance specs in my old Motor's manual this one seems to be ok and within the range of different ones used. I will be putting it on my in car distributor and see how it work. If it does, this would be an easy $17 way of using a new in stock off the shelf cannister. Here is the one I am trying and it was used on mopar V8s and Slant 6's: https://www.oreillyauto.com/detail/c/standard-ignition/ignition---tune-up/distributor-vacuum-advance/acc1ad8ac67e/standard-ignition-distributor-vacuum-advance/std0/vc168
 1 point
 -
I currently have two old Mopars that originally had those rubber boots and I sold another one. I have had varying degrees of success with replacement boots. I’ve had some fail and I ended up replacing them with leather boots. I found it impossible to change the rubber boots without disassembling the joints. This is not required with the leather boots. I highly recommend them for not only the cars that came with them but also for the later cars. My ‘53 Plymouth currently has one rubber and one leather boot. I just don’t think the new replacement rubber boots are very good quality.1 point
-
There was a thread on the forum not too long ago (may have been on the car side) regarding a clutch issue after replacing the clutch disc. It seems that the new disc had a larger center spring hub that interfered with the pressure plate. I don't recall all of the details. But then again, as you eluded to, you may just be hearing 'normal' clutch engagement that you wouldn't normally hear with all of the panels in place.1 point
-
I can be in Cottage Grove in under 2 hours if you need me to rough 'em up a bit... ? Just kidding, I'm not that kind of guy. But we got your back. We want to see that truck back on the road too.1 point
-
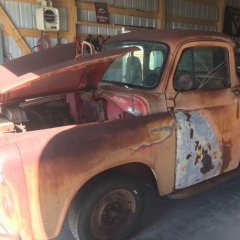
Not sure just found this 51. There is very little information I can find on the internet.1 point
-
It's not a common option to find shocks on the medium duty trucks. 1-1/2 to 2-1/2 ton trucks. I have seen front shocks only installed..never rear shocks except on busses which were required both front and rear.1 point
-
Well for what it is worth, I installed the clutch from my 52 parts truck with a 3 speed (which had been making no noise) into my 49 with a 4 speed. When I first started driving it, there was a strange noise when I let out the clutch at higher rpms (like you would do on a hill). After a few runs and a couple hundred miles it doesn't make that noise anymore. The noise was similar to yours but not quite the same, there was kind of a whine in addition, to me sounded like vibration. This last Saturday I tried to make it make that noise and it did not.1 point
-
I would still make sure and try to eliminate the clutch disc being installed backwards. Been there, done that, as mentioned in a previous post. Engaging the clutch should not be a noisy process. SOMETHING is wrong and if is unlikely to fix itself and go away. Great looking project by the way!1 point
-
@Brent B3B, you don't like my 'sparse' interior? The heater wasn't working, but the A/C worked awesome that day. ?1 point
-
LOL, Oh no Julie! Don’t let Merle near it or the interior will be more stripped ? (Photo of Merle from his build thread)
 1 point
 -
Welcome Julie! 51 or 52? I’ve never “restored” a truck, so take it for what it’s worth. ? I would make it safe and enjoy what you have. LOL, But at minimum get the correct steering wheel and a horn ring ? well said on the resale JB1 point
-
We're all glad for you that your R10 worked out, but like you said, it's your opinion that it's the best option. My 49 is getting a 291 hemi and a 4 speed. In my opinion, that is the best swap. I think the original poster is on a budget and doesn't have a lot of available parts. I say he does what works for him and his car. The R10 T5 argument doesn't matter if he wants something different. Also, yeah, a T5 can be swapped or any other tranny in a morning if you have the parts. I don't get the hate towards the T5. It's not the best but it's not the worst either. I've been building cars professionally for over 25 years. One thing I learned very soon in my career is that everbody wants something different. Another thing I came to realize is that restoring is boring. Putting everything back to stock isn't for everyone. definitely not me. Nothing wrong with a nice stock example, just has never been fun for me. Once again, my opinion.1 point
-
As far as suppliers go I’d like to throw one more into the mix Van Pelt V8 transmissions sells the same items for about $200 less. On their order form there’s a box that asks what transmission the parts are for. I put in 49 Plymouth. I got the parts shipped to me without comment. Why? Because they fit. The Overdrives do not cost $1800. On eBay there is one guy who offers one for that much...but only because after months of offering it at $2100 he lowered the price. He watched as 6 other guys sold their’s for around a thousand. Considering how much work is involved with installing a 5 speed, it’s my humble opinion your time and labor are worth something. So can you bolt in a 5 speed in a morning? I don’t think so. In my 3 passenger Business Coupe a 5 speed would turn it into a two passenger coupe. I am loathe to do that. And another thing, (this a question I don’t know the answer to) what is the Overdrive ratio in the various 5 speeds? The Plymouth Overdrive offers a 30% reduction in engine rpm. Are they better than that? Will installing a 5 speed increase a cars collectability? I am thinking that a Plymouth Overdrive does.1 point
-
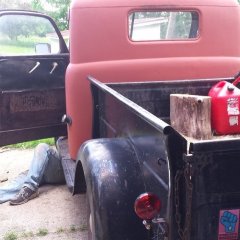
A small syringe works great for filling the bowl through the vent. Also, maybe disconnect the line from the tank at the pump and run a hose from the pump to a 1 gallon gas can to run the car. At least until you know the tank and lines are clean.1 point
-
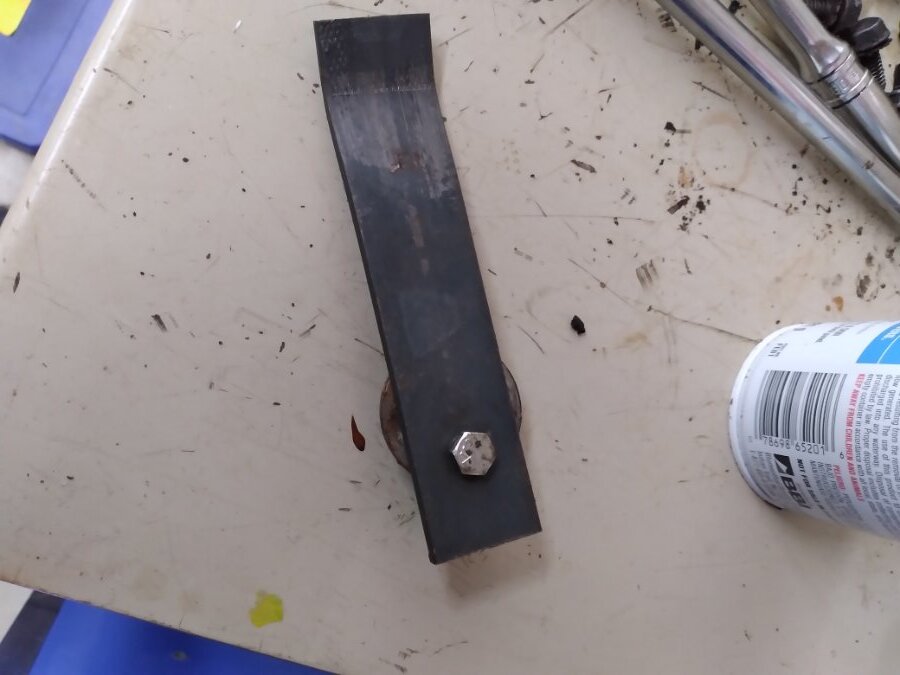
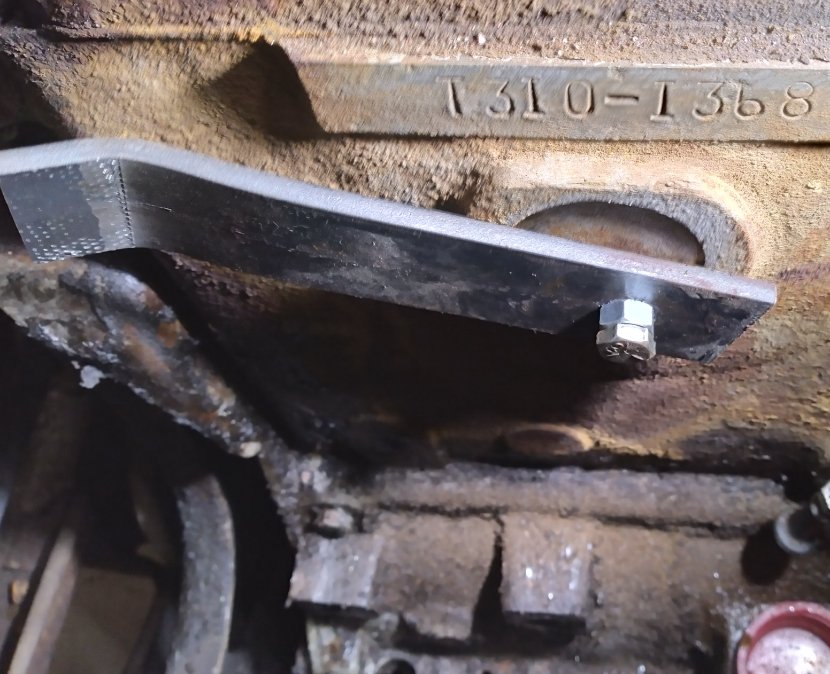
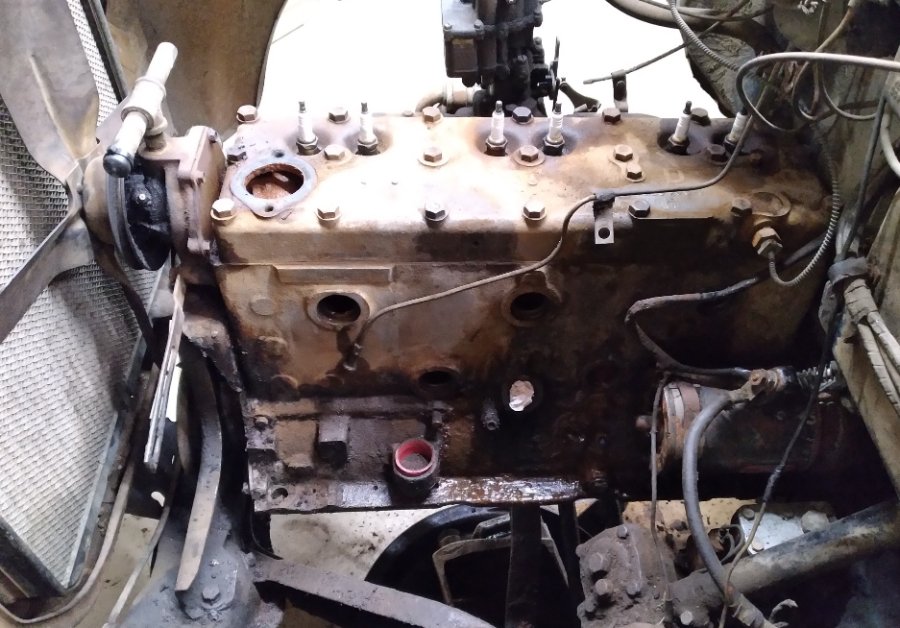
Progress update - Pulled all the stuff off the left side of the engine today and removed the core plugs to clean out the crud from the engine block. Plenty buildup down at the bottom of the block. Check out what was behind door number 4! I need to flush the block out without making a giant mess in my garage. I'm thinking a kiddie pool under the truck should work well. I've included some pics of the core plug removal tool that I made a couple years ago when I did this to my Meadowbrook. I drill a hole in the core plug and thread it with a 1/4 20 tap. Then put the tool across the plug and thread the bolt in. The bolt pulls the plug towards the tool and deforms the core plug a bit. Then I can either pry the tool off the engine with a screwdriver/prybar or grab onto the curved end of the tool with a pliers and use the tool to pry the plug out. Most of the work is done by the bolt so it doesn't take my effort to pop the plug out. I also started soaking the manifold bolts with penetrant. The exhaust manifold is badly cracked on number one. I think I have another manifold to replace it.

 1 point
 -
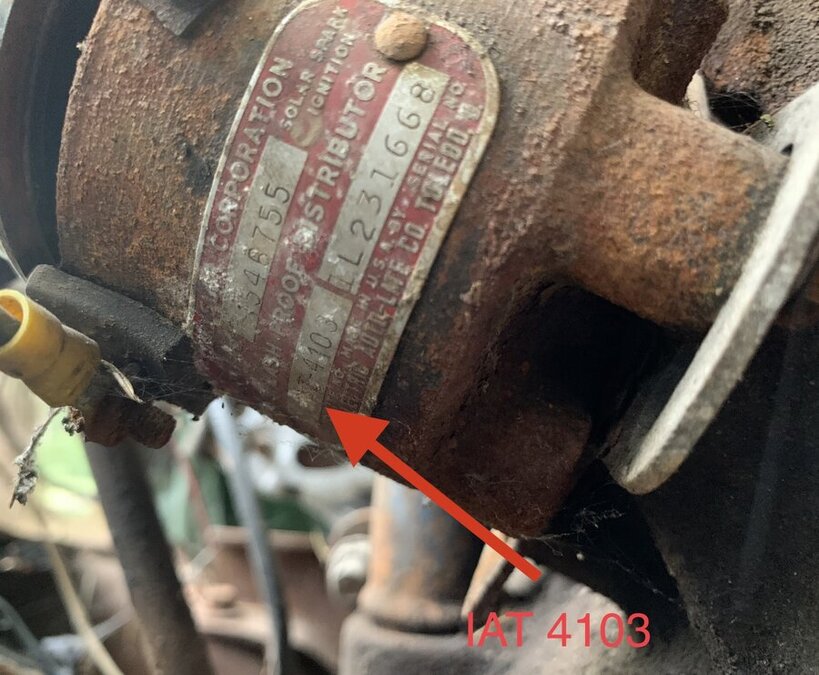
visual aid the numbers IAT 4103 is what I found Napa looks for
 1 point
 -
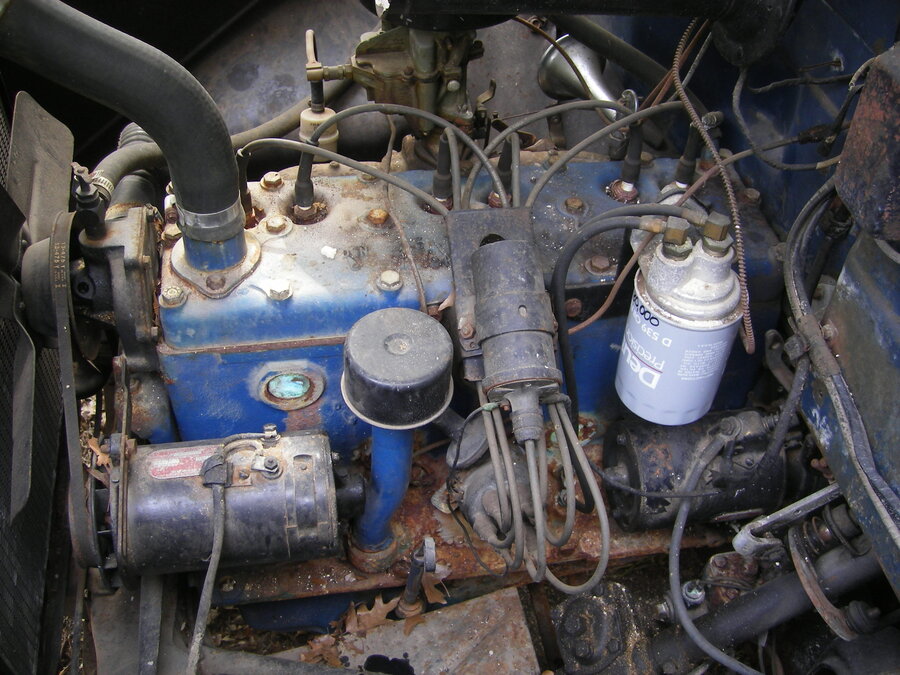
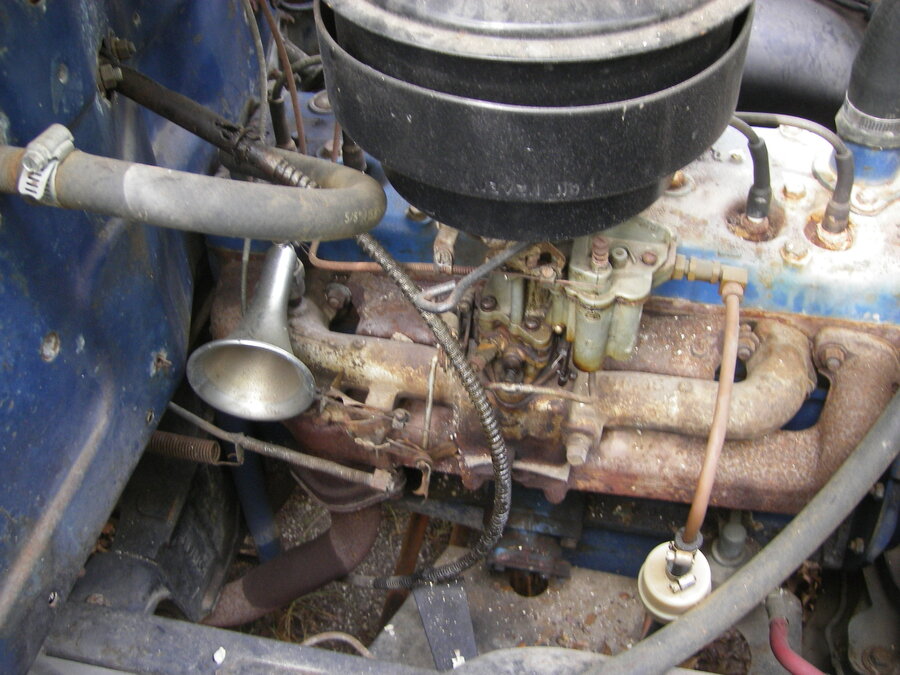
DG - I've had my 53 since 1975. Rebuilt it about 3-4 yrs ago and I took lots of photos if you ever need some. My engine (original) was pulled once for a valve job and painted blue - it is red now. It came with an oil filter, and I tried to use a spin-on instead, but it was not compatible with the bypass oil system - back to the cannister. On the intake manifold, you will see a Hollywood Wolf Whistle - been on there since 1975. It will take another posts to give you "after" photos of the engine.
 1 point
 -
When I had the Red painted on my truck I used a 1969 Barracuda "Scorch Red" which seemed to be the closest I could find to 1953 "Dodge Truck Red". I am really happy with the way it turned out. The Chrysler code is DT3333. My painter used Metalux R6 Ay1ER6. There are specific codes to get the "Scorch Red" and I would be happy to share them if you are interested. Here is a shot of my cab although the computer always makes it tough to see the real color.
 1 point