Leaderboard


Popular Content
Showing content with the highest reputation on 07/19/2021 in all areas
-
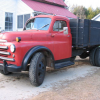
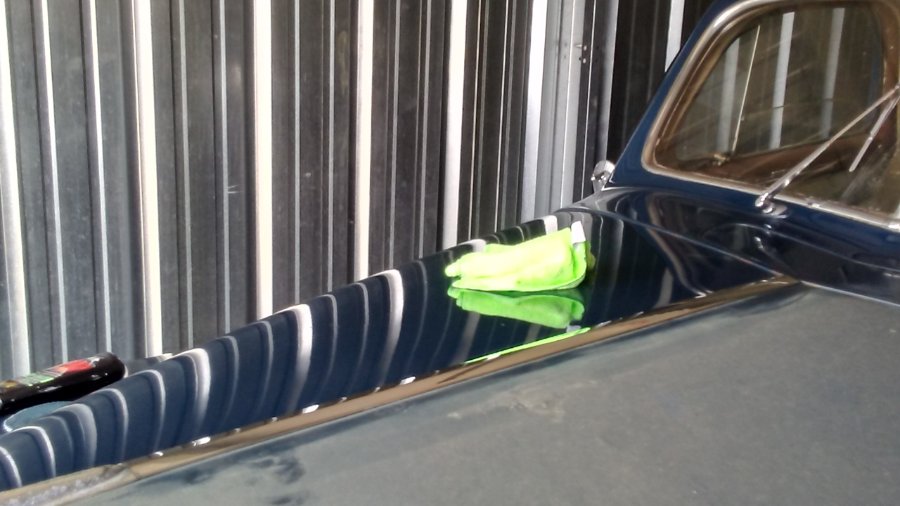
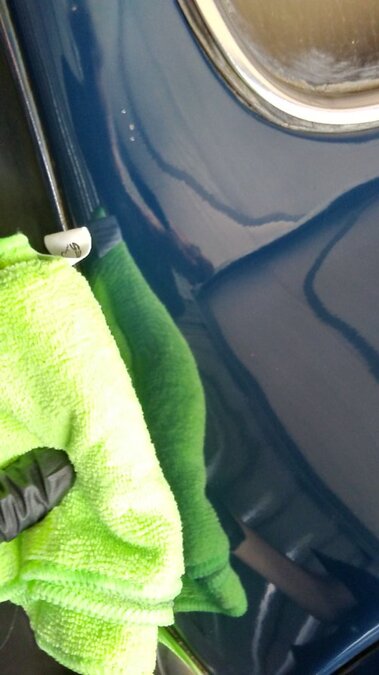
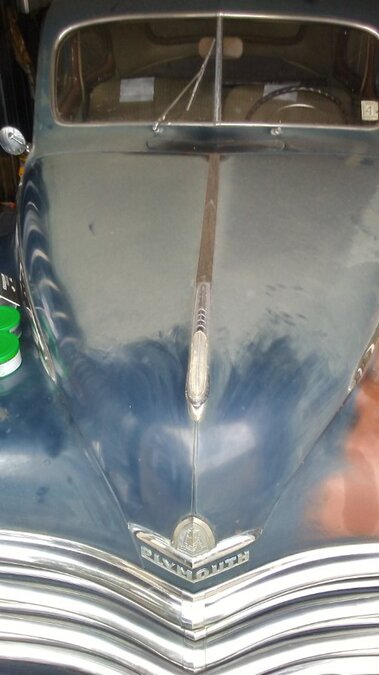
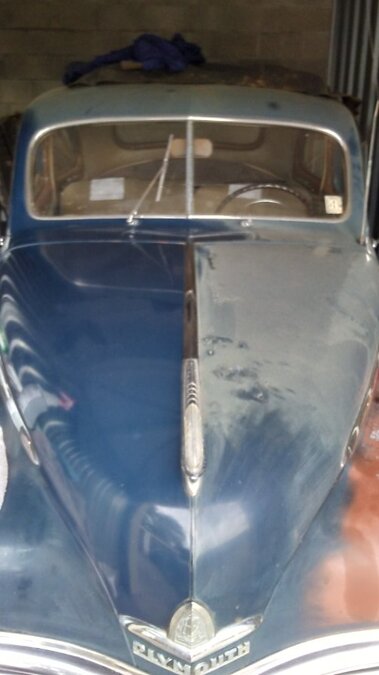
Since I am waiting for parts and still want to make progress, I decided to try and do something about the cosmetics. I have brought back finishes before that seemed too far gone, and my coupe would, I am sure, seem way too far gone to a lot of people. Keep in mind, I currently have the '47 in a storage unit, with no power and no running water. Given those two facts, I am, as the English would say "Rather Chuffed" with the result. The formula? Spray bottle of water for repeated dousing of the crud, many, many large terrycloth towels (that have to be frequently washed in hot water), Dupont #7 (orange), followed by Dupont fine polishing compound (white), followed by Meguiar's Ultimate Compound, followed by Turtle wax's tinted black wax. I generally think Turtle Wax products suck, and how they came to be so big in this industry I will never know, but their tinted black wax hides a multitude of sins on dark colored cars, especially. Particularly if you have busted your keester prepping the surface first. On the unfinished side of the hood, that's not just dust. It's how the actual finish looked before I started. It was like running your hand over sandpaper... The photo with the blue VW Passat in it (my daily driver) is the reflection in the hood. Now I just have to do the rest of the car!!!
.jpeg.20b32acd98ba4e399e370f964cab96ad.jpeg)

 2 points
 -
P is for Plymouth D for Dodge C for Chrysler S for DeSoto2 points
-
@Tooljunkie, checked valve clearance this morning before I started doing anything else. Exh had .009 , intake had a buildup of crap that I could see taking up the space between the tappet and valve stem. Got a .004 in and worked my way up until it was cleared out ending up at .009. I didn't have a helper today so instead of my thumb, I put a compression gauge on 6. With all the spark plugs out and the gauge on 6, I cranked the engine for about 10 seconds and listened for the slowdown when 6 would hit the compression stroke. Nothing. Tried cranking again and saw the oil pressure gauge climb a bit, so that's a good sign. After about 10-15 seconds of cranking, number 6 hit some compression! I removed the gauge, shot a bit of oil in each cylinder and turned the engine by hand a few revolutions. Then checked for spark and had nothing. Cleaned and set the points and we have spark! Gave the plugs a quick hit with a wire brush and threw them in. Cleaned up a few corroded plug wire terminals and connected everything back up. Grabbed a bottle of gas and squirted it down the carb. Had my wife run the key and starter and it fired! Let it run for about a minute or two, feeding it gas from a bottle. Wife reported the gauge showed 40 psi oil pressure. Not much smoke from the exhaust, and no strange engine noises. I think we've got a viable engine! The wells by the tappets have some sludge in them as expected. I'll clean them out along with dropping the oil pan and giving that a good clean out too. I drained the oil, other than being really black, there wasn't anything alarming to see. Spent a good amount of time today scraping decades of crud from the sides of the block and pan rails.2 points
-
a copy to review can be found here for FREE http://dodgepilothouseclub.org/know/ph_parts/pilothouse.htm1 point
-
https://clestersauto.com/1 point
-
it's the cheapest option out there; a little elbow grease and some real grease, and a little luck and you might not have to do anything else..1 point
-
FRAM is probably one of the worst if not the worst that you could use. An interesting project Oil Filters Revealed1 point
-
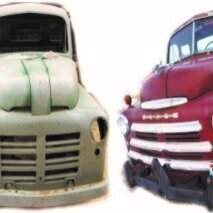
I have sales literature that talks about these trucks being "Pilot House" and why called so. So I'd say "official". As much as it annoys me when a C series owner talks about their "Pilot House" C series, I can understand the WC series owners being a bit put out when the B series co-opted the "Job-Rated" logo and imagery, but that info is actually on the trucks and sales documentation for whatever that's worth.1 point
-
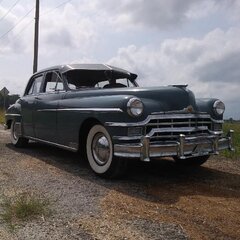
Your 1940 P12 came from the factory with a 201 cu.in. engine. The switch to the 218 cu.in. engine was in the 1942 model year. The 1940 201 was rated at 84 BHP where the 1942 P14 and the 1946-48 P15 cars were rated at 95 BHP. Engine bearings, etc. are different but most of the engine gaskets are the same. Taking a quick look through the service manuals for the two, there is a lot more that is the same than what is different. Most of the advice you see here for a P15 is directly applicable for your P12.1 point
-
I ran my 218 for about a month,and decided it needs rings at the very least. When i get a chance im going to pull it apart and see if its worth fixing. I like the way it ran,but it needed more work than i wanted to put into it at the time. I need to fix up a flathead for the next project.1 point
-
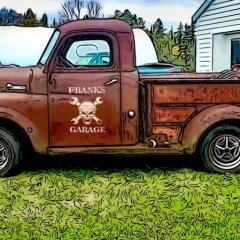
While moving it up to the garage I couldn't resist taking a few pics of the truck in the sunlight with the Meadowbrook in the background. Waaay in the background is the now abandoned project that delayed working on the 1 ton. Its an 84 BMW that's been in my wife's family for 30 years. Salt ultimately claimed this one, too much hidden rust all over to feel safe putting it back on the road. Truck is in the garage now, will start working on it this evening after dinner and when the heat breaks a bit.
 1 point
 -
I spent MONTHS with an odd vibration that I could not run down. Turned out that the left front lip of the motor mount would contact the block side mount. It would do it at idle. If you look real careful at the way the mount is designed, if the rubber gets old and compresses just a little the two side can make contact. I had to grind some clearance into the mount. You can see stress marks from the press if you have it in your hand. Also, if you have two or three of them that radius edge on the drivers side is different on all of them. Check that out real well before you do anything else. As to the Fluid Coupling. If you still have the bottom plate out, drain it. Turn it back up to the fill point. Take a screwdriver and carefully turn the inner around until you line up one of the large holes with the threaded outer plug hole. You will have to take a drill bit to gauge the inner hole size as I don't remember what it was. Then take a BOLT that is threaded to the plug hole pitch and size. Turn the end of the bolt so it will go through smooth the inner hole. Screw the bolt down. Now drive it like a stick easy around the block and see if the problem goes away (Assuming it was not the mount). If it does then you know it is the coupling. If it does not then it is not the coupling. An old timer taught me that trick years ago. He said to keep a bolt like that in the glove box on long tips. Just in case the fluid coupling seal dies or the bearing dies...you can stop, let it cool dump the oil, and screw in the bolt in place of the plug. Then drive it like a stick to get where you are going. He said he drove one like that for a year and it never caused an issue. James1 point
-
A car like this offers a tremendous amount of smiles for its price; you're gonna have a lot of fun getting it going! 6v+ can be a very reliable system...I've never had an issue with starting, for instance. To me, the idea of driving down the highway with a six volt positive ground, flathead six powered, goofy-obsolete technology transmission, alongside folks driving a late model Prius or a Hemi Charger or a Tesla, I don't know...just something special about that to me. Folks who go swapping in modern powertrains miss out on that novelty.1 point
-
This is what I found from Best Gaskets: The Best 4164 seal set can be used to replace the original rope seal and retainers on most of the earlier engines if the crankshaft seal journal (2.650 in) is the correct size to match the 4164 seal. This was a common practice to do this. Some engines that were made for the Best 4164 seal set can use the Best 3675 seal set if the crankshaft does not have the cast in oil slinger and if the square ledge in the engine block and cap is correctly machined to accept the Best 3675 seal. Most engines that were made to use the Best 3675 seal may still have the bolt holes in the engine block and main bearing cap for the seal retainer. These may or may not be threaded. I had one customer who ground the oil slinger off the crankshaft in an earlier block that used a rope seal and installed the Best 3675 seal set and it didn’t leak. It all depends upon the engine design and the machining quality in the rear main seal area on what can be used. Just hoping someone has done this before with success. Bob Marx was a big help @ marxparts.com1 point
-
It's good to see that my video is still getting some play. You don't have to do your valve adjustment with the engine running, but I have found that it is a little more accurate. You can also adjust the valves with the engine off. The procedure should be in the shop manual. (edit: I just checked the manual and it references adjusting with the engine running) The engine should be hot for a proper adjustment. If you go to the "Resources" tab at the top of this page there is a Tech section with a valve adjustment procedure for engine off. You don't need any special tools, but they help. You will need 1/2" and 7/16" open end wrenches. If you get yourself a set of tappet wrenches you will find that they are easier to use. They are longer and thinner and work better for reaching into the valve area. Also, longer bent tip feeler gauges make things easier as well. Again, it helps with the reach. These tools also help keep your hands further away from the hot exhaust manifold. And speaking of that... a good pair of gloves is a plus too. I'm not familiar with your truck model, but on the Pilot-House trucks the inner fender panel comes out, and if you pull the right front tire you have fairly good access to the valves. Maybe Ed can chime in on the earlier trucks. And again, on the B-Series trucks the clearance specs are; Intake .010" / Exhaust .014" / HOT. When you adjust the tappets think of the upper part as a bolt that's screwing into the bottom section (because that's basically what it is). Screw the upper part into the lower part to increase the clearance, and screw it out to reduce the clearance. Merle1 point