Leaderboard


Popular Content
Showing content with the highest reputation on 03/23/2021 in all areas
-
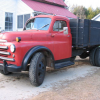
with front seat
 4 points
 -
a few older pics of the sugar house:3 points
-
the reason for the whole endeavor: temp indicates 7* above the temp of boiling water - syrup 1st filtering, via the paper and wool filters, into the stainless draw-off bucket drip, drip, drip.2 points
-
collected about 150 gallons of sap today, from yesterday's and today's "sap run"; not bad for my north-slope sugar bush. plan to boil a good part of tomorrow, hope to make another 3 gallons with what sap i've got on hand, and have some left over to boot. pics from the weekend: the evaporator, with it's homemade arch and commercial pans (g.h.grimm co) - 2'x6' setup not the fastest rig, probably boiling 18 to 22 gallons of sap per hour. the arch was converted from a 2x5 drop-flue rig to a 2x6 raised flue rig, thus the added box at the back, and the hole in the side of the arch where the drop flue drain used to be. getting close to the first syrup draw-off of the season. hard to see, but to the back right, the flue pan drain is visible (yellow handle at the back), above the arch and below the sap float box.2 points
-
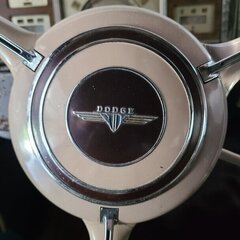
I have seen these in NOS on ebay and the sort. Look for a good part out car since your car like mine had some pretty high production numbers and good parts show up with regular searches. The grille panel pictured will be an expensive proposition to restore into something that will not show previous damages. M2 points
-
Ken, east on Kettleman, left on 88, right on Brandt.... then roll your window down, listen for the subtle sound of a flathead with Swiss cheese for an exhaust system. Or look on the horizon for the blueish white cloud...... that will be me. I’ll be on the track preparing to “school” those T-5 brothers ?
 2 points
 -
I'm with PA, I always found bibs to be uncomfortable. My father wore bibs all the time, though; usually with a big ball peen hammer in the loop. It was his favorite tool. He used it to drive fence staples, bust out boar hog tusks, and killed hogs with it. An all-purpose tool. ?2 points
-
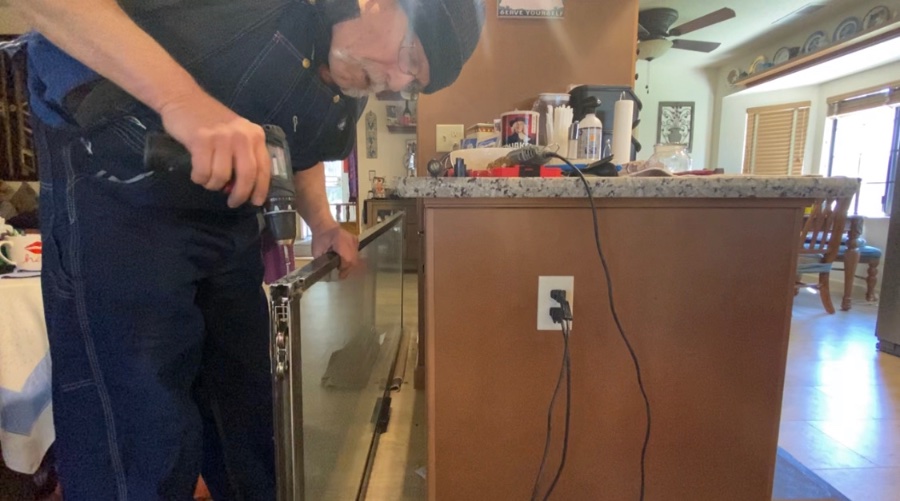
Ok, got it all done today. Yesterday was ‘D’ day but I couldn’t get it to go into gear while running and on the ground. It did fine while still up on jack stands. Today I hit it again and, with some advise from John T and Charlie C, I got it going. OMG - what fun. I should have done this 20 years ago, or at least 10. 1st is a little low and it doesn’t stay around long (10-12 mph), but after that its a blast. As today as the maiden voyage I didn’t want to wind it too much. A comfortable shift point is about 2,000 rpm and that’s 45 mph in 4th gear. I only did 1500 rpm’s in OD because of road conditions (mostly speed limit) and that got me 50 mph. I’ve still got the stock 4.10:1 rearend and 29” tires. With a red line of 3200 rpm (according to the factory manual) I should be able to do 60-65 and stay out of everyone’s way. Now on the Tim’s!2 points
-
I finally bought my first pair at age 66, because I got tired of wearing a belt. Once I get ‘em broken in, I’ll be well dressed for the tailgate barbecue. Anyhow no car work lately, but here I am putting new rollers on my patio door.
 1 point
 -
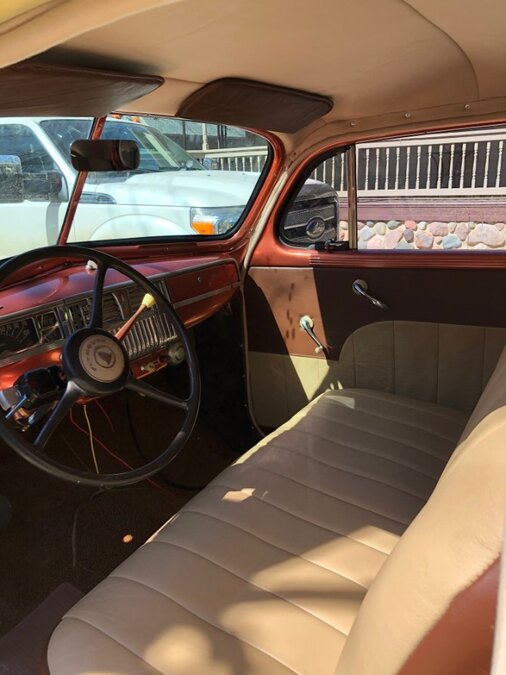
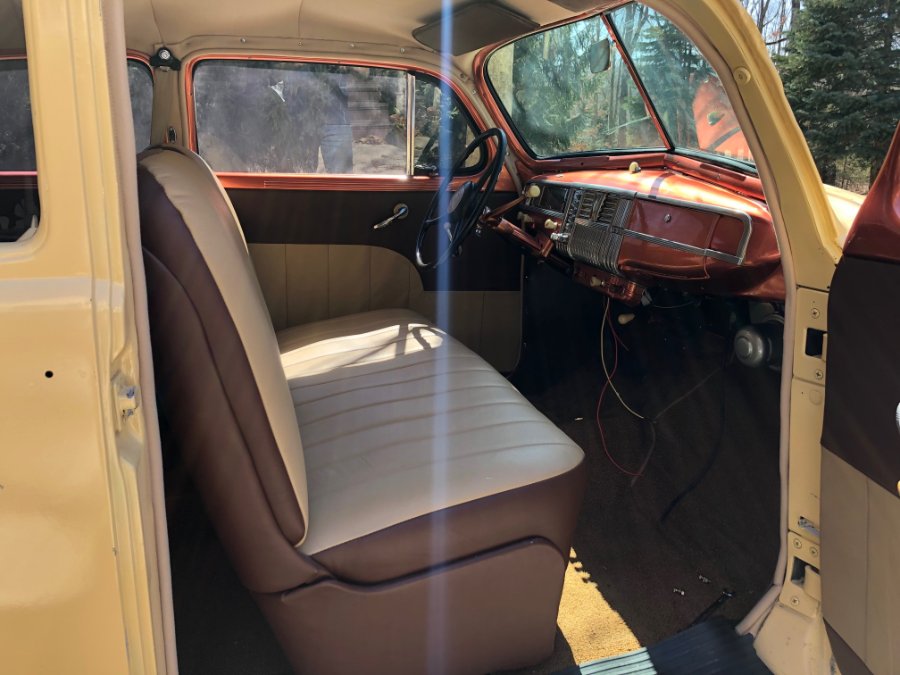
Do you have a wholesale auto trim business in your area.....where you could simply purchase a roll of carpet ... which you could then take to an auto upholstery shop where they could cut, fit and bind it? That's what I did and it all fits good. But costs a bit more. I had them do front, rear and trunk carpet (all the same color) and it all was good. They even made a "flap" in the driver side carpet which can be folded back to access the master cylinder for checking/filling brake fluid.....without having to pull the carpet from under the rubber sill plate. I use matching maroon rubber floor mats on top of the carpet to protect it. They can be easily removed if you wish to have just the carpet seen during a show.1 point
-
I am looking in my Hollander Interchange book on glass It all depends on what tyep of car you are looking to take th eold glass out of and put into your car. If the glass is original to the second car there isa very good chance and I would say kore like 75-90% chance that the glass is starting to delaminate becasue of the age and been sitting out in the sun. Just trying to remove this old brittle glass is not worth the effort becasue is it going to break if you hit an edge and remember that you now are dealing with 70+ year old glass. Save the time and effort go get new glass cut to fit your car. Why take the chance to put in old glass that might delaminate in a couple of years and have to spend the time and effort to replace it with new glass. If you are getting a coupe for the parts then keep the old glass as patterns but this is all flat glass and any good quality auto glass company can cut the glass for you. Also Steele rubber has quality rubber gaskets but they are not cheap. I replaced all the glass in my 39 Desoto 25 years ago. Well worth the time and effort. I can copy the page with the glass information but not much intercahnges Rich Hartung Desoto1939@aol.com1 point
-
It was pretty common in the day (50/60/70's) to move up one size when putting new tires on the car. General consensus was the larger tire gave a better ride. Worked Firestone retail in the sixties before moving to one of Goodyear's distribution centers.1 point
-
I am installing a custom made console with all kinds of creature goodies....one is also the rear camera displaying on the stereo monitor...as an added however I have this in a vehicle with multiple blind spots....enclosed van without windows....so in order to check my six at any given time even at speed on the interstates without scaring the bejebbers out of the guy behind me with reverse lights coming on....override switch and a couple diodes and camera displays while rolling forward at a flip of the switch. Another small mod to consider.1 point
-
I just went through the same thing with my conversion, trying to find the right drivetrain angles. the sites above are great but I also used this site: http://www.billavista.com/tech/Articles/Driveshaft_Bible/index.html. Since I am running a double rear driveshaft like the factory B3F 152 had, but hanger bracket had to move, spent much more time moving the rear axle pinion angle to get everything right. What I have found is that for ideal life of the u-joints, you want to be <3° operating angle but something >1°. There is a debate on running 0-1° angle, but most say in order to self lubricate you need at least 0.5-1° of angle for the u-joint but above 3° the life of the joint declines(unless you are using a double cardan style, common on front driveshafts for 4WD or some rear transmission output driveshafts). Dont forget the driveshaft angle itself plays into the deal, not only does the angles of the components but also the angle of the shaft plays in since you look at total u-joint angle between the component(axle, trans, etc.) and the connecting shaft.1 point
-
I'm with you brother except the fact is majority of our parent US companies have sold us out for the lower cost overseas made items they stock and sell...they have sent their molds, trained the folks and given away cast and mixing secrets for decades now.....all to put a dime in their pocket and in truth, they care less if you are happy. They glut the market, they make the bucks, sole source and umpteen retailers, they raking it in. It will not get better....1 point
-
The problem with a lot of these Chinese and Indian parts are they have no idea what the part is for. They are given the size and shape and they make it without regard for its intended purpose to cushion the body from the vibration of the power train.1 point
-
Nice. You're getting close Nick.1 point
-
Ya'll have piqued my interest. I also have a set of the Marmon ones Marc and they do seem pretty tough. Fingernail indent only if I press really hard. Since they are cheap I'm going to experiment with a couple different softening methods and come back with my results.1 point
-
I agree. It could be good deal IF the prices is right and you have a Tig/Mig welder,English wheel,a nice selection of dollies,and the skill to use it all. If that ain't you,stay away from it unless you can get it REALLY cheap and then preserve it and store it in case you have an accident and need body parts.1 point
-
Well.......it is a 1940 Plymouth grille shell but for me unless its VERY CHEAP I'd hold off buying it as the amount of work required to repair that one especially the drivers side thru the grille stampings.......also does it come with any of the stainless/chrome moldings and badges that attach to this sheet metal...........andyd.1 point
-
Lacking the special swedge tool one can cut the stud off flush with the hub/drum and carefully grind the expanded area away with a die grinder. Dremel type will work but much slower. The tool is just a special hole saw shaped cutter. If you have a drill press, you may be able to find an annular cutter that would work. Cut the stud short enough that the cutter will reach the drum face..
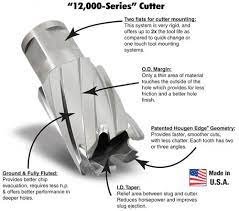 1 point
 -
I still farm and do occasionally partake in the bib wearing experience. More so in the winter as I find them a little hot and confining in the summer - but I do own a pair of pinstriped bibs for those more discerning farm social events.1 point
-
If his are from either China or India likely the rubber mounts will last if lucky a couple years then start cracking. At least India rubber doesn't have the awful stink chinese rubber does. Too much china clay in rubber is one reason for cracking and hardness. Now days take what you can get. That's the way it seems to be.1 point
-
If a rubber part needs replacing, I mostly try to find a match in polyurethane. It will not deteriorate over time. It’s available in black and once in place, you cannot tell the difference. I have a pile of highly inferior parts made by the junk manufacturers across the pond that I will never use. I would not even re-sell them with good conscience. The only way to stop these inferior parts from showing up in your order be it rubber or cheap metal is to make sure they stay on the supplier’s shelf. Insist on made in the USA as much as possible and keep unscrupulous manufactures out of the loop. THEY DO NOT DESERVE TO INVADE OUR HOBBY WITH CHEAP GOODS THAT MAY COMPROMISE OUR SAFETY AND THIEVE AWAY OUR HARD EARNED DOLLARS! My rant for today. M1 point
-
after a year off, back to sugaring this spring. made about 3 gallons of syrup over the weekend, but the season may quit soon, as we will be having about 3 or 4 days of 60* weather. at least the overnight temps have been low to mid-20s. new tank for the main line - about 210 gallons capacity using the old main line tank from a different sugar orchard for collecting now about 175 gallons capacity. edit: capacity of this one is close to 250 gallons. i've since moved the tank to be centered in the bed, up against the headboards. sap is heavy, and it made the dump body lift a bit on the driver side when driving over bumps etc. this can be seen the the above pic, as the body is squatting to the passenger side (gap in grille above frame rails is uneven).1 point
-
Here are two threads I started about my experience with engine mounts, maybe there will be some useful info for you. https://p15-d24.com/topic/50844-engine-mounts-p15-caution/1 point
-
Good idea. I made a new thread called Backup Camera and Stereo Schematic.1 point
-
That is really good to hear. I have done the front disc swap, 12v conversion and new wiring harness throughout. I have a LA360 that I had considered swapping in but, the more I drive it with the flat 6, the more I love it. I really think the OD and rear swap will be the cat's meow for me.1 point
-
Just wanted to do a quick update. Installed the fuel tank and lines. She got a new water pump also. Molded hoses and fan belt. Waiting on a few odds and ends. Couldn't stand the engine color any longer so I did a quicke prep and paint. VHT cast iron because I had a can on the shelf. Also put some blue lacquered cloth plug wires. Looks much better in my opinion. Doing the brakes next starting tomorrow. Hope to be driving it soon.
 1 point
 -
The BBQ will be awesome this year…!! ...Its a gathering of world travelers and Mopar know- it- alls (lol). A place to say “hey” to vintage trucks, cars, and the old guys who love them. When the event is underway, a few forum names would come up....some asking questions like "wonder what he's like?" "wonder if he'll come out next year?" or "wouldn't it be great if that guy was here, I'd like to talk with him". Each year I give out an award to someone who symbolizes the fun of meeting a person known only from the internet, someone you’d hope would be at the BBQ. It's what created the "Wish You Were Here Award". An award that reminds everyone on the forum, no matter where you're at, you're invited!! Past winners: 2008 Don Coatney 2009 Merle Coggins 2010 Hank aka HanksB3B 2011 Ed aka Young ED 2012 Bud aka Budstruck 2013 Tim Adams aka Plymouthy Adams 2014 Mark aka ggdad1951 and Davin aka Desotodav 2015 Joe Hanely aka 52b3 Joe 2016 Dave aka Dave72dt 2017 Rob aka Dodge4ya 2018 JB Neal 2019 Todd B This gentleman has the distinct honor of winning the award two years in a row. Why? Because, it's only right that he has the opportunity to meet his friends at a BBQ that’s actually gonna happen! This is what I said last year... “The reason so many of us have become friends is because of the continued efforts of one person. Someone who has been working at this for quite some time. He’s the gentleman behind the curtain, the trucker who tunes the algorithm when it's out of rhythm. He’s a dude who loves the old iron just as much as the next guy. He’s the reason I have so many friends across the globe. I can’t thank you enough!” Whether or not he can make it to the BBQ, is yet to be determined, but he still deserves the recognition! • 2020/21 GTK Webmaster • Forum Admim/Webmaster Extraordinaire Congratulations again Sir!!! Look for your trophy in the mail for real this time my friend.1 point
-
i agree fellas, beauty and class1 point
-
That's what I had installed last year and only regret that I didn't do it years ago. My rear brakes are 50 years newer and I installed front disc last year also. Now I just have to live long enough to enjoy the swap.1 point
-
The only way to truly address this would be to pull the manifolds off and thoroughly clean them. If it were mine I'd ignore it and fire it up, unless it's heavy rust flakes. You could always spray it with a little penetrating oil and wipe out what you can reach, but I don't believe it'll do any noticeable damage.1 point
-
Very nice car and a body you do not see very often! It has tons of potential to become a class ride. This site has all the info to fix your car up and a great bunch of enthusiasts. Welcome aboard!1 point
-
May I donate to the remove the Ford label fund? lol1 point
-
I ordered and installed brand new bias black walls on my '38 Plymouth. I figure it was a lower-priced model car, for the average working Joe or Jolene. Who buys the cheaper car in 1938 and puts white walls on it? That's just my opinion. I went with Coker. Bought them from Summit Racing web site. Free freight. Coker was charging a premium for freight. For my 1953 Chrysler, I bought brand new Coker Radial, wide-white walls. Expensive? Ya, sorta I guess. But the old car deserves it. The Chrysler was a premium product. Good chance I figure that back in '53 folks might have been more inclined to buy white walls and fancy chrome spoked rims. The difference? The radials float along and offer a cushioned, track-free ride. However my big old Chrysler does not have power steering. The bulge in a radial tire makes it harder to steer in low speed applications. Like pulling into a parking spot. Or parallel parking. The bias are firm and do not flex. Low speed, strong arm steering wheel manipulation is easier. However the bias tires do want to follows ruts, cracks in the road. Sorta like they have ADD. Ya gotta be ready with the steering wheel at all times. I read that putting radials (they bulge and flex) on original rims designed for bias tires, can cause pre-mature failures of the old rims. Cracking can develop from all the tire flexing. Transferring additional stresses onto the rim. Seems believable to me. I run tubes inside both types of tires. I am fortunate to own 2 cars and 2 tire options. Spoiled. Preference today? For me personally it makes no difference to me. Both tires have good and bad points. I just can't imagine putting wide white wall radial tires on my '38. For me it just doesn't work. You do whatever you like and I'm good with that. Just leaving my experience and opinion for you. - K

 1 point
 -
Nobody said that. However bias plies have issues. If you are looking for a load range tire then bias plies shine there, every where else they are a poor second. How it looks is a personal thing so I can't comment on that. But I have daily driven bias plies and radials, I prefer radials.1 point
-
$1500 for dimply things on the sides of my tires...that'll make you reconsider how cool you want to look ?.1 point
-
Bias plies do handle differently that radials. When they break loose they do so in a different manner as well. https://mechanicinsider.com/radial-vs-bias-ply/1 point
-
Yes, bias ply tires are less expensive. I bought a set of Cokers last fall, shipped to my home for just over $700 shipped to my door, including tax. Understand though, I don't drive the long distances you mention. If I did, I'd have spent the other few hundred dollars on radials. _1 point