Leaderboard


Popular Content
Showing content with the highest reputation on 01/12/2021 in all areas
-
Old jeeps, AMC cars..really old AMC Ramblers and a host of other cars and trucks had tapered axles. Brake shops and regular repair shops had these drums off quickly...no fooling around...good tooling ...knowledgeable mechanic. Get'er done....the customer needs their car next day. Diy'er newbies might take a week or more for some to get two drums off. Just the way it goes first time. I started on these type drums and axles when I was sixteen. Never waited for them to pop. I got them off just like the old guy up the street did them. He had a pretty good sized hammer and seemed like a strong old man. He taught me and now I'm just like him? I've removed hundreds of tapered axle style drums from the small Plymouth's to the big V12 Packards. All good exercise too.3 points
-
Little farther along. Need to attach the seatbelt strap to the B pillar and then hide all those screws.
 3 points
 -
I agree with this. I have pulled dozens of drums without any trouble. One was on a car where the rear axle was buried in the ground. That was probably the toughest but I got the drums off the same day I started using just the puller with no penetrating oil or heat. If done correctly, most drums pose little problem. A good puller is essential and correct use is just as important. Never hit the centre large piece that lines up with the axle on the end as this can cause problems to the bearing races and internals of the differential. There should be a wishbone that goes on the large central piece and you pound on that turning the central shaft in a clock-wise motion. Don't be afraid to REALLY POUND HARD on the wishbone. Brute force is necessary. As mentioned, do not fully remove the axle nuts. Just undo them a few turns. When that drum pops it will make a VERY LOUD noise. Only the drum will come as the axle is held in place by the backing plate. Without the nut on the end of the axle, the drum, with the puller attached, will launch itself into you or anything else like another vehicle that is in the way.3 points
-
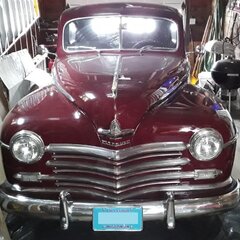
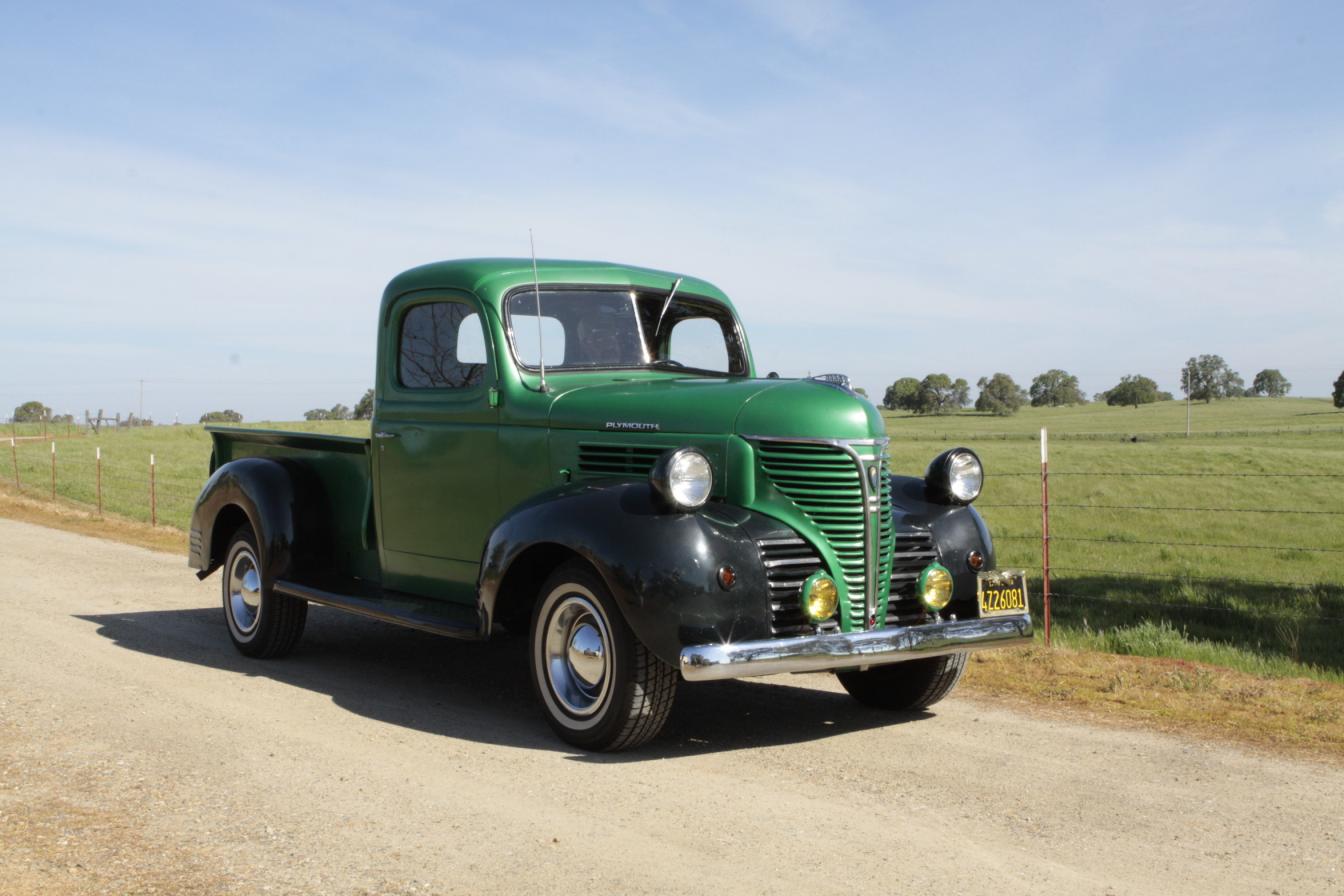
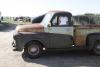
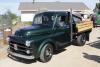
Finally getting around to introduce myself. I have post on some topics already cause I thought I had something to add, and wanted to return the favor. I have learned a lot since finding this forum. I purchased a new-to-me 1947 Plymouth Special Deluxe Club Coupe, on August 14, 2020, from a 90 year old gentleman in Ohio. I don't know much about the car, because he couldn't remember much about the car. He did say it was just like the one his aunt had, that he drove her to shopping and church in and always liked. Also, that he had not had it long and it was from California. Only bad things that he could remember was it pulled to the left, and the wiper motor didn't work and was removed. We (My wife, stepdaughter, and myself) took it for a test drive were the water pump decided to grenaded and puke coolant about 3 blocks from his house. We got it back and it was in such nice shape, despite the few problems we bought it. Had it transported back to Wisconsin. Then the fun started. So far, I replaced the water pump, thermostat, hoses, clamps, and flushed and filled the coolant system. Got to really drive it (1-1/2 miles), yes it pulls horribly to the left. Also the battery didn't seem like it was charging after starting and turn off the engine 4 or 5 times (not in a row). So, started doing research and found your helpful group. Changed battery cables to 3/0 welding cables. That lead to having the generator tested, it worked. Decided since it was out put new bearing, bushing and brushes in it. Also, bought a new regulator and had it tested with the generator. The regulator was good but the shop said it should be adjusted it was not putting out enough at operating temperature. The shop adjusted voltage output, and cutout amperage. That takes up today. Still need to put the generator and back in and get it to repeat what was seen on the test machine. Need to install a new wiper motor. Need to get the headlights, parking lights, taillights working correct to install turn signals, Then the steering issues. So, probably soon will be picking your brains. Thanks, Cory P.S. - The few things I definitely have learned on this forum are to have P-15 Shop manual, P-15 Parts manual, Owners manual, and MoTor's manual. Which I have. Also how to use the forum search and I have.?


.jpg.a175f49e95255413cca09f7e1b2c87da.jpg) 2 points
2 points -
2 points
-
They can be difficult. But with the proper puller it's not too bad. I don't recommend using anything on the tapered shaft upon reassembly as power transfer relies on having a clean metal to metal fit. If you ever decide you need to pull your rear brake drums you are welcome to borrow my puller, since you are fairly close by.2 points
-
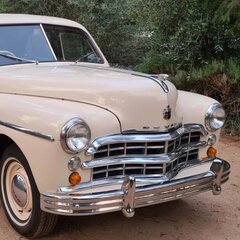
Hi all, have just joined this site and am impressed with all the information and knowledge available here. I have purchased a 49 Dodge D32S Special Deluxe and of course have a few questions. Location of a chassis number? It has an alloy tag on the firewall but is there a stamped number somewhere? There was no jack with the car and believe the original is a bumper jack, but figure a small trolley jack will do the job? Keen to find out the differences in the different variants of these cars. Cheers Bill
 1 point
 -
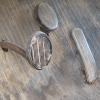
It goes in the groove on the inside of the torque tube to hold the bearing pieces inside.1 point
-
I have done adjustments hot and cold. Cold works well too. You can add .002" to the spec and set 'em cold. I've had success both ways. Remove all plugs. Start at #1 TDC. Wiggle both tappets up and down. Both will move as both valves are fully closed at TDC only. The wiggle is your proof both valves are closed as there should be the clearance. Unless of course one is set too tight. Set #1 valves, both. Look at 1 fan blade and rotate it 120 degrees. Got to valves for #5. Repeat process above. Then carry on. The order is 1 5 3 6 2 4. When all 6 are done you will have rotated the fan blade two full revolutions.1 point
-
No, goes like this.....1 point
-
I talked with a repair shop yesterday. Was very helpful. All pro clutch and drive line repair. In Abilene. His opinion was it was not common but happens, needs to look at it to see if repairable. Prices seemed reasonable, roughly $160 labor to replace yoke and re-ballance + cost of new yoke. I will be using them in the future at some point. Imho, I probably bent it removing the old original u-joint ... bend it back and it works fine. I drove it yesterday and while only in town, Am sure the problem is solved.1 point
-
Sometimes a very hard part to find OE. Just use an internal snap ring using 90 degree snap ring pliers.1 point
-
I think it looks kind of like this. I think it is part number 1140 557. They called it a snap ring. One goes on each end to hold the bearing pieces in place.1 point
-
My truck was originally from Iowa. The Iowa title had the chassis Serial Number on it, not the engine number. While that may not be true for all of Iowa, it's at least how it was done in the small town where my truck was first purchased.1 point
-
That sounds like a good winter project for inside. Just pay attention to where the rotor is pointing when you pull it out so that it goes back in the same way. Check for bushing wear. Clean and inspect the advance weights and springs. Clean and inspect the points plate and associated advance mechanisms. Test the vac advance unit with a vacuum pump to see if it holds. If not replace it. Kanter has replacement units. They're pricey, but seem to be good quality. I've been running one on my truck for a few years now. Then just reassemble with new points, condenser, rotor and cap. Then you have your spring tune-up half done. ?1 point
-
P18....P17 was sub model of the model desigination1 point
-
Maybe the battery cables aren't large enough.....1 point
-
Thank you ratbailey for posting this issue and also to those who answered. Happy Wiring1 point
-
I did some work on the QuadCab a few years ago, and the alignment guy forgot to adequately tighten all of the adjustments, something I didn't find out for a few hundred miles of highway driving until the truck wanted to veer into oncoming traffic on a regular basis. After the alignment was reset, I went back a few hundred miles later with the same problem, swapped sides of the front tires, and the pull went the other way...so those brand new tires had gotten the radial pull, not eligible for road hazard warranty claim (which was a load of baloney), so I had them put those tires on the rear for 25k miles, which helped with steering but reduced the treadwear...something to bear in mind on steering issues1 point
-
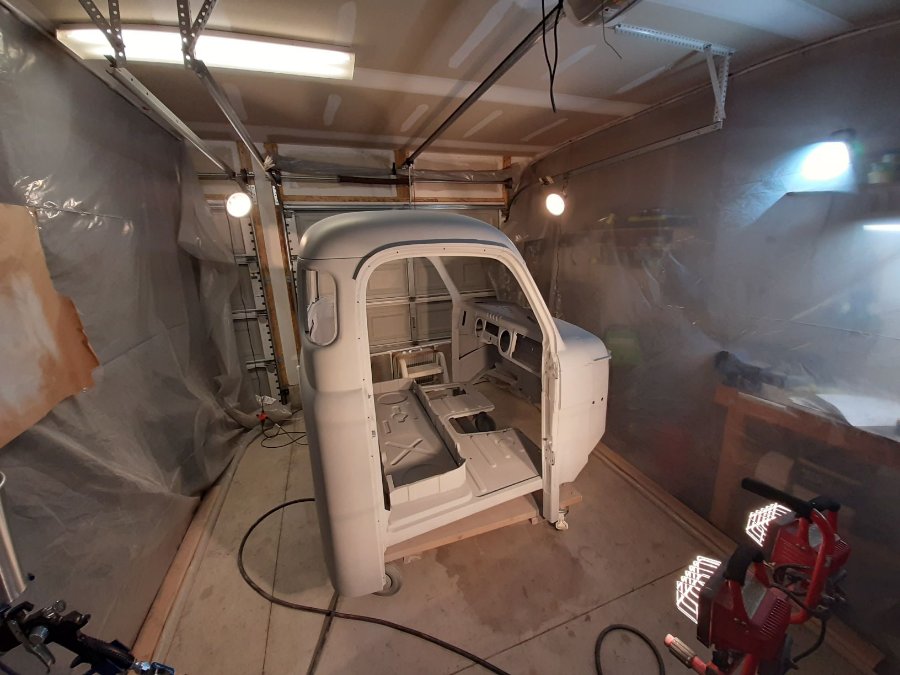
Set up a cheap spray tent in my garage to try and cut down on getting dust everywhere. Worked pretty well except for the fresh air fan being on the floor and pulling in cooler air. I was able to finish priming the cab, really happy with the results for this being my first time. There are a few spots on the roof that I'm going to have to do some additional body work before I put color on, but good enough for now. I plan on temporarily mounting the cab back on the frame this week to free up some garage space. Once I have a few smaller pieces ready, I'll try my hand at base/clear and then work the cab.


 1 point
 -
It really isn't a problem IF you have the right puller,and a little patience. It's just more difficult than pulling the typical modern rear brake drum. BTW,I saw where you asked about lubing the axle end. No,you don't want to lube it,but you do want to inspect it carefully for dings,rust,and any other problems it might have before you put the drum back on. A LITTLE bit of polishing with an emery cloth if it is rough/pitted can be a big help when you go to pull it the next time. You are NOT looking for a "chrome-like" finish. You are looking for smooth with no burrs. Same with the inside of your drum where it slides over the axle. Check it for smoothness,also. BTW,30's Fords are afflicted with the same problem. Last pair of those suckers I pulled were on a 37 pu that seems to have spend several years in a stream bed before I got it. When I finally did get the drums off,they were too pitted to use. No real surprise. I bought it for nothing money to basically get the good serial number off the chassis. Sold the front axle for more than I paid for the truck.1 point
-
THAT is the sort of thing that makes this board so special. I have seen offers like this,as well as free parts offered to other Mopar fans on this board fairly often,and I have NEVER seen it on any other antique auto board. Not even once. Good on you,Merle! If you ever happen to be within 200 miles of where I live and have some sort of mechanical problem,send me a PM. I check the board every day.1 point
-
A worn timing chain will cause timing to fluctuate as well.1 point
-
A paint stirrer stick makes for a handy, non marring gaping tool, cheap too.1 point
-
The leak from the throttle area is just a symptom of the real problem. There should be no liquid gasoline in that area, it should already be atomized at that point. Most likely the needle and seat is not sealing well, the float is improperly adjusted or defective. If it only leaks after running at normal temp or above then shut down, it may be boiling fuel in the bowl. Just to be clear, changing the throttle base will not fix the problem as it is above that part.1 point
-
Patience is the key. You can let the puller sit over night while it applies pressure. Just make sure you only loosen the nut, not remove it, because when the hub lets loose it can fly on you. A good hammer to bang on the tightening part of the puller is important as well. Once you get it loose for the first time in who knows how many years it should be easier later on, assuming you regularly inspect the brakes.1 point
-
Got it. I moved it just above the shifter but with enough room to hang my fingers out to reach the switch easily.
 1 point
 -
I got my complete harenes from Rhode Island wiring service too. Top quality!1 point
-
RI is a great choice...I have installed several in 1946-52 MoPars. Better than Y&Z....weak connector and labeling issues.1 point
-
There is a company that makes the wiring harness that looks original. Which is probably what I would do on a resto. I also believe they can supply the proper looking wire for anything you may have added. It's under the links directory at the top of this page. http://www.riwire.com/1 point
-
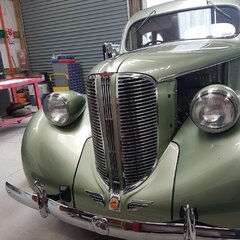
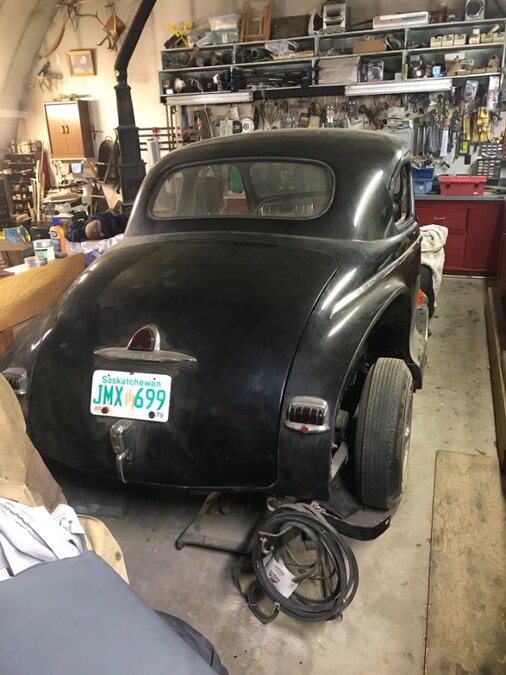
Welcome to the group. I am just down the highway from you, I’m in Saskatoon. I have a 1950 Dodge Special Deluxe. I downloaded your picture and reloaded it.
 1 point
 -
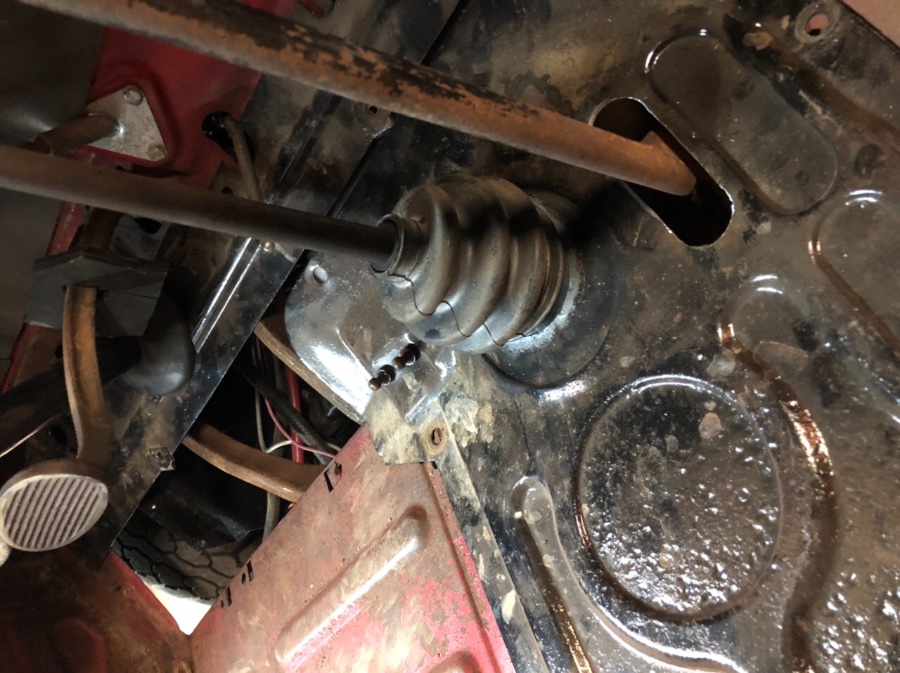
Not the most correct boot, but i like to run with what i have. A cv boot worked perfect in my eyes.
 1 point
 -
Galvanic is not a problem whatsoever , almost all 25 inch blocks came with brass tubes when manufactured in Canada, and they slide out slicker than a whistle with little or no problem.1 point
-
sometimes it is not just a money thing as it is to rise to a challenge and make a part yourself, as the man says, it is not anywhere near rocket science...just an application of elbow grease to metal...I say go for it and I have all faith you will succeed in your endeavor...many folks here do not have a well equipped shop and little experience in fabricating items....they buy from the shelf, while there is nothing wrong with that, nothing wrong with making your own either.1 point
-
FEF was recently in a shoot....
 1 point
 -
Cool! Welcome to the dwell meter club. Have you set it up to check your dwell yet? How about a little report on your findings? Thx.1 point
-
Reviving this thread today as I learned something new about points. I located an article in an old "Skinned Knuckles" magazine. Dated Nov 1997. All about dwell and ignition timing. I was intrigued to learn that for every 1 degree that the dwell is adjusted, ignition is also adjusted exactly 1 degree. That's considerable. Many folks are still adjusting their points gap with a feeler gauge. That's not good enough. Sure it'll get you home. A matchbook cover will get you home too. However you don't really know how far out of spec your dwell time is. The fibre rubbing block on the points arm wears as it rides up and down the distributor cam. It's wear affects points opening time and dwell. Additionally points contacts wear down. Gap increases. This also effects ignition timing. Maybe later we are up front at the crank pulley with a timing light trying to twist the distributor. We run out of adjustment. Still we can't seem to get the timing mark lined up as per OEM specification. As the rubbing block wears, the points wear, the ignition timing retards accordingly. All this adds up and compounds. If a car is new to us and we have little confidence in the history of it's maintenance: Maybe we should start with new points? They are cheap. A new condenser. Get a dwell meter. Few people know what they are for any more anyway. Find a used one for good price. Set the dwell to spec. Record dwell with the engine running . Set the valve clearances hot. Set A/F mixture screw with vacuum gauge to assist. Re-set engine idle RPM. New spark plugs and lead wires, rotor and cap sure won't hurt! Replace any rotting points wires including the wire from the coil to the distributor. Ensure the isolation block or washers are in place at the side of the distributor where the points wire enters. Then finally set the timing on the crank pulley with a timing light. You should be left with a well tuned car! (assuming, vacuum and centrifugal advance, carb settings are all working well). As you drive it, the points ramp block wears down. The contact points wear...Little by little we lose engine performance as ignition timing retards. Maybe not enough to notice it until we see that we are burning more fuel. Maybe travelling that hill home slower than we used to. Keep on top those wearing variables. Get a dwell meter! Get to the root of the problem. If I grasp all this correctly it seems to me, just setting the timing with a timing light and twisting the distributor is not the right approach. Start with points, then the dwell time...Then after, take out the timing light.1 point
-
When using a dwell meter, I generally overlook the actual measured gap. I don't bother attempting to learn what actual gap measures in at by using a feeler gauge. I use the dwell meter to measure the dwell time. I adjust according to what the meter shows. Points surfaces become mis-aligned as they wear. A feeler gauge can produce inaccurate recordings when measuring worn points. If you happen to have a Motors Manual there is good info in the general repair section under the Ignition System title. One example is provided in the illustration below. The dwell meter is a more accurate precise measurement. A feeler gauge can be accurate on flat aligned points. When points are worn, the feeler gauge often only gets you in the ball park. If your car seems to be running fine and you are hesitant to tweak the dwell, you don't have too. The dwell time is the amount of time the points are closed. My understanding is this is the amount of time that the coil can build up a high electrical discharge. Generally, more dwell time attributes to higher voltage at the pug tip when it arcs. A nice thick, hot blue spark. Especially important under a heavy torque load such as a hill climb. I deduce that too much dwell introduces the laws of diminishing returns. Timing should be checked and re-set after the dwell is adjusted. Additionally any changes to the air idle mixture screw will also effect idle speed. A vacuum gauge is helpful here too to set the idle mixture. Then adjust the dwell and idle speed. Then the timing light comes out. Worn distributor shaft bushings will have the timing bouncing around. Seen when using a timing light. Additionally a sloppy worn breaker plate may also net erratic timing. The condenser, the tricky little variable that can also be troublesome, I just go ahead and change out if I do't recall or know the history of. I've had good luck with decent quality condensers that work. Others will tell all sorts of stories about cheap, crappy, brand new, condensers they had to deal with. In addition to all those variable...Theres the coil, cap, rotor, spark-plugs and wires, vacuum and mechanical advance mechanisms. Points spring arm tension. Lol, a can of worms! It is fun though. Sorry I'm getting off topic here. Keith
 1 point
 -
The factory didn't supply a shift boot for the floor shifts. The floor mat was cut tight to the transmission tower. This from looking at Don Bunns book and truck sales films.1 point
-
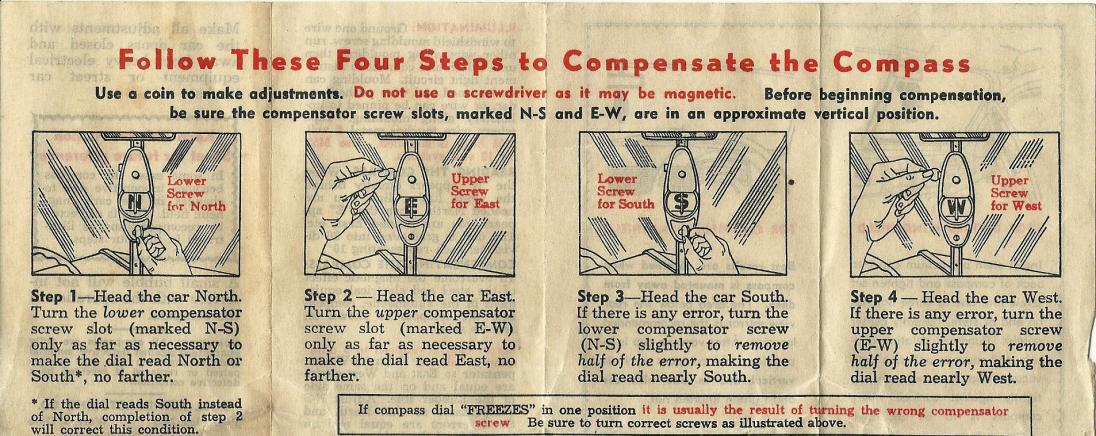
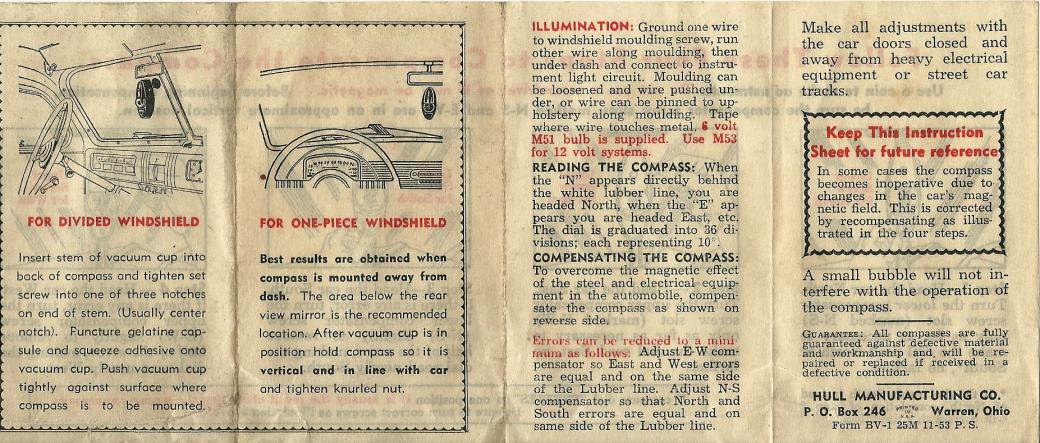
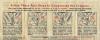
Hull Compass instructions.
 1 point
 -
If you want to see a lot more pictures of the BBQ they've been posted on the DPETCA gallery site: http://dodgepilothouseclub.org/gallery/v/Clements_2011/ Here's just a few more:


 1 point