Leaderboard


Popular Content
Showing content with the highest reputation on 01/04/2021 in all areas
-
Decades of huffing brake clean, flathead exhaust fumes, and gear oil has got me looking this good today. Imagine what 10 years of welding fumes will do for a guy's complexion?2 points
-
Wow...that's gotta be the very rare experimental 14 cylinder W block engine.2 points
-
Sniper, Yes. The tip is longer by 1/16". I am swapping them out at NAPA tomorrow for Champion 592. They R45S) are for an eight cylinder not a six. Thank you for your help. I wasn't about to risk monking up my Valves. When I bought the car in 2007 it had R45 Plugs in it not R45S they (R45) measured the same as Champion 592 7/16" into the block from the top of the threads to the bottom of the tip of the plug. The R45S measured 1/2" That was what bothered me as I have heard of guys bending a valve by using the wrong plugs. Tom2 points
-
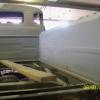
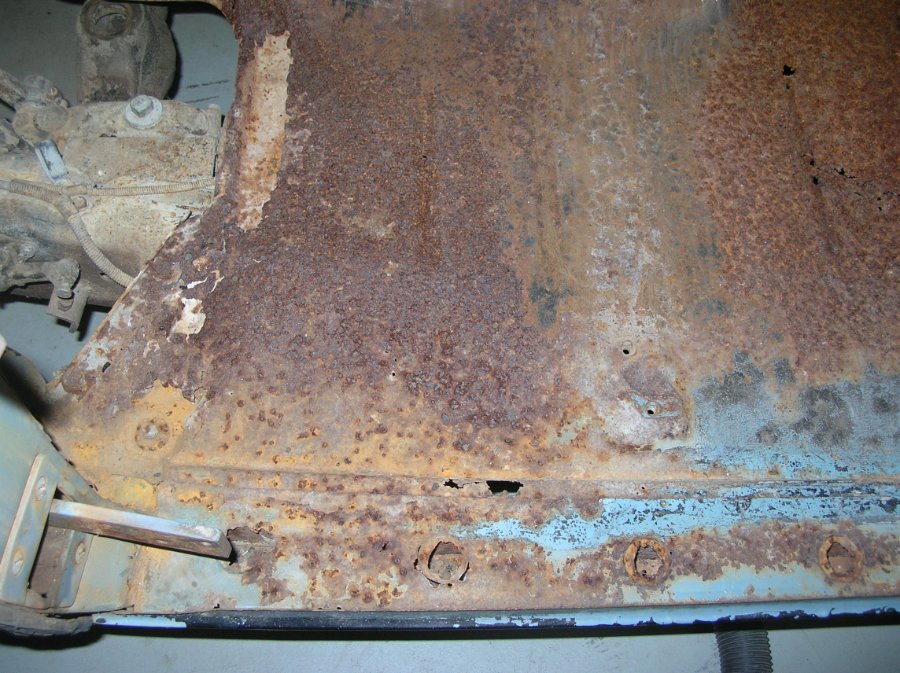
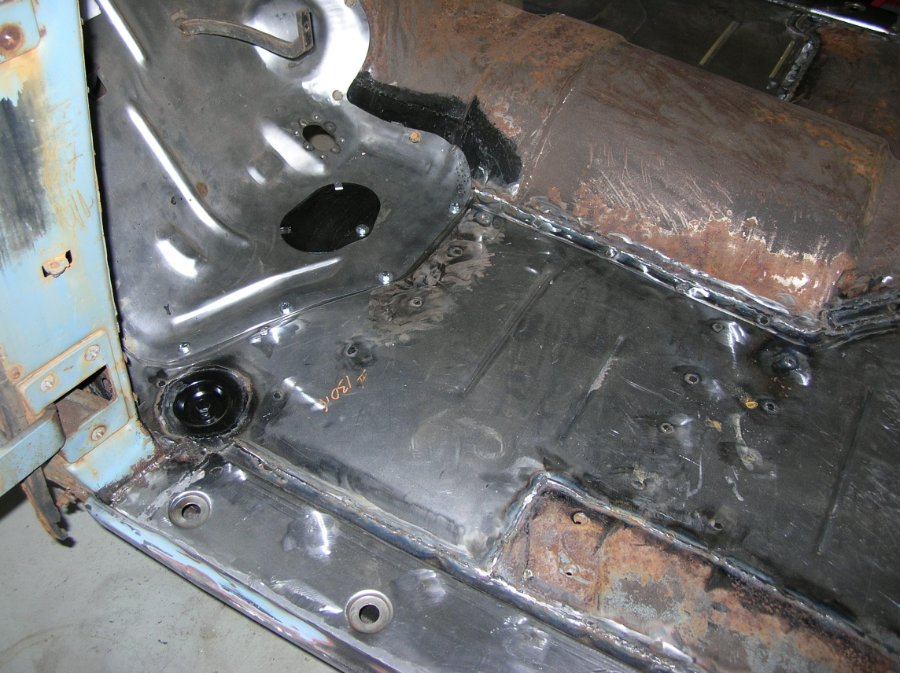
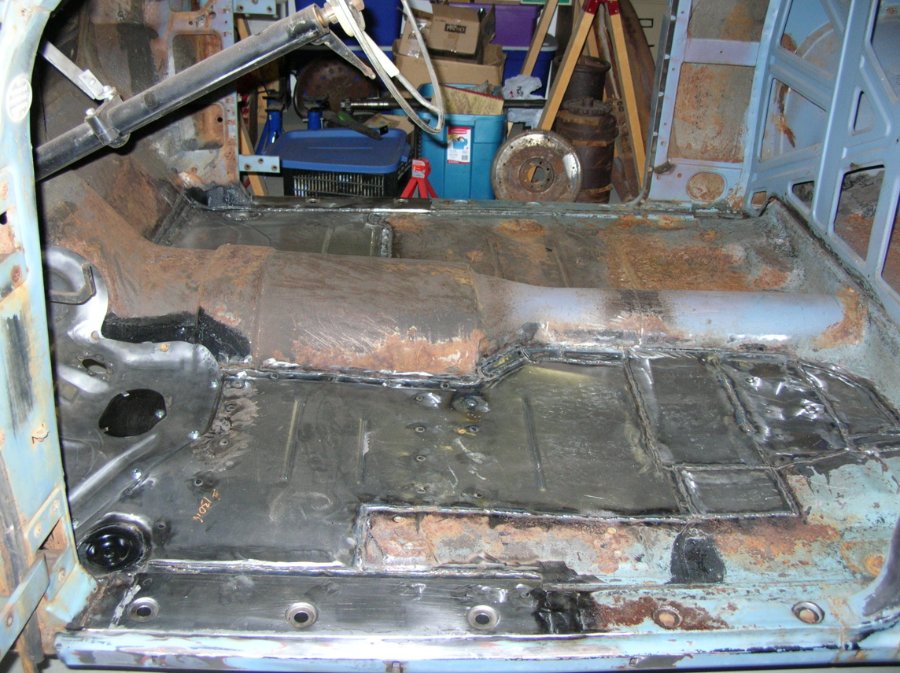
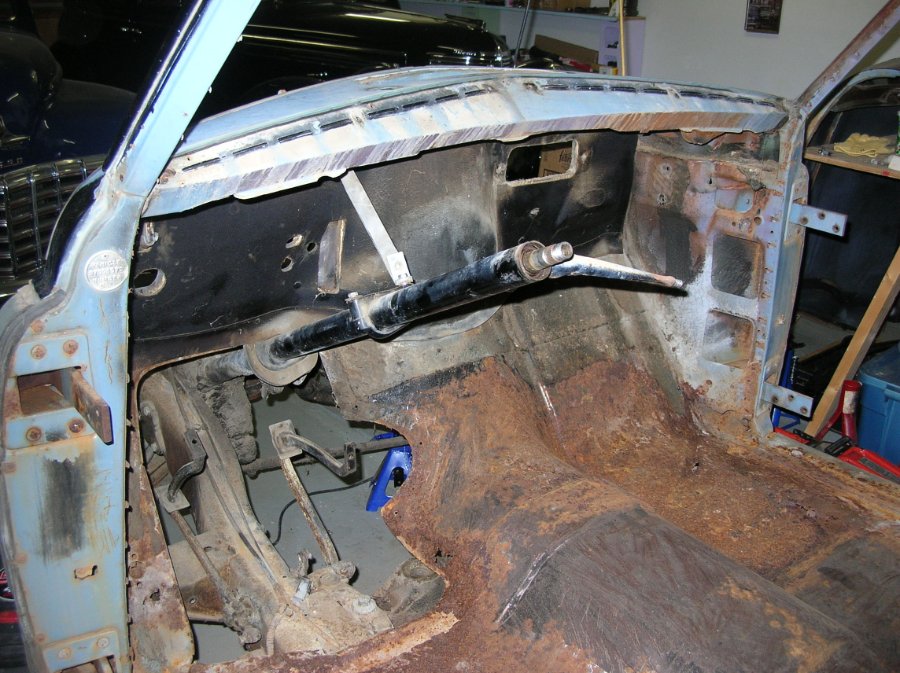
I wanted to learn to weld so I could replace the floors and rockers in my '51 Dodge D39 business coupe. I bought a second hand MIG welder from a neighbour. It was not set up for gas (argon and CO2) but had the necessary portals for this. With no gas it would spit like crazy but with the argon/CO2 being used it made a very nice weld. I did not know how to weld when I got it so enrolled in an evening welding class at the local college. Great instructor. It was eight classes of three hours for MIG and TIG welding. It was supposed to be half and half but after one session with TIG, I asked the instructor if I could go back to MIG and practice as I had a MIG welder and would never use TIG. No problem was his answer and he would check on me and a couple of other students wanting to practice MIG. It was a great course and I learned a lot. I highly recommend taking a course rather than relying on You Tube videos. Before and after pictures of the welding on my '51 Dodge. I have used the MIG welder occasionally since on a few other things as well.
 2 points
 -
Horses for courses. Wouldn't have been the first time that he has worked on the flathead and probably shows how durable the low compression sidevalve is. Would have been plenty of home mechanics back in the day doing some similar refurbs to keep the wheels on the road. Good to see another old car guy sharing his stuff. Flip flops crack me up!2 points
-
It’s seems the Chinese scale model manufacturers have not yet found this web site. For if they have they might have learned that an inline six 201 motor doesn’t have chrome valve covers. Don’t know why I never looked under the hood of my scale model diecast cars before.

 1 point
 -
My latest toy showed up this morning. I have put off learning to weld for too long. I'll be 50 soon. Never too late to start I guess. I looked around at entry level Miller and Lincoln welders. 110V and 220V. I compared prices, settings, quality and read internet ratings. I began to realize that the entry level, home hobby welder market is very competitive. Top name brands utilize off-shore labor and materials too, to remain competitive. I decided to look into a made in China welder. Not ideal, for some reasons. I agree. I weighed the pros and cons. Read the reviews. I've never welded. I want to try my hand at it. This one covers MIG, TIG, Stick, accepts gas, and flue core wire too. The price is extremely low when compared to leading brand name welders. You get what you pay for. My welds will suck no matter what I buy. I'll wreck stuff no matter what I buy. The reviews on-line are promising. What the heck, I went for it. I can play around and learn without spending 4 digits on a welder. If I get half decent results and like it, I'll buy a better one some day. If I suck and just burn up everything? Well, that could very well happen. So I'll have invested less for my experiment. Next I'll tie into my 220V dryer hook up. Its in the wall right in my garage. I think I'll add a switch so either the dryer or the welder is on. I'll try some 6013 and stick weld first. Wish me luck. Much reading and experimenting to come. Anyone want to come show me the basics?....I'll take ya for a ride in my 53 Chrysler. Keith
 1 point
 -
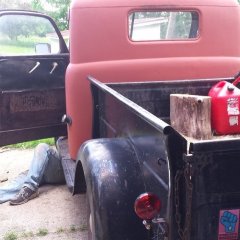
Below is an article that I wrote for my Local car club. Just think of how many times that you have been working on your car or truck, modern or antique and you are alone in your garage? We all have done this numerous time, Think of when you change the oil and your modern car is up on car ramps and you are under the engine taking off the bottom cover and then draining the oil and oil filter. same when working on your antique or older car. Do you use a bottle jack to hold up the car with only a very small point of contact to hold the 3000 lb car up in the air and did not use a hydraulic floor jack to also support the car or did not put a jack stands under the rea axle when pulling a rear drum and using a drum puller. Then do a brake shoe replace. Just think about the potential for an accident to happen. So read the article below and ask you kids for a set of baby monitors. They do not have to be a two unit but need to used so that your wife or someone in your home can hear you if you ever need help. Makes a great Birthday or even Xmas present. It is one of those safety tools that i hope none ever needs to rely upon, but better to be prepared. Rich Hartung Desoto1939@aol.com1 point
-
A Flathead Chevy? What it appears! ?? DJ1 point
-
? Chrome V-8 valve covers too...1 point
-
I think the shaft you refer to is the clutch shaft. You should be separating the transmission from the bellhousing so there is no need to do anything with the brake and clutch pedals. There should be 4 bolts that attach the trans to the bell housing. Once they are removed, along with the drive shaft and such, the trans should slide right out. If you are attempting to remove the bell housing with the trans you will fail. The bell housing wraps in behind the flywheel and won't come off without removing the flywheel first, which involved removing the trans and clutch.1 point
-
For some reason your vids make you look older But enjoy, trial and error is the facts of life ... videos give clues but actually doing it gives experience. I am a few weeks ahead of you, bet you surpass me quick as you learn.1 point
-
I really enjoy your style. Its very unique. Keep it up.1 point
-
Dumb things like using a razor knife ... you pull it towards you, and you thinking ... hope it does not slip. It does and you probably need stitches. But we knew what was going to happen ahead of time. Kids, they pulling the knife, it slips ... happened so fast they no clue what happened. Is how we learn. I remember the weekly Monday morning safety meetings as a union carpenter ... think it was really just a chance to let the men get over their weekend hang over. Ladders have always been the biggest issue. Funny story ... as a finish carpenter, I remember looking out the window and a framer falling off a 6' step ladder while doing some fascia. He actually fell off it 3 times ... uneven ground, issues ... After 3rd time, he looked like the Tasmania devil and destroyed the ladder. Was so funny to watch ... ladder spinning around and tossed to the ground. Then a big stick and beat it to submission. Just saying sometimes we get ahead of selves ... the ladder never did anything wrong. Work smart, work safe1 point
-
I am a master of the bigger the blob the better the job school of metal joining. lol1 point
-
S means extended tip1 point
-
I wish kids would read this and learn ... kids never listen. Years ago when was 22 years old, worked in a Bandag retread plant. At one point we were doing 176 tires a day. High production shop. In order to meet this production ... imagine if you will, a 30' long chamber filled with air. At 110 psi. We had 3 chambers. Takes a long time to exhaust the air out. We would cheat and exit the air more quickly. What a noise it made ... today I need hearing aids . Later I was a remodel carpenter ... and a smoker ... I hated wearing mask because could not breathe to begin with .... Imagine if you will opening walls & ceilings. cough ... cough ... cough ... all good here boss. Later, I did over extend myself carrying roof trusses ... they needed to be dropped with a crane. Result is my back is hosed ... I am permanently disabled. Today, I walk into shop and put on safety glasses, wear a mask when I should. I take safety precautions every chance I get .... fact is, I should have done it when 30 years old and not start when 50 .... just my ramblings as a disabled idiot.1 point
-
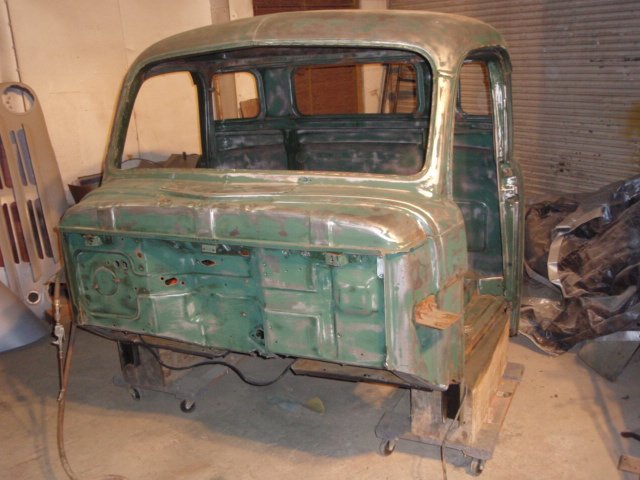
I reinforced that section of the cab with square tube and angle underneath before I pulled the cab.1 point
-
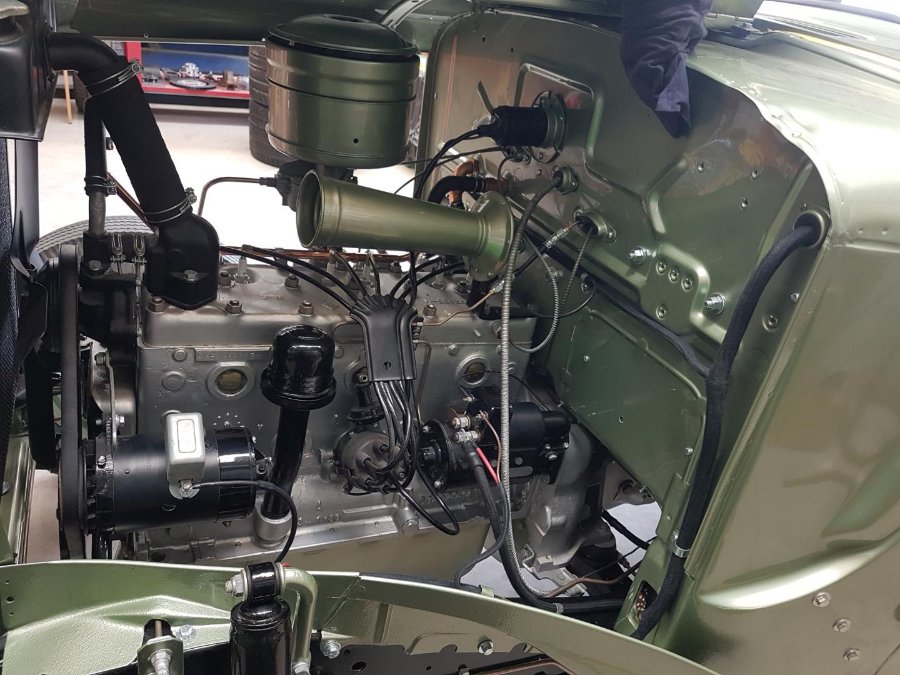
@RecklessBattleBornHow did you connect the output of your alternator? It sounds like it may be connected directly to the battery without going through your ammeter. This would explain why you measure good output of the alternator with a volt meter, but nothing registers on the ammeter.1 point
-
Oldguy48: Yes I know what you mean. I will be getting my first grandchild in June. We all know that grandpops are perfect but we do need to be careful not to influence them in the wrong direction. Over time they will learn the bad words but hopefully not from us. Glad that the article was useful to someone and hope that no-one ever has to resort to using them in an accident in the garage. An ounce of prevention is worth every penny that you spend even if you do not have to use the mechanism to help with the issue. Another option is to use Alexa and have a station in the garage with you when working on the car so it could call your wife or even 911 or the police department Rich Hartung desoto1939@aol1 point
-
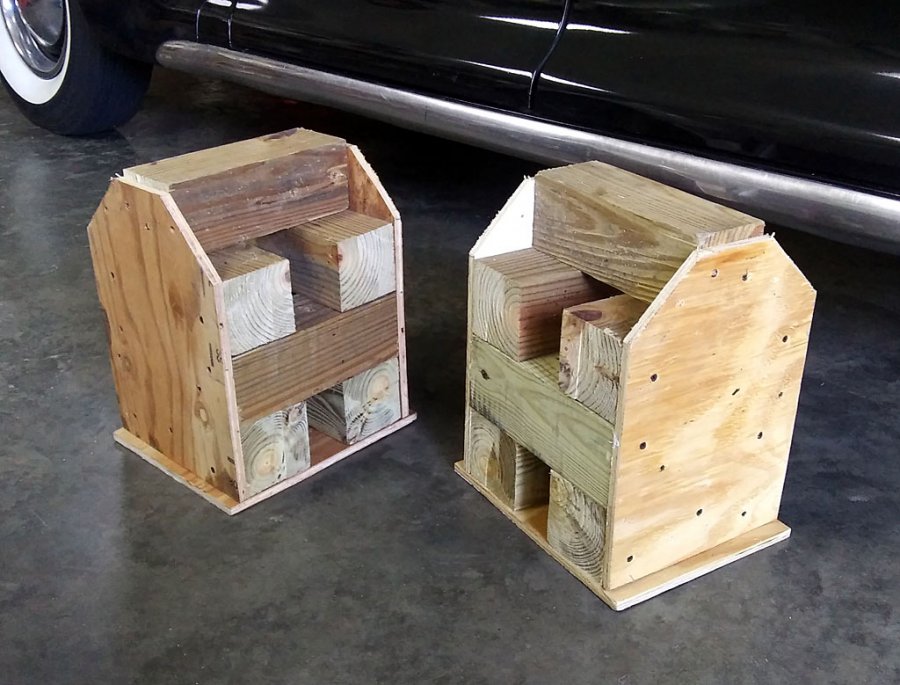
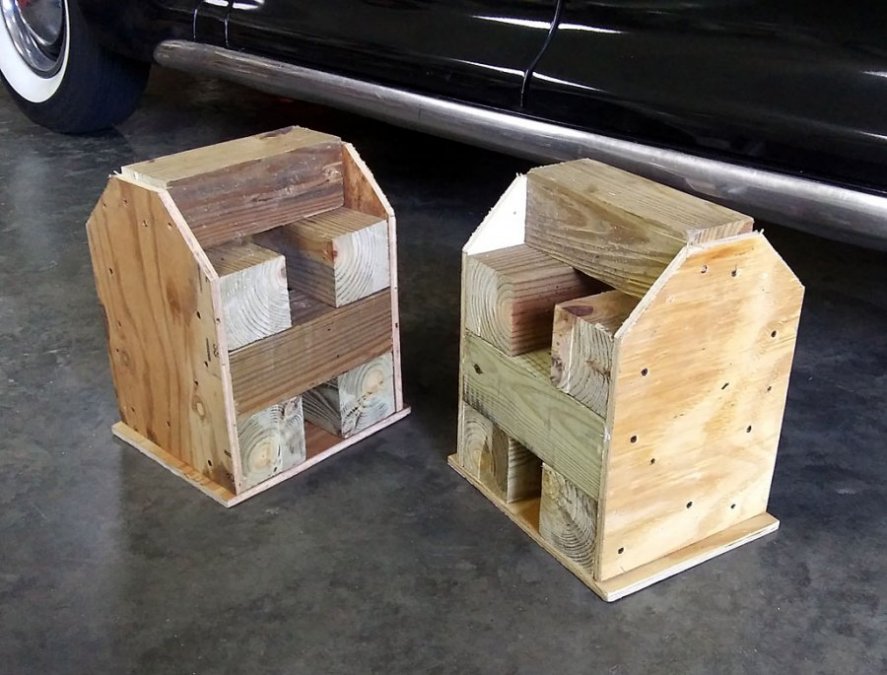
I used furniture dollies with 12x12 wood blocks to support my cab and move it around the shop. The cab rested on the sills. When I needed to work on the bottom side I could tip it over and place one of the block/dollies under the rain gutter above the door. I couldn't seem to find a pic of it on it's side, but that worked well for cleaning and painting the bottom side. Plus it was great for painting the inside, especially for getting up under the dash.
 1 point
 -
I had built a dolly that bolted to the cab mounts so I could move it easily around the garage floor. Those same mounting points become a cradle on the outside of the cab when it's laid on it's back. Later on I removed the cab mounts on the dolly, put on some taller mounts, added a couple 2 x 4's and it became a dolly for metal and body work on the truck box. Dolly was made of 1 x 2 or 1 x 3 rectangular tubing with a couple of crossmembers, 2 straight and 2 swivel. Main bars are about 6' long, crossmembers are the long enough to weld the upright mounts in the corners and bolt those to the cab mounting points. Upright mounts were only 1' or less tall to keep total cab height down for hammer and dolly work on the roof. One change I would make to the dolly would be to use a couple casters with brakes on them.1 point
-
This is how i did the underside of my cab. I used POR15 on it and was very happy with results, though time will tell.
 1 point
 -
Back in the 1970s I was able to buy and sell some 50's Mopars I found in people's back yard, driveway, etc. Some were missing keys...so I just took the lock (or sometimes the car) to a certain old time locksmith. He would bring out his little "gun" feeler gauge .... "shoot" the lock to determine position of the tumblers....and make me a new key that worked correctly every time. But, in later years they banned those "guns" as the thieves could also produce a new key so they could steal your car. I don't know if a person can find one of those "guns" now, or not. A few years ago, I took a nice trunk handle that had no key to a locksmith who claimed he could make me a new key----but he apparently was not as good as he let on. The lock just barely worked....was hard to turn.....and seems like he messed up something else as well. The good news is I didn't really need that handle so it's in some box of stuff in the garage. I later discovered I could buy a brand new ignition tumbler with working pentastar key at O'Reilly Automotive for a very reasonable price.......fits right into the ignition switch housing. Currently I do not have any door locks on my P15 convertible.....although I do have a couple sets of used locks with keys purchased at swap meets. I put chrome "plugs" in the holes in the door. I figure that if you lock a convertible...and someone wants in badly enough, they will simply slash your convertible top. So......I hope they try the door first...... All the above information probably will not solve anyone's problem.....but there used to be solutions years ago. Maybe some exist today if you check around. Bob.1 point
-
Interesting video..........quite a few things I do differently but I suppose its a start for someone without much experience........would be interested in seeing the rest of it and whether it ran o/k................lol............andyd1 point
-
That looks very much like the one I had in machine shop class. I have several small sets of modern inexpensive bits but I have many old bits from the 60s and 70s which are high-quality American made stuff. They are still good but every one of them has been chipped and dulled and re-sharpened by hand on my grinder more than once. I will sharpen any size drillbit and I have jet drills which I have sharpened on the whetstone. It’s not because I’m too cheap to go buy another drill bit, but some things I do just for practice or because it’s a challenge. Also, I don’t always have the time to run to the store. So, Based on all of this, maybe I will buy a Drill Doctor if they have a model that goes up to 1 inch.1 point
-
I watched that video recently too. I thought a rookie could learn more if there was some explanation. Why things were being done a certain way. I believe this block is getting no machining. No cylinder taper or out of round measured. What did the crank and rod bearings measure up for wear? Taking the top ridge off with a reamer makes machinists cringe. My understanding is its pretty easy to wreck your cylinders doing that. Especially a rookie. If you have a you tube channel and you need content, this works to keep views up. If you need to rebuild an engine, have reliability, and good return on your investment, this fails in my opinion. Its an experiment. Slam new parts into an old block. Roll the dice. See what happens. It’s entertainment. Not education in my opinion.1 point
-
30 or so years ago this was a project they made me build in trade school. A guide to sharpen bits and maintain the correct angle. I’ve had this floating around and transferring to the next bigger tool, my entire adult life.
 1 point
 -
Bottom of the cab was stripped using scrapers, wire wheels, a lot of wax and grease remover, then primed and painted. Most of the work was done with the cab on it's back, cradled in a dolly keeping pressure off the rear cab panel and giving good access to the rear corners and also the transition portions of the firewall to floor as well access to the inner cab roof. I think I had the cab on it's nose to access the underside of the dash but it's been long enough ago I'm no longer sure.
 1 point
 -
That was just for the rewire. Car has been back on the road since 2008. Only had a few rewiring issues back then as anyone who went to the POC meet in detroit could testify to.1 point
-
This is my original dash wiring. Shows how some of it was clipped in.1 point
-
A 1/2 X 3/8 pipe reducer will work fine and would be much easier.1 point
-
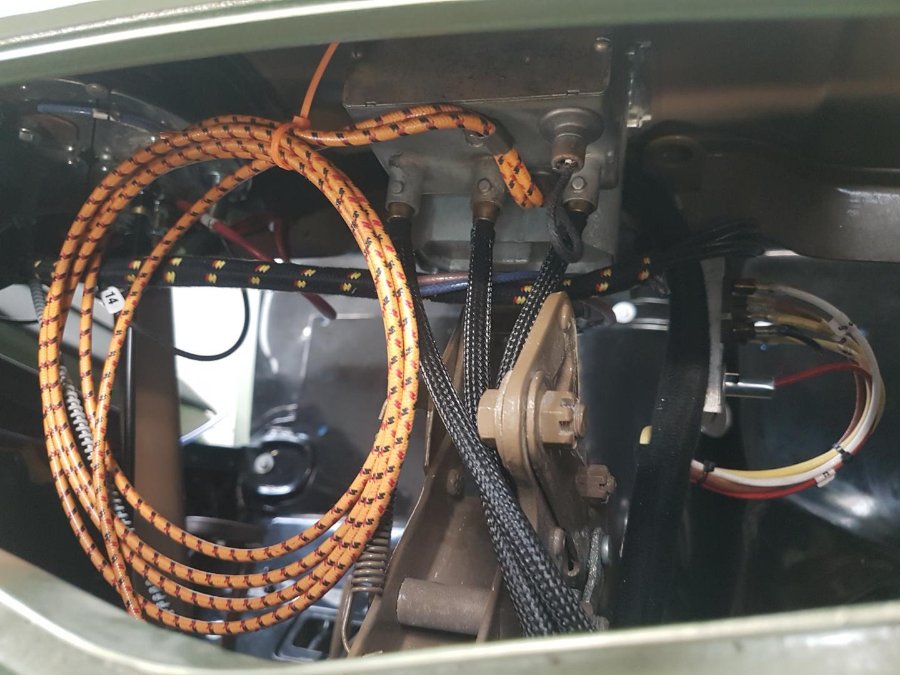
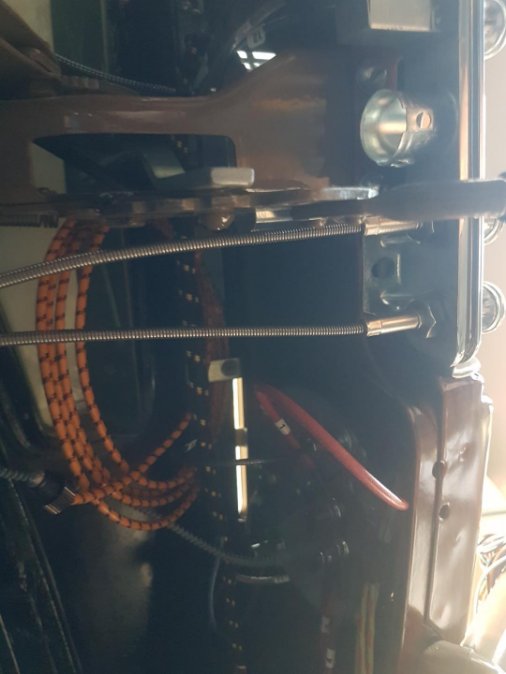
Nick. Not sure if this is any help but...... Although my vehicle is 1938, all the late 30s through to late 40s mopars had the same or very similar rubber cowl grommets and their metal surrounds. Even right and left hand drive vehicles were the same. So my wiring is nearly identical to keithb7s 38 Plymouth. All these late 30s and 40s mopars have the loom exiting the interior das through the same rubber grommet in roughly the same position before going to the starter and other destinations. See my first pic. As far as behind the dash goes, each wire from each attachment point just runs in the shortest distance and tidiest manner into its woven harness and then to the exit point in the firewall. A bit hard to see in these photos. First one looking down through the cowl vent aperture - never mind the orange coiled wire. It is for my original radio and not wired in yet. Second vague photo looking up under dash mostly showing connections to my light switches etc.
 1 point
 -
Never turn your back to the door ?1 point
-
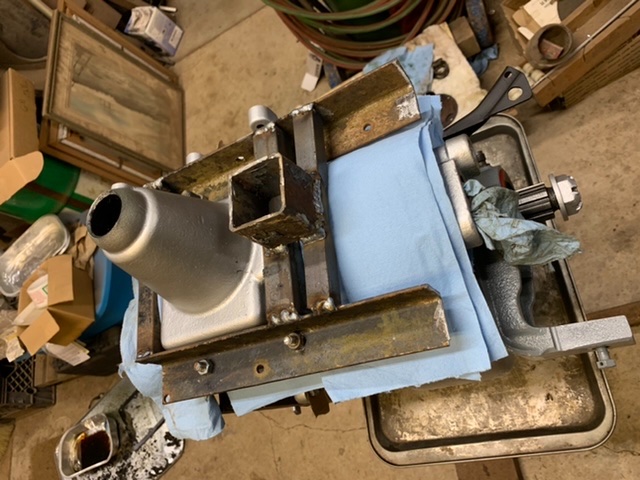
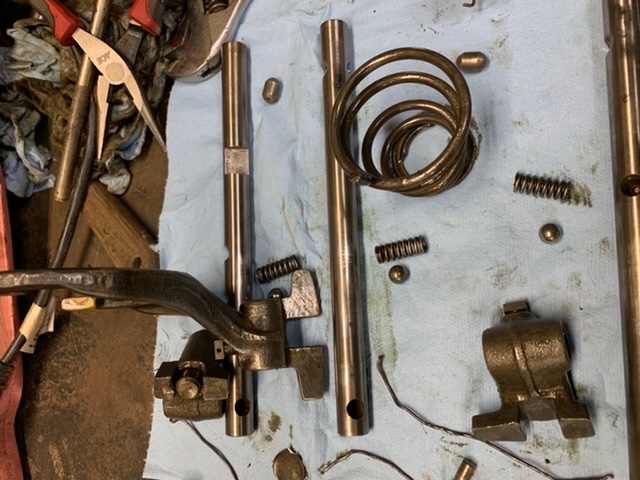
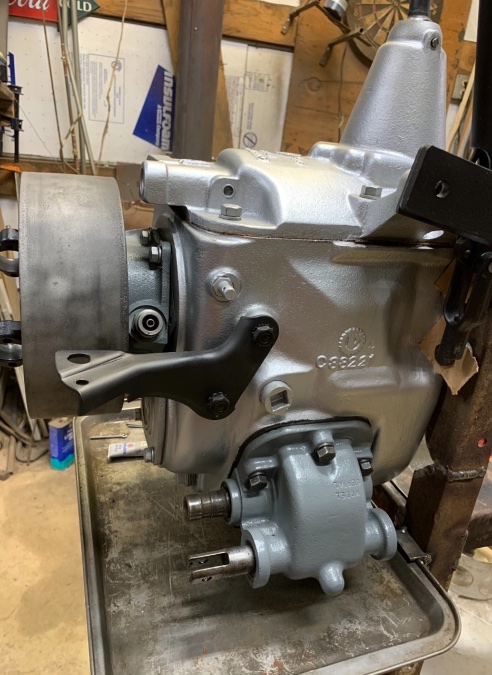
Updating, changed some gears, bearings seals, threw on some color now I am close to reinstalling the transmission back in the truck. I got more intimate with it than I planned on, I ended up building a transmission top holder for my vice to hold it while I worked the top over and I fixed some “worn” parts while I was at it Definitely not perfect but overall, I think it’s better than it was.
 1 point
 -
Antonio going in first ?1 point
-
Good thread even if the baby monitors won't work. I try to get these "jack stands" under the car if at all possible:
 1 point
 -
Great idea but my wife would shut the monitor off once I started swearing .1 point
-
This makes me nervous knowing I’m pulling mine this coming spring to drop in a rebuilt motor.1 point
-
As soon as I read that I knew you were from NC. To be honest I'm a fat guy, I like to eat but the only time I never finished a plate of BBQ was in Raleigh, I don't care for vinegar based BBQ apparently. Now around here BBQ means smoked over mesquite for hours. Where I grew up it was KC style, both of which I love. But vinegar, nope.1 point
-
my buddy is coming tomorrow to give me a hand lifting some of the heavier items into place on the assembly of the lift.....moved the big runways from the orchard to the shop bay today....one of his favorite deserts is pecan pie....so I have these ready to pop in the oven in just a minute or two as the oven temp reaches my set point....home grown all organic pecans.....1 point
-
I got a free frame today for my 55. The main reason for getting it was the home built power steering setup. Somebody fabbed up a custom bracket and installed a power Saginaw box. Gonna swap this over to my 55 shortly!

 1 point
 -
Mr. DrPreposterous : I am a newby too, to "old" cars - I bought a 48 Plymouth coupe about 6 months ago. It appeared to be in great shape - a no rust body, the undercarriage was rust free too (well, some very light surface rust), and the flathead motor ran great with no smoke. I test drove it, and well, it drove like a John Deere tractor. But it stopped good, shifted good, started good, and it looked good too! The interior was original and in good shape, and it had this gorgeous (to me..) satin blue paint job with ghost flame pin stripping. Good glass, the vacuum wipers worked, and the dash had good chrome. It had been converted to a 12 volt system, the drive shaft and rear chunk had been replaced, as well as the clutch and pressure plate, and the stainless trim looked nice. I paid $8k for it. I think I did well. 70 year old cars ain't a dime a dozen here in Tennessee! Especially ones that are rust free, and do not need any body work. It does need a plethora of little things fixed. I think if I put another $4K in parts in it, it will be what I want it to be - a car that stops almost like my new car, is really reliable, and I wouldn't think twice about headin' out on the highway for a long trip. I am a fair to good mechanic, have drawers and drawers of tools, so the labor of fixing things will be a labor of love. With you having no wrenching experiences (LOL) you can count on some sizable labor costs. (If you can even find a mechanic that has experience working on a really OLD car). I guess I am saying that I agree with DrDoctors and Knuckleharley's posts that if you want a car that drives like a dream, and is very reliable, find one that has already been gone thru and PROPERLY restored to be in very good condition. You will have to get out your billfold and belly up to the bar for it. I will have about $12K in mine when it's finished to my satisfaction, with NO labor costs. So a budget figure in the mid to high teens seems quite reasonable, to me.1 point
-
Looks like a good,and a reasonable,plan to me. I will add that driving a P-15 in modern traffic is likely safer than driving the Honda beater you wrote about because who notices a Honda,and EVERYBODY will notice a P-15 in modern traffic. This means you MIGHT be less likely to get into an accident to start with. I can see the 12 volt conversion since you live in the frozen north and plan on driving it in the winter and it will be parked outside in the cold while you are at work. If it were me,I'd leave the points distributor in it,though. They rarely give trouble,and when they do they are easy to fix right where the car sits. Just carry new points,condenser,distributor cap,and rotor as spare parts in the trunk and you will have all ignition emergencies covered.1 point
-
not only is it a device that will bring your car coolant to the proper temp it is also a control flow valve that ensure that you are nether circulating your coolant too fast or too slow...too fast you will not absorb the heat into the coolant from the engine block..too slow and you will not exchange this heat properly across the radiator...even old guys who have messed with these cars for years were misinformed long ago and were never corrected over time...I would not dismiss him entirely..only question a few of the things he may say....9 out of 10 he may well be dead on the money...1 point