Leaderboard


Popular Content
Showing content with the highest reputation on 10/22/2020 in all areas
-
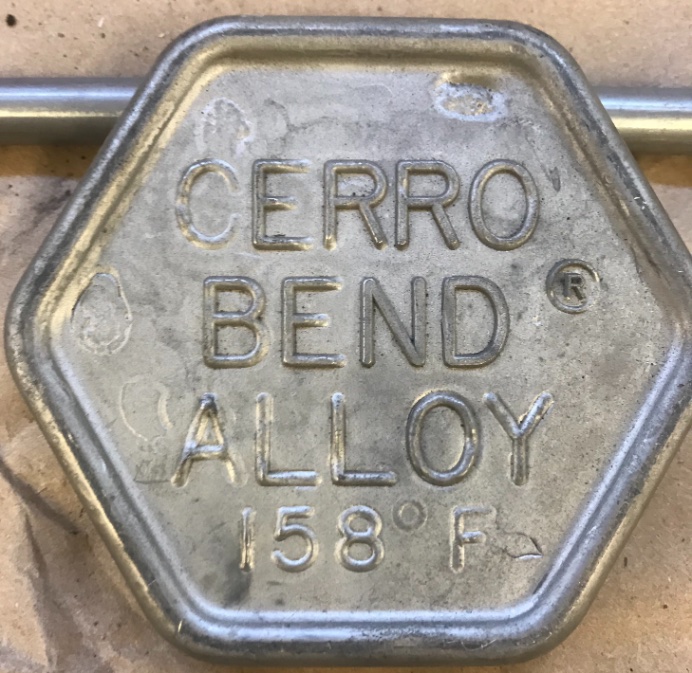
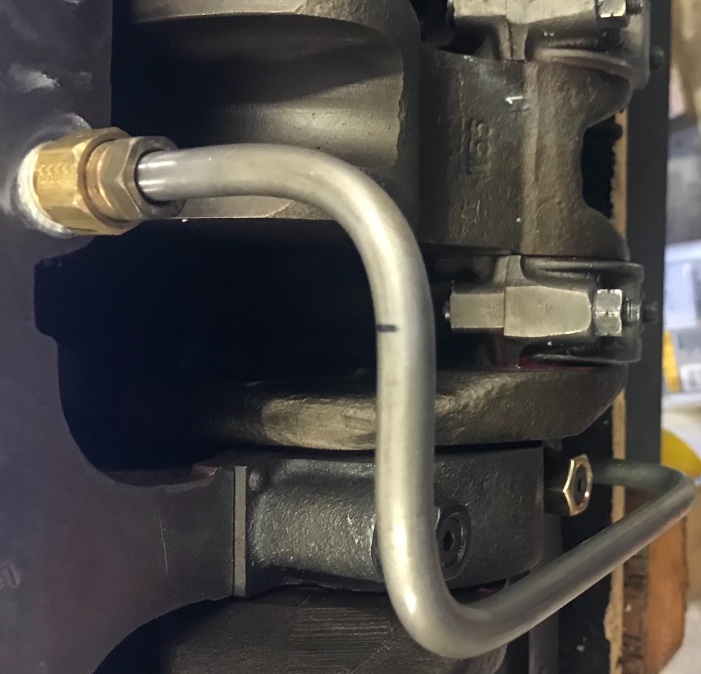
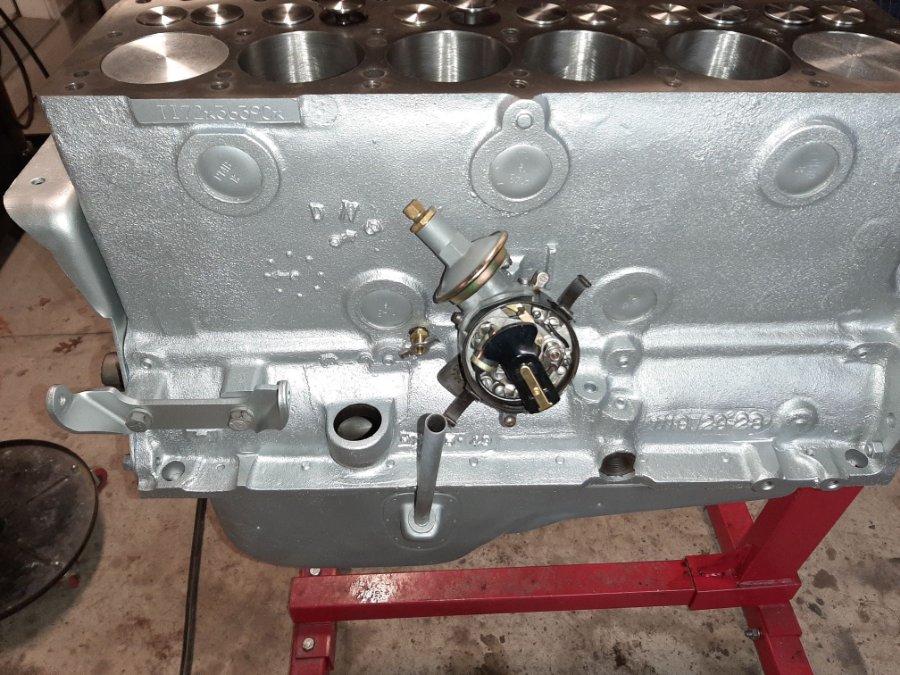
This is one of those "Did you know?" posts. The oil cross over tube from the oil pump to the galley is a 7/16" tube. Did you know this is a size nobody makes fittings for? Of course when the engineers worked on the flathead 6 engines that was not even a consideration. The Dodge Brothers machine shop built parts for a lot of car manufacturers and delivered complete running chassis to Ford until 1914. They could (and did) build just about anything the designers wanted and did even special parts like they were everyday. The engine I am working on was a bare short block. The oil pump, cross over tube and some other things simply weren't there. I could buy a surprising amount of this stuff NOS. Vintage Power Wagons supplied the NOS Oil Pan, NOS Pick Up Tube and used Pick Up Screen assembly. A Cross Over Tube had to be made. 3/8" and 1/2" fittings are commonly available. 1/2" won't fit inside the pan so 3/8" it is. Because the 3/8 tube is smaller than the 7/16, I wanted to make sure the bends were perfect large radius with no kinks or flat places to restrict the flow. Steel tube from the hydraulic shop was used because it has a nice heavy wall and no seam. You can bend a tube perfectly by filling it with a low temperature melting metal such as "Cerro Bend Alloy" which is a brand name for "Woods Metal". Woods metal is made of Bismuth, Lead, Tin and Cadmium which melts at 158 f degrees. Because of the Lead and Cadmium it is considered toxic however unless you work with it all day every day your exposure level is minimal. I heated up a mini Pepsi can with a propane touch and poured it into the 3/8 tube, then let it cool. As Cerro Bend cools it expands and makes a tight fit to the tube. When it was room temperature I proceeded with my bender. Since you are now bending a rod as apposed to a tube it's not easy. You should lube the bender and have a vice handy. Once bent and trimmed I put the work piece in a pan of water and brought it to a boil. The Cerro Bend was coming out in little metal balls before the water boiled. A few taps to make sure it was all out and it was ready to put the final double flare on the tube. It was easy to do and solved the problem I had with the reverse turning oil pump. Here's some photos.
 4 points
 -
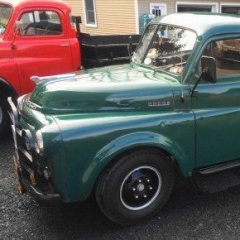
I have some free time today, so I'll make the choice easier on him by removing the fenders while he's at school. FYI, his cross country team won their Catholic League meet this past weekend. Nicholas (and five others on his team) received All Catholic League designation (finishing in top 20). 17:20 was not his fastest time ever, but by far his fasted time on the specific course (one of the more difficult courses in the area). His team runs a meet this weekend to hopefully qualify for the regional meet and their chances are good (not given).3 points
-
“Without looking I believe . . .” I looked in the 1936-42 factory service manual and saw “every 8,000 miles” (page 23). I looked in the 1933 Plymouth instruction book and saw “under normal conditions it should not be necessary to replace this filtering unit more frequently than 8,000 to 10,000 miles” (page 62). I looked in the 1946-54 factory service manual and saw “every 10,000 miles or once a year” (page 306). Remember this is a bypass filter system and the service intervals are different than for later full flow filter systems.2 points
-
Sorry, didn't have my thinking cap on, or the right one anyway, pictured Cavalier in my head but was thinking it was Volare. Feel kinda silly now, oh well, won't be the last time.2 points
-
this is my last lighting upgrade.......I have since picked up 10 more fixtures and another 2 cases of LEDS...I will soon be total LED shop, barn and outdoor work bay...they just too easy.....so cost effective and outright purchase....good fluorescent lights are as costly and way less efficient and lumens are way less...Running conduit for these at this height was the worst part of the job....but you would have to do that no matter the lights you using...all things being practical.
 2 points
 -
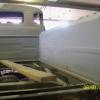
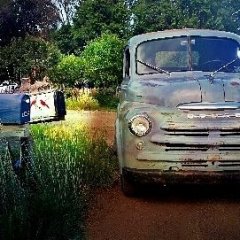
Getting close on the 48 1 Ton
.jpg.126a8092b824ea3c151445a449e404f3.jpg) 2 points
2 points -
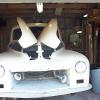
I normally don't share much on here, I'm really a better listener, but tonight I got off with only 2 strokes on my Wang Doodle! Maybe I should explain, with the help of a friend at work, and some scrap metal, we made the 'Wang Doodle Water Distribution Removal Tool'. After reading the horror stories of trying to retrieve this tube from the block, along with a disastrous attempt I saw on Youtube, I was prepared for the worst. A week ago I sprayed penetrating fluid down the water passages to help loosen any rust. Yesterday I tried removing the tube just by pulling on the aluminum piece (aka the Wang) just by hand, nothing. Today we made up the hammer slide portion (aka the Doodle) and I got 1 1/2' on the first pull. The remainder of the tube came out on the second pull. WAHOO!!?? Now I do have to be realistic about my success, as you can see in the picture the tube is in great shape! Yes, Walter Chrysler was smiling down on me today.
 1 point
 -
I would always put a brass water tube in rather than a mild steel one...............as an aside in 1974/75 I had the 318 Poly in my 1940 Dodge rebuilt..............I assembled the engine myself and used brass welch plugs in that engine then..........they are still there, nothing has coroded nor leaked in the past 45 odd years.............my 2 Oz cents worth.............andyd1 point
-
I didn't know you were here too Keith. I also left a comment on your video #2 about perhaps using a home made tool with 7 teeth as opposed to one tooth to remove the tube. In the parts supplier's notation about dissimilar metals, their concern was the effect it would have on the block casting and not the brass tube. Most of the time during my high school chemestry classes, I was looking at the girls as opposed to listening and learning, so I'm just passing on what they seem as a concern as opposed to any knowledge I have. However I did learn that Becky was very friendly in class. So grade 10 Chemestry wasn't a total failure.1 point
-
I have a sodium valve 251 in a 1948 2-1/2 tonner 5&2 I ran for over 10 years hauling anything and everything in Seattle. Freeways too @ 55.. The engine handled it fine. Truck is wore out..not the engine. With excellent maintenance and not over revving these old flat heads they last a long time. That was back in the time when you could buy high quality engine parts though.1 point
-
Finally got the knuckles back from a semi-local machine shop. This was the third trip. First time they were "ready", I could not press one of the pins in manually at all, and the other required near super-human strength. The guy there thought that once I "pounded in all together", the weight of the car on the joint would loosen it all up sufficient to make steering quite easy. We talked for a while and they tried again. Second time seemed like they had not touched it further. I was going to take it back and try elsewhere, but they wanted to send it to a shop they use for all their "unusual" jobs. Third time seemed like a charm. These fit quite snug with no side to side movement, but I can push them through the knuckles and supports with some effort. All the grease holes line to the fittings, and it all went back together pretty good. In addition to the king pins, I replaced the coil springs, shocks, and tie rod ends. I can not fine any tech specs for the tie rod ends (but the sleeves get 20 lbs.), but I an guessing about 30-40 lbs with a cotter pin should do it. Also, I am not sure about the tightening bolt on the top of the knuckle support. I think it ultimately just insures that the alignment adjustment holds, so I assume about 20 lbs. should be enough for this. Anyone actually have any specs for any of these? I'll work a bit with the alignment and rebuild the rear brakes, then its back on the road, Really looking forward to it. Thanks to all here who have offered all kinds of help. Really a great resource as well as confidence builder.
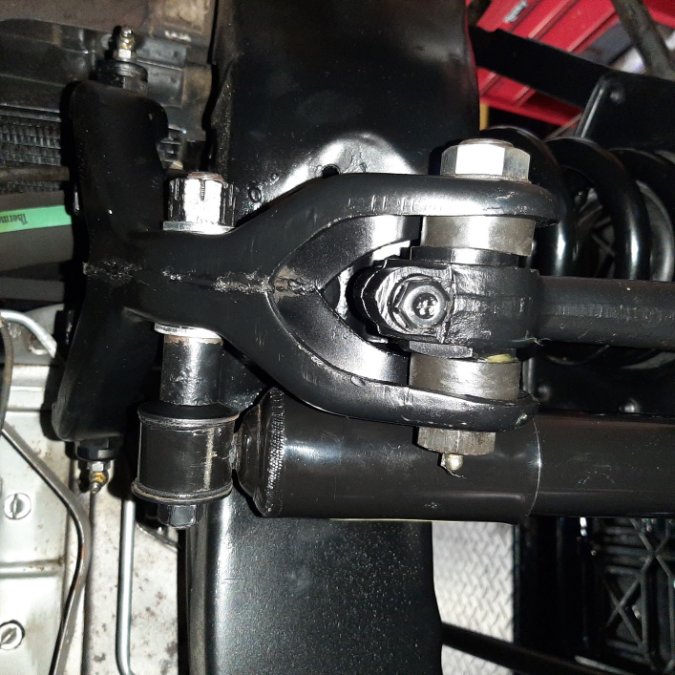
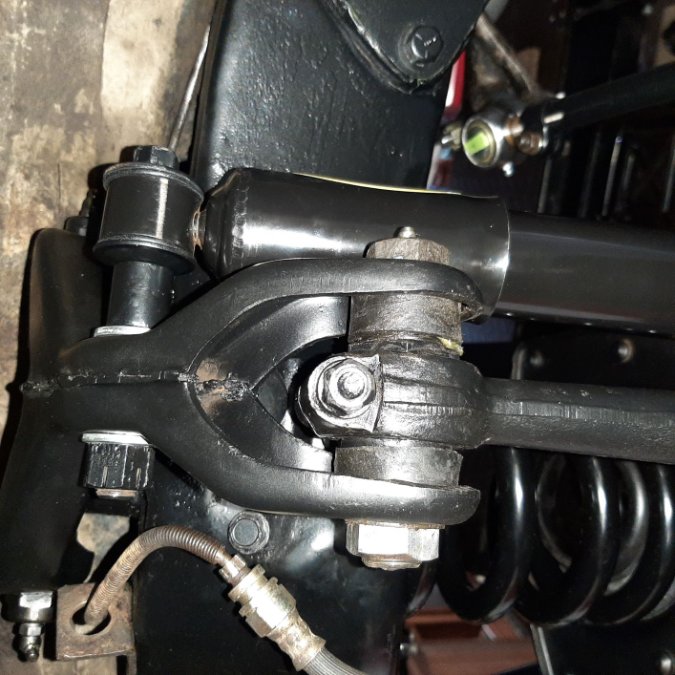
 1 point
 -
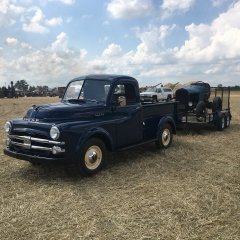
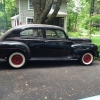
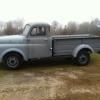
Had a great time Sat. touring the hills of Pa. with the Troy Town Cruisers.
 1 point
 -
No one has installed a Volare rack and pinion setup since Volares never had a rack and pinion setup. Volares could use the box the OP was asking about though. Now some may have adapted the Cavalier center steer R&P and one of our overseas members used an Austin? R&P. But if someone has done a writeup on it I haven't seen it.1 point
-
Looking good! My Meadowbrook is rusty and crusty, perfect for a cruise like that. Looks like fun?1 point
-
I had a similar issue with my truck. My truck was fine, but in the matter of one trip, the clutch started acting the same as yours. I was at a car show and couldn't get it in gear without severe grinding or shutting the engine off to put it in gear. I adjusted the clutch at the show to the point where it would slip enough to keep the truck stopped, but still not enough to go into gear. When I pulled the clutch out, I found that one of the pressure plate springs had broke. I sent it out for a rebuild and all is good again.1 point
-
Amen to that. I average 3500 miles a year on the Coronet and I don’t get too concerned about wear and tear. Remember all of our cars were once daily drivers.1 point
-
Without looking I believe the factory lube chart calls for oil filters to be changed with every other oil change. So if conventional wisdoms said 3000 miles for the oil, that would be 6000 miles for the filter.1 point
-
I could have sworn I replied to this earlier today but I don’t see it now. I hope this isn’t a duplicate. Back in the day the disposable canisters were changed every 8,000 according to the 1936-42 Plymouth Factory Service Manual. The 1933 Plymouth Instruction Book says 8,000 to 10,000 miles. Glancing around the web, a couple thousand miles a year seems to be what most cars of this vintage get, so you are looking at replacing it every 4 or 5 years. Cost for a new filter is between $35 and $45 or between $7 and $8 per year. I don’t think I’d call it a “expensive dumbass thing” at $8/yr, far less than a tank of gas or the oil needed for your seasonal or mileage dependent oil change.1 point
-
Check out this company on page one engine parts for the filter setup. More like $35 https://www.vintagepowerwagons.com/online-parts-catalog DJ1 point
-
Throw out brg will not cause your problem unless it's improperly adjusted. We're really trying to determine if the clutch disc is actually releasing and not hanging up on the splines or rubbing against the flywheel or pressure plate enough to cause the trans input shaft to turn. You may need a helper to verify the disc is released. You don't need to have it running to do that. Jack up one rear wheel, use a jack stand, place the trans in gear and have someone push the pedal down, try to turn the wheel that's jacked up. If you can, it's probably released and you can check the trans fluid level and type.1 point
-
I bought one of these to replace the sealed unit on my 51. https://www.omix-ada.com/oil-canister-assembly-45-67-willys-jeep-models.html1 point
-
I was a pump jockey in the 60s. Chevron made a re-refined 40 w oil. Flatties lived on it1 point
-
If it has API standards its probably better than what grandpa shoved down that filler tube1 point
-
Getting close to the end
.jpg.6a16effe39df77fdd22d79793165d34f.jpg)

.jpg.24bbcc7e5ff41d51836b258ff77d22ff.jpg) 1 point
1 point -
Quick put a GPS tracker in it, it is beautiful1 point
-
Good info guys. Booger is my 4th plymmie and the first one with the sealed disposable filter. Okay, cool. So how long are these expensive dumbass things good for? Like in miles?. Until I salvage a changeable drop in canister this will have to do. And change the piping...and that's a good winter project.1 point
-
I realize that the fixtures were free but I would go with LED fixtures and toss the old fixtures. The LED shop fixtures have come way down in price and amazon will deliver them to your door. The difference to use a bad pun is like day and night. They provide such superior light for a shop over fluorescent tubes it is like you removed the roof and let the sun shine in.1 point
-
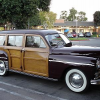
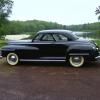
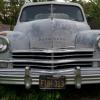
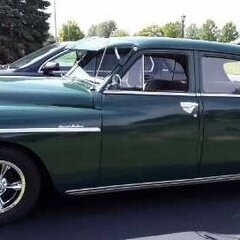
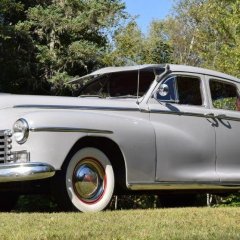
Sunday was unfortunately the beginning and end of the season for the P12. Took a trip around the lake here in town and paused at the Community Center for this picture. Inspection on Monday and then back in the garage with hope of more post pandemic auto activities in '21. P.S. Sorry about the wheels, Plymouthy!
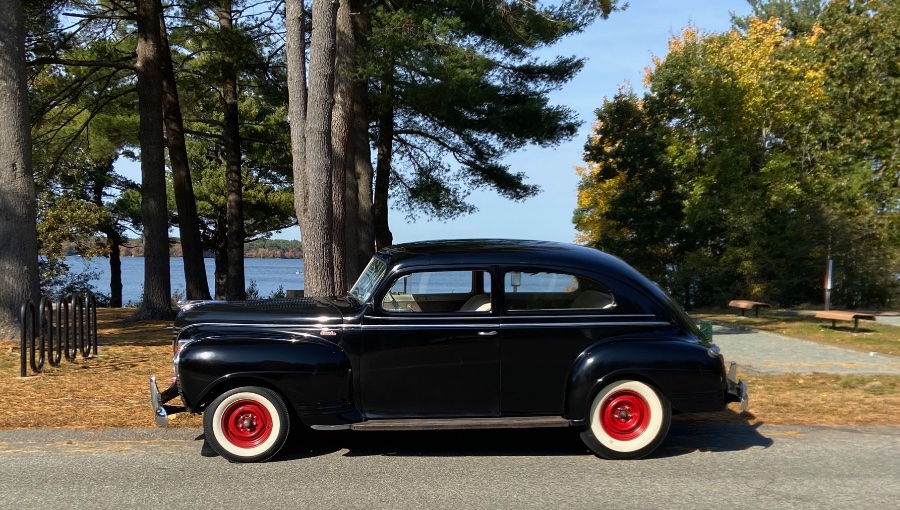 1 point
 -
Hey, my favorite color! Keep those pics coming - now get to work :-01 point
-
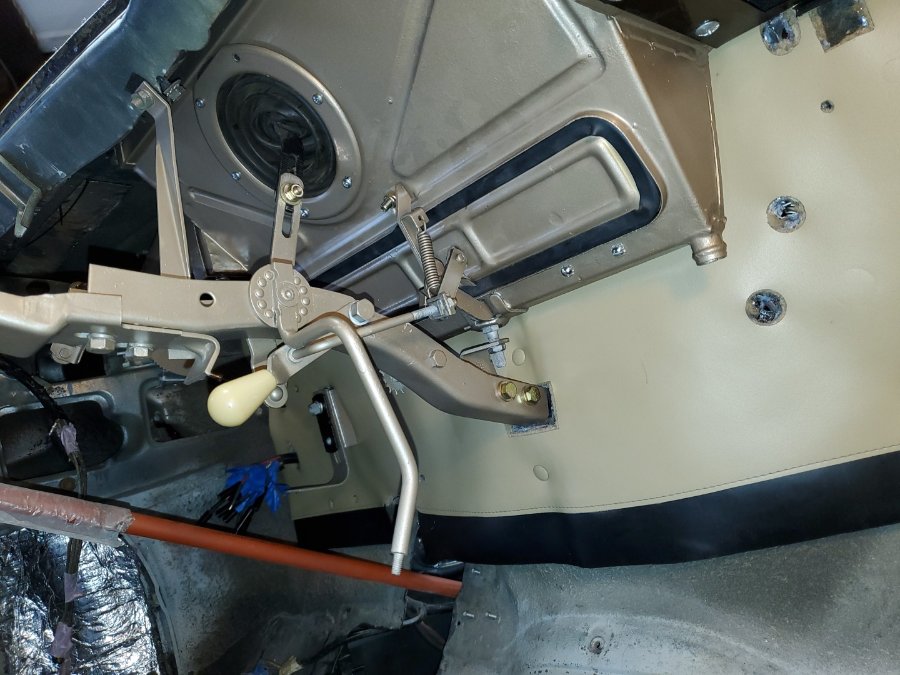
Full day in the garage. Dash pad with reconditioned retainer clips. Fresh air adapter package. Cowl vent /fresh air vent controls. Now the Motrin.


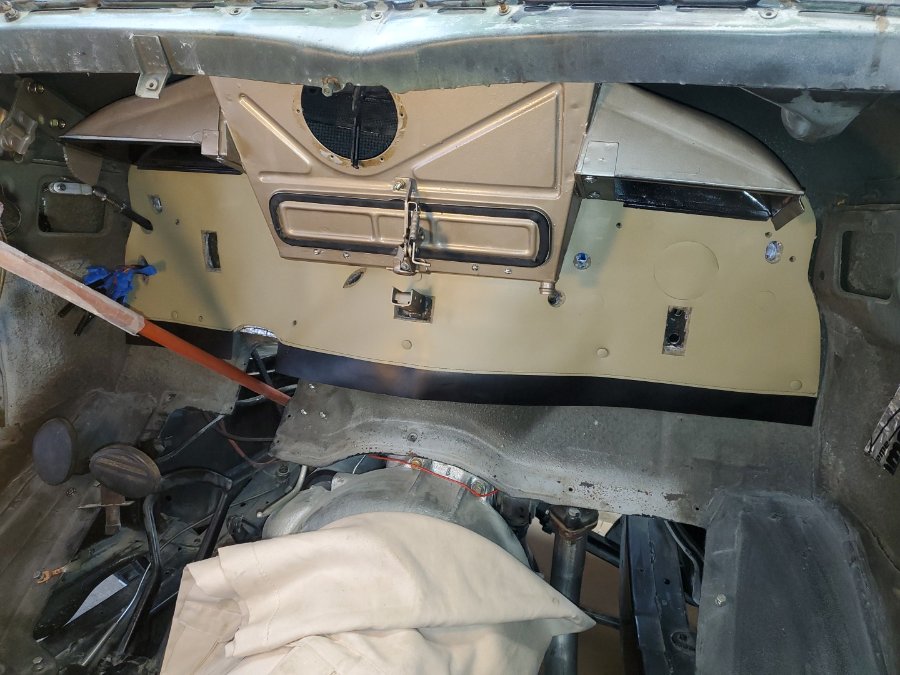
 1 point
 -
In all reality, 40 footers are what everyone needs. I have done full frame off, 100% nut and bolt builds for people so they can be trailered around, never really enjoyed. What good is a car if you're too afraid to drive it? I would bet money you enjoy driving your 40 footer a lot more than they enjoy staring at their garage candy.1 point
-
Todd: Thanks for your update on the oil filtering information. I change my filter about every two years I just take the top lid off of my canister to check the oil and also look at the color of the oil on the dip stick. If it is still gold in color thne I feel the oil is still good when it starts to be blackish then I chnage out the oil. Learn something everyday with these old cars. I know that on the old metal oil container Wix and PB 1/2 they stated you chnaged the oil filter every 8000 miles. Rich Hartung desoto1939@aol.com1 point
-
Mine is a 40 footer too but that doesn’t detract from the fun of driving it. I figure if it’s moving no one can spot the flaws.1 point
-
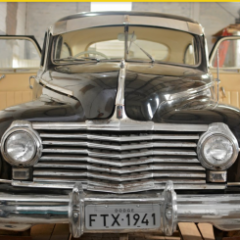
Hi guys, how are you? We restore my 42 Dodge dash. There are no signs of cuts. I still think its a factory right hand exported to Uruguay. What do you think? Here is a video of it. VID-20201020-WA0022.mp41 point
-
One thing to note is that with a depth media type filter being used in a bypass setup is that you don't need to change the filter on every oil change. The original type of filter for 1933 had an additional outlet and the owner’s manual said that you checked the filter periodically by removing the plug on the second outlet to see if clean oil was coming out (engine fully warmed up and at idle). Basically, if the media hasn’t developed channels (letting unfiltered oil through) and it hasn’t been totally clogged up, then it was still good. The later filters don’t have that second outlet port so you can’t do that test. My personal test is to feel the outside of the filter after a long hard drive. If the filter feels really hot (i.e. hot engine oil is going through it) it is still good. If it is only at the general temperature of things in the engine compartment, then it may be clogged and I'll replace it. That works out to replacing it every 3 to 7 years with the amount and type of driving I do (even though I change the oil at least once a year). But please, don’t use this technique for checking a modern full flow filter. First, oil will be going through them regardless so they should always be hot after the engine is fully warmed up. Second, they are built with an internal bypass valve which opens if the media becomes clogged which you really, really do not want to happen (it dumps the collected junk into the engine). The only safe thing to do on a modern full flow filter is replace it every oil change. The only reason for bring this up is the filtering systems are different (bypass vs full flow) so the failure modes are different and that affects some of the service requirements. You can safely run the original style bypass filter for multiple oil changes, something that you should never do on a newer car with a full flow filter.1 point
-
I recommend you convert them to single end LED tubes now while you have them unmounted and such...takes about 12 minutes start to finish for a 4 bulb 4 foot fixture to be converted and wired with a ground pigtail.1 point
-
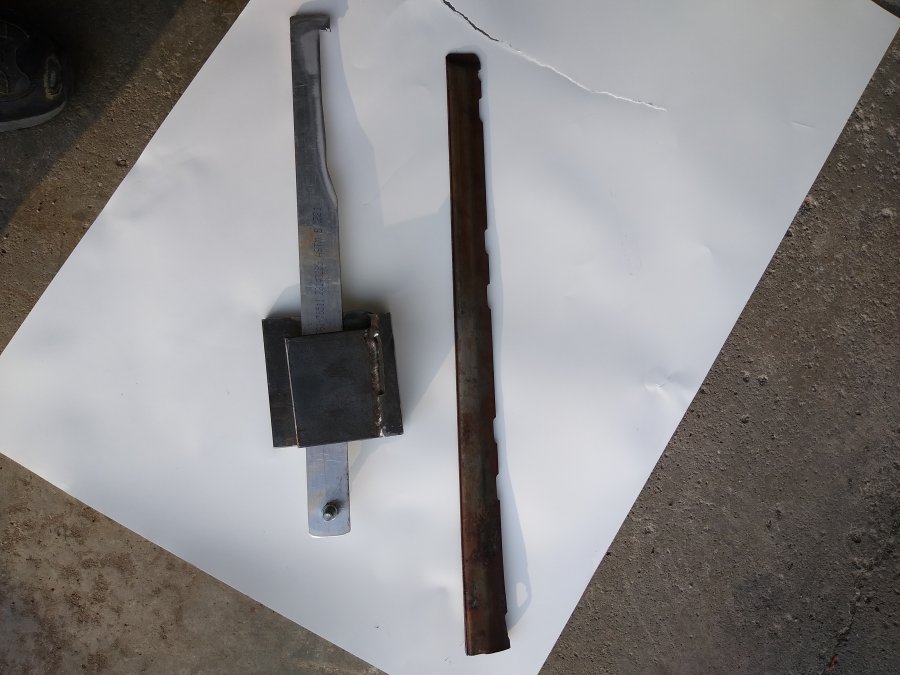
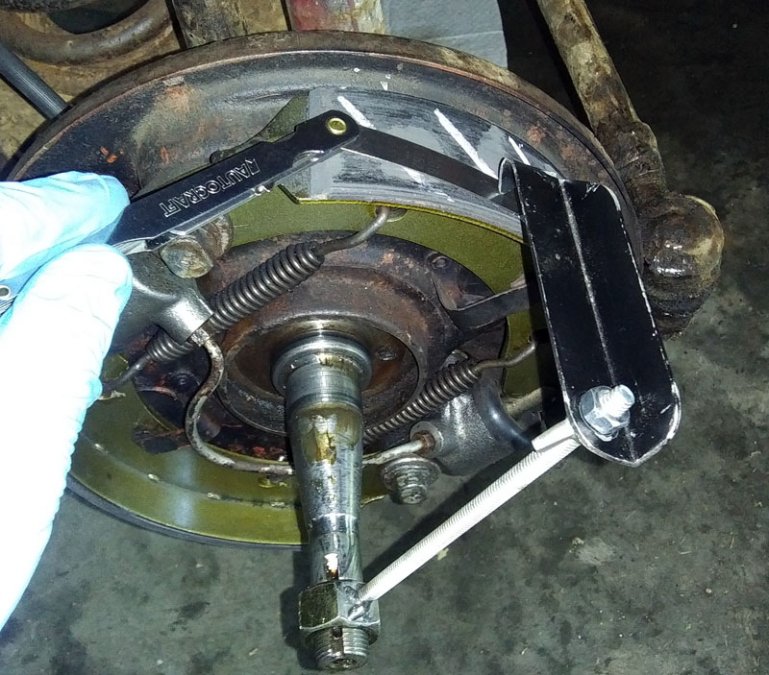
Don't have an authentic brake tool but if you can't find one you can easily make a tool that will do the job....here is my version: Before removing the wheel drum, one minor cam adjuster is tightened enough to create noticeable drag on the drum. The drum is then removed and the brake tool is threaded onto the axle. The pointer is located over the portion of the shoe that contacted the drum which indicates the ID of the drum and adjusted for a snug fit on the shoe. If you want to get really fancy a 0.006" feeler gauge can be inserted between the pointer and shoe. I tried chalking the shoe to assist with indicating the high point during the initial adjustment but didn't find it to be of any advantage. Notice how these brand new shoes have not yet worn enough to have full contact with the drum. I'll readjust the brakes after some miles have accumulated on the shoes. Once the pointer is adjusted to match the high point of the shoe that was adjusted against the drum, the tool is swept over each shoe so the major and minor cam adjustments can be set so each shoe is concentric with the drum. Hopefully this will remove some of the mystery of adjusting the brakes and provide visual confirmation of proper adjustment.
 1 point
 -
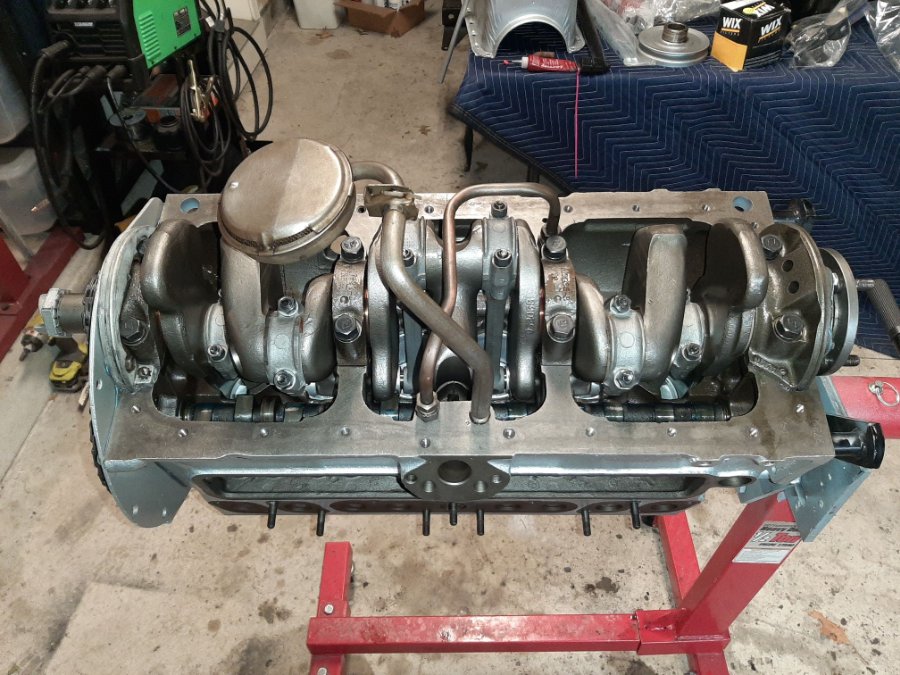
It was a good couple days, got some work done on the engine. Realized I had the oil pump off by 2 teeth and made the adjustment. Installed the head and started working on the cooling parts. I think my favorite pick is the clean cooling tube, espicially after all the work to get the old one out. I'm not sure why some of my photos are being turned.

 1 point
 -
Some of us have stumps in our lives ....1 point
-
I have a 1955 Imperial that weighs in @4500 plus pounds. I have several 1.5 ton trucks that are around the same if not lighter. That's what I was basing my thoughts with. 48D1 point
-
The cars are more likely heavier than a stock truck. The truck was designed to carry heavier loads. The difference was mostly handled in the transmission and suspension, not the engine. Most rebuilds are for nostalgia, not busting a hump. I say build a solid engine of your choice. Shore up the suspension, tranny, tires a little taller than stock, and drive it. 48D1 point
-
I would put together the better of your two 23" blocks/heads with the 230 rotating assembly (assuming it's good.) You already have it so it's "free" horsepower so to speak. Small gains in HP/TQ are large by percentage in lower powered engines; you can usually tell the difference in performance.1 point
-
I plan to have the rack directly centred to the axle L to R and at the exact height of the steering arms. If this was front steer and I could use a Mustang II rack then mounting wouldn't be such an issue, but the Omni rack mounts are quite a bit different.1 point
-
Most semis use a frame mounted steering box with a pitman arm / draglink setup. I'm not aware of any r/p steering for big trucks with straight axles. I'm trying to understand how an axle mounted r/p setup would work given all the movement that goes on with the axle. Not saying it can't be done, just trying to figure out how it would work safely. Mike1 point


.thumb.jpg.d599d4c13e08899474e0348bd9baed3b.jpg)