Leaderboard


Popular Content
Showing content with the highest reputation on 10/20/2020 in all areas
-
Call and ask Bill Hirsh's son. He may have a book with the codes and if anyone has gray he would. I can tell you that the off white color, which my '49 had, is no longer available anyplace. Bill said he sold the last yardage he had and know one else had it either and I looked hard for a year. One other thing to note. Of the three or four convertible top companies out here NONE of them often have the "correct" pattern for these cars. Let me tell you why. When research my '49 I talked with the Grand Daughter of the only company out there that is still "family owned" who manufactures tops. She told me the following story. ***Back in the 1960's when competition was tough all the top companies did what they could to "simplify" the top designs to make the tops less expensive so as to maintain market share. People purchased based on price and just wanted a top that worked. The little details did not matter. She then went on to say that most of their patterns in the pattern drawers were the last generation pattern. Sometimes, though not very often, the original factory pattern is in the bottom of the drawer and they can see the differences.**** She did not have the original factory pattern for mine, just the later revised version. So be weary of claims that they a have "the pattern" for your car. In my case, I had the factory photos (actual photos) of a 1949 Desoto CV and we scanned them at very high density. We could clearly make out the stitch lines. In the case of the '40's Chrysler's and Deosto's the top dipped down on the side and was not a smooth line from the rear to the sides. Her pattern did not show it. Also, in 1949 only, the entire rear window zipped out as it had 2 zippers. None of the patters show that. My car was a family car and the shredded top factory. In the end I found a shop that does custom tops literally from scratch here in the San Francisco Area. They do all the high $$$ stuff for Roy Brizio Street Rods. When all was said and done the top came out fantastic. It also only cost perhaps 20% more than the cost of a kit and a shop installing it. I went black as I think it looks better. Good luck. James.2 points
-
I recommend you convert them to single end LED tubes now while you have them unmounted and such...takes about 12 minutes start to finish for a 4 bulb 4 foot fixture to be converted and wired with a ground pigtail.2 points
-
Thank you Dodgeb4ya. I need to learn as much as possible so that I can enjoy and confidently drive my '41 Royal. Duke1 point
-
I have seen people put them on the hub and something is behind it and the hub and it does that. 1. Pull Radiator. 2. Remove the little bolts holding it to the hub. 3. Start Engine from dad cold for 30 seconds and see if face of hub is running true. (you can bend some bailing wire and have it just on the face with a little bit of clearance. If the hub hits the wire, then the face is messed up and you need a new one) 4. Place pulley on and bolt down without balancer. when dead cold again do same as above. If not running true, it the wire will run and leave a mark. Take off and bend to true. Do this until it runs true. Then put on balancer. If that moves sent it out to be rebuilt or replace it. James.1 point
-
Home wiring is designed with wire that is double insulated. Commercial wiring goes in a steel conduit and it has insulation designed to go through a conduit without damage. Automotive wire doesn’t have that. But a stranded wire is better than solid wire of the same gauge. It’s just more expensive, and it can carry more current than the solid wire. Anyhow using automotive wire in household lamps is not a problem as long as you don’t have excess heat or abuse the insulation. I put up some LED bulbs (not the tubes) in my shed the other day and when I looked at it the package said it should last 50,000 hours. I didn’t even buy sockets. I just soldered them right to the 12 gauge copper. Now, I did not come out of the commercial electrician business. I am a radio guy and I’m used to building chassis on the bench. It doesn’t bother me to solder things that cause other people grief in the future.1 point
-
I will be running a total of 2 fixtures = 4 bulbs total. I am replacing the original single incandescent 60 watt light bulb. = 1000% improvement. I have two extra fixtures I may hang later if I think I need them. With this small space I do not think will need them. All I can find online is led sold by the case of 25 bulbs. I think it may be to difficult to fed x a single tube and expect it to survive the trip. Makes sense to me. Other idea, these bulbs should last a long time, but if one does burn out, I want to be able to run down to the store and pickup a replacement. Maybe in another year my hardware store will start stocking them and make sense to convert then. I have the lights hanging now, I bought the bulbs, The 12/3 pigtail is ready to connect, only thing left is the 18 gauge jumper wires. I figure I have enough correct 18 gauge to run the power side of ballast. Will use 16 gauge automotive wire to jump the neutral side of ballast. If you do not hear from me, I blew myself up I just know the wires are rated differently, House wiring is single strand and the sheathing is more durable. While automotive wire is multi strand and different softer sheathing. Does it really matter to run a florescent light? All the wiring will be stapled to side of rafter in open air, easy to monitor if it gets even slightly warm I will stop using and replace.1 point
-
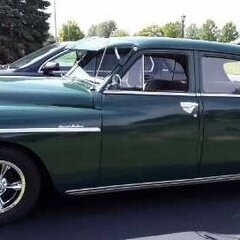
The factory wheels that came off my Dodge pictured earlier were 15X4.5 FWIW1 point
-
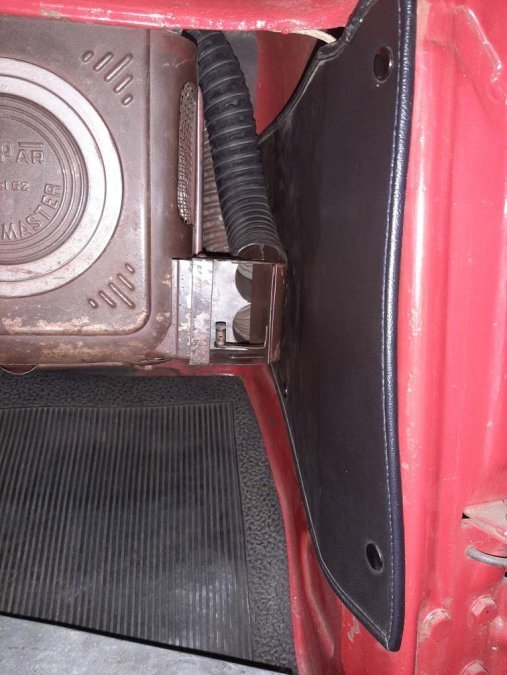
I guess it just goes to show that it's easy to gloss over something IF you think it's right. What's even funnier is for whatever reason I was thinking mine was the only one having the two outer rings painted silver. Yet in my stash of pictures I've saved over the years I just found several model 62 heaters with the same pattern as mine. I plan on repainting if for no other reason than I won't have to look at it knowing I screwed up Here's a picture of a model 62 I've saved for reference.
 1 point
 -
There is a YouTube video from the factory dated 1954 that troubleshoots the Kelsey Hayes vacuum booster. Key words to search are "master tech 1954 power brakes". Very informative . Hopefully u document on here the resolution. Thx and good luck1 point
-
If u have several miles on your brakes, you can take the drums off now and use a permanent marker to put some parallel lines on the shoes about every half inch. Them reassemble and go drive it for 10 to 100 miles. Then remove drums and look at the lines....if you see lines that part of shoe is not being used. So there should be no lines on shoes if they are adjusted correctly. If there are line there is some brake tuning required.1 point
-
don't paint that either.......?I'm glad you posted the picture. edit read Young Ed and Jersey Harold's post about the U shaped washers......1 point
-
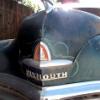
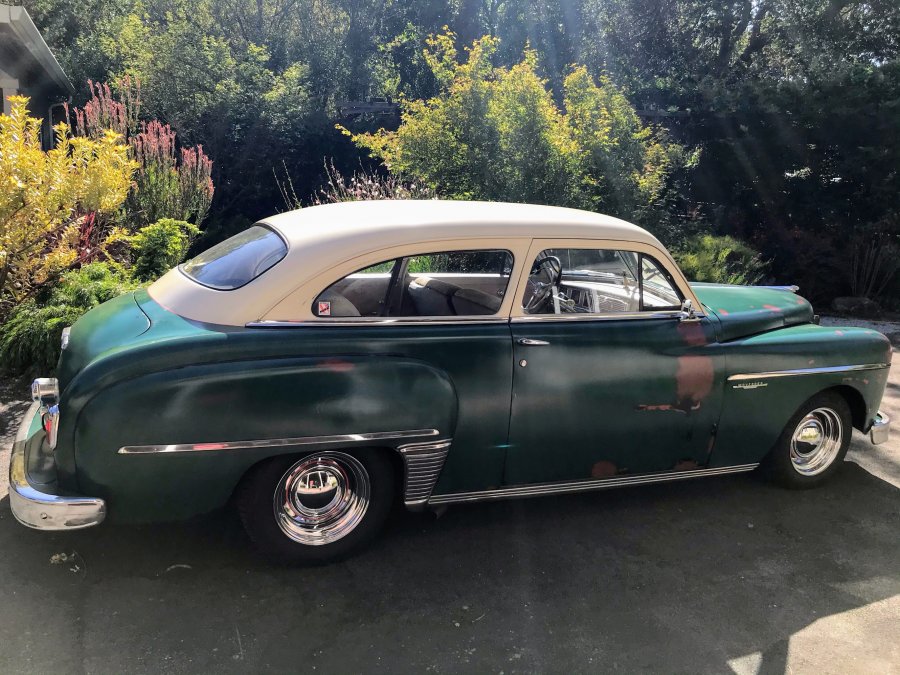
i love this car1 point
-
That somebody was me. I used u-shaped fender washers so I could pull them right out as I went along inserting the welt. The prior owner had gotten paint on the original black plastic welting and it took me a good few hours to clean everything off, using a variety of non-abrasive products. When I got done, the welting looked like new.1 point
-
If I'm remembering correctly someone on the forum painted their fenders on the car by leaving the welt off and putting a couple washers between fender and body. That way it could still be bolted tight but you can make sure to get paint right to the edge. Then remove bolts a few at a time and insert the welting1 point
-
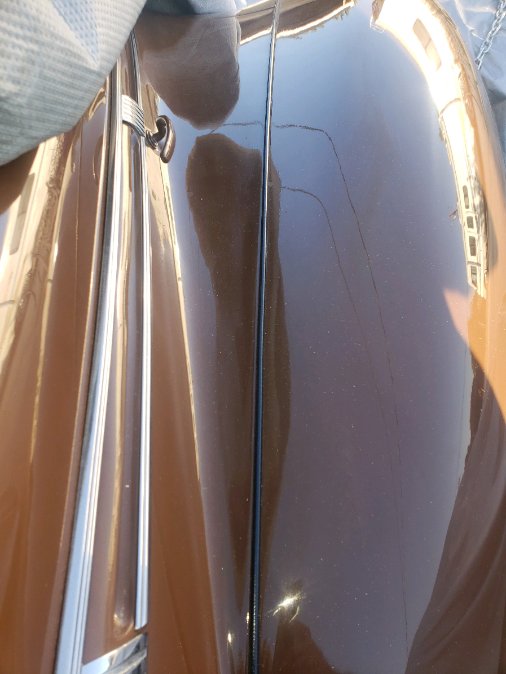
This is what it looks like on my car.
 1 point
 -
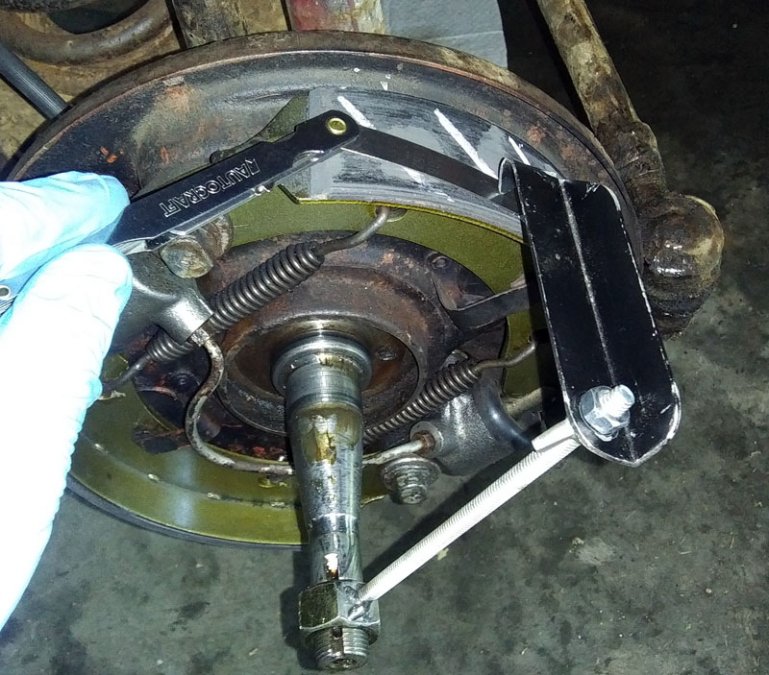
Don't have an authentic brake tool but if you can't find one you can easily make a tool that will do the job....here is my version: Before removing the wheel drum, one minor cam adjuster is tightened enough to create noticeable drag on the drum. The drum is then removed and the brake tool is threaded onto the axle. The pointer is located over the portion of the shoe that contacted the drum which indicates the ID of the drum and adjusted for a snug fit on the shoe. If you want to get really fancy a 0.006" feeler gauge can be inserted between the pointer and shoe. I tried chalking the shoe to assist with indicating the high point during the initial adjustment but didn't find it to be of any advantage. Notice how these brand new shoes have not yet worn enough to have full contact with the drum. I'll readjust the brakes after some miles have accumulated on the shoes. Once the pointer is adjusted to match the high point of the shoe that was adjusted against the drum, the tool is swept over each shoe so the major and minor cam adjustments can be set so each shoe is concentric with the drum. Hopefully this will remove some of the mystery of adjusting the brakes and provide visual confirmation of proper adjustment.
 1 point
 -
Might want to try a propane torch first, heat it up and the grease may just run out but be careful. I've freed up king pins with a propane torch.1 point
-
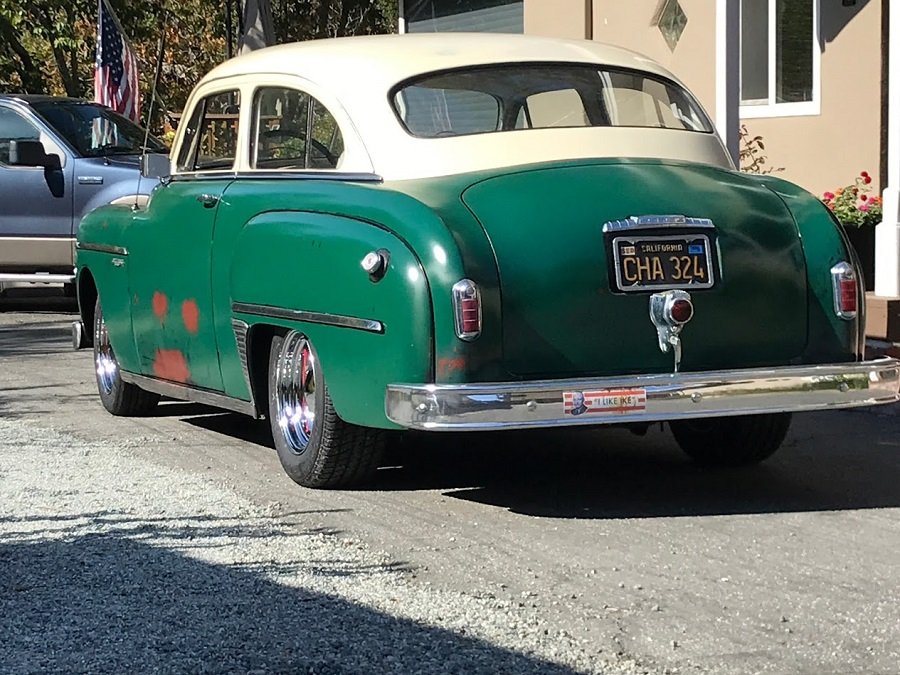
If you are going to aftermarket wheels, up to 15X7 fit nicely and easier to find tires too. Here's 15X7 front and 15X8 rear but the rear axle is 1" narrower than stock.
 1 point
 -
Maybe try it without welting, probably look much smoother...1 point
-
I'm really glad that you're able to enjoy the car with your family again!1 point
-
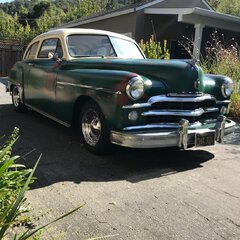
The contrast really does look sic, but the work to get it on and stretched and fit... yea it will look good in charlotte ivory too. That fender is getting smoothed and painted in place.
 1 point
 -
Fitting the fender weld now. I really like the black accent on the charlotte ivory so I'm planning on keeping it black initially. I can always paint over it later if I change my mind.
 1 point
 -
call up the folks you got it from, surely they have the answer for the very parts they are selling.....1 point
-
Since it's not a service brake and only needs to hold the car when parked, the scoring isn't really an issue. And the one time you need it in an emergency it's gonna be pretty much used up any way. Just get new friction material put on and adjust it to hold the car istopped.1 point
-
There is indeed a certain amount of excitement involved with driving something faster than it was intended to be driven. Pursuing a felon in a cop-car built to do just that?...meh. Racing a riding mower at a "neck-snapping" 20 to 30 mph?...now that's an adrenaline rush!1 point
-
Some like the looks of old cars but want the modern conveniences. That’s the appeal of restomods. Myself I want to experience the feel of what it was like to drive the car back in the day. To each his own. There is room for everyone in the hobby.1 point
-
I guess I have gone through the change of life as I used to be an incurable Hot rodder until I hit my mid thirties then the great slowdown began. Now I am the old goat everyone today wants to pass. But being able to enjoy the ride old car or new is just so much more satisfying. Just don't seem to have the inner urge to beat everyone to everywhere.1 point
-
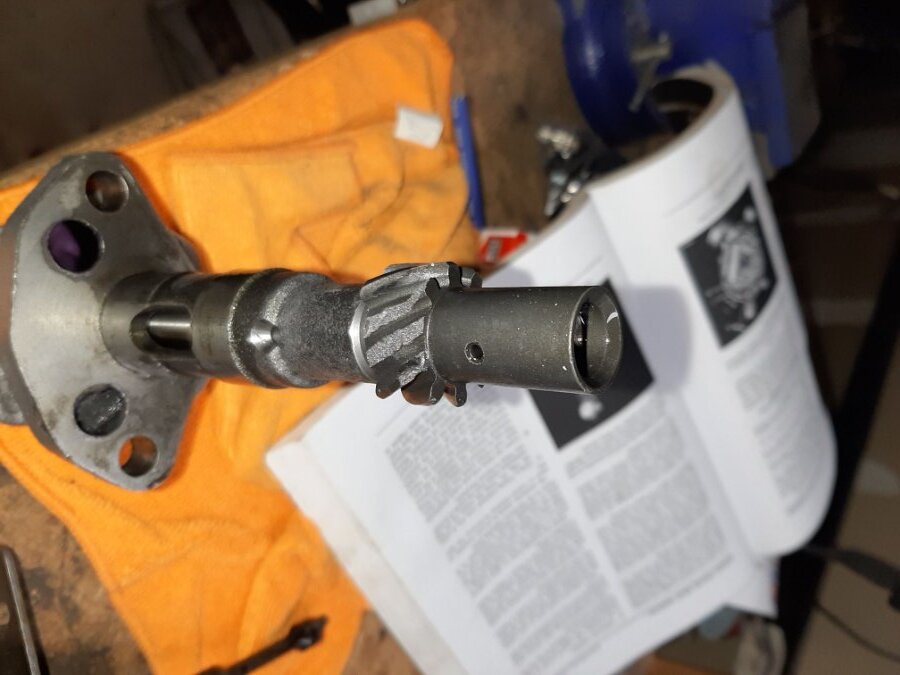
Thought I was making good progress but today hit a huge issue. Over the weekend I had everything together so I started walking through my first start checklist. Did an oil pressure check without any spark plugs, 10 lbs at cranking speed so I installed the spark plugs and proceeded to start it. After I realized my oil pump was off by one gear I adjusted it and it started for a few seconds before stopping. I figured I just needed to adjust the carb, and called it a night. Went to start it today and it just turned over. Started checking and realized I wasn't getting a spark. Turned the engine over without the distributor cap on and realized it wasn't spinning. I'm getting worried. Pulled the distributor and everything was ok with it. So I pulled the Brand New oil pump. It won't turn and when I was trying to start the engine it sheared off a couple teeth. Now I'm draining the oil pan to pull it and check for any other damage. I'm enjoying working on the truck, but days like today are frustrating.

 0 points
 -
The paint will never stay on the black plastic welting......it might look good for a little while and then it will start to peel, I would recommend against it.0 points