Leaderboard


Popular Content
Showing content with the highest reputation on 09/14/2020 in all areas
-
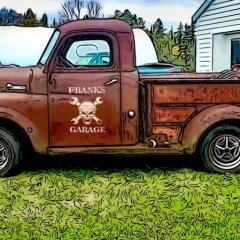
Just curious about this. I sometimes have strangers in their 20's come to see me because someone has told them I have several old cars,and they are looking for "old car projects". They get here,look around at the 30's to 50's stuff,and tell me,"No,I meant old cars,like a 68 Camaro." It won't be long before "old cars" will be crap like 95 Mustangs and Camaros,and our stuff will seem to be like Model T's. What is to happen to our old stuff when we pass? Will it be sold by the pound for scrap,put into a museum,or are there people you know that are interested in it? I have it written into my will that all my old cars and parts are to be sold,and have two friends that don't really know each other more than casually named as the people who will handle the sales. Both are restorers and hot rodders,both are in their early 60's,and both grew up working in their fathers garages,so they know the stuff,and know what it is worth. They both even know people who would want to buy it. When it is sold,they will each get 10 percent of the sale price for their services,and the rest gets split between two named charities. There will be a lawyer overlooking the books. I figured that was the best way to keep the sales legit. Seen stuff just sit around forever and not get sold because family members got involved and nobody wanted anyone else to get anything because each one of them wanted it all. Neither one of these guys is related to me,or to each other. I have also seen stuff worth thousands sold for hundreds before any auction even begins,and somehow it ended up in the guys garage that was "helping the family get fair prices." Not trying to get morbid,but it is a good idea to have written and notarized plan in place regardless of your age. If nothing else,it might keep your relatives from fighting each other over the spoils once their spouses and children spot something they want. It's your stuff,and it is YOUR wishes that should dictate what happens to it all.4 points
-
Good news that no serious damage was done with the green paint. Bummer on the motorcycle tank repaint... I had a can of spray paint spontaneously start to leak while on the shelf in my laundry room. It had probably been there for several years and I believe the can seam rusted, but one day I could smell paint fumes in the house but couldn't identify where it would be coming from. As I walked past the laundry room I heard a hissing noise. I opened the door and noticed the mist. Fortunately all the paint pigments were settled at the bottom and the leak happened about half way up. It was only clear paint solvents, but it was still a mess to clean up. Once I realized what it was I grabbed the can to toss it in the garbage, stirring up the pigments in the process. It started spraying color into the garbage can. I got it outside to remove the fumes and commenced to cleaning up the mess.2 points
-
Dude.....I so want to do an electric conversion on one of these old Mopar’s, just think if you used a businessman’s coupe how much battery space you would have.2 points
-
I'll admit that my first thought when I read the thread title was "Wait, you actually pass people in your car?" _2 points
-
Installing vibration, heat, and sound insulation kit.


 2 points
 -
Recently my doctor prescribed gabapentin to ease my leg pains, you would not believe the number that is engraved on that pill, it must be kismet LOL!
 1 point
 -
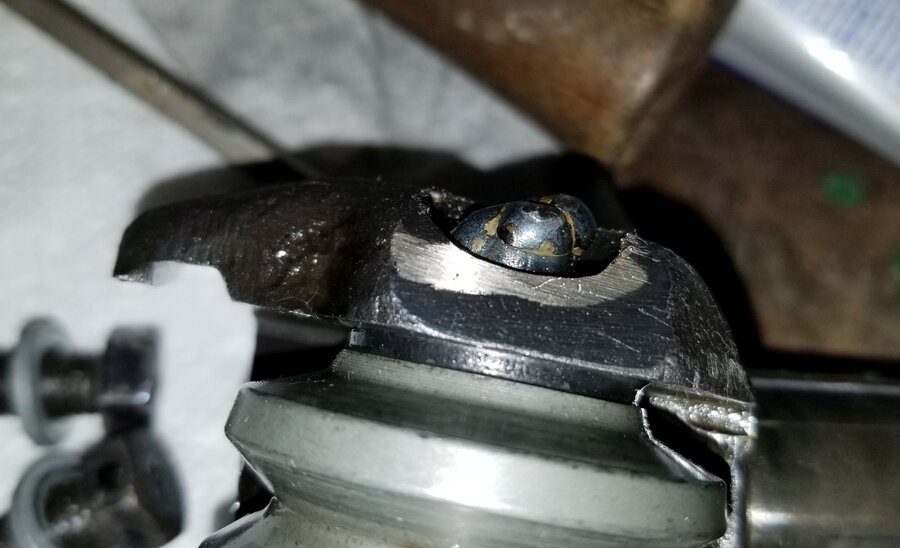
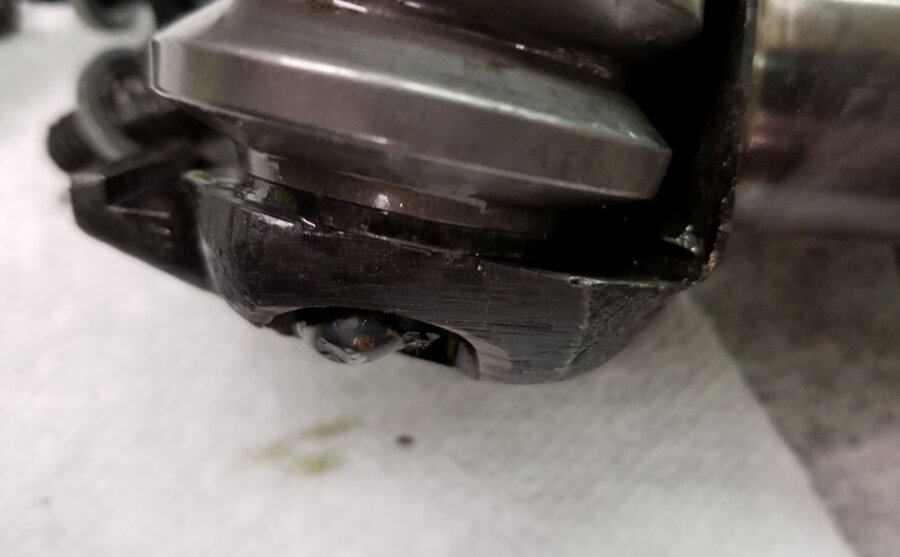
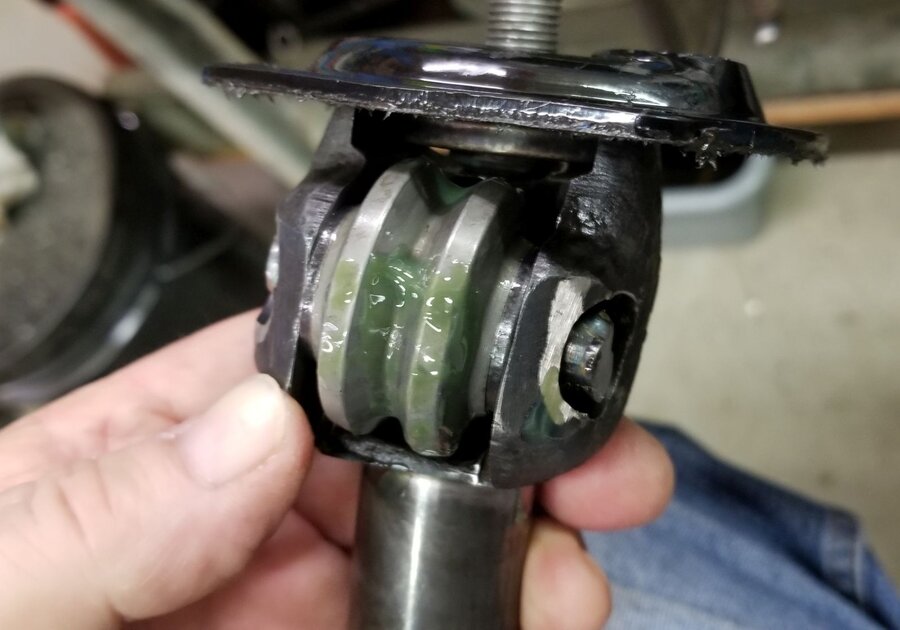
Ok, the steering gearbox is assembled. The final product feels really good. I did however make mistake #3 when I welded the ends of the pin the second time around. I didn't find out about the problem until I had the sector shaft in place and found that I couldn't rotate it through the full range and the more I tried the more the sector wanted to bind in the housing. It took me a bunch of times tapping the sector arm out of the housing, recentering it and trying again. Finally on one of the attempts I noticed that it seemed to be in the same spot (duh!) so I pulled the sector back out again and looked closer. It turns out when I welded the ends of the pin I built the weld up to high and the end of the pin was catching on the edge of the casting inside. I guess there is a reason for the curved grinding that was done on the sides of the sector arm. Pictures of the pin before grinding: Pictures of the pin after grinding: The fix was to tap the pin all the way to one side, grind down the top of the weld bead, tap the pin to the opposite side and grind the bead on that side. I managed to grind enough so that if the pin was maxed out to one side it wouldn't bind. After solving that problem the rest of the assembly went really smooth. Here's a couple of pictures installing the worm: The steering shaft can rotate approximately 4-1/4 turns lock to lock. I made a mark at the 2-1/8 point and I can definitely tell as I'm adjusting the sector arm in and out where the high point of the worm is. Right now I have it set to where I think should be but I'm not sure just how much drag should be felt when the steering wheel is centered. More research is needed. So the lesson learned this time was to make sure the ends of the pin are ground down to allow for clearance inside the casting. I can't imagine what would have happened if I was driving and the pin decided to shift far enough to contact the casting. The outcome would probably not be good. I still need to put the dust seal in place, put the outer tube in place and add the cornhead grease. I'm going to wait on the grease until the whole assembly is mounted in the truck. Brad


 1 point
 -
Restoration Specialties In Windber, PA. I have dealt with them personally several times and they are always most helpful and friendly. They have a great online catalogue. Good company to support as they are a real help to our hobbly. I am in no way connected to them, just a loyal customer.1 point
-
primer is a substrate that provides protect to the original surface and is to be also able to work to a level and surface for bonding your top coat..therein lies a many problem with the epoxy base as they dry so hard they are not easily worked to allow top coating. There are a few 2K primers out there but they are readily sandable...are these the primers you are inquiring....otherwise if not 2K I do not recommending adding a catalyst. Also the better primers are lacquer and most catalyzed paint is enamel based.1 point
-
Me three, the B4D has wing windows without the 1/4 glass. I open the cowl vent and wing windows and tell Julie It’s the “A/C” And “hang on” got to say, I love the no seat belts.... If I hit a corner just right, she slides right over to me ?1 point
-
I have only one charity. (and its not me) St. Judes. Right on, Knuckle1 point
-
Frank,it is obviously not about the money,but preserving the cars,parts,and tools,so they don't get sold for scrap and disappear forever. After all,*I* am going to be dead,so what good is the money to me? BUT......,what money they do bring after expenses,half it is is going to St.Judes Childrens Hospital. I see this as a "two-fer".1 point
-
anything is possible, such as doors swapped to wing/non-wing, etc. however, the '52 standard-cab b-3-c my dad purchased in 1983 has vent windows. nothing to indicate they weren't original to the truck when he purchased it. truck originally came from north carolina. note the red under the door card matches the red of the cab roof, while the remainder of the truck (dash, lower door & exterior) was painted maroon/burgundy. edit: in looking at Bunn's book, my '52 is a deluxe cab rather than a standard cab, as it has electric wipers, the dome light, and dual wing vent windows. so, merle was correct. according to Bunn, the deluxe cab didn't come with cab corner windows. a custom cab would also have the driver armrest, cab corner (quarter) windows, and dual sun visors, too. also, the standard/deluxe/custom "standards" changed from 48-50 to 51-53, with some gains and losses depending on which level was chosen, ie, cab corner windows for deluxe and custom 48-50, but only for custom 51-53, and dome light/electric wipers only for custom 48-50, yet for both deluxe and custom 51-53. etc.1 point
-
I then will play the devils advocate, the money I spent on my cars and parts is long gone, all the other cars are gone........I decluttered nearly a decade ago, we have one car and one truck.....so I really don’t care what happens to my car or minuscule parts stash because the money spent was under the table and not a part of the budget. So regardless if it is stolen, sold, or given away there is no loss of profits as the money was not earned by her or her’s in any way at any time. I worked hard on second and third jobs to earn that cash.......1 point
-
Hi Worden, I reviewed your resistance numbers. If you like, for comparison I can record some of the same measurements on one of my cars. However both of mine utilize breaker points. If I recall you are using the Pentronix system. I have no idea about it other than it's solid state and I suspect uses a hall effect, or magnet of some type, to trigger the spark. I am suspicious about that Pentronix system, possibly being the source of your trouble. My points, file, condenser, & dwell meter, have all performed rock solid so far. I'd be inclined to make a new separate post, just addressing the electrical issue. Copy and paste your same post above. You may likely get a lot more views and responses. Some of these long threads, people get lost in. If they aren't following along the whole way, they may get behind and give up following.1 point
-
the rear 1/4 windows were an option, not a standard item. fwiw, my '48 b-1-fa has them. not that the quarter-windows are particularly useful in my truck....can't see a whole lot out of them. my '52 b-3-c doesn't have them.1 point
-
The SPW wiper kit arrived while I was gone. Bench tested the motor with the 6-12V 20A converter and it ran so I got into it. I wanted to mount the motor behind the kick panel on the pass side but it stuck out to much. Only way to put it there was modify the kick panel. So I started looking up above the glove box and heater unit. I made a couple brackets that point the output cable directly at the door post where the original vacuum line ran up to the overhead. Angled it up to reduce the first bend. The directions also say that all outputs from the motor assembly and transmissions have to go at least 4 inches straight before any bends. Had to do a lot of holding with the heater unit and glove box in before I could see a way to mount it up. Painted the brackets and they are drying now. I did test mount the transmission over the pass side just to see what it would take. Actually fit pretty good. I don't see any problems so far. Biggest hassle is going to be running the tubing. First pic is the top plate for the motor assembly with brackets installed. Second two pics are the mounted unit (heater and glove box removed) at the top of the kick panel area on the passenger side. I'll attach a couple more pics tomorrow afternoon.


 1 point
 -
You can just splice new wires to the ones that were cut,and then wrap them tightly with electrical tape. I like to add a rubber outside "sleeve" of something like vacuum hose before I crimp the fittings that go to the sending unit. Especially in older cars with cloth insulation over the wires. Adds a little extra protection and costs virtually nothing.1 point
-
this technique and wording in order to be successful works best with those suffering Tourette syndrome1 point
-
I have a 39 Plymouth which also has the choke & throttle knobs molded on the metal sleeve that holds the cable. I wanted to keep the original knobs that would match the light and panel knobs. Found a small shop that did a great job at repairing, he made a vertical cut in the metal holding the knob with a dremel, then silver soldered a new cable within. The groove in the metal sleeve then had to be filed out. Unfortunately the shop owner recently passed, however wouldn't be difficult for someone that is good at silver soldering If you want I can send photos of the completed work, may take me a day or so. Regards, Richard1 point
-
Thanks for the heads up, never saw the wedge carb plate before. I think I am good. Others talked me off ledge and I welded up the spring perches today such that pinion angle was same, but opposite, the trans output angle.1 point
-
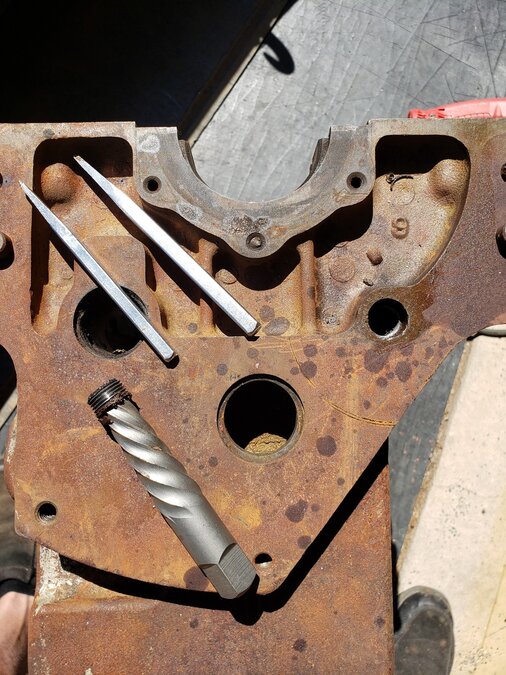
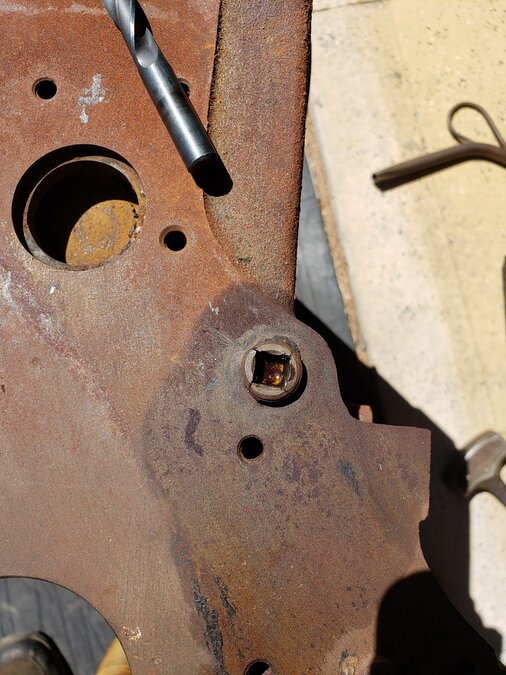
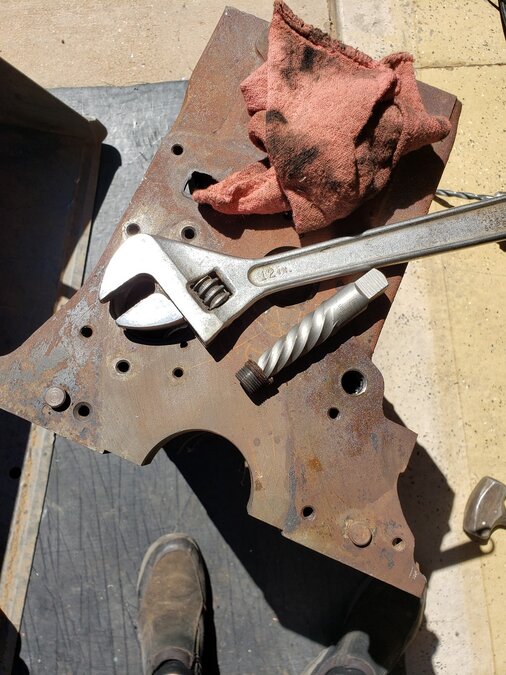
Actually that is what I used but mine is half-inch drive, I had it in my impact screwdriver the kind you hold with your hand and hit with a hammer and it's supposed to jar it loose, well one of them it just rounded out the second one it just started cracking because it was above grade so to speak. I drilled them out to about as much as I felt comfortable, 1/2 inch, then used an easy out, just barely tapped it in so it didn't spread too much and got both of them out with the threads unscathed. Hot tanking and magnafluxing next Friday, and I'm going to leave the broken rear main seal bolt for the machine shop, I tried but I can't get it, don't want to bung it up to much.
 1 point
 -
I have had a little vibration when cruising off the loud pedal, especially on the highway. Turns out that after finding a final preferred ride height my pinion angle ended up way too far nose down- like 9° I got a couple sets of shims, 4° and another that was more like 6°. The thicker ones covered the leaf spring pin leaving only a small rounded nub- not enough to hold alignment on the spring pads that are welded to the rear. So I went with the thinner ones, and added a little air in my bags to get a touch of rake. Now I’m closer to 4° nose down at rest, and still dead straight under power when the leafs wrap and the slapper bars limit windup. I did have some excitement when I dropped one of the wedges on a full can of spraypaint in the garage- the paint had gotten knocked over and the wedge nicely pierced the side creating a spinning jumping can spraying green paint everywhere! No damage to anything important though and the harleys are across the garage and behind stuff.1 point
-
Didn't say it was my first beer.....1 point
-
I would grab the beer first, then do next step1 point
-
As mentioned, toe plays almost as much a part in this as caster. and i dont recall 40 psi being the correct pressure for bias-ply tires. guess higher pressure lowers rolling resistance. seems you are getting close, and there are so many variables. one change at a time, and make a note of the change. side note, my 2001 pt cruiser has only toe adjustment. After replacing a tie rod end with careful measurement it was difficult to drive,it took 1/2 turn on adjuster to make all the difference. changing caster or camber, toe is always reset last.1 point
-
Floor is completed. Treated whole floor with Metal prep, POR-15, and Topcoat. Then painted on OEM bed-liner in the trunk and real finder wells. The main cab has a layer of rubberized sealant (Flex-seal) applied to the floor. When we get to the interior work, a layer of foil insulation will go down under the carpet. Should be a pretty quite ride. Probably should have finished the body panel welding before painting the floor, but I just couldn't wait


 1 point
 -
I've seen old brake hoses do weird things. They can collapse on the inside and hold pressure and release when the hose is moved by moving the steering. Rare, but plausible?1 point
-
I've been enjoying this thread, and you have every right to be proud. Nick will be doing very well if he keeps up with two out of three of those like skills ( I still pick up my trombone, but my last, and first, competitive run was a 5k with my fellow co-workers at my first job after college - in 1977).1 point
-
Knuckleharley, it's so nice to see you posting here again. Hang in there and keep working on the old gems. Wishing you the best and stay safe. John R1 point
-
Hey Keith, no swearing on the forums. W****r and s**w are both swear words in my book. If I never saw s**w again it would be too soon. ?1 point
-
You ever do something so stupid that you have to confess? I had not cranked the B3C in about 6 weeks so I thought I would start it last night in the barn and let it idle. Since its been sitting in the high humidity of a late Georgia summer, the clutch was stuck engaged, unbeknownst to me. Well you wouldn't think it would start and take off in reverse (it should have lurched and stalled), but it did, and my pressure washer happened to be behind it. The pressure washer was flattened and lodged under the truck where it crushed the new fuel tank I installed this summer and tore the short rubber fuel line between tank and fuel pump. I pulled the truck forward after a few pumps of the clutch to dislodge the pressure washer and ran to get a pan to collect the gasoline then quickly gorilla taped the fuel line. On the bright side - only about 1/2 a gallon of fuel leaked out and the tank wasn't pierced, although it is pretty mangled, and Gorilla tape is awesome. And I already know how to install a fuel tank. ? -Humbled0 points
-
I had something similar happen 40 years ago. A friend had just painted his motorcycle tank and fenders and they were sitting on sawhorses just inside the back door of the garage. On that fateful day I happened to go into the garage and on my way back out I slammed the door to close it. Well, a can of spray paint fell off the shelf and landed on the floor performing the same act yours did. He had to get another paint job.......0 points