Leaderboard


Popular Content
Showing content with the highest reputation on 09/02/2020 in all areas
-
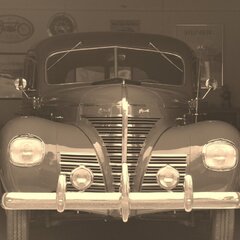
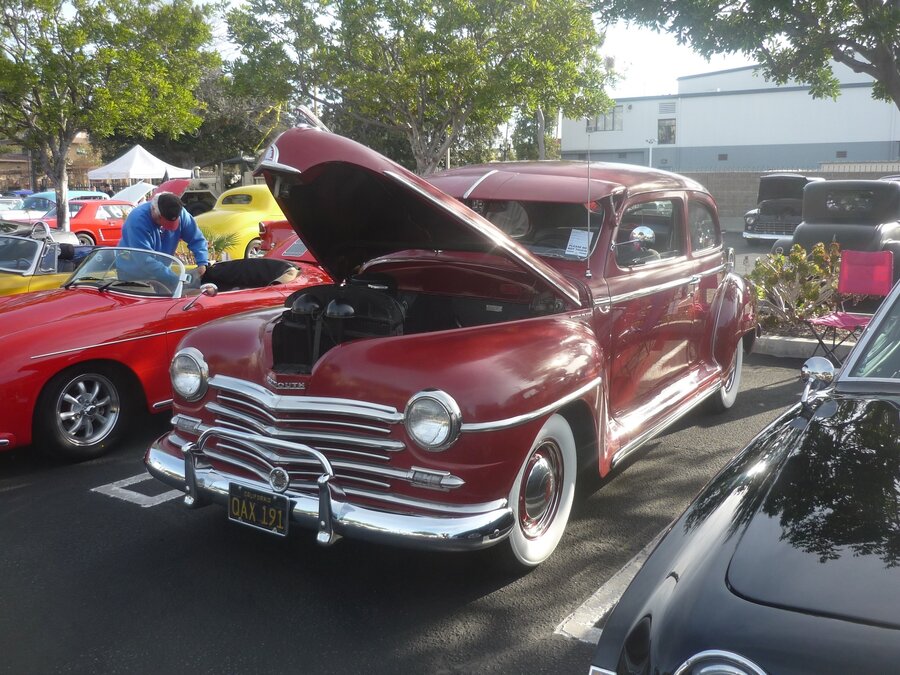
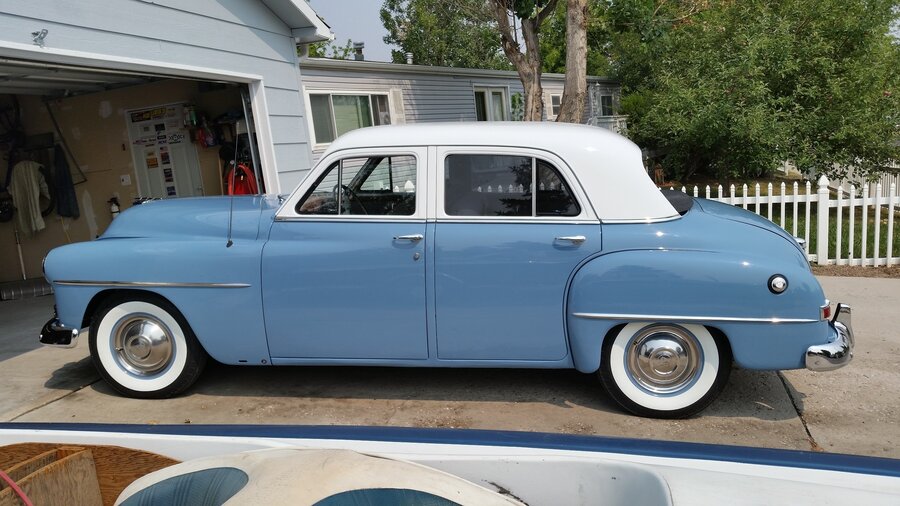
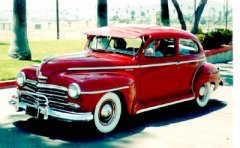
I run Coker white wall radials on my Chrysler. The look seems to suit it well. I run black wall Coker bias tires on my 38. I can't be sure, but I suspect white walls were not too common in 1938, especially on a Plymouth. The bottom of the Mopar line. I suspect the Plymouth was more of a working man's car. I like both tire options. The bias gives me the feeling of the car back when it was new. Of course the radials offer a smoother ride and easier to drive. Yet so is the Chrysler's entire suspension and steering too. It was designed to be that way. In 1938 the Plymouth had a solid front axle with leaf springs on each corner and king pin style steering. White walls on it just don't seem right to me. The choice is yours. Some folks will put white walls on some of the cheapest cars of the time. Some folks will put black wall radials on a Dusenberg. Your call. Depends what you want.
.jpg.dd603f6eca54dd0f3e0f7f9cadf561e3.jpg) 3 points
3 points -
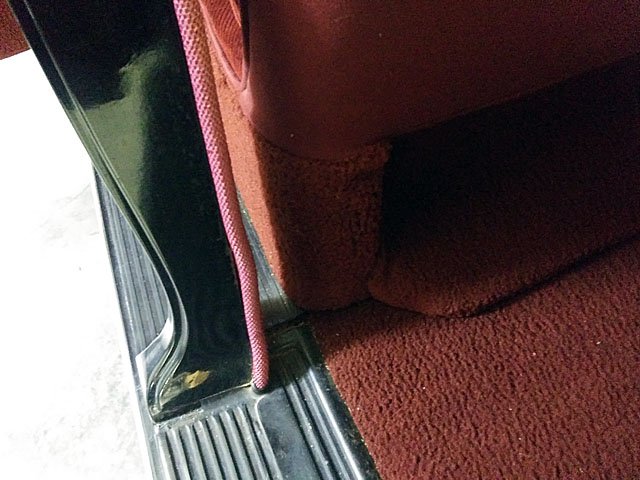
Finished installing a seat belt yesterday. Is there any interest in showing the installation?
 2 points
 -
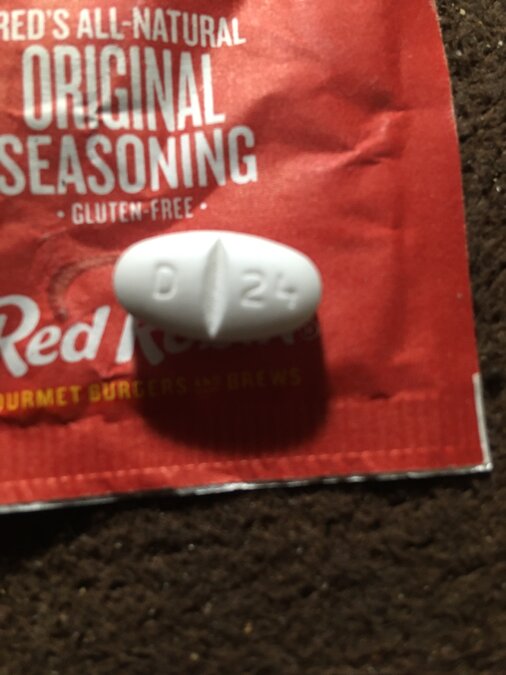
Recently my doctor prescribed gabapentin to ease my leg pains, you would not believe the number that is engraved on that pill, it must be kismet LOL!
 2 points
 -
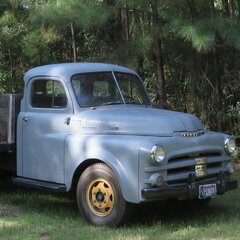
Here is my recent purchase. 1951 B-3-D
 2 points
 -
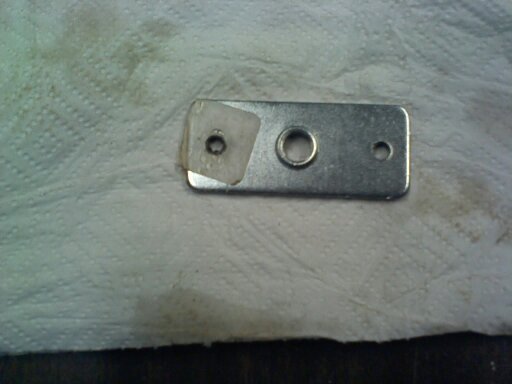
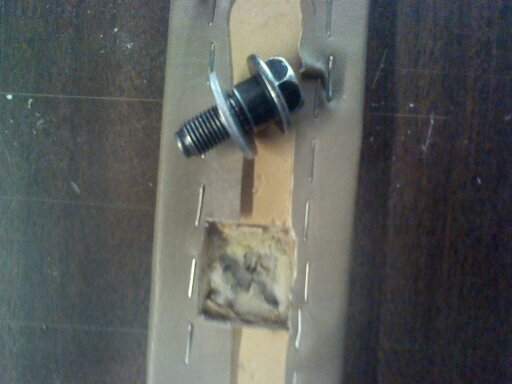
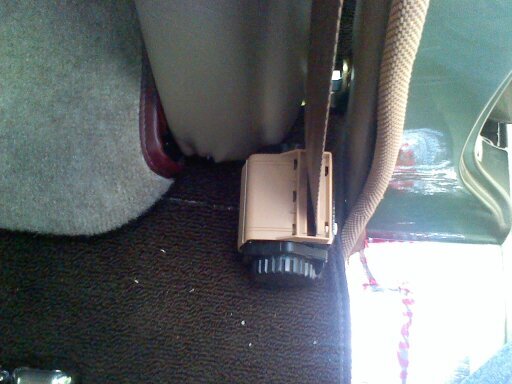
In addition to the seat belt, I bought extra hardware (Washers and B-pillar mount) from Seatbelts plus. Although the pillar plate could have welded or rivet to the pillar, I decided to put the plate inside the pillar. The plate was too wide to fit right behind the metal so I had to decide between cutting the plate to make it narrow or mount it farther back inside the pillar on the ridges created by the shape of the pillar. Also, I tapped the holes for 1/4" 20 screws. There is a hole that matches the light switch hole on the driver's side. I only needed the longer cut on the left side. I dropped a string and a screw from the top trim hole to the switch hole and tied the string to the plate and lifted it into place. It was easier to use a longer bolt to hold the plat in place while securing the 1/4" screws. I enlarged a hole used for mounting the trim to a 7/16" hole and drilled 1/4" holes fro the screws. My trim is quite thick so I had to remove the backer board so the bolt would reach and I installed a 7/16" washer to ensure the mount move freely. I mounted the retractor and the outside mount on either side of the body mount so the retractor sits on the edge of pillar and I wish I had installed the other mount closed to the seat. I may or my not move it. I also opted for the 20" belt receiver. not thrilled about the placement but the seat is slid all the way back so when I side it forward I think its going to be fine.


 2 points
 -
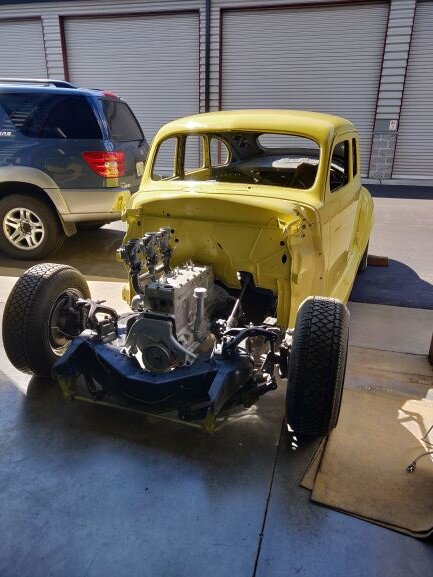
Back in the garage at HOME. Paint and body came out perfect, Sooo happy with the color. I'll be posting more pix as assembly gets started. Happy Day !!


 1 point
 -
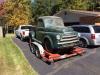
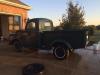
Flatbed Red Rebuild For Farm Truck Use... As stated earlier, this '51 has been drafted for farm work and will need a li'l work done to get it ready to haul water from a well at the bottom of the hill. This truck was seen earlier and has changed owners a couple of times since being dragged out of a barn in Kansas. The truck is mostly complete, riding on 6.50x16s oddly enough, and the flatbed has one floorboard that will need replacement. The sideboards are kinda shot, but the bulkhead is in decent shape. The pinstriping on the bed sure seems fancy for a work truck, but I've seen this done on some modern trailers so maybe it's a selling point for higher quality1 point
-
A decade of road-testing is plenty... Those who think a formal education is a crowning achievement in one's life are sorely mistaken. Restoration of a unique antique automobile is THE crowning achievement...okay, getting married, having children, blah-blah-blah all that spiritual stuff is important too (and just as expensive). What started as a photo-op for a diaper-clad red-head on the bumper of a '48 Dodge that had been in the family since new has progressed to the next big step of knocking the rust off and making the beast shiny again. I got it running after ten years of scraping cash & time together while blundering through high school & an engineering degree. Family squabbling ensued as the spoiled side of the family assumed this heirloom was 'given' to me in tip top shape and much peace-making diplomacy had to be pursued. Working through the Texas motor vehicle legal red tape of documented ownership was an exercise in patience & learning how to read disgruntled state employees. Debugging nagging carburetor & electrical problems was a good polishing of practical engineering fundamentals. Finding repair parts learned me real good on how to get creative with existing materials and a limited budget. In summary, many disciplines had to be mastered to bring this piece of American steel back to life. Ten years ago, I got the '48 on the road, licensed, insured & inspected. Offended many folks when they offered to purchase my buggy for a miniscule fraction of the $$$ I had invested in it & I turned them down flat. I didn't want to do any cosmetic work until I had all the bugs worked out, and that finally happened last year when I replaced an intermittently foul-running carburetor with a NOS find from eBay and resolved the hot-starting problems. Didja know that even if the original big gauge cables look decent on the outside, that the indiviual strands corrode over time & build up a crippling resistance in the starter circuit? I sure didn't until I took some advice from the guy down at the starter & alternator shop. The bias-ply tires are so worn now that they won't pass inspection, and it's been 10,000 miles on the rebuild, so everything has to be gone through per the shop manual directions. And the frame is bent from one of great-grandpa's three accidents he had before grandpa took the key away from him at the ripe old age of 90 back in '68. The bent frame has really showed up in the tire wear. Oil leaks are purt'near everwhar cuz of lack of properly located sealant in the motor & transmission areas. A couple of brake lines are weeping from inaccurate flaring technique. And I suspect the rear axle vent is plugged because of the gear oil that came out of the grease plug. So I reckon it's time to take the next step and make Pappa's Dodge respectable. Doing research on this forum has really straightened me out on a lot of li'l odds & ends. Such as Wix 51010 oil filters that I've been using ain't right. The 218 Plymouth (!) that no one remembers having been swapped out has been running this filter since way back, cuz Dad remembers having to pull that messy perforated coffee can out when he was learning how to do his mechanic'n. There is a PCV system available for this motor, thanks to the P15-D24 downloads & member contributions. Setting the brake shoes can be done with a fabricated tool; bleeding the brakes can be done effectively by one person. And I can even jump start the 6V system with my Dodge diesel by simply disconnecting the charging circuit. Let this be fair warning that I may be contacting a few of y'all for some technical information from time to time. I haven't committed this site's contents to memory yet, but I've read a majority of the threads & taken several pages of notes, cuz nobody likes to be asked a 'stupid' question. But I would like to thank all who have posted so far for providing a fountain of information. When I did the initial mechanical restoration, I took plenty of pictures. Unfortunately, they were Polaroids that have since disappeared through a collection of mishaps. But I will be recording as much as I can this go around to go along with the documentation I've been collecting. btw, the '49 1 ton went through a mishap last year thanks to Three-Tooth Timmy at the local tow truck establishment. Long story short, I have to replace the drag link, the steering box mounting bracket, and tie rods. Comparatively easy to accomplish... Thank y'all again!1 point
-
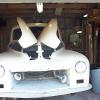
Lol, Here’s a picture for ya ?
 1 point
 -
I've mounted them under the dash in my P15 and B1 horizontally.. Easy to get to, out of the way. I would avoid the trunk as I had one go off when a piece of cargo hit it. Big mess. I also use CO2 around the house, lot easier clean up if you use them. Also good for calming down pissed off rattlesnakes?1 point
-
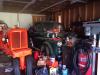
part of the ongoing lift project...preparing the area for install. This used to be three school science/lab tables....took the wheels and tops off...set on a base....new counter top....and what is a throw back to an old movie...PAINT 'N' COUNTERS OF THE THIRD TIME... this time around the cabinets got shelves to go with the drawers....I have plans to rework the left side cabinets also... cut out is for my wash tank to sit flush..moved the switch to cabinet long ago1 point
-
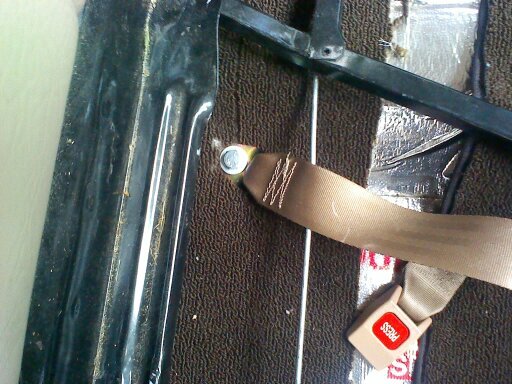
I have the seat all the way back and don't want a retractor in the backseat floorboard blocking access through the door, haven't figured out how to make this work. A solution might be non-retractable shoulder belts but they are a bit unwieldy to stow.
 1 point
 -
Hello, I have Goodyear collector tires I purchased for my 48 Plymouth throught Jim Benaminson in the Plymouths Owners Club (benji@utma.com). They are a 6:70x15 3 1/4" www.
 1 point
 -
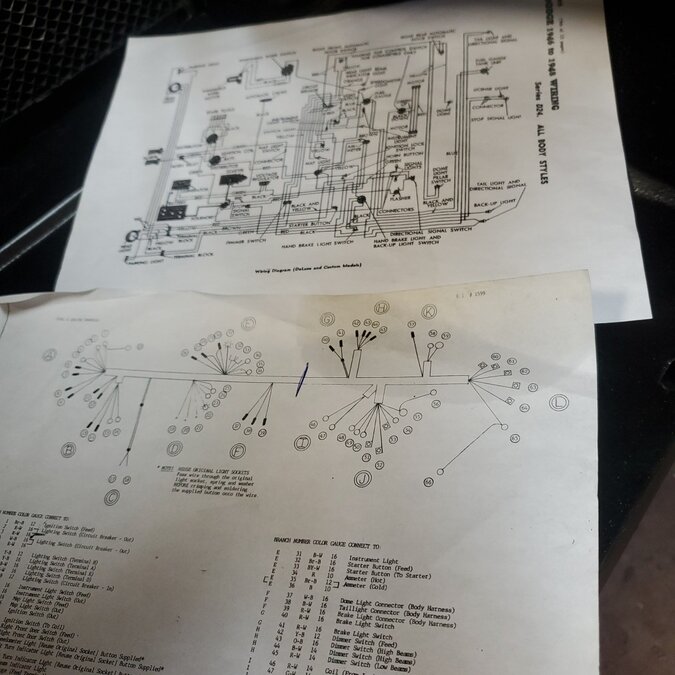
Last night, one easy task, gas filler neck. Also one more detailed, wiring blocks. Wiring break down chart from RI Wiring came with my harness. Invaluable in helping as is has the color and gage. Unlike the diagram. Both came in handy.

 1 point
 -
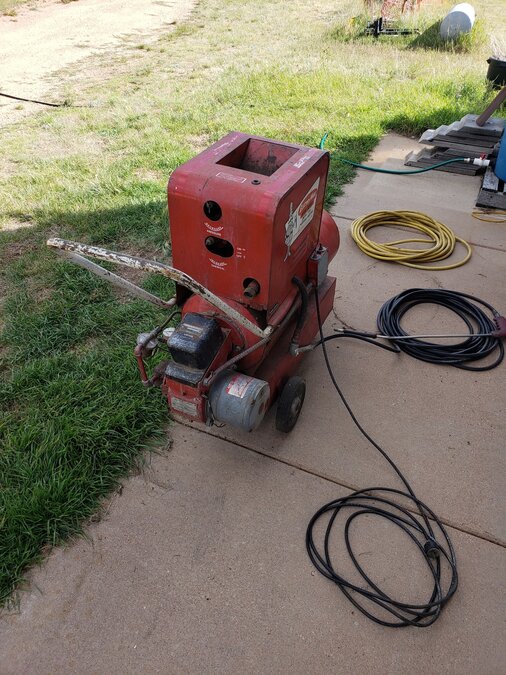
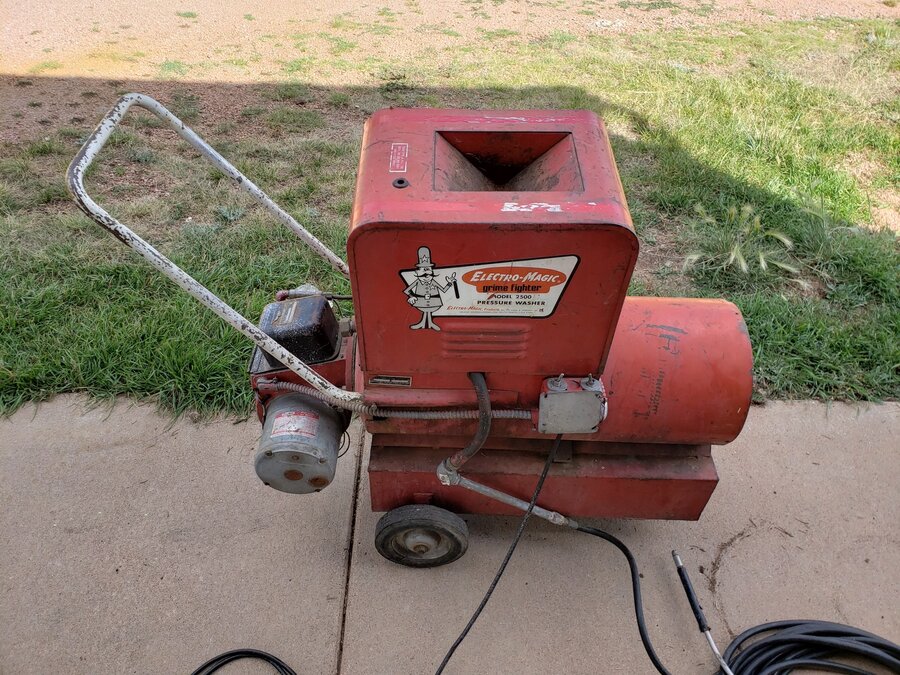
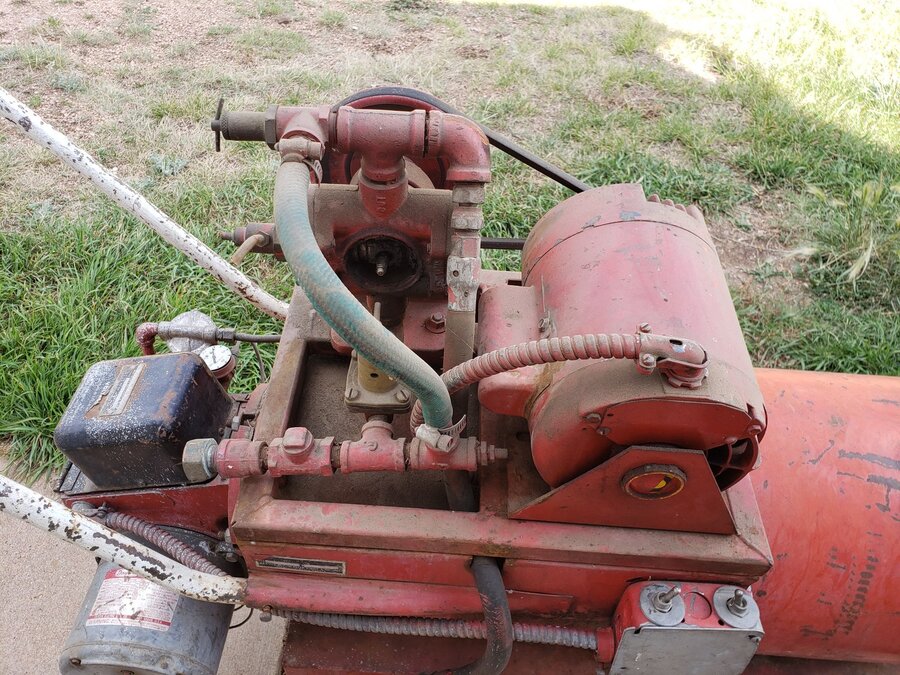
A freebie on the side of the road, Electro Magic Grime Fighter Model 2500, no idea of year (like I need another project) Maybe a basket case, who knows, definitely missing the coil assembly for heating. Fan/Fuel (kerosene) pump works then binds, Water Pump Motor/Pump seems to work. Not sure why there was a compressor air line with it, but I can always use another. Longshot, can not find a manual, wonder if anyone has one?
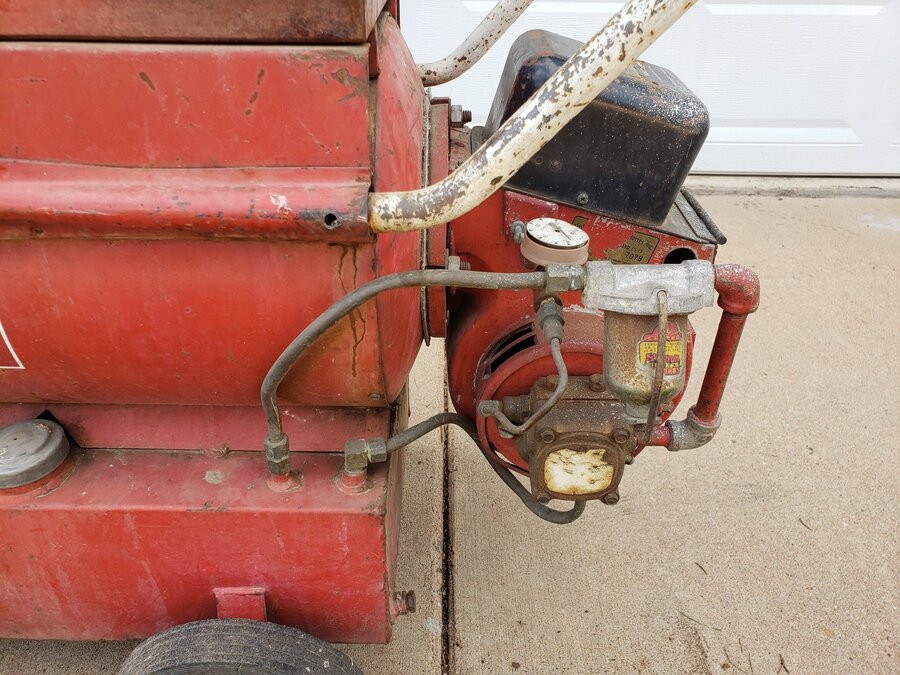
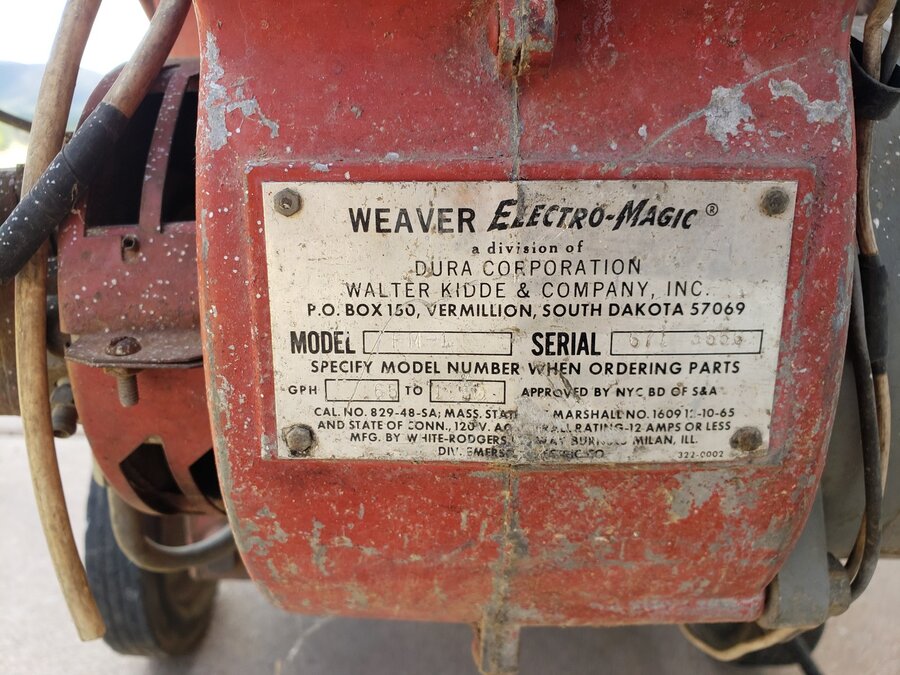 1 point
 -
Nobody out here knows what the hellgrammite is so I had to laugh when I saw the Porsche. They were common in the Rocky Mountains and we used to find them for fish bait. We didn’t know what the hell a hellgrammite was & as kids we called them rock rollers. At some point it became a comic book character.1 point
-
I've stick welded cast iron hooks on loader buckets, preheating the cast iron and bucket steel cherry red to get less of a temperature spike during arcing...had to use O-A torch and be super careful after initial tacks to get everything back up to temperature without getting anything too hot...very nerve racking to get everything setup + preheated and welder dialed in cuz I only had one shot at it...probably the purtiest welds I ever made because of the preheating and let it cool off very slow, probably should have covered the area with sand to really slow the cooling...I practiced on metal of similar thicknesses to get the welder setting close before preheating, then only needed to turn it down a li'l when tacking...lots of work for such a small chore, but the end result was very robust and worry-free1 point
-
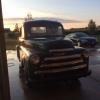
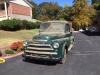
Back out for a cruise tonight. Saw a great photo op. The old 265 is running very well. Burning a little more oil than 3 years ago when I bought it. Oh well. A sign of good use!
 1 point
 -
Awhile back, my wife and I made a 250 mile loop. I went west to Anaconda, then farther west to Georgetown Lake. Going north between Philipsburg and Drummond I saw this sedan that the man was fixing for a neighbor. A mile south of Drummond we stopped at Ohrmann Design and met John, nice guy and very talented.


 1 point
 -
Well I just thought it was hilarious I have a D 24 emblem on my gabapentin when I own a D 24 and for those of you wished me well with the gabapentin thank you, it is also being combined with 50 mg of tramadol once a day. about 10 years ago I was helping a friend clean out The back of a semi trailer And a strong gust of wind picked up and slammed the door right into my back as I was pinned by the other door already in place so this also has to do with nerve damage and a sciatic nerve I don’t like being on an opioid I don’t even like taking aspirin, but you Gotta do what you Gotta do when the pains got you by the balls.1 point
-
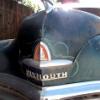
The one shown in his picture doesn't look too bad and an excellent candidate for the "pick and file" approach. I had ones on my '51 Dodge business coupe project that were a lot worse than that and they turned out fine after picking, filing, and buffing was done. It must have taken me 100 hours to do all the stainless side trim and grille on the car but well worth the effort. The one shown was particularly bad to start.
 1 point
 -
This topic was discussed a few months ago, and Bob (Dodgeb4ya) posted this image that shows that the Purolator and AC filters work from outside-in, whereas the Wix and Deluxe units filter from inside-out.
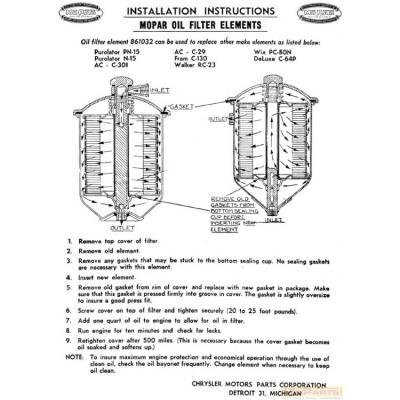 1 point
 -
I have also added an electric pump to prime my carburetor when it's been sitting for an extended period. I used to have it plumbed in series with the mechanical pump and found that sometimes it could push fuel through the mechanical pump and sometimes it wouldn't. I suspect that it had to do with the position of the diaphragm. Maybe it restricts flow through in certain positions? Sometimes I'd just have to give the engine a quick crank to get the fuel flowing again. The electric pump was also helpful when things got hot and the pump on the engine struggled to pump fuel. I could switch on the electric pump to help push fuel through the system. I have since re-plumbed my fuel lines and put the electric pump in parallel with the mechanical pump. This allows for easy priming, and it can still assist the system if needed.1 point
-
Whew......you “ Dodged “ that one....lol...very good I’m glad you are on top of things, can’t wait to see a driving video!1 point
-
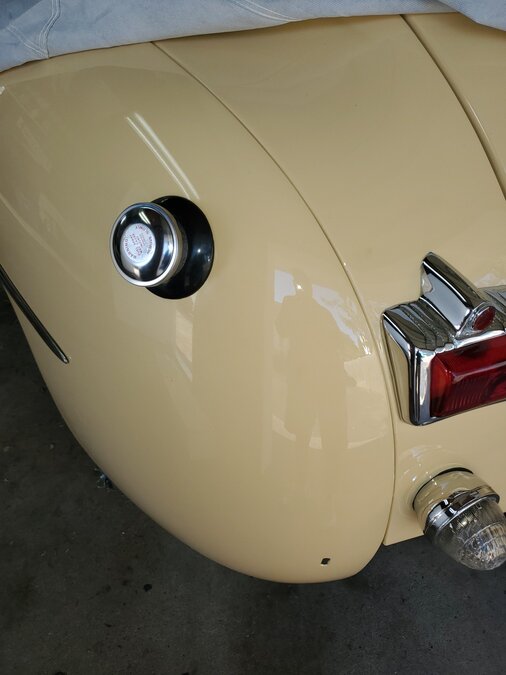
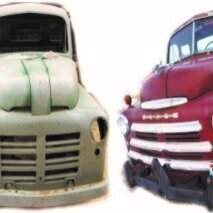
Thanks, previous owners did the chroming, Fargo even on the rear bumper. I think some of the late 50's Dodge trucks had chrome bumpers and that might be what is on the Dodge.
.jpg.ef4ebefb892a8f9dac8b4fa7dd068147.jpg) 1 point
1 point -
Sounds like the infamous engine/transmission mount dragon has reared its ugly head again.................. https://p15-d24.com/topic/50844-engine-mounts-p15-caution/?tab=comments#comment-5394811 point
-
One thing I've noticed about Amazon is for the past few months they do not actually put the package in the post or UPS for several days longer than they used to. Pete1 point
-
I applaud you!! That car is a beauty!1 point
-
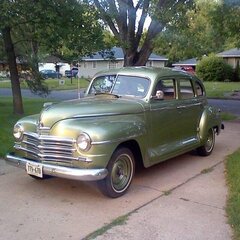
little back history Purchased new by my dad in 1951. Transferred by the Airforce to Tucson AZ where the car spent the majority of its life. Was dads transportation until 1986 when he passed away. I was the only one of seven siblings to drive the car during high school in the early 70's. Mom kept it parked beside the house until I took possession in 2013 and moved it to Wyoming. I started the teardown in the winter of 2016, the most recent photo was Saturday when I drove it around the block for the first time. Still some loose ends to complete but the end is in sight.

 1 point
 -
Great looking paint. I know the feeling, I just got mine back a couple weeks ago.
 1 point
 -
In my searches the 11/16" diameter was always the show stopper. Thanks for doing all this leg work. As for colors, I bought some Monroe 66858 shocks off of ebay and they were bright yellow. Since I could only get two good ones off of ebay I bought two more from Amazon and they were gloss black! Now I have to decide which pair to paint, right now I'm leaning towards black Brad1 point
-
I dug up the shock absorbers that I pulled off of the '49 1-ton to study them a little more, as they appeared original with the DPCD logo stamped into the dirt shield. I was able to get the p#s off of them and critical dimensions: F -- 1261982 -- 12.38 -- 20.25 R -- 1196294 -- 11.75 -- 18.75 I could not find neither of these p#s in the parts book nor could I find any reference to them online, so I'm not sure if these were original to the truck or if the p# I'm looking at on the dirt shield is referencing something else...these dims compare very close to the dims of the 31000 & 32207 shocks that I've been using for years from Monroe, which were listed as replacements in their interchange book back in the 90s. So I did some studying of the parts manual and Monroe's Instruction Guide, as well as Gabriel's Online Catalog (which took some digging to find), and found some more part replacement numbers that could be used. Some shocks are more available than others, and some shocks are cheaper than others, but after putting a few more hours into researching this topic, I think we have more options available for builds and restorations. One thing I noticed in the parts manual is the specification of 1" domestic and 1-3/8" heavy duty export. Looking at the shocks available, the common spec for passenger cars is 1-3/16" bore, with light truck shocks having a 1-3/8" bore. I switched to a large bore shock on The Blue Bomber years ago, and it produced a slightly bouncy ride unladen but under a heavy load or pulling a trailer, the truck rode nice and smooth, and braking was much more controlled, with noticeably less nose dive. So if you are just going to use your old buggy for commuting, then the 1-3/16" shocks should work fine, as they are a stronger design than the originals...if you plan on carrying a load on a regular basis, then the bigger shocks are a good investment. I know when I was hauling water with both my '48 1/2 ton and '49 1-ton, I noticed after a few years that the replacement shocks (1-3/16" bore) were all leaking as I was really loading up the suspension but not moving in a hurry on any trip nor traveling tens of thousands of miles annually. B-1-B, -C, -D B-2-B, -C, -D Front -- Monroe 31000 = Monroe 59001 = Monroe 32293 Gabriel 81147 = Gabriel 82047 [1-3/8"] -- Monroe 34904 - Monroe 37098 - Monroe 37112 Gabriel 61500 - Gabriel G63689 Rear -- Monroe 32207 = Monroe 59017 Gabriel 81676 - Gabriel 82007 [1-3/8"] -- Monroe 555004 Gabriel 61550 = Gabriel G63949 - Gabriel G63299 B-3-B, -C, -D B-4-B, -C, -D Front & Rear [1-3/8"] -- Monroe 66858 - Gabriel 82065 The Monroe and Gabriel shocks are not exactly the same in extended and collapsed dimensions, but they are generally within 1/4" of each other. The best way I can explain this is that the Pilot-House trucks have a certain suspension travel, as do other makes & models that have similar geometry, and the manufacturers make shocks that fall within a certain range within that travel, so several different shocks could possibly fit a certain suspension geometry and still work. I would favor a shock that allows the spring to hit its bumpstop so that the shock is not bearing a severe load...conversely, a shock should still have some stroke left when the springs have reached max vertical travel so that the tires are not being lifted off of the ground prematurely, enabling more control of the vehicle in extreme situations. Obviously, the B-3 and B-4 shocks that are available now are more limited...just looking at the applications online, that 11/16" mounting diameter does not appear to be an industry standard as the 5/8" and 3/4" mounting diameters have been used on many shock configurations over the years. I would list the different colors that these shocks are coated, but some of the factory descriptions do not match the pictures on their websites...also, some vendors had different colors listed from the factory website, so I reckon ya get what you get in the box1 point
-
How'bout taking a 1x4, cutting it with a jigsaw so that it fits inside the drum, then cutting a hole at its center so that it can rotate on the shaft...then ya could drive a bent nail in the end of the board to act as the gage tip...easy to make, easy to adjust, easy to replace if lost or damaged...1 point
-
Excited to join the forum to provide assistance and ask for advice as needed. I recently acquired a family hand-down. My uncle gave me a 1948 Dodge Pilot House Truck that has been stored in his garage since 1977. He purchased it used in 1970 & drove it until he backed her in the garage. Thirty Eight years later, she came out and moved to her new home. I have started the search for parts, looks like I will need a few. I remember driving this old girl when I was 16 (Long time ago). I put a battery in it the night before and she cranked over with a sputter and I stopped. The gas tank & fuel pump is out. Veryfying the engine isn't locked up. Full steam ahead on a full restoration. I expect this project will take a couple years. I don't retire until the end of next year. Then she can get full attention. Enjoy a couple photos. Later!
 1 point


.thumb.jpg.52b659814cb5758b70f78e52ab046bdd.jpg)