Leaderboard

Popular Content
Showing content with the highest reputation on 08/28/2020 in all areas
-
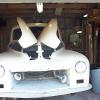
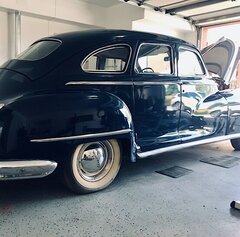
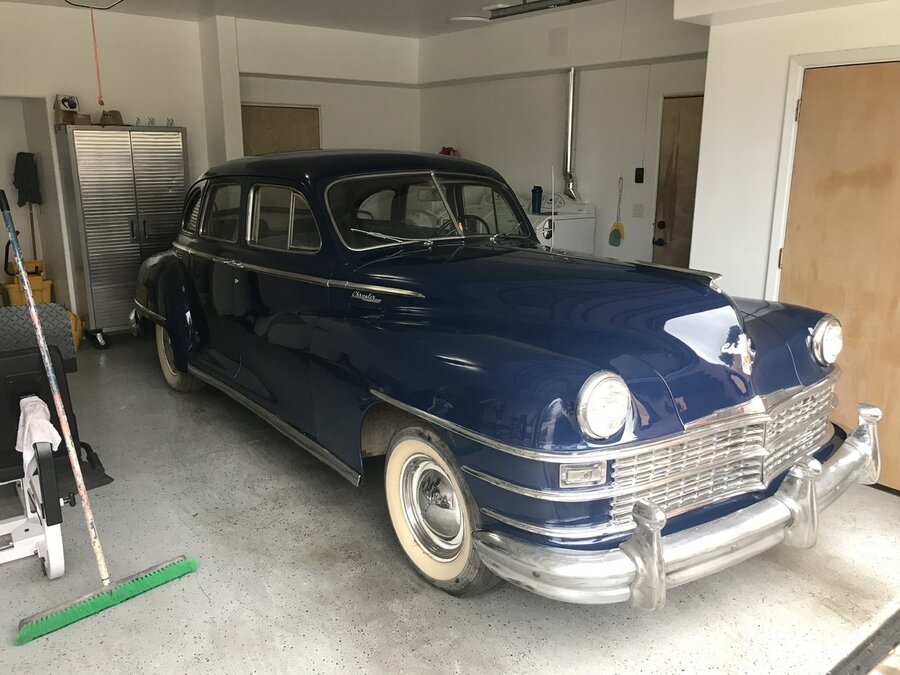
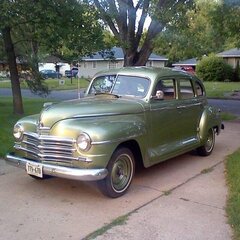
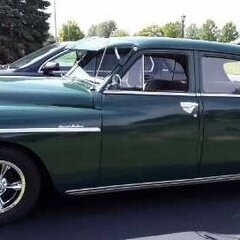
Hi all! Until recently I really had no reason to look for forums like this, because I had no vintage vehicle, but mainly because it would just make me extremely jealous of all you who have some amazing oldies! When I was a teenager I had a 1973 Dodge Dart Sport - my most fun car ever! My dad taught me how to make my own repairs, so I learned quite a bit. One evening back then, my cousin took my car for a joyride (without asking) and totaled it! Since then, I’ve always wanted to do a restoration. Well, finally after all these years, I had a 1948 Chrysler Windsor dropped in my lap - well, my garage from a close friend who was paying me back for some money I lent him. I did not expect this! But, it’s a great surprise. And, from what I understand, a good car to start with, because there is still a lot of parts out there for it. It’s in relatively decent shape. The body and interior are great, but my friend says it runs slow - not much power. It’s been sitting in a container for the last couple years without running, so I’ll be cleaning out the gas tank and spark plugs, and see if I can get it going. Then take it to a mechanic friend who will do some tests on it to see the extent of work that may be needed to the engine. Anyway, there’s a lot more I can say, but some of you are already asleep, so thanks so much for this forum and site! I’ve been looking around for a couple days now and I know you all will be invaluable in my process! Here’s my new’48!
 9 points
 -
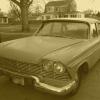
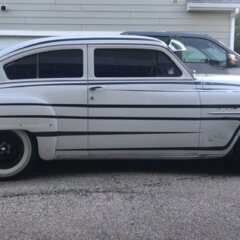
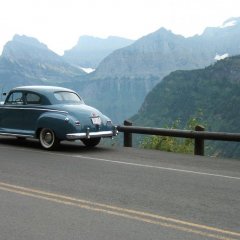
New member to the forum, although I have been lurking, for a few months. I bought a '51 Plymouth Concord back in June. It has a '54 Plymouth 230 (I learned from this site). The car is lowered 4" all the way around. It has been a bit of a struggle, since I bought it, but I think I have her running alright. I chased a midrange stutter for a while, and I found that I had low compression in #4 cylinder. Pulled the head, and didn't find anything. I pulled the valve covers, and discovered a broken intake valve spring. Replaced the spring, buttoned her up, and was left with the same problem. Pulled it all apart (this time with the K-D 700 valve spring tool) and found that the intake valve was bent. Lapped in a new valve, and put it all back together. I think she will hold up, for the rest of the season. Won't be doing a whole of driving in these miserable Midwest winters.2 points
-
Beautiful ride, congrats but I do have to warn you as a former sailor I know about polishing metal and you have a ton of metal to keep polished. Good luck, lol.2 points
-
take your time...be systematic on your approach to and actual work...odds are you got a good runner that will be smooth with new fuel and oil and filter change...2 points
-
Here she is.
 2 points
 -
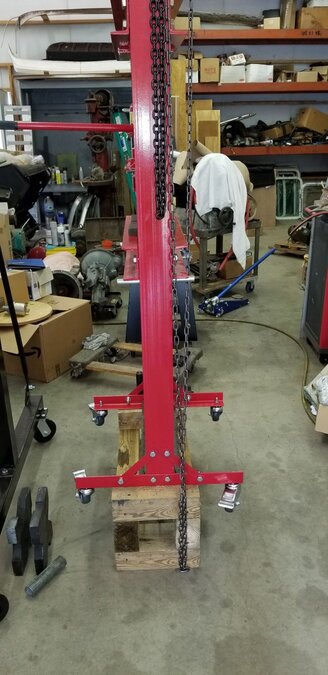
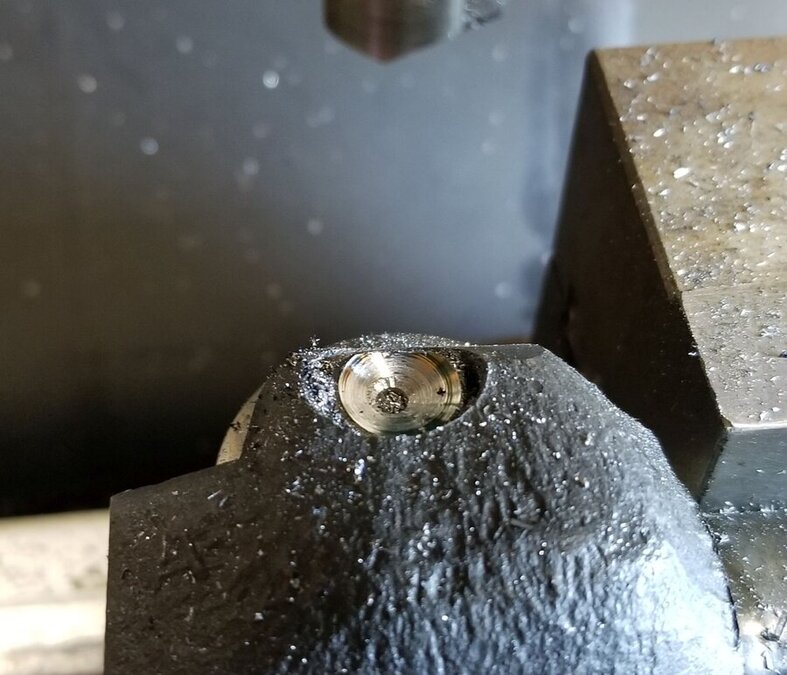
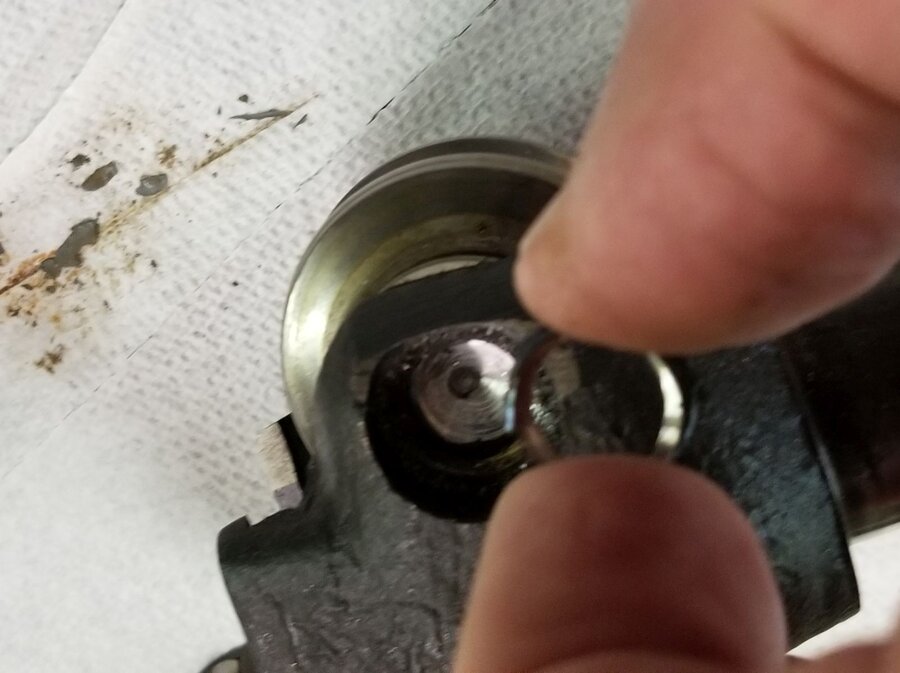
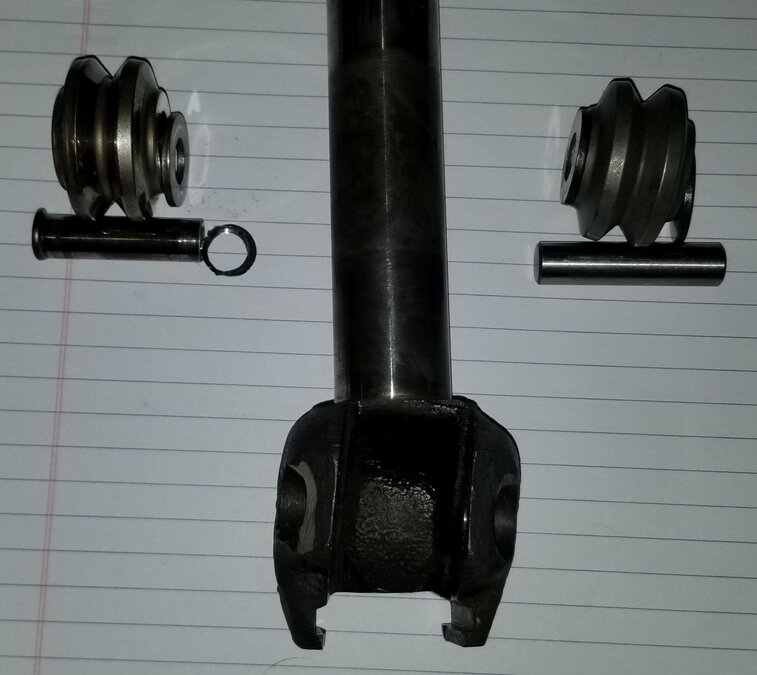
Last night I machined a push pin on the lathe so I could press the worm gear off the shaft. I'm happy to report the job went well. I lifted my hydraulic press with the gantry crane and set it on a wood frame made from 4x6s and 4x4s that I had made previously for a different job. The worm gear removal went well, it didn't take the full 20 tons but it definitely let go with a bang and moved about 1/8". After that it didn't take much effort to press it out the rest of the way. Next I tackled the sector shaft roller replacement. The pin that the roller rides on is basically riveted in place on both ends. I'm not sure how much tonnage it takes to rivet a 1/2" diameter hardened pin but I'm sure it's a bunch. Removing the old pin was a challenge. There is no part of the sector shaft that is flat, square, parallel or perpendicular. I ended up clamping it in my milling machine vice and with a center drill in the quill I did my best to eyeball the center of the pin. At the same time I had to level the top of the pin so it was parallel with the table. This was not the easiest thing to do but I actually succeeded surprisingly well! I was able to start a hole in the center of the pin with the center drill After that I tried a HSS endmill and found out rather quickly just how hard the pin was. My second attempt was with a 1/2" carbide drill bit that I've had kicking around my tool box for over 30 years. I bought it for one job and never used it again until today. I believe it will need to be sharpened before I can use it again. But , it did its job. I almost hit the center of the pin dead nuts. You can tell by the metal ring that snapped off when I started pressing the out the pin. I doubt that I could get that lucky again if I tried. On the left is the original roller, pin and shims. On the right are the replacement parts. The kit states that the thickness of the replacement parts is slightly larger to account for wear and warns that the roller needs to be centered in the housing to work properly. Herein lies the next problem. My original roller and shims measured 1.1345" in overall width. The replacement roller and shims measure 1.152". The new parts are .0175" wider than the original. The fit of the original was nice and snug in the pocket and spun smoothly. The new parts aren't close to fitting. I measured the individual width of the rollers and the original was .969" and the new one is .977" which is .008" wider. This means I can't swap shims to makes things fit. The only option I can come up with is to take the new roller and shims to the machinist down the street and have him surface grind the two new shims to remove .0087" from each shim. Once all that is done I'm left with one last problem which is how to fix the new pin in place. The kit instructions suggest that if I don't have a riveting press handy to rivet the pin in place I can weld each end to the sector housing. I have a feeling that's the approach I'm going to have to take. I'll update things as I make progress. Oh yeah, one more minor problem! With my current hydraulic press configuration I don't know how I can press the worm onto the steering shaft. The bottom of the shaft needs to be press against a solid surface that is part of the press. Looks like I'm going to have to do some jury rigging to my press to get the job done. Needless to say this job is not a simple take the old parts off and put the new parts on type of job! Brad

 1 point
 -
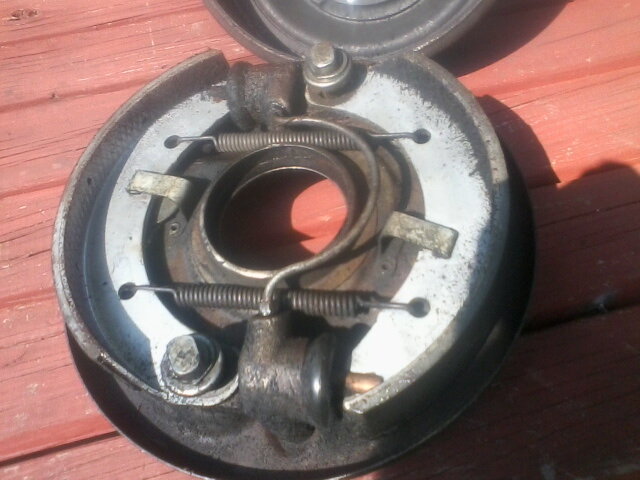
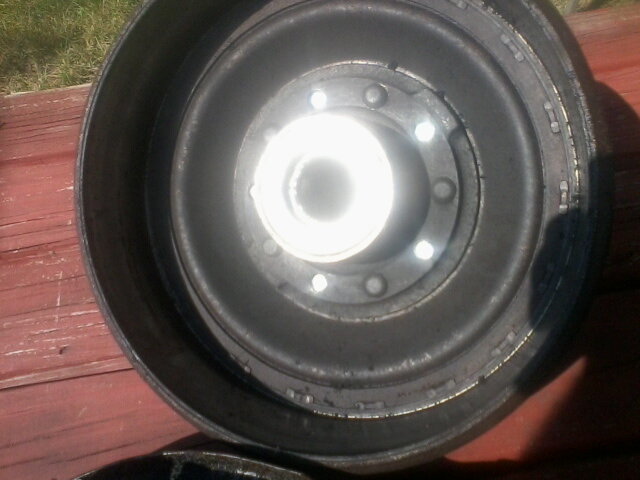
I thought I couldn't give them away. Next time I'll write a better description. Tried to sell my front brakes for $4.99. Sold them on facebook for $40. Still cost me $4.99 to list it.


 1 point
 -
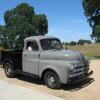
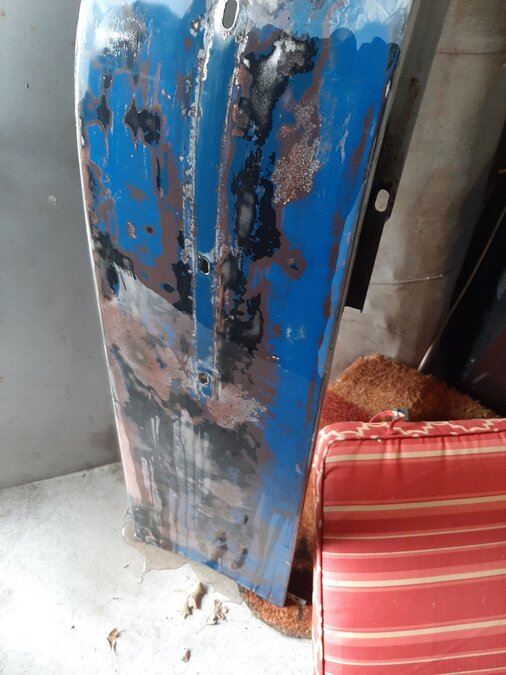
Thanks for all the quick input on welting. I searched on this forum but apparently did not search the right description. I’ve read the additional old post that were referenced, much appreciated. So, I am trying to keep as near original as possible, (although sometimes I don’t know why) I am going with the flat welt not the piping type. The front grill section was never taken apart and It does not extend out of the joint crevice.. pic of just media blasted & the wood flat bed just put on.

 1 point
 -
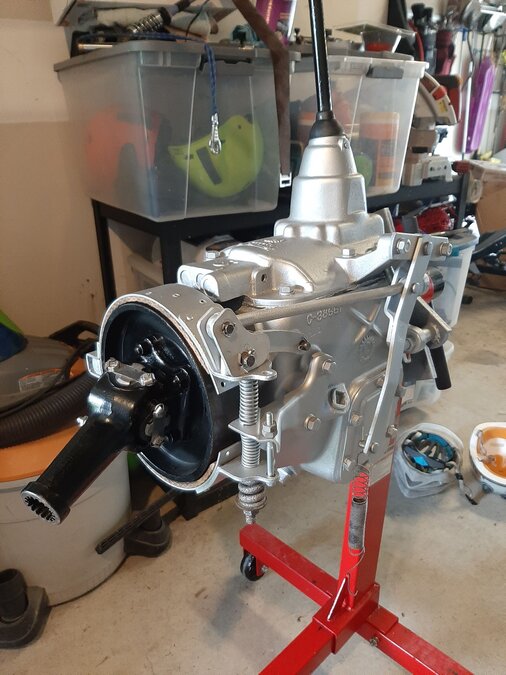
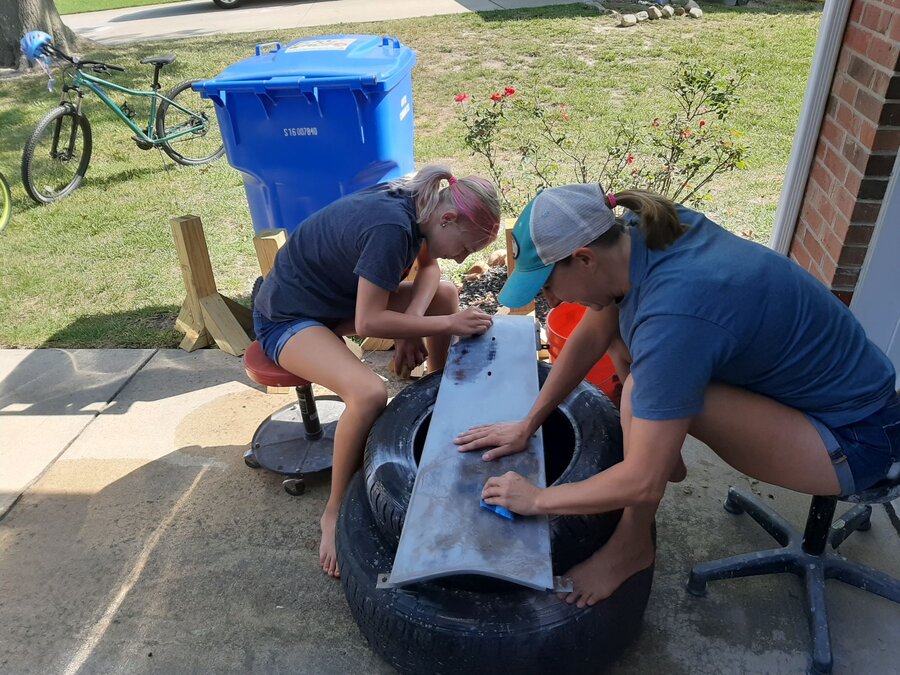
Mounted the emergency brake. Got some help from my wife and daughter to try and bring the old paint back to life.
 1 point
 -
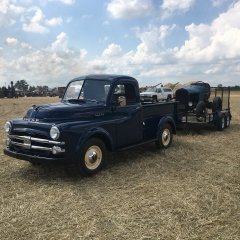
I had the old Dodge out for an enjoyable drive this morning. I enjoy living in an area where I don't have to deal with city traffic..?
 1 point
 -
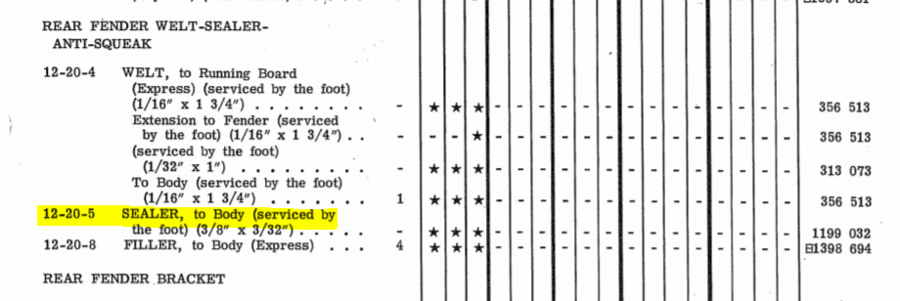
Seems to be the same (at least on the online version of the parts manual) for all years and up to 1 ton for the rear fender to bedside and just a flat 3/8' x 3/32" strip. I don't think (again from what I've seen original in the world) the rear fenders had piping on the seal. I've seen plenty that have after rebuilding/repair/restoration. But for sure I know FEF never did.
 1 point
 -
I think looking at your amp gauge is maybe easiest clue to see if it is correct. .... it is possible I believe, ??? you will destroy the original positive ground radio if you have it installed and turn it on. I know nothing about the transmission wiring, above someone said it should not matter. The story goes, positive ground was superior for a few reasons, less corrosion on wires, they had less frame rust ... was a few reasons and almost all auto manufacturers used positive ground. Except for 1, that was gm ... they never had a positive ground system. In order to get some uniformity and everybody going the same direction for new doo dads like aftermarket radio's, air conditioning etc .... GM won out, and everybody else went negative ground. This was in the early to mid 50's, GM came out with the sbc, they brought out the corvette, Ford introduced the Edsel. So even though positive ground is better, today's cars are negative ground. .... No reason to be ashamed of a positive ground system.1 point
-
My '49 had piping between the rear fenders and bed.1 point
-
I have a 49 Windsor that was also wired with negative grounded when I got it. Even though I thought it started well, once I switched it back to positive ground it started way easier. Another way to tell if they correctly switched it over to negative is to look at your ammeter while the engine is running. If it goes negative when you rev the engine and/or positive when you put a load on it like turning on the lights then the PO probably didn't actually convert it over.1 point
-
Depends on your year (it seems) and your opinion. For the B3 and B4's I've seen (both in pictures and originals extant in the world) there is not any visible piping on the rear fenders or grill/front fender interface. Some like the look, some don't. I feel the parts book is pretty clear on which is "correct" when you look at the pictures (no piping).
 1 point
 -
I'm guessing that the welting ridge that you are talking about is its piping...I do know there are two places where the original piping can be seen on my '48 and '49: rear fenders at bedsides, and inside windshield frame, as this piping hides gaps between parts and gives a cleaner appearance. As for the welting on the grille to front fenders, there has been a difference of opinion on using piping or not...this has been discussed over the years, with some good insights on ways to address this grille welting detail1 point
-
Jeez,my friends never pay me back...especially not that nicely!1 point
-
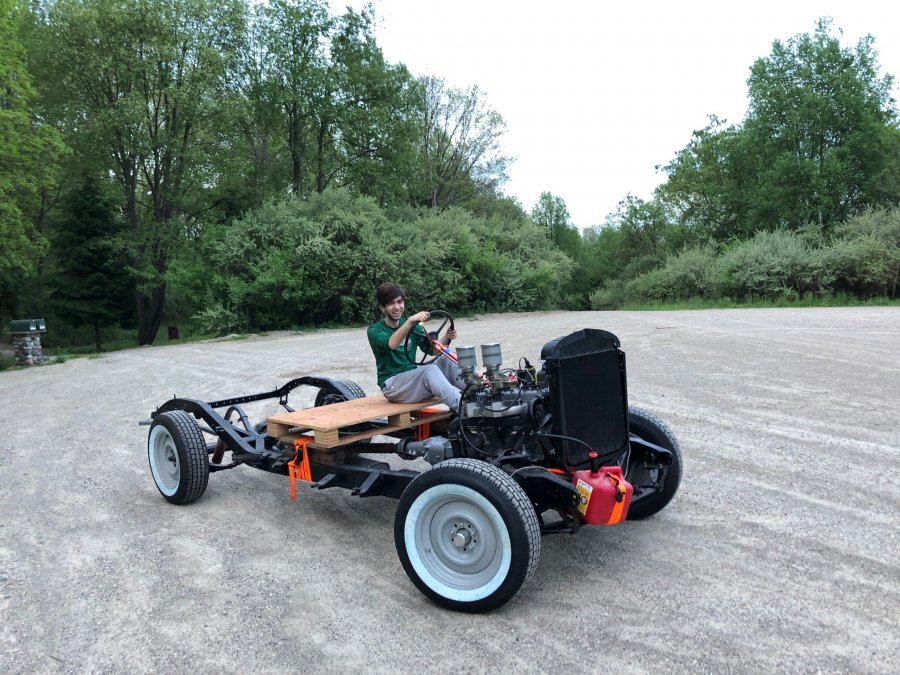
I made up a temporary shaft years ago when I swapped a Mustang V6 with C4 into my little Dodge D50. Intended to use it to test drive and debug, then get a real shaft made by a real shop. Worked so well, I never got around to the better one. So my answer is obviously, run it 'til there's a good reason not too.1 point
-
That thing is primo. Does that hood have its own zip code? dude youll get loads of help in here. I only have one thing to say...never ever put corn gas (ethanonal) in her and it needs a name..no rush out1 point
-
Sweet car! You've found a great forum.1 point
-
Yep! And we had to walk to and from school 10 miles up hill both ways. What's up with these kids today? Lols! I remember as a kid pumping gas in the 1960s at my dads station. He was paying me about 1.50 hr. and the gas price was about 30 cents a gallon. Geez! I'm old! ?1 point
-
Welcome!1 point
-
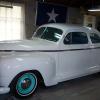
Love it! Oh man, them scallops! Welcome aboard the forum.1 point
-
I personally would just drive it unless circumstances changed. Maybe take a look underneath after a few miles to make sure all is tight and no seals are leaking.1 point
-
Got new 2/0 cables last night so I will put them on and let everyone know how it goes.1 point
-
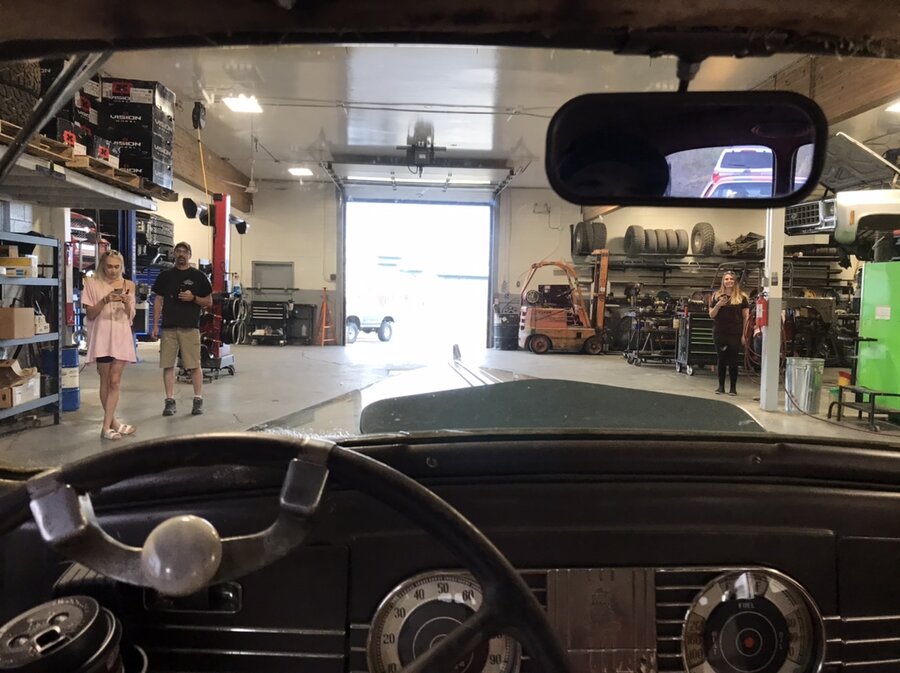
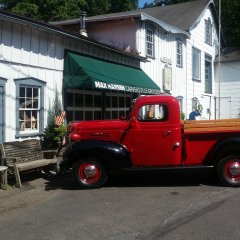
Last night I participated in an organized rolling car tour. We raised $1200 for Multiple Sclerosis. Was a good run. 125 cars participated. At one stop we all drove right through a repair shop. Anyone that could, peeled their tires inside the shop. I did not. Lol. A nice warm evening. Cops showed up to monitor behavior at the wrap up gathering. They were cool as they just observed and made their presence known. Gatherings are frowned upon due to covid. Several cars could have been required to be towed away For various infractions. But all turned out well. My lowly ‘38 can been seen in this one. Met some good folks. Was a good event.

 1 point
 -
Ma and Pa Kettle were good at math... https://youtu.be/4yO3oRLY5zA1 point
-
hi Vince1 point
-
1 point
-
few Concorde on here....they are the often misunderstood model....I like their styling.....as most folks say, where is the picture....and if it is a work in progress...we understand....got to start somewhere.1 point
-
Welcome!1 point
-
welcome !1 point
-
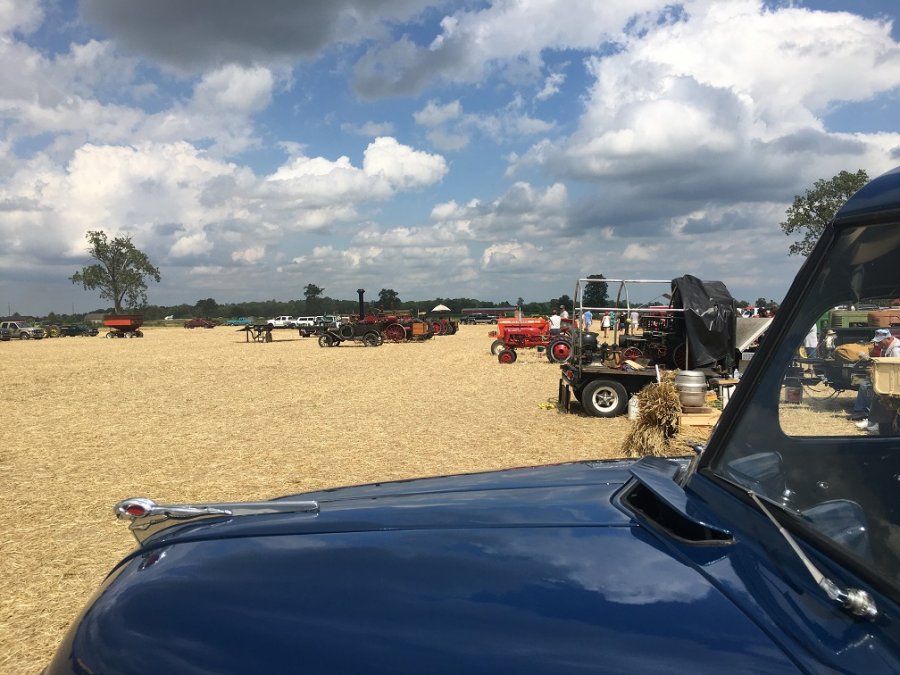
Most recent outing ?
 1 point
 -
Welcome to the forum!1 point
-
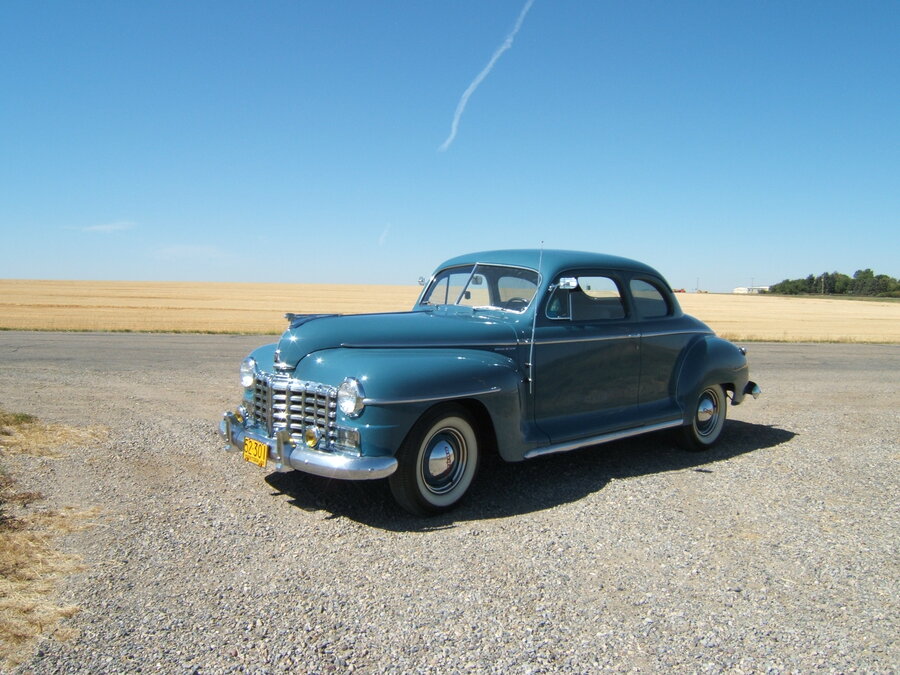
@RobertKB I do love those Dodge coupes. They have a great front end and grill. In my opinion, when it comes to coupes, they are second only to the 48 NY'r 2 door coupe with straight 8. They are a big beast that I'd also love to own. I am a little jealous of you folks who have nearby old Mopar connections. I'd enjoy a partner to cruise around with and help each other out with wrenching. The ultimate friend: He lives in my neighbourhood within walking distance. He's nuts about pre 20's-50's Mopars. He owns one or two, different models than my 2 cars of course. He has a hoist. Does welding and body work. Likes beer. His kids are all grow'd up and gone. Has an independent, un-needy, low maintenance wife who gets along with my wife....LOL. That there is a match! I'd get nothing else done around here except we'd have dialed up some of the finest Mopars in the land. In the mean time this site will have to do....
 1 point
 -
It can take anywhere from 3 weeks to 9 months, if at all, depending on how the zombie apocalypse is going in Michigan this summer1 point
-
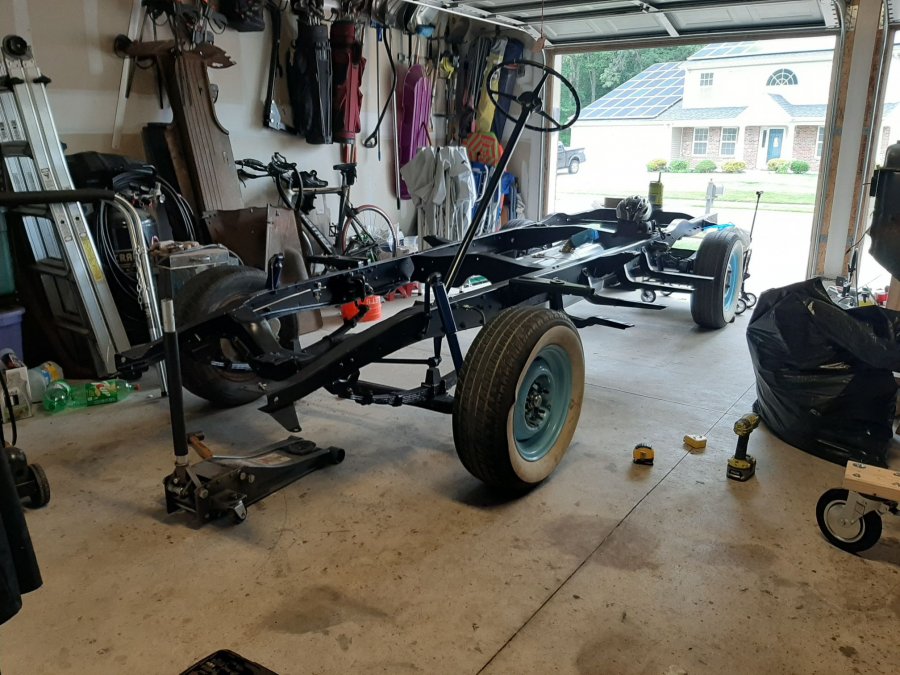
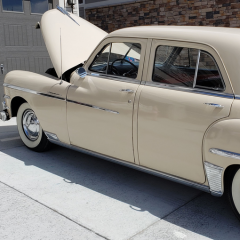
Finished all the brake lines and finally put the tires back on. It was nice to push it out of the garage and wash all the pollen off. Also took care of the toe in/out after the disk brake upgrade. Finished cleaning and painting the transmission.
 1 point
 -
I used old mud-flap shims on the front, under the radiator mount and on the supports that bolt to the part of the fender that has the two large rivets. Made some 1/8" shims from an old conveyor belt to help fine tune the alinement. It took quite a bit more shimming than it originally had, and since there was some welding done to replace some "capture nuts" on the fender brackets, not everything lined as much as I wanted. I put the front grill on, then the hood. I centered everything as best I could, using the hood to cowl gaps and a tape measure. Next I put my wheel wells under the hood (for later) and attached the fenders to complete the doghouse. I think I unbolted, re-shimmed and re-aligned that damn doghouse for two weeks, using the door gaps and the hood to cowl gaps as my guides. After all of that, I finally remembered that my driver's side of the hood was "a bit twisted" thanks to a brother-in-law. All in all, I discovered that what really helped me was knowing curse words in three languages.1 point
-
I used steel shims everywhere. I made some of them, and I used some from a body shim pack I got at harbor freight (part #67585). I also used washers a lot. I forgot to mention that I had to shim my cab up and down to get it right too. My frame was very bent and out of square when I bought the truck. I got it pretty close to the factory measurements, but I know its not perfect. As far as the rubber mounted parts, I used an old truck mud flap too. I cut them in squares like the original ones were, but added steel shims as needed.1 point
-
I hope something I say helps and sorry in advance for stating the obvious, because I know I probably am going to say stuff you already know/thought about! It took me HOURS to get it right on my truck. I spent multiple weekends just trying to shim and align the front sheet metal on it, so I know what your going through, but you'll get it! First, how centered are the front bumper brackets through the front panel? When I did my truck, I started by getting that fairly centered, then I just rotated the panel from that point to even out the gaps at both doors to the fenders. I also had to shim the core support up and down on each core support stud to get the front clip square (and to get even gaps up and down the doors. The amount of shims on each core support stud is noticeably different for my truck to line up right. If one side is lower than the other up front, I would think that would cause some of your hood fitment issues too. I'm sure this isn't the case (but I'll ask lol), but do you have the rubber bumpers on both hood halves for when they are resting? if one or the other is missing it would cause that side to hit in front corner and the other not too. I also noticed in the video, your passenger side hood to cowl gap looks a little tight. You might try evening that out side to side and pushing the core support straight back to take up the gap. As far as the center section of the hood, my hood doesn't fit the radius between the center and halves the best either, but side to side the gaps/step is even. Something else to keep in mind is your door to cab gaps. Make sure the rear gap on both doors are the same. My hinges were bent, and it took a while to get the doors to fit right to the fenders. The front fender to door gaps on my truck are still the greatest, but its the best I could get it. I hope this somehow helps and was understandable! Below are the best picture I have on my work computer to show the gaps.
 1 point
 -
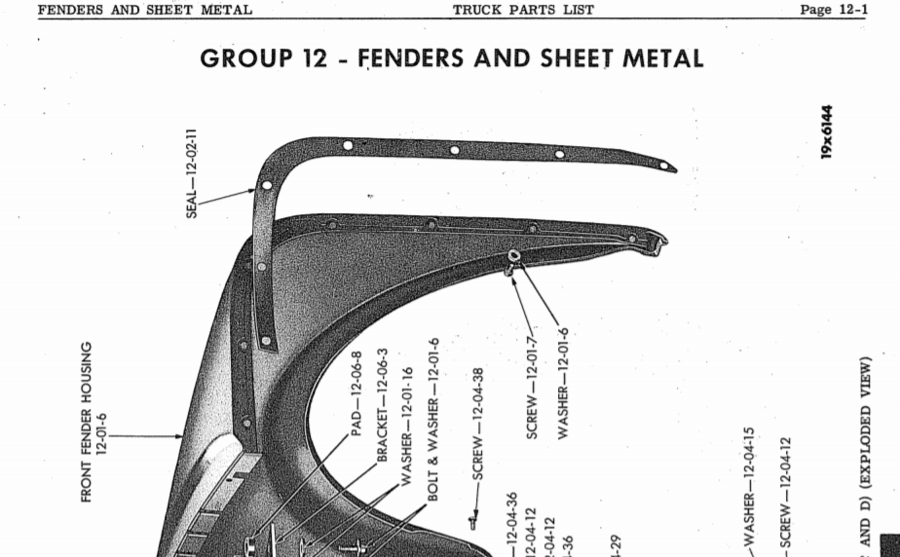
While it is true the Pilothouse trucks have no beading/welting, they do use various materials between metal to metal locations. The "nose" section and front fenders have a rubber seal on each side. If you check the parts book on the club website, you'll see this seal on page 12-1 (Fenders and Sheet Metal), Part 12-02-11. This is no longer available; however it is easily made using the appropriate thickness of sheet rubber. In doing my restoration, I simply laid the fender nose down on the sheet and traced the outline. The "beadding" between the rear fenders and the bed can be duplicated using 3M Strip-Calk or similar material. Any materail that squeezes up can be cut off with a razor. At the ends of the running boards where they mount to the fenders there are "anti-squeak" seals (Part 12-02-15). They are no longer available but can be made from the same sheet rubber as with the nose piece. There is also a rubberized welting material mounted to the fender extensions (Part 12-04-36). I was able to locate a similar product and it is simply pop-rivated to the extension panel. The "filler" material grey beard mentioned is available from Roberts and others. If you check my album on the club site, I think I have photos of most of this posted.1 point


.JPG.cde2bca95c084def59c2d69204428645.JPG)