Leaderboard


Popular Content
Showing content with the highest reputation on 08/10/2020 in all areas
-
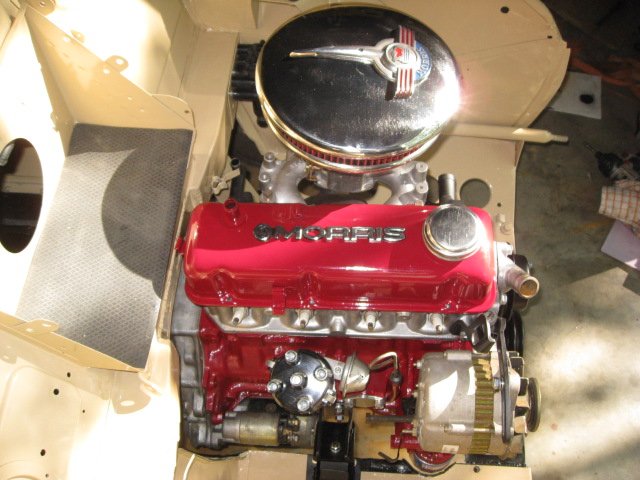
engine runs! didn’t get as far along as i’d hoped. for one thing, i didn’t realize the full pressure oil canister is NOT compatible with the starter on the medium size trucks; i’ll need to figure something out for that. then, i used the distributor from the 251, but after a bit of trying to get combustion, i checked for spark with my timing light and found no spark being produced. so, i swapped the dist from the original engine, and almost immediately had it coughing and sputtering. with a minor adjustment, i had it running. i now have it purring. it starts instantly, and has steady 40 psi oil pressure at operating temperature. the gas line has developed a pinhole leak, so that will need replacing, and several of the coolant hoses leak, so i’ll probably replace them, too. it does have more throttle response than the 237 (no surprise), and seems to be pretty smooth at 3000 rpm. two-speed rear still shifts. maybe tomorrow the transmission et al will go in.3 points
-
Were these words even event'ed when the flat 6 was popular? Los runs back to his corner2 points
-
When I have had situations like this involving nightmare wiring I have found that it is simply better to tear it out and start from scratch. Wiring one of these trucks is a pretty simple job. There is plenty of info on this site. Spend some time planning it out and it will be pretty painless. When you do this you will end up knowing and understanding the entire system. You can easily switch it over to negative ground during the process. Jeff2 points
-
I use to hand crank the Dodge my father gave me when I was a seventeen year old student all the time. Had no money to replace the regulator so it was crank or no drive for a couple of weeks. I went through it again a couple of years latter when the reg went and I could not find a replacement. Then was the starter motor failure and I was 400 miles from home. Its not that hard. Use one hand and remember to keep you thumb out of the way. Tony One note of caution, I would not do it on an engine that was just had the timing reset. If its timed wrong and backfires it could hurt.2 points
-
I would advise against notching the frame to accommodate your brake lines...if anything, make your brake lines fit inside the frame however possible, especially if you've already deviated from the factory setup...2 points
-
Does the distributor shaft have any lateral play in it? Bushing may be worn out letting the shaft wander enough to misfire.2 points
-
engine is in its new home. with the hoist, putting the motor in was a breeze. probably the easiest engine installation i’ve ever done in a vehicle. got most of the accessories hooked up: carb, alt, coolant lines, oil lines, dist/wires, vacuum piping for the 2-speed and the midland booster, radiator, hood, flywheel and clutch. put oil in the pan and coolant in the radiator. still need to install the transmission, accelerator linkage, parking brake, driveshaft, pto shaft, pto levers, install the floorboards, and couple the exhaust. once i get the clutch/brake shaft installed, i’ll start it to verify it runs, then complete the other stuff.2 points
-
I know everybody has an opinion on drums vs disc brakes. On some collector cars you have very little choice as to brake system improvements. Sometimes it's a challenge just to make them drivable. One of the things that has bugged me is picking a good improvement, then not being able to find the replacement parts or what they came off of originally. I've seen many posts about "What kind of rear end and brakes are these?" The neat thing about the Plymouths I know and love (1949-54) they use hydraulic parts that are readily available (reproductions of course) and are the same for all the MoPar cars. So if you can find a 1951 DeSoto 12 inch drum set up it's no challenge to repair or restore it and they really stop good. Being an old racer I've noted that drum brake cars race in a class of their own with other flatheads and 6 cylinders. Once you modify a car with disc brakes it runs with other modernized cars which includes OHV V8s. That may mean next to nothing for the vast majority of people but it is a consideration of mine. (example: La Carrara Pan Americana revival of the Mexican Road Race) On my Plymouth (a 1952 Suburban) I have gone out of my way to keep it all period MoPar (within 5 years update or backdate). The idea being that it is an example of what could have been done during the time it was considered a "late model" car. A Hot Rodder's Hot Rod of the 1950s. Cutting frames for better steering and brakes are only one step away from installing an SBC V8. When you do that it really changes the character of the car and takes away from the charm of it. For my money it would be better to let Detroit do the work and just order a new car. You'll get more for your money and one day in the future your kids will own a "collector car" that was once their Dad's. (think of what a nice Challenger will be worth in 20 years!) The Old Car hobby is all about having fun. Do what gives you the most enjoyment. I've been able to buy lots of highly desirable parts from guys who went the modernization route...cheap! So I do appreciate their version of the hobby. To say a disc brake conversion is easier, more effective and less expensive may or may not be true. Consider the many posts regarding "residual pressure valves" and "dual circuit master cylinders" on this site alone! If there is that much handwringing over disc brake conversions it does not seem easier and less expensive to my mad mind. Finding the right drums and backing plates isn't an engineering project. You're not changing the design at all. Just the size of the brakes. Part of the fun is the hunt!1 point
-
Yeah, you're right. Still dealing with cyclic inductive reactance in a motor though, which is why I guess I called it impedance. In any case I was just messing around. Problem here is, we don't have separated arm and field terminals. Total overall resistance is unchanged so limiting current or voltage on our wiper terminal has the same net effect. Limited power. Shunt wound limiting field increases speed, assuming arm is not limited. Limiting arm decreases speed. Limit both and you've limited total power. Slows down. Power in ^=power out Voltage and current the motor take are tied by their relationship , we can limit the availability of either. Unless we're splicing into the motor internally and changing the arm and field separately none of the speed control methods apply explicitly.1 point
-
You can also close the contacts manually with power applied the see off it works1 point
-
On the solenoid right behind the upper right terminal there are two contacts, when energized power should be on both sides of those contacts, if not clean them and check again if not then bend the lower one up a little and recheck1 point
-
Well, to be seriously anal, impedance applies to AC circuits not DC. One could make the argument that since the commutator in effect chops the DC and turns it into a pseudo AC waveform it still applies. I don't get that far into these things so much anymore and I won't argue that you are wrong about it either. But as I said, theory is nice, till it hits reality and in my world reality trumps theory. So if my circuit does what I wanted it to do that is all that matters for me. I do need to redesign it as it does move slower than I want. It's fine for a low speed (misty rain) setting, if I had more than one speed to choose from. Might do a two speed redesign, but I would need a new wiper switch. Heck, If I am going to do that I may as well go for a three speed or even a variable speed. See what you did there?1 point
-
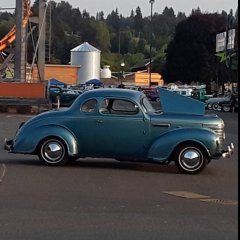
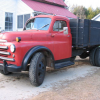
This morning I drove to a town close to home that among other activities this weekend held a car show,(first one I've been to this year as so many events have been cancelled). While the show was scaled down a bit this year, (no judging, live entertainment,nor vendors), it was nice to see a good turn out of cars,probably a couple of hundred.There was ample space where the cars were on display and no crowding at all,weather was good, and I quite enjoyed the day.There was a number of Chrysler vehicles.I took a few photos. (1)This1938 Plymouth appeared solid,was nicely reupholstered, and while the car has been brush painted with the brush strokes quite visible,the old Plymouth has character and I'm sure the owner is thoroughly enjoying his ride. (2)The 1942 Chrysler Barrel Back is a car I have seen before and I always stop by to enjoy another look and chat with the owner. (3)The very nice Fargo truck appeared modified.The owner wasn't around when I stopped by. (4)The 426 Charger appears to be a flawless high end restoration...
.JPG.cc780d47face2e7f51d426807f2beb26.JPG)
.JPG.4381e17caf660fffdc8e5e100525e57e.JPG)
.JPG.8d49b39f57e00e0a75c59ab7e9d0ef3f.JPG)
.JPG.a2c559bbf9c041c66300e589d665af1f.JPG) 1 point
1 point -
I personally approve of this upgrade! Thanks to Chrysler's commendable policy of interchangeable parts and continuity of design you can in fact up grade to 11 inch or even 12 inch brakes. My copy of "Plymouth 1938-1954 Part Interchange Guide" gives you lots of options you might not have thought of. Also Andy's has a chart of bearings and seals you can check for free to see what fits. Just be aware that 12 inch drums might require different wheels than the 15 inch wheels found on 1949-1954 Plymouths.1 point
-
Very nice and interesting car but to me the fender skirts do nothing for it. I've never been a fan of fender skirts. The other similar barrel back shown above does not have them and looks better to me.1 point
-
"The distributor shaft does have a little lateral movement (maybe 1mm - 2mm) in it." If that's true your distributor bushings and possibly the shaft are beyond completely worn out. ...how would you adjust the points? That much slop is a huge problem.1 point
-
Just installed my alternator from Bill Howard Enterprises. Started charging immediately, ammeter shows positive. Feeling more confident to do some driving, just need to verify source of oil leak on back of engine and repair. Thanks for all the help.1 point
-
nothing short of a complete teardown and thorough cleanup is going to yield satisfactory results. I think your metallic residue is from the piston skirt and more will be found in the oil screen and galleries. Bits could even be lodged up against the camshaft journals. Get your crankshaft polished or reground by a machine shop and any questionable rods resized. In an earlier post I mentioned that I had torn down an identical engine . The crank was 010 and good.1 point
-
As I recall, this was a recent acquisition and was either an unrestored survivor, or an older restoration that hadn't been touched up yet. Memory is a bit foggy on those details as it was many years ago.1 point
-
So I finally got my '49 Suburban off the jack stands and took it for a test drive yesterday. Now that it's on the ground started thinking about it's stance and spring sag. What should it be? Looked in my parts manual and found a good side view picture of a 4 door sedan. Did a scaling calculation using the wheel rim diameter of 16.5". So from ground to the bottom of the rocker moulding where the bottom rear corner of the front fender meets the bottom front corner of the door calculates to 11.0". From the ground to the bottom of the rocker moulding where the moulding meets the front corner of the rear fender is 11.9". Measurements on my car are: 10" front and 11" rear or about 1" low. Wonder if new body mounts would correct the problem. Point being if you can find a good photo of your model car when new you can do the scaling calculation to get "good enough" estimate of ground clearance. Regards.1 point
-
When i did the brakes on my '51 I could not get a good seal on the front 4 way splitter by the MC as one port had been cross threaded. The 4 way splitters are not common, but I found 2 3 way splitters. One had a male port and 2 female and the other had 3 female ports. i joined the 2 T's together and they were close enough to the original lines, I made a new line to the MC as that was the line that was cross threading. These parts are generally used for trailer brakes and were readily available.1 point
-
Thanks for that research. Since I couldn't get my fitting out of the head it looks like I chose the right one for my dual heater set up.1 point
-
DJ - Yes, It's a Wilcap adapter, Wilcap adapter 230 flathead to GM auto transmission and I'm going to be running a GM TH 200 4R auto trans with overdrive. GM TH200 4R. It looks similar to a turbo 350.and has the same mounting points, but has that 4th gear for cruising. I purchased a P22 218 motor from a shop near my home last year and it came with the adapter- all for $200, and it ran!
 1 point
 -
Not commenting because I find the triangulated 4 link to the one of the last the styles of rear suspensions I would use. Doubtful you will find a kit that doesn't need fabbing to work and as old as these vehicles are I wouldn't trust any of them to be square and true to blueprint. So you may as well get a universal 4 link setup and custom fit it. But if I was going to put a different rear suspension in I would look at a truck arm suspension.1 point
-
Thanks to you @RobertKB, for reminding me I have a spare block, with a brass tube in it! I owe you something lol. Next time you pass through Kamloops be sure to stop in for cold one. Actually the same goes for many folks here. I'm near the Tran-Canada Hwy. The only road that crosses this country. Any Mopar friends are welcome to drop by. My front engine mount appears ok. I would like to change it. I have a new one here ready to drop in. I attempted to, and got to second guessing what I was doing. I removed the top two nuts on the mount., I started to jack up the front of the engine using a block and a jack. The engine started to rise up, but not enough to clear the threaded studs in the mount. Seemed to me I might be stressing something if I kept going with my hydraulic jack. I gave in and rescinded. Not wanting to risk wrecking something. A good friend has me lined up with a '49 251 engine. I am thinking it will end up in my 38. My 38 already has the same 25" block in it now at 228 ci.. The 251 would give me gobs of torque and great power to weight ratio. I'd enjoy rebuilding a flathead. I think it sounds like a great project. Would make the '38 a sleepy little stocker to reckon with. So the front mount would be updated at that time when the engine is swapped out. Could be a few years, who knows. But at 1,000 miles per year, I'm sure the current one will be fine for some time yet. I picked up my rebuilt rad today. Just like brand new! A new water pump and thermostat were installed today too. I am very much looking forward to running the car again very soon.1 point
-
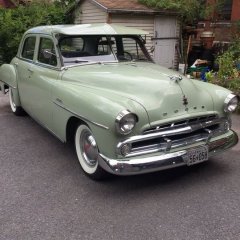
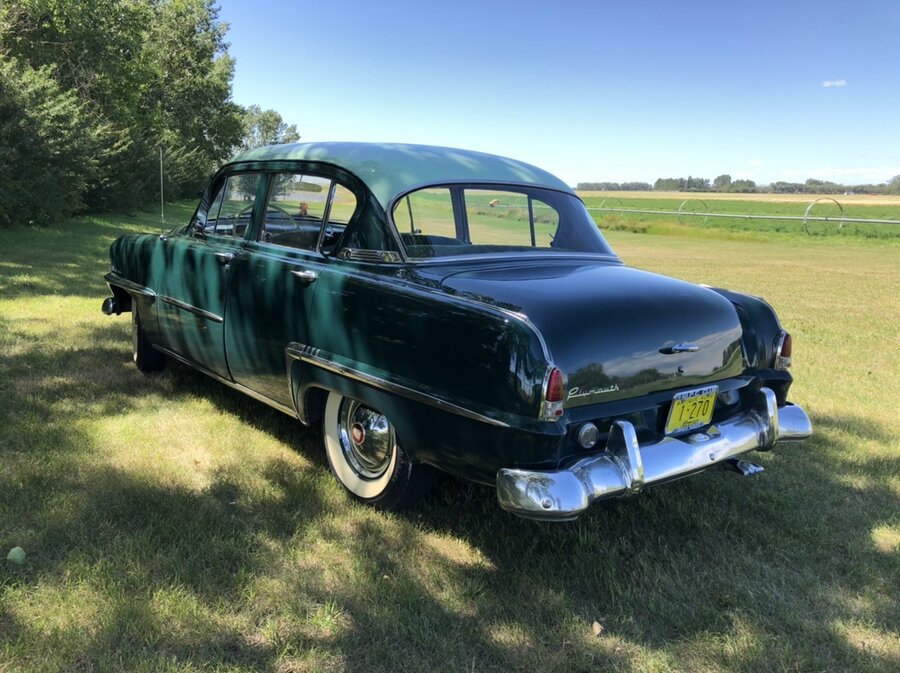
So.......different green car. I have been having carburetor issues with my ‘53 Plymouth but after a full rebuild with a new carb kit, I finally got the old girl out for the first time this year. She’s purring like a kitten even with 102,000 miles on her. Green paints on the car are original as the car has never been repainted and never will be as long as I own it. Up close there is lots of gravel rash and a few scratches. I’ve owned the car since 1975, the same year I got married. I still have my wife as well. ?
 1 point
 -
Good gosh fellas. Just rebuild the vacuum motors. Put on a vacuum fuel pump (may need header mod) or an electric vac pump, and if you like add a vacuum ball/ check valve In Line.....or see if the same year dodge, Chrysler, desoto electrics fit. No need to puff up and spur each other like horny roosters1 point
-
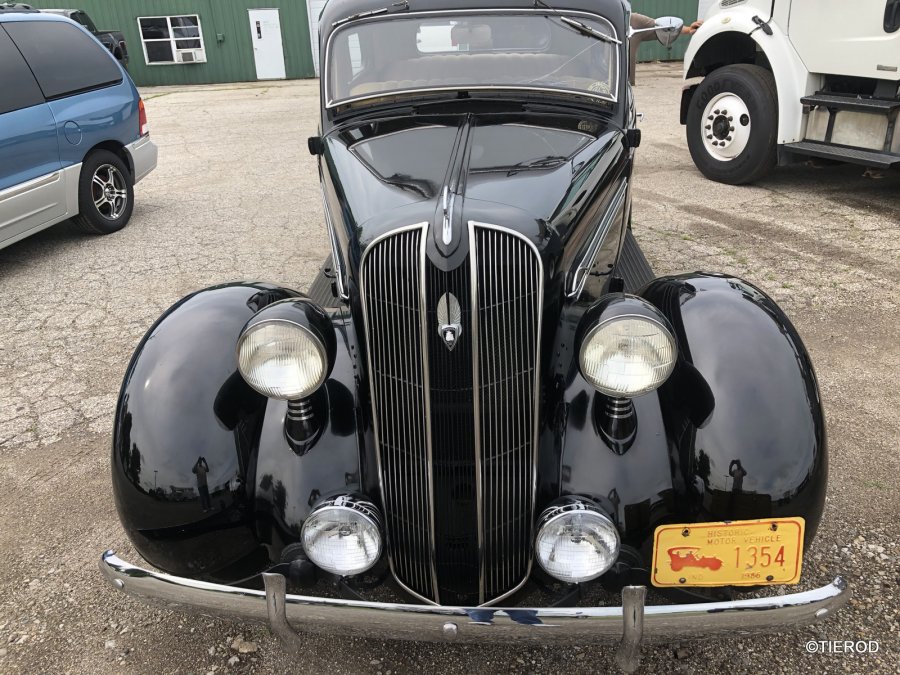
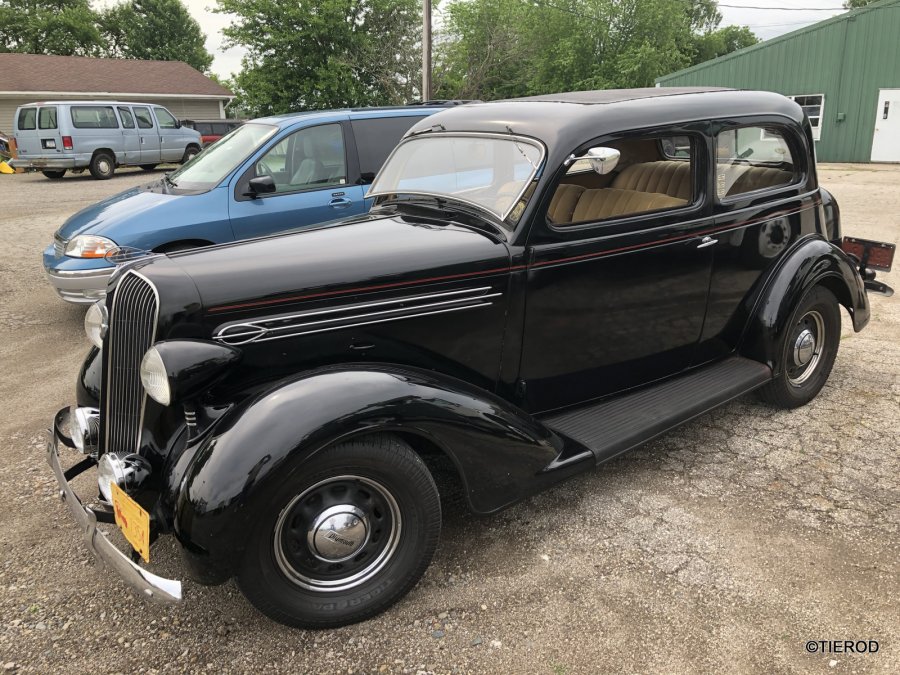
New Member: 1936 Plymouth 2 Door Sedan I just picked up this 36 2 door sedan, I believe it is a touring sedan P2? Original inside (I've been told) , 1 repaint many years ago on the outside,. It is said to have original 50k miles. Runs good, low RPM knock. Starts fine. Smoke bad on de-acceleration. I love it...Need to learn about these MOPARS as I've been a Shoebox fan for years... Bill j. "Tierod"
 1 point
 -
The "twisty-cap-y-thingy" on my truck doesn't have the numbers 710 on it. It has a picture of the thing that Genie comes out of.
 1 point
 -
I always run a Tstat in my cars, but in the 1970's we used to replaced the 160 F(summer) with a 180F or a 195F for the winters months, even put a piece of cardboard in front of the rad,, and switch back to a 160F in the spring,, check the cooling system and we kept the antifreeze every time, reused it & top it off with new liquid. Also used the old ''Water pump lubricant''' As for the fire or heat, under the oil pan,, well it is still being done in the great white north, on Diesel engine, if you had to shut the engine off for some reasons,, but usualy you leave it running 24/7 in the winter of course..lol.. I used a oil pan electric heater once on a diesel Jetta, warn oil, it did start like it was in the summer at -20c (-5F)1 point
-
So here is the update on my old gal. I decided if I have to take the whole engine out a sbc is going back in. I went ahead and used the old wet sandpaper and shoestring trick on my rod journal to polish it up up. I mic'd it all over and it turned out nice and round and within spec to use an undersize bearing. Put on an undersize bearing and got my clearance within factory spec. Replaced entire rod that was spun with new one. Replaced all pistons and rings, and wrist pin bushings in all rods. Replaced pistons because of excessive ring land wear. Some rings were broken too. Found minimal wear and cylinders where in spec for standard replacement pistons. Also replaced all other rod bearings with standard size bearings and replaced #3 main bearing with a standard. Plastigauged rod bearings at .0015 clearance. Plastigauged main bearings #2, #3 (replacement), #4 and all were at .002 clearance. #3 (original that was replaced) was the only one that was over .002. I read on here that there is mixed opinion on bearing clearance, with some opting for .002 and others tighter. Figured I will try it. Didnt check #1 main since I would have to have the timing cover off and all the things associated with taking the cover off. Cleaned up and de-carboned head and painted it. No burnt valves all seem to seat well. Decided to just clean them up and not do a full valve job. She now has 1,200 miles (and many oil changes and filters) since I did my shade tree rebuild. Oil consumption is now almost nothing and her new rings seem to be seating well. I think any oil dripped now is from timing cover. No knocking and oil pressure has been 40 - 45 lbs at 30 mph+. After a run at 60 mph she has about 38 - 40 lbs at 50+ miles an hour and 25 - 30 at 30 mph. After leaving the freeway and driving at lower speeds oil cools and she goes back up to 30 - 40 lbs at 30 mph and 40 lbs at 40+ mph. I am using 10w 40. Have tried 15w 40 and pressure is about the same. If she blows up again I may actually decide to keep her flatty and do a proper rebuild since I now have experience rebuilding her but who knows..May still go for more power.. For now she will not be run as hard as I used to run her. I know this isnt the proper way to do things but I am already happy I got 1200 miles out of her and she may or may not get many more. Some people on here are lucky to do 500 - 1,200 miles in a year.. Forensically, I found a piece of piston skirt in the oil pan. It is possible that tiny metal pieces from the skirt caused the failure in rod #4s journal. Piston #1 had the broken skirt. I still havent had a chance to check the clearance of my old oil pump to see if it was out of spec but hope to do that when I have time.
 1 point
 -
on the AVERAGE....only the very lowest bolt on the fender at the cowl gives issue as it is the one that seems to always have a certain degree of dust and dirt holding moisture. But as stated, that is my experience.....each person has to make the call for attack...they just need to know what options are available..... working solo I set my engine and tranny today...barely nicked the paint on front corner of oil pan....dang...touched up and you would never know it now.....
 1 point


.thumb.jpg.52b659814cb5758b70f78e52ab046bdd.jpg)
.thumb.jpg.d599d4c13e08899474e0348bd9baed3b.jpg)
.thumb.jpeg.28cb36506a6b17cd30e7d4a22504384d.jpeg)