Leaderboard


Popular Content
Showing content with the highest reputation on 05/26/2020 in all areas
-
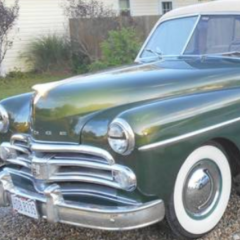
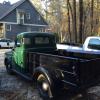
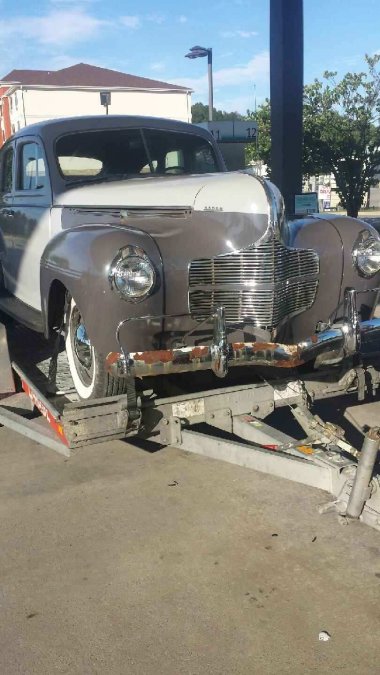
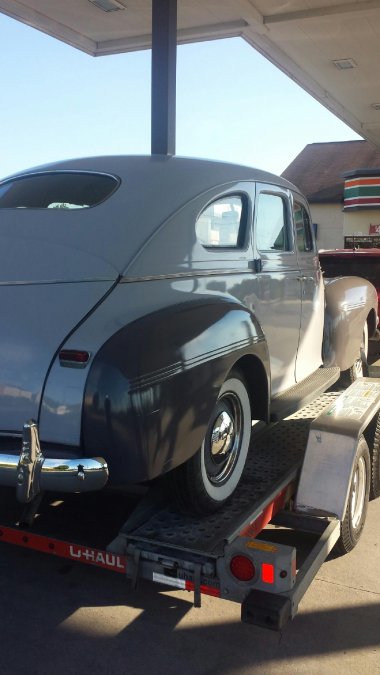
Okay what is Memorial Day without a parade, vintage car included.
 4 points
 -
You are getting prepared for the Viking season. A place to dry your crying towels.4 points
-
The kid has great potential as a corporate executive.......get the peasants to do the dirty work.... ?2 points
-
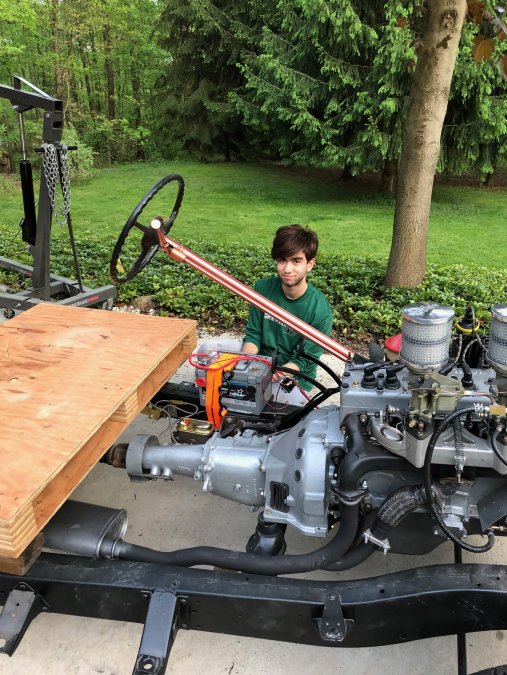
Here is a short video of my first drive https://youtu.be/nfRBovLJIWk2 points
-
I made a mistake....!? The five mounting screw type senders use a cork gasket up through1948. 1949 and later senders using the twist lock ring as shown by the OP ....a rubber O-ring is used. The original O-ring was a square cut ring.2 points
-
Why not make your own 1/8" cork gasket....easy to make if for 1941-48 MoPars. Cork is good...won't leak. Yes the sender needs a good ground. But for a 1949-54 MoPar a rubber square profile O-ring is used...2 points
-
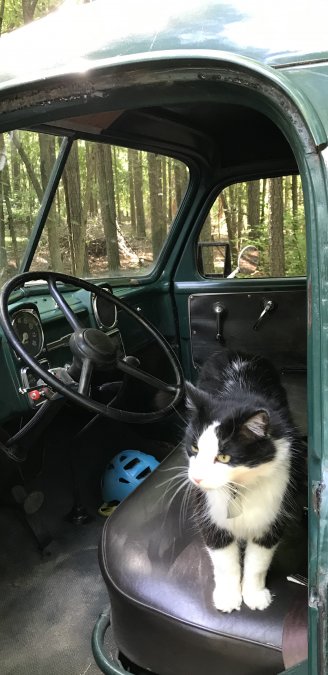
My co-pilot, our barn cat Berlioz.
 2 points
 -
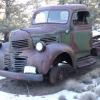
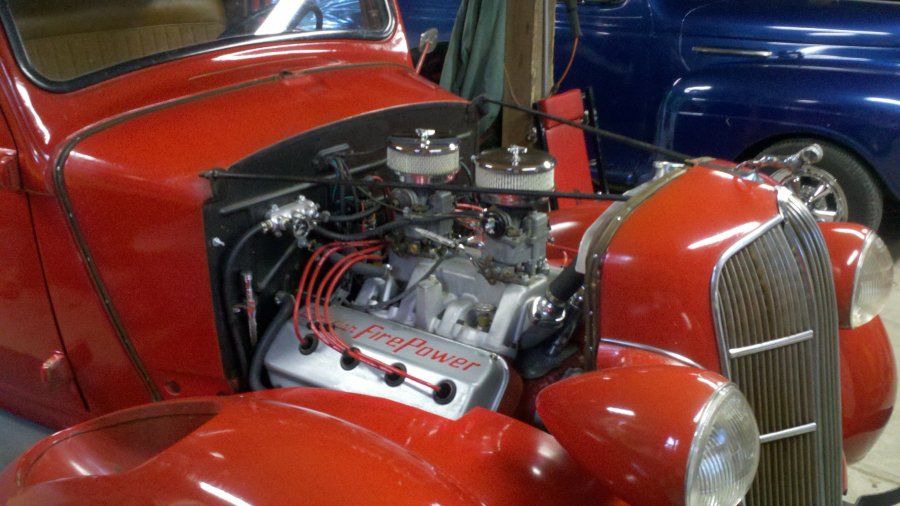
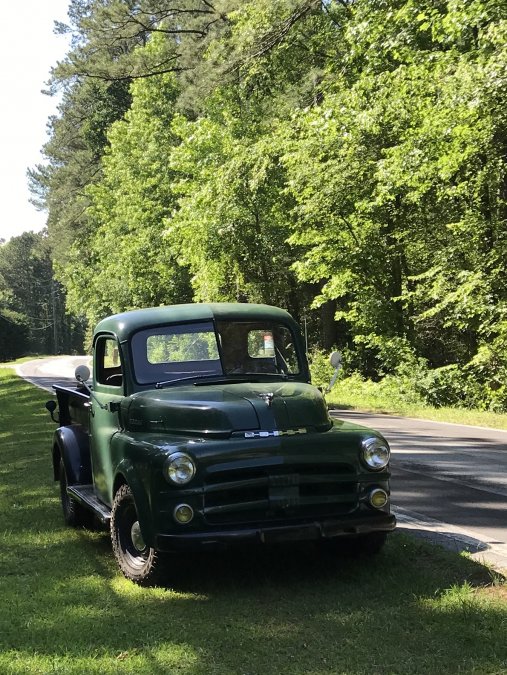
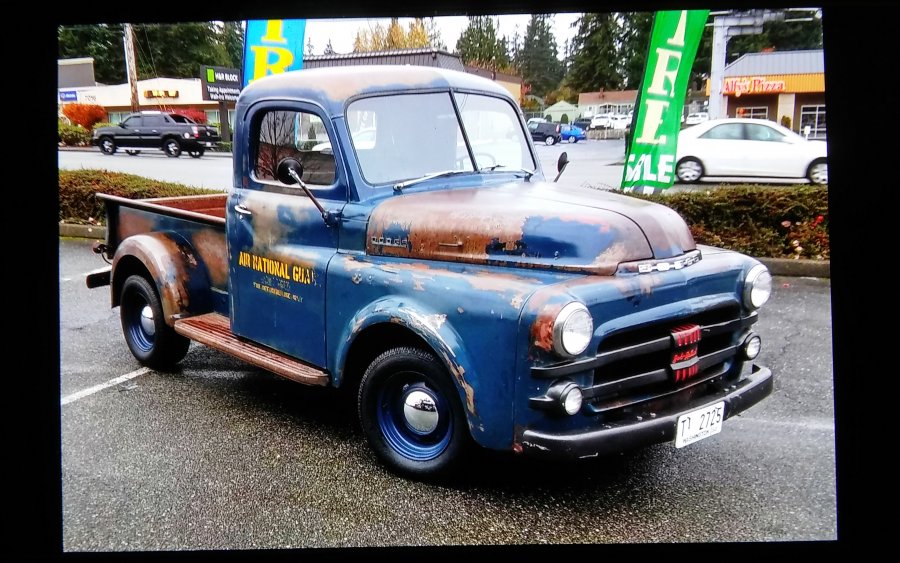
I put a '54 Chrysler 331 in my '36 Dodge pickup when the flathead started knocking about 10 years ago. Best thing I ever did to this truck.
 2 points
 -
You might make a conditional offer. $100 bucks, with more payment after it is thoroughly checked out. If I had it, it would be sold that way, but the price would be $500 or more since you would be assured of usable parts.2 points
-
Hello everyone. I wanted to start a one-place thread to update the group on this build. I have a couple little threads out there, but this one will tell the story (comedy or tragedy, we'll see) on the breathing new life into my 1940 Dodge D14. To tell the story, we have to rewind to 2008 ... that is when I sold my 1973 Stingray. The wife and I then got a boat ... and you know what they say about those. Fast forward through 7 years or so of nagging her until she finally caved and agreed to get another car ... her only requirement, it needed to have 4 doors ... done. I knew I wanted to get a prewar car and I started this adventure in 2015 looking to get a 1937 Desoto. The deal fell through the day I was going to pick it up - the seller decided not to sell it/ or sold it to someone else, I'll never know now. A few weeks went by and I found this 1940 gem for sale in Pennsylvania ... called the guy and went right out to take a look. Here are the photos when we looked at it/brought it home back in 2015. Cutting it close on the prewar era and some say it;s not ... but it was made by the US in the US and we were still technically not IN the war until 41 ... that's my story!


 1 point
 -
Been doing a bit of digging of dirt....placing the moisture barrier and wire tomorrow morning....shooting for a Friday pour....
 1 point
 -
don't work on GM cars...so no worry of a twisted frame......?1 point
-
auxillary running board mounting brackets....the tilt and fold style....1 point
-
Optional B-3 Squirrel hide drying rack.1 point
-
1 point
-
Here's a B Series 20 minutes up the road from us in 1950. These black and whites are from a ferry that crossed the Chattahoochee River from the mid 1800's century to the mid 1950's. They're not great as they came from a an Atlanta news paper article about the ferry. Since the article was from 1950, I assume that the Dodge is a 1948-50?
 1 point
 -
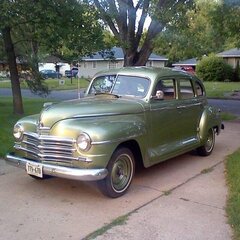
On holidays I usually do something community oriented instead of vacationing. This U.S. Memorial Day I decided to pick trash along the highway near our place and of course the '52 was my companion. This road was first paved by the county, probably early 1950's (they dug the fill dirt for it from our property from what I can tell) and I'm sure there was a B series Dodge doing the work.
 1 point
 -
I cleaned the points and checked the oil level ,it was overfilled because I only lifted one front side to have access. Shifts as it should now. I need to reset the magnetic dashpot to prevent stalling on abrupt stops. Thanks for the advice. Anyone with a gyromatic should watch the chrysler master tech video, it is far better than the manual.1 point
-
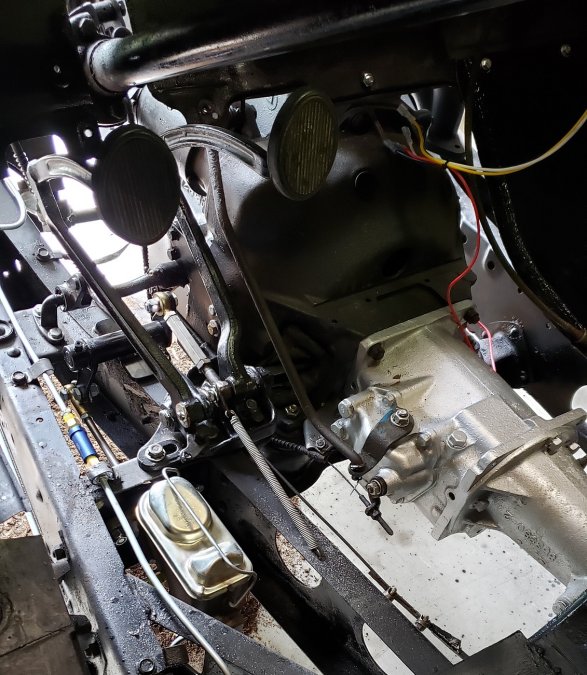
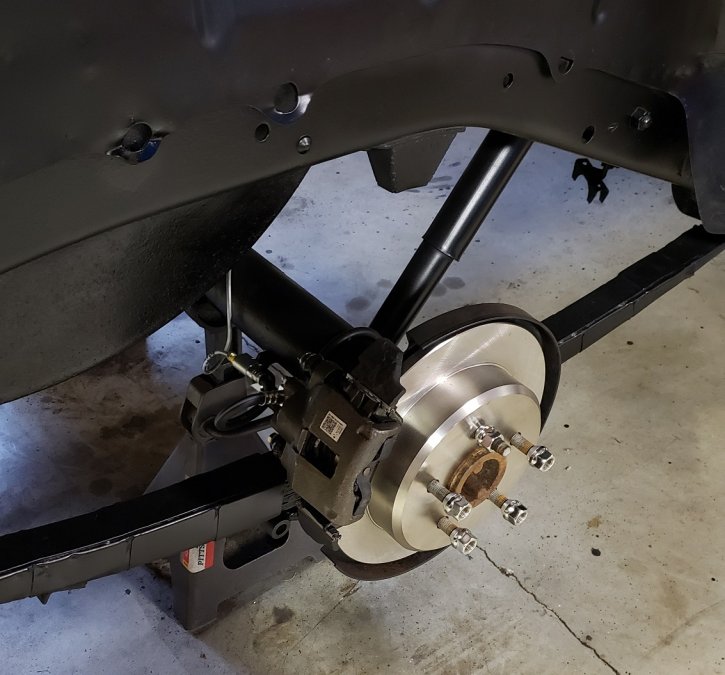
Hello all. It has been a long road and the project took the back burner for a while. But, here is an update on where the build is now: - Rear replaced with a 98 ford 8.8 with disc brakes - Engine buttoned up, repainted silver - All the body rust repaired and sealed, fuel tank repaired and installed - Front disc brake conversion (Scarebird) finished and pedal assembly reinstalled - Trans reinstalled, clutch linkage and shift linkage reconnected - Front and rear brakes plumbed, bled and tested - New wiper motor installed from Newport (great kit) while dash is out On the list of things to work out are: - How the heck the throttle linkage from pedal gets to the side of the motor to the bell crank ... no pictures from my books on how this linkage is made ... I have a rod, but can't make out how this attached .... it can't be solely supported by bellcrank and floor board, can it? - Prime and paint - Wiring - Exhaust work ... looks like it's not possible to run true duals all the way back given the battery box and left side mounted fuel tank ... only have a small opening between tank and spare tire well to run tubing and this is not big enough for duals. If anyone has info on they did it around the tank and spare tire well, I'd be happy to see but everything I've seen, it's too tight

 1 point
 -
Great photo, what a sweet pup!1 point
-
And Our Co~Pilot Aussie in his "52" Dodge M37.
 1 point
 -
the original seal for the sending unit to the tank should be an o-ring that fits in the tank groove...I had enough left of my originals to get them sized at a local industrial supply for pennies...a ground stud can be added for improved gauge accuracy1 point
-
Could it be you are starting out in third and not upshifting?1 point
-
The shift housing is easy to remove, just follow the manual procedure. That will allow you to determine if something is out of whack in the housing. You should find this recent thread an interesting read: https://p15-d24.com/topic/52787-no-reverse-or-first-gear/1 point
-
Cool ! Finally able to upload a picture of my 52 ! Thanks. This beauty spent its life on the Mt. Home Idaho AFB. Has 57k original miles and runs and drives like a dream ! Lots of looks and thumbs up ! It's a boyhood dream come true. I intend to leave it in it's original "patina" ! I figure it's earned it !
 1 point
 -
Mine will comfortably run all day at 70mph in overdrive, and it sits nicely in the power range to give a bit of acceleration when needed. My car has a standard 3.9 rear end.1 point
-
With given perfect conditions (engine, cooling, trans, overdrive, shocks...) my P23 makes 81 mph (130 kmh) with 2200 rpm for hours, interrupted only by fill-ups :)) I don´t know gear ratios, but George Ashe had sent me "faster "gear wheels On less than perfect roads the running gear is the limitation: you will get seasick! Mine has a sway- bar, maybe it is even worse without! And while reaching even 87 mph, You must remember the 60 mph brakes!! Our constant travelling speed is75 mph, also the noise is more acceptable then. Without overdrive riding is very uncomfortable in Germany´s today´s hectic traffic Greetings! Go (all the speeds are speedometer readings! For GPS values take 10 % off)1 point
-
You not only cleaned them, you polished them. I used this self-etching primer on many of my parts that were brought down to the metal.
 1 point
 -
My 41 windsor will cruise at 65 but has triple carbs ,twin exhausted and a split manifold ,it needs an overdrive really! On the other hand my 48 New Yorker will cruise all day and all night at a true 70 ,more if needed.The straight 8 is literally a quantum leap form the 6.1 point
-
If it says Red Ram it's a Dodge Hemi, which the D553 supports, in this case a 1955 Dodge Super Red Ram, top of the line 270 Hemi for Dodge then. http://hothemiheads.com/hemi_info/hemi_engine_id.html1 point
-
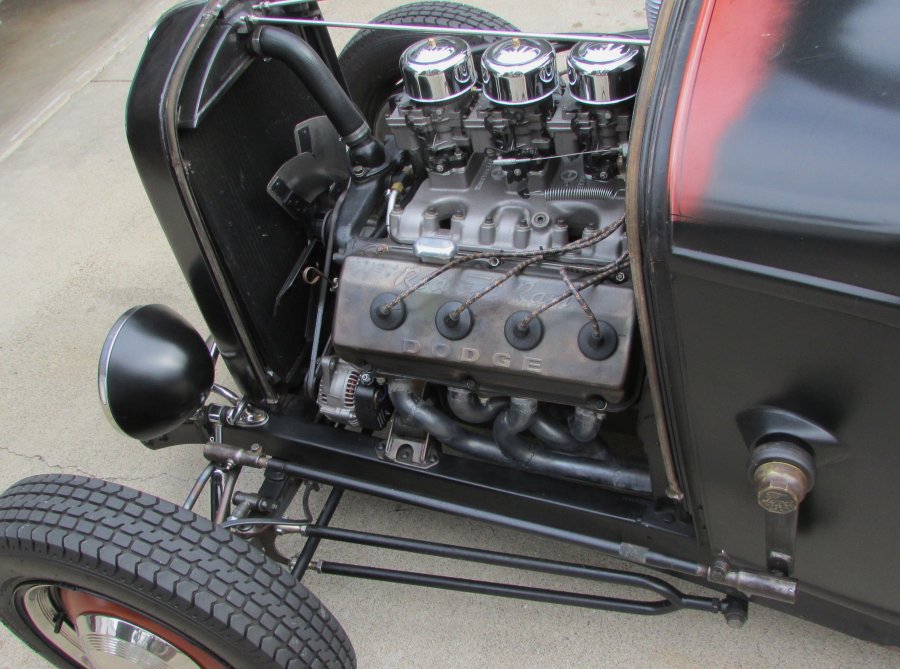
I have started a build thread for my Baby Hemi for anyone who would like to question or comment. https://www.jalopyjournal.com/forum/threads/poly-begets-a-hemi.1194565/1 point
-
http://www.wilcap.com/chryslerfh.html https://www.plymouthowners.club/talk/index.php?topic=1552.0 http://vintagemetalworks.blogspot.com/2014/04/new-product-dodge-218230-passenger-car.html https://www.hemmings.com/stories/article/borg-warner-tremec-t-5-transmissions1 point
-
...sorry but, Dodge engines do NOT have the same block extension as the early 331 Chrysler. There are a variety of bellhousings to accommodate the various fluid drive couplers and torque converters and likely what is seen from above or below.1 point
-
I was told by a machinist to use a pilot drill bit that just barely bigger that the web of the drill bit size of the larger drill to be used. The Web is the cross section between the flutes of the drill bit. (The sharp center). Hope I am clear of the explanation. The is no need to progressively drill larger and larger holes to get up to where you want to end up. I have drilled up to 2" holes using this method. Say a 1/2" drill bit has something like a 1/8" web (off the top of my head). Therefore a 1/8" or barely larger will allow the 1/2" bit to easily drill the hole and will be centered and round not oversized and out of round. DJ1 point
-
I ditto the prior remarks about the extended bell housing Chrysler. Neither DeSoto nor Dodge had that feature. Dodges and DeSotos are great alternatives to the Chrysler Hemi and they still have the "Hemi presence" If memory serves the Dodge is a good 2" shorter then the Chrysler and in every case narrower than the Chrysler at any deck height. DeSotos fall in between the two but IMO, DeSotos are the most rare and therefore even more expensive to rebuild. I am just now starting on my second Hemi build, a 270 cu. in. The prior 325 has just clicked over 40K miles and I couldn't be happier or more proud of an engine I built myself.
 1 point
 -
Wilcap makes adapters to put a number of transmissions behind an extended bell 331. http://www.wilcap.com/Hemi.html This is what an extended bellhousing looks like
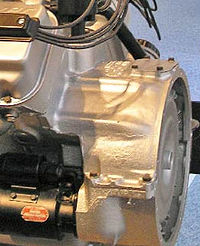 1 point
 -
I thought this was a personal grooming thread at first glance. When I first read it my thought was. Marijuana is now legal and haircuts are against the law. It took 50 years but the hippies won after all. Peace!1 point
-
I would look first at the natural breathing of the engine itself. two major areas come into play. One is the fill tube and the vented breather cap..if you have the open sided breather it must be pointed at the firewall to prevent too much air forced into the engine by the fan....second is looking at the scavenger pipe and ensure the position of this tube is correct so to create a venturi effect. This allows vapors in the engine to be removed in such a way NOT to remove small atomized particle of oil along with the vapor....1 point
-
I have a 52 and I made new box planks from local west coast fine grained fir. The original wood was some sort of eastern hardwood which in fact seemed pretty soft. I have not had the truck out in the wet so I do not know yet if the fir will cup but I have sealed it pretty thoroughly. The thickness is 7/8 and the grooves for the box strips which I bought from Mar K can all be cut on a tablesaw. What surprised me is that the outer planks are tapered as the box is actually one inch wider at the tailgate than at the front panel. I do not know if all trucks are that way but mine certainly is which means I have to re make the outer planks. The truck is not at my home now so I cannot give you dimensions other than the thickness. I can recommend MarK for their box strips and bolt kit. They probably sell wood too . Have a look at their on line catalog.1 point
-
Under the seat there should be a round plug in the floor. Pop that plug out and you will have access to the sending unit. Merle By the way... When I put my sending unit in I added a grounding terminal to assure that the sender was properly grounded. I drilled a hole through the plate and put a machine screw up from the bottom with a little Permetex sealer. I then use a second nut to attach my ground wire, which runs to one of the trans cover bolts. I dont' have to worry about counting on the ground through the mounting flange and the tank attachments.1 point


.thumb.jpg.78d6c0802c54e2d4382e1ae232fa93e6.jpg)