Leaderboard


Popular Content
Showing content with the highest reputation on 02/24/2020 in all areas
-
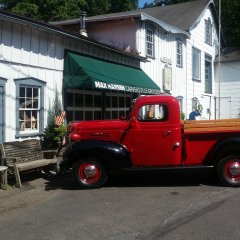
2-23-20: Went out for a cruise with the kids. 40F and sunny today. Gosh that was nice! We stopped at the market for some snacks and when we came out a trucker stood admiring the Meadowbrook. His name is Karl and he is from Quebec City in Canada. He said next stop was North Dakota to drop off some things and then to Portland Oregon, and then California to pick some stuff up and come back this way. He asked me a lot of questions about the Meadowbrook, including if I had to put leaded gas in it. We chatted for about 15 minutes. It was a good visit and he was a nice fellow. Pic 2: at the supermarket for a few groceries and then home. The sun was going down by this point and it was cooling off. We had the heater on low to stay toasty.3 points
-
wow smal world!! Karl as a familliar face.. I'm prety sure I meet him a while ago.. I'm a retired military (20yrs) and retired from truck driving also a 20yrs. I'm also from Québec, Canada,, small world!!2 points
-
Diff went back in today with a new gasket. New inner axle seals too. New axle bearings arrive in a few days. Then the axles go back in. Started making new front steel brake lines today. Then the brakes will go back together in the coming week or two. Along with outer axle dust seals. All the parts in hand. Reassembly progress should be steady over the next few weeks. I am again yearning for a test cruise. Will do that maybe after the brakes are done! Gotta get my fix.2 points
-
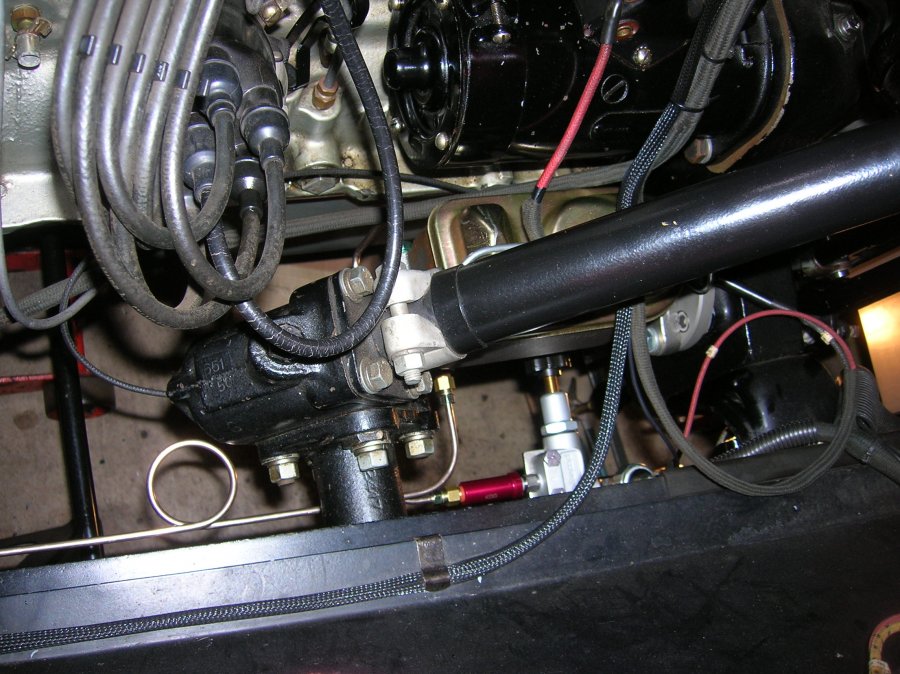
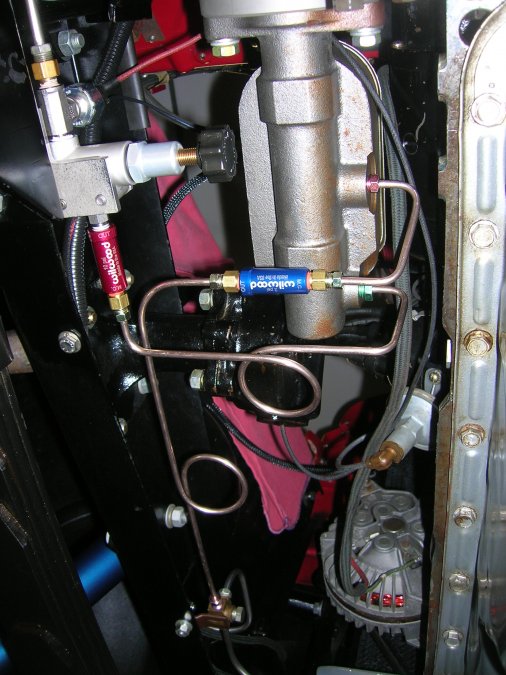
I thought I'd update my disc brake and split master cylinder install progress just in case anyone is interested? Finished bending brake lines needed for the conversion today. I'm using a copper / nickel alloy called NiCopp. Never used it before. I've read it meets oem safety standards and has been used for many years on European cars. I wish I knew about this before. Wow! Is this stuff way better to work with than steel or stainless. Bends and flares like a dream. That said, fabricating brake lines is still a royal pain. Laying on the cold concrete floor wasn't much fun either. Anyhow, I wouldn't refuse any constructive criticism, if any experts out there see something I've missed? Next thing to do is get the brake hoses and mount to the calipers.

 2 points
 -
Look closer, the terminals are there. i have never seen the three connections as marked, i would think the configuration is different. the centre pin, marked as ground i believe is high beam. set up the way its marked, goes dim and dimmer. It puts the 2 filaments in series. best way to check is with an ohmmeter. You will find two circuits with close resistance and one almost double. The double is the two filaments in series, incorrect.1 point
-
common as houseflies......many swap meets have vendors dedicated to pigtails and other wiring products...the wires on their replacement head light plugs are ample for 6 volts...on the average, their relay pigtails are also over kill on gauge...suitable for 6 volt headlight application.1 point
-
I forgot to mention apply it thin. Yes I can see brush strokes in mine too. I'll be okay. Don't remove it ?1 point
-
They have new wiring on them so I would think they must have stepped it down somewhere. The whole car has been rewired and it looks like they did a good job but that doesn't mean everything is right.1 point
-
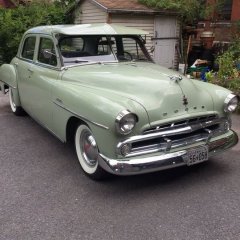
Good to see people taking advantage of all the good, serviceable four door vintage rides left out there. Great car; nothing wrong with a good old crew cab.1 point
-
Kits like this make a lot of sense to me. Similar kit will be used on my 56 PU. Not the greatest quality I'm sure, but a lot of parts for the money. https://www.ebay.com/itm/universal-wire-harness-kit-For-Car-Hot-Rod-Street-Rod-XL-12-Circuit-Wires/133307013302?hash=item1f09b798b6:g:sRgAAOSwe2JeIR5a Add relays if needed/wanted either near the fuses or load as desired.1 point
-
it is not the time the device is drawing current as much as it is for the contacts of the switch making and breaking said current...1 point
-
Use 2 small blade fuse boxes on the firewall. One for switched items and one for always hot. I’ll post some pics later. Relays on any high current items like horns. I have switched every light on my 52 to led so all are low current.1 point
-
Some folks swear ya gotta put in a fuse box, some folks think inline fuses are adequate...it all seems to be personal preference as soon as ya start deviating from the original wiring installation. For reliability, I recommend putting fuses under the dash out of harm's way...for example, on the firewall above the starter pedal, directly behind the speedometer might be a decent spot that can be accessed for service and near the original hole in the firewall where the wiring harness penetrates. additional information - Modified Wiring Diagram with Headlight Relays + Turn Signals additional information - headlight relay instructions1 point
-
You should have a heart to heart talk with the seller of the axles minus the missing studs and C clips... If they were shown in the ad picture they owe you those parts. Bait and switch BS.1 point
-
For my 51 Plymouth, Flaming River says it uses the same adapter as my 65 Cuda, which tells me that the Cuda's wheel should fit the 51's steering shaft. It also says it will fit your 49. By implication the Grant adapter for my 65 Cuda should also fit both our Plymouths. Now will it cover all the gaps and work with the horn button? that is the questions nor have I actually tried it.1 point
-
Everything has a torque specification. Bolts stretch, sort of like a spring, to clamp the load. Not enough stretch and they loosen, too much and they can break. Attached is the PDF from Anitsieze regarding new torque specifications. torque_specifications.pdf1 point
-
Its gone....and I didn't get to see it...oh well. I guess it would help a thread if we save an image from a craigslist post. Seems we lose a bit of steam when this happens. 48D1 point
-
If the shift tag is only painted, then you could contact a gauge face restoration outfit and see if they can do their magic...1 point
-
That one fish looks like a cat... Catfish? ?1 point
-
When I lived in Kansas, I often saw pretty girls wearing t-shirts and buttons that said, "Everything in Kansas isn't flat!"1 point
-
Now that the major house repairs are done, I've been able to get back to work on this ol' beast. The steering column & gearbox parts were all cleaned up & treated with Rust Cure. The original column was bent, and the gearbox end was torn off. Its replacement was a pitted column that had the shifter brackets removed. The holes in the column were filled with JB Weld, and I figgered I'd try to smooth out the surface with the JB Weld also. All of these parts were foam brush painted with Rust-Oleum primer & semi-gloss black, wet sanding the non-cast pieces in-between coats. I only tried to smooth off the surface to the touch on the non-cast pieces, so brush marks are visible, but only from about a foot away...good enough for these parts. Assembly was waaay easier than disassembly...The gearbox seal I picked up from Roberts years ago, National 240151. I opted to use the John Deere corn head grease for lubricant, even though the fill plug is stamped "HEAVY OIL ONLY". I filled the chamber between the sector shaft bushings with grease before installing the sector shaft. With the gearbox held so that the sector shaft was vertical, the cavity was filled with grease, then the worm shaft was rotated about a dozen times back & forth to settle the grease out, as it does flow, especially when agitated. This movement allowed the grease to fill the roller bearings, around the worm gear, and through the sector shaft gear, as the gearbox became whisper-quiet and effort was greatly reduced after shaft cycling. Permatex black was used to make the gasket for the gearbox cover...I debated on making a paper gasket for this gearbox, but I had recently serviced the axles on my '02 Ram 4x4 CTD, where both axles use RTV for differential cover gaskets. So I figgered making a RTV gasket for this application would be just as acceptable. The adjustment was made per shop manual instructions for the sector shaft to find the high spot on the worm gear, and the assembly cover cap screws were torqued. Gearbox installation should be in the next few days, with all new bolts...then we'll see if that motor will fire after sitting for 4 years1 point