Leaderboard


Popular Content
Showing content with the highest reputation on 02/07/2020 in all areas
-
I don’t have any friends so, I did mine by myself using a set of “glass grippers” the rope Tom mentions and a plastic scribe tool Rob mentioned. Standing on the outside of the cab, I pulled it from the inside out, set the bottom lip of the rubber on the pinch weld and worked the rope while pulling the gripper (Fine tuned it with the scribe) I should really get some friends ?6 points
-
I've been looking for sometime for a B Series truck in any California Auto Museum and haven't seen one yet. I know I've seen a picture of one every now and again, I believe its dark green, in some museum somewhere online. But I've decided to build a factory correct 1950 Dodge Pilot-House to either loan or donate to the museum in Sacramento. As many of you know I have several parts trucks and lots of friends to guide me through "Factory Correctness". Yes I'm taking about you guys. So I plan to begin this project at the 13th Annual Clements Tailgate BBQ. I'll roll the truck I have in mind for the build out, and put its "ugly iron arse" on display so we can all wish the B2B good luck. My love of racing has influenced my builds for many, many years. My love of history is just as long. My admiration for friends who build these trucks as close to original specs is on full display at the BBQ I throw every year. I will do my best. I look forward to a good outcome and see this as a gesture of love of all things Mopar and more specifically 1948-53 Dodge Trucks. Tim aka 48Dodger California Automobile Museum4 points
-
Thanks for the feedback @classiccarjack. I figure there’s probably no shortage of folks on here like me, who cannot seem to get enough of these old Mopars. I hope that sharing my progress and the odd video on nothing but my passion, breeds community spirit here among us. There’s probably a few beginner folks viewing here, with little car repair experience. There may also be folks who maybe used to wrench, but for various reasons cannot anymore. Maybe there’s folks who are reluctant to start a major project on their old Mopar. Perhaps lacking the confidence. Or maybe its a lack of motivation? We do know there’s some well respected, experienced mechanics here too. Maybe they smile and remember when they rebuilt their first transmission. If I can reach out to any of these people via my thread here, I figure it’s worth my time to keep posting. To some, maybe we’re thought of as an odd bunch. The old pre-muscle car Mopar guys...Maybe we are odd, but we have a great community here and am glad to contribute to it.4 points
-
I used some dish soap, some nylon string and a wife. Install rubber on window Soap up the rubber Rap the string around the rubber Have wife hold pressure on window and seal from inside while you slowly draw the seal out and around the frame. Be careful not to pull string to hard and cut through the rubber.3 points
-
Brent - Somehow I missed the backstory on this one. Your photo made me wonder Is this how all of those fires on the West Coast got started? Were you trying to compete with PFlaming's cat? Were you trying the PFlaming custom patina treatment? Or, were you fogging for mosquitos?2 points
-
You've got friends, knucklehead...lol. photo: Brent getting an award at the 10th annual Clements Tailgate BBQ and holding me back as Chevy guys stole my brownies. Nick work Jocko....looks great! 48D2 points
-
i will let everyone know what I can even if my card comes back in the mail.2 points
-
I recently had to use plastic tooling to install a center glass with new rubber...had a helper push against the glass as I worked the rubber lip.2 points
-
I was wondering the same thing and discussed it with Plymouthy Adams. I have Arthur's home address and can send him a card. I will do it right now so I don't forget and tell him we are missing him and wish him well. dp..................OK, done, I will get it in the mail and see what happens. dp2 points
-
Hi Everyone Thought I would share 'Peppa' with you, she's our 1950 two door Sedan Fastback and has been in the shop since August 2019 to get all the rust taken out, brakes sorted etc etc so far we're looking at new window rubbers, inner cills, boot floor, fuel tank, trunk floor, inner fenders. After that we'll get a new headlining, seat covers and carpets. The body and trim dents straightened and door rust will eventually get done. Doing this on a real shoestring budget so my two children and I can cruise around, do a few shows. Luckily a few mates of mine own other US cars, Pick-Ups etc I also have a 1942 WLA in the shed. Being based in the UK it often proves difficult and very expensive for parts, so would gladly accept any parts donations and I'll always pay for postage Really looking forward to getting her on the road very soon, cheers Kit


 1 point
 -
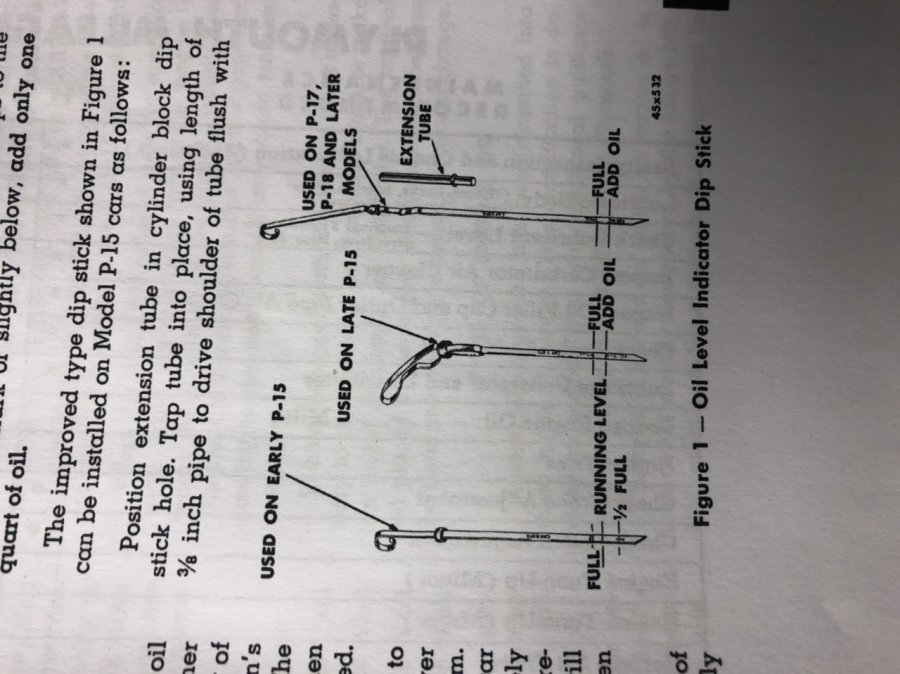
Just happened across this in the shop manual. It should shed some light on lengths, handle styles and markings
 1 point
 -
FureyLee, Thanks. That explains why I can't find the dipstick tube - because there isn't any. (I tore that blown engine down back in 81 or 82, and my memory has suffered since then....)1 point
-
Welcome to the Forum. You'll find a lot of very useful information, and some amazingly helpful people on here. As a 'new' UK owner, I hope you'll be able to join us at The P-15 Picnic in September, and come along to The Pilgrimage in April. PM me with your email address and I'll add you to our circular news list. Also, if you're on facebook we have a page for UK owners, so please join us here. All the best, Robin1 point
-
Matt, The company I am talking to about this is: https://www.cheprecision.com/ These folks are not inexpensive. Probably too expensive for most people to use given the Benefit-Cost of their parts. In my case, given the use and my experience in particular with the stock valve guides, the cost is worth the benefit to me. The clearances for the lifter bores or the valve guides will be guided by their recommendations. One thing to keep in mind is the very "direct" angle of the valve train in these cars. As such, I think we can run tighter tolerances using their materials. I have been toying with the idea to use sodium exhaust valves as well with the bronze guides. My time line to those parts will be in about 3 to 4 months. They will not provide any pricing until I send them a print for the lifter bores and I will send them an actual guide. James.1 point
-
Personally I thought he was doing a burn-out to wake up the neighbors. 48D1 point
-
More work this weekend on the digs. Might even fire up the B1BQ this weekend...lol. Looking forward to seeing everyone.... ITS ONLY 2 MONTHS AWAY!!!!!! ROCK AND ROLL BUILDERS!!!! THE ROAD IS A WAITING AND THE DAY ONLY SO LONG!!!! BRING THAT FLATTIE L6 TO LIFE AND RIDE BROTHERS!!! Oh look......Brent DOES have a friend!! 48D1 point
-
well you DO live 10000000 miles away from us all! Maybe you and Tim should alternate BBQ years and you can have everyone work on your trucks at YOUR place instead of TIM's!1 point
-
Cab is on frame and all welded while in place. I will remove the cab to finish stitching up the butt welds and grind any (ha-ha) excess material.1 point
-
I gave an old Atwater-Kent distributor for a Model T to a friend of mine. (they were an accessory. Model Ts had a timer and vibrator coils originally) He grabbed my Dad and off they went to see Mr Harris. You know he went through his books and found a cap & rotor, a set of points & a condenser for that old thing! All the parts fit something else but they were exact replacements, he had to cross over several ignitions to get there though. I learned thirty years ago when I moved here you never know what you'll find around here.1 point
-
Yes but I’m off a fresh rebuild so no oil in the filter, gauge, internals etc. once I crank it over without firing it up, I’ll add a bit more.1 point
-
His name is Lester J. Harris. He is a resident of Northern Nevada and has about 2 warehouses full of old car parts the vast majority of which are brand new. He also has a 1938 Dodge so he speaks MoPar fluently. He bought a large part of his inventory when Mcquay-Norris auctioned off its inventory after a merger in 1969. You might find a couple of youtube interviews with him, so you get to see the man who will pick up the phone when you call. (775)267-25591 point
-
Thanks all, this manual has found a (soon to be) new home. I didn't want it sitting on a shelf here, when others could use it.1 point
-
here you go.... for the full effect ? I was about to take down the video1 point
-
If you're trying to burn out the gunk in the crankcase filter cap on that big truck, I think ya got a little carried away ?1 point
-
lets correct that.....good Chrysler cars and GM junk.....1 point
-
As far as I know there is no kit. You will have to piece something together. ECI makes a bracket to mount a dual master cylinder where your master now resides. It uses a 67-72 Mustang master cylinder. If you can find a Ford M/C that is in an all drum system that uses similarly sized wheel cylinders then it should do the trick. ECI http://www.ecihotrodbrakes.com/chrysler_master_assemblies.html I looked at the Mustang wheel cylinders and they seem to be of similar size as yours, assuming we are talking about the P15 here. The Mustang has one double sided front wheel cylinder, per side, with a 1.125" bore, the P15 has two single sided front wheel cylinders with the same sized bore. The Mustang has one double sided rear wheel cylinder, per side, with a 0.875" bore, the P15 has one double sided rear wheel cylinder, per side, with a 1.125" bore and this difference may be the issue. So I decided to look at what other Ford products use the same master as the Mustang, seems most, if not all the Fords used it. I decided to look at the full sized Ford's wheel cylinders and the full sized ones might be the donor you need. A 70 Galaxy with all drums has a 1" bore drum master cylinder that should fit that bracket and uses a 0.906" rear wheel cylinder and the same sized front wheel cylinder. I hope this helps.1 point
-
New NAPA points and condenser $22. Got it started tonight ? Turns out the previous owner had the wrong points, condenser and it was 180deg out of time..... Need to “fine tune it” next and then move on to the brakes stay tuned......1 point
-
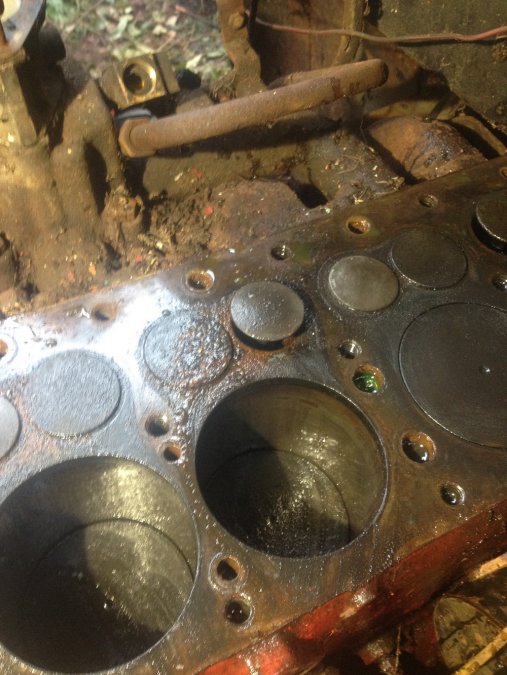
On my B4GA I am choosing to try and “revive” this truck with as little expense as I can, keeping it stock, without compromising safety. (Because it makes me smile.) I pulled the head, because there was no compression (head gasket). The valve seats are pretty pitted….. I am lapping the valves and cleaning up the seats and some parts….. My plan is to use as much as I can from the truck, the way I bought it. My expense so far is: the truck itself $1. J Nickle welding rod for exhaust manifold $8. (Local welding supply store) New intake to exhaust manifold bolts, nuts, washers and exhaust pipe bolts $8. (Local hardware store) New head and manifold gasket kit $52. ($38 at rock auto $14. shipping)
 1 point
 -
My father and I made the 4 hour trip to Venus and spent a few hours with George today. I'm getting closer to transforming my 1947 237 engine in to a dual carb 265. George was gracious enough to give us the "nickel" tour which not only included merchandise but some of his past and current projects. It was a day spent well, with one of the nicest gentleman there is. Rob1 point
-
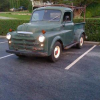
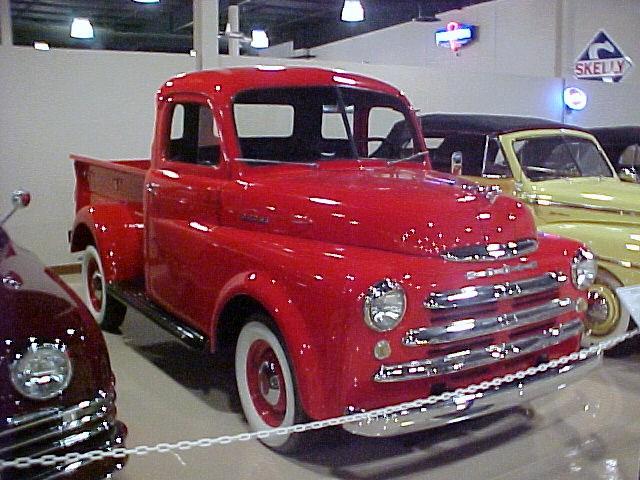
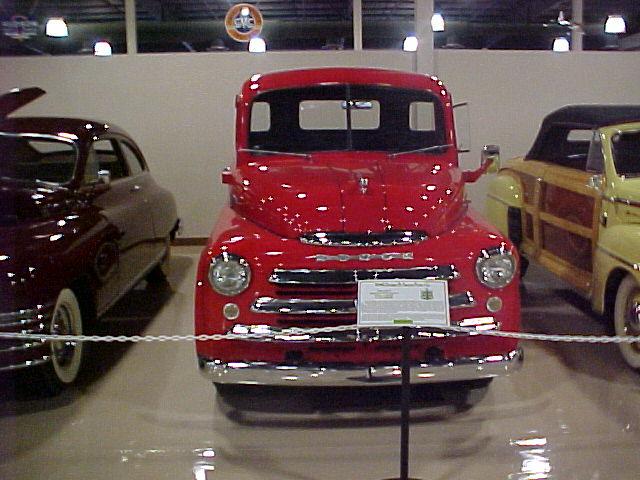
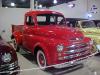
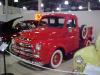
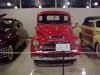
We were at a car show today at Dick's Classic garage in San Marcos Tx. While we were there, we when thru his museum of classic cars. I spotted this 48-49 B series truck, sorry the pictures aren't the best, but check it out!
 1 point