Leaderboard


Popular Content
Showing content with the highest reputation on 01/26/2020 in all areas
-
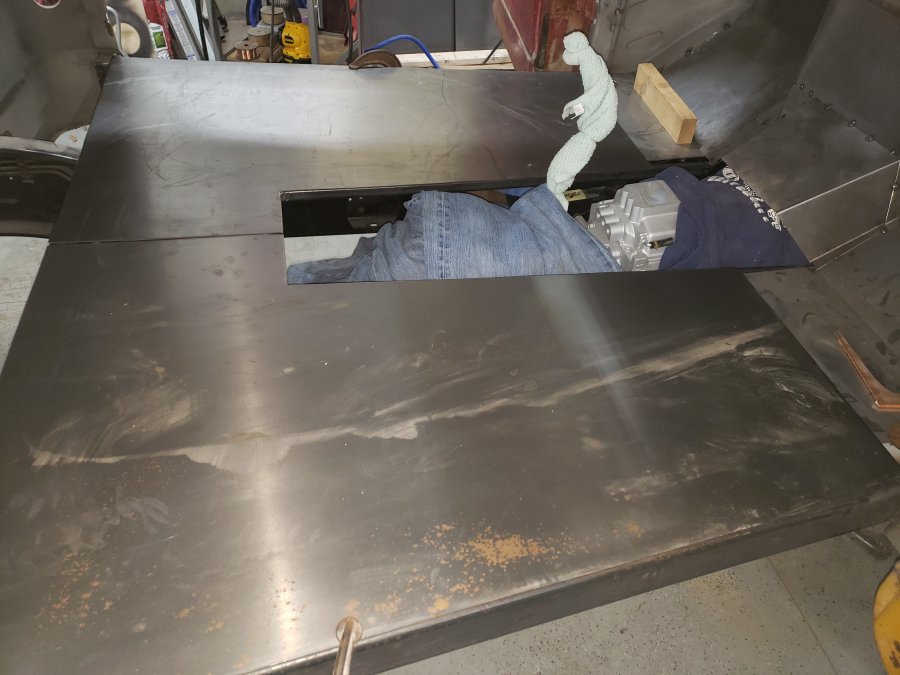
Floor!
 3 points
 -
So far there are already 148 members in the new FB Mopar group. They have posted many items for sale and wanted ads, at quite attractive prices. I sense the group is out to help fellow vintage Mopar lovers out. Folks from around the world are introducing themselves and sharing photos of their lovely old Mopars. There is no unrelated or unwanted material listed there. The gathered group of "idiots" there is fine by me, and I am happy to be a part of it. The group will continue to grow. As media forms change, if we fail to adapt we are left behind by the next budding generation of car enthusiasts. Pertaining to the old Mopar car hobby, I embrace change and welcome new members. Whatever medium they choose to use to actively participate, I will adapt to use it.3 points
-
2 points
-
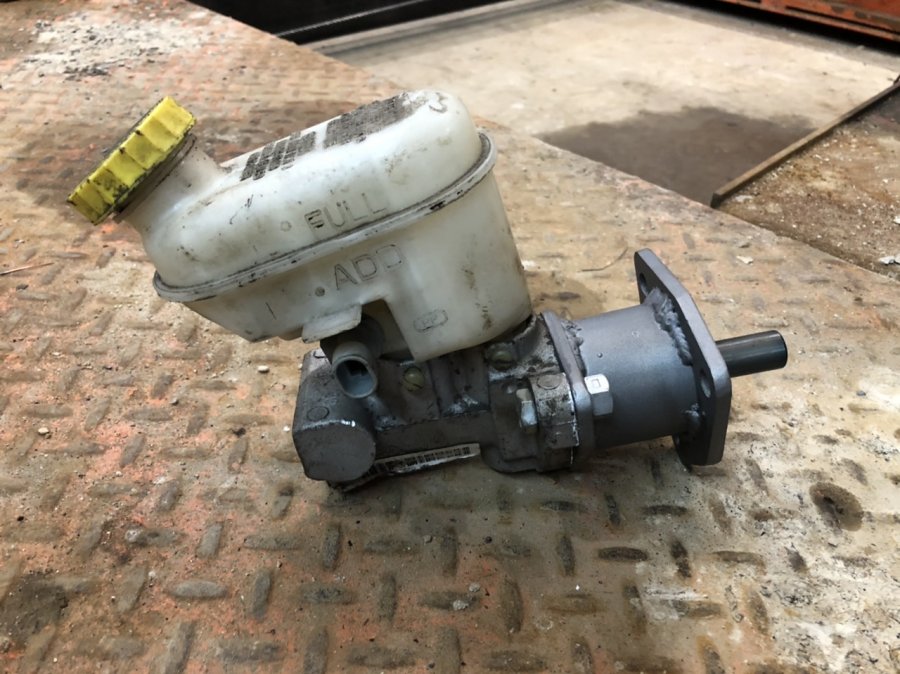
Are you having wheel cylinders seizing up with corrosion from not being driven enough? Is the car stored in a unheated and possibly somewhat damp building? If you answer yes to the above DOT 5 is a good fluid to use. Yes you have to replace all rubber..hoses and cylinder cups and residual valve. Silicone fluid will leak on any pitted cylinder. So new or sleeved cylinders should be installed. If you drive the car a lot, live in relatively dry country and flush the DOT3 fluid every 2 years...and the braking system has never been much of a problrm stick with DOT3...preferably higher temp DOT4.2 points
-
Awesome work on the floors.....this picture makes me smile, but I'm sick....lol. the t shirt is pulled up, the pants pulled out and the underwear [towel around shifter] is pulled up into a wedgie....lol. As if someone under the floor board had been victimized.2 points
-
Floor cut and fit. Bead roll tomorrow and weld it in.
 2 points
 -
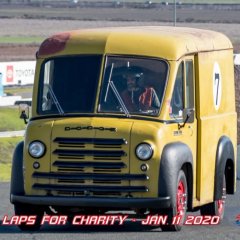
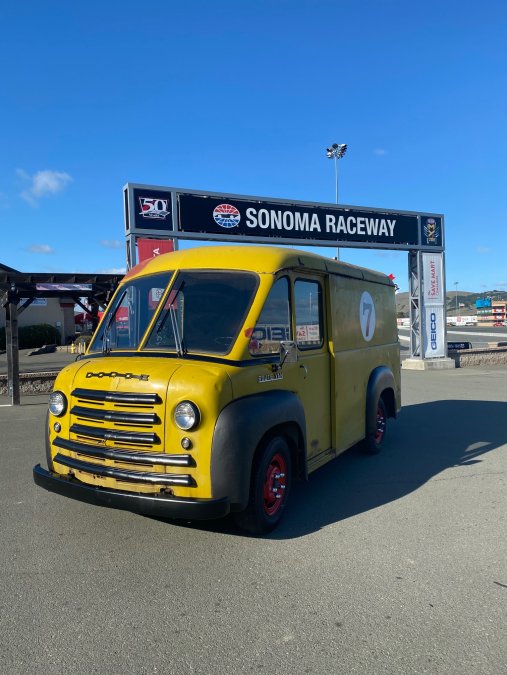
Updated pics of the van and its progress. Two weeks ago I attended the Sonoma Raceway Laps for Charity. It was fun, got my own pace car and after one lap I had a fan crowd in the stands cheering me on. Looking forward to upgrading the suspension to help it corner better. Look out Herbie!!!!

 2 points
 -
Dates for this year's event Sept 17 through 20, 2020 Plymouths (and others) to Plymouth Commemorare the 400th anniversary of the Pilgram's landing at Plymouth Rock Touring Rhode Island and Southeast Massachusetts with stops at Museums, Battleship Massachusetts, historic sites like Mayflower replica, Plymouth Plantation Enjoy a New England Shore dinner, quafe a couple craft brewed beverages, sneak in some antiquing. Meet fellow car enthusiasts, see great cars, great places Contact Mark Duggan through this web sites pm feature or at Mark@randdusaclassicscom to be placed on the event e mail list. Lodging, itenerary and activities are being planned now. A moderate per car registration fee will will be announced to help defray organizers expenses. Consider joining in this year. We had a great time last year. All Chrysler makes invited, other orphaned brands encouraged and welcomes. It not just for P-15s anymore.1 point
-
I bought a 1945 California license plate off ebay. It was supposed to be "restored". It was horrible. They guy even smeared some RTV over a crack and painted over that. That gives you an idea of the rest of the plate. I took it to work and glass beaded it clean. There were a couple spots I missed, so a quick touch up with some sand paper took care of that also. To fix the crack, which was maybe an inch long in the center of the plate, I soldered over the area on the rear of the plate. I leveled that pretty much, but left some thickness for strength. It's been humid around San Diego, so even over night there was some minor surface rust starting, especially in the pits where it was rusted before I'm guessing. I took a paper towel and some Corroseal and wiped the surface of both sides of the plate. I started with a thicker layer, so it got down into the pits, then wiped most of it off. You could see the typical blue tint from the chemical reaction. Next I went to the store and got some Rustoleum spray paints. Clean metal primer (light rust or none the can says), gloss black and gloss white. So far I've primered the rear of the plate, to make sure there was no reactions. I figured I could test there After I've given it enough time, I'll do the front with the primer and let that dry in the sun also. Last for today is a couple coats of gloss black. I'll continue tomorrow. Almost forgot to mention, I got one of the '46 plates to make my new plate GTG for my truck. It was in pretty much new condition. No work there required. It is interesting to note that although the 1944/46 plates were black with white lettering, the tag is yellow with black lettering. I wonder why? I know that's the correct colors and I'm pretty sure this has original paint on it also. Later that day... Way to optimistic about the surface. Lot's of wet sanding and it's still a bit rough in places. It's a lot harder to sand a license plate than a nice big flat truck panel. Anyway, one more coat of primer and I'll see what it looks like tomorrow. Might go right to black, might sand some more. Sunday 1/26/2020 Did a bit more wet sanding today and got most of the pits out. I went ahead and sprayed the back side with the gloss black. I put three coats on and it looks pretty darn good. I'm going to just let the paint cure for a few days now. Then I'll mask off the whole rear and put one more coat of primer on the front. I exposed a bit of metal on some edges, just a bit. I quick spray and then later that day...maybe not until next Saturday...I'll spray some black on the front. Monday 1/27/2020 OK, paint was no longer soft to the touch, so I continued. Put two coat of black on the front today. I'll add another tomorrow. I also bought a set of silicone rubber rollers today. I'm going to put paint on them and roll it on like was originally done. I'm going to go for many light coats until I get the coverage I want. Worst that can happen is I start over. The roller is thin enough so that I can follow the top of the letters and number, rather than just going across them all side to side. The CAL and 45 at the top of plate is recessed, so that will need a brush. Picture once I'm happy. You will excuse me for blocking a bunch of the letters thought Thursday 1/30/2020 DAMN! Had two perfect looking coats and went for one more...late in the evening...low light...it wrinkled. Crap. Taking it back to work tomorrow to start over. Oh well, it's only time. Saturday 2/1/2020 After going down to Bonita for the Saturday morning cruise, I dumped some MEK over it and used a steel brush. Clean Jean. Now after a wash and dry...self etching primer. Very light coats Two on the front drying in the warm sun, then an hour from now, two on the back. More sun drying, then a single light coat of black on the rear again. Tomorrow will be the second coat. I'm taking it slowly this time and not rushing the dry times. Since I won't get more than two on the rear (black) tomorrow probably, I'll wait until next weekend and another day of sun to finish the black.1 point
-
there seems to be a ghost floating over the transmission....1 point
-
I've got some of those but hadn't thought of cutting them in half. I have considered attaching some of the no-slip sheet used on motor home shelves to the back. The work ok as is but slide off the fender too easily. Maybe spray both pieces with 3M super 77 glue?1 point
-
I would highly recommend not changing fluid types until such time you are doing an entire system upgrade or overhaul...that way there is never a question of contamination or comingling.1 point
-
I have a few Harbor Freight moving blankets, best bang for the buck for a host of jobs in, out and all around the shop...came in handy when camping also as chair cushions...I keep a couple in the van in the storage lockers provided in the floor.1 point
-
I caught Habba Fright's 40x72 moving blankets on sale for $3.99. Cut one in half and you have two perfectly-sized fender blankets. Keep another full-size one on hand for a quick slide under the car.1 point
-
this may suit your need...pricy, but it all is PAY TO PLAY https://www.ebay.com/itm/Mopar-Logo-Grip-Fender-Cover-22-x-34-non-slip-material/391714201742?hash=item5b33fc608e:g:DyAAAOSw32lYsHT1 my go to fender protector is a Summit Racing.... Summit also has a host of brands/model on their website......1 point
-
Go to Harbor Freight and buy a welding blanket. Excellent for laying over the fenders to work on motor.1 point
-
Here's a good read: https://techtalk.mpbrakes.com/brake-fluid/can-i-use-dot After reading that, I concluded that the answer is no. But, your car, your money, your decision.1 point
-
Cool. Let's see a Chev or Ford do that!1 point
-
Facebook is flypaper for idiots....1 point
-
Great idea. I'll add that to the Group rules and put out a message.1 point
-
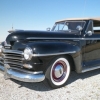
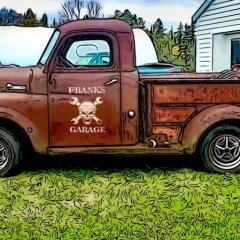
I don't know if I missed it while browsing your amazing [drool] collection or if you didn't say....are any of these trucks for sale? Is your last name Elder? It's not a common name out west as it is in PA where most of us started.1 point
-
All chrysler and desoto cars and most dodges use the two lower thick rubber donuts with a taller matching washer "T-tubes" ....that being a 3" welded washer and tube assembly The washer T-tube is pushed down into the top of the upper motor mount . Then that mount assembly is set into the cross member...the bell housing rests on the two mounts. The lower under side rubber donuts are then pushed up onto the protruding steel motor mount washer T-tubes. The bolts dropped down through the bell housing and mounts...then the large 3" steel washer, lock washer and nut are installed and tightened...TIGHT! The original two factory rear mount bolts and T-tube washers are a specified length/height. That being so when the mount bolts are bolted tight they cannot crush the rear mounts so tight that a vibration occurs. On the plymouths mopar cheaped out on most models..not all and did not use the thick lower rubber donuts. Instead they only used that 1/8" lower 3" diameter anti-clunk or vibration prevention washer. Once again the correct dimensions of OE bolts and T-tube washers and factory correct height top mounts all need to be used to prevent crushing tight the rear insulator mounts. The left rear engine mount rises when accelerating hard from a start..the reason for the 1/8" + rubber washer on the drivers side only. The bigger and heavier FD engines supposedly needed the full upper and lower soft rubber mounts. The plymouths didn't. I have seen original p15's though with upper and lower mounts. As long as the right soft mounts, non damaged washer T-tubes of the correct height for the type of upper lower mounts you can install any style of rear mounts aand not crush them tight. Remember that driving over rough roads also causes the trans and engine to bounce up and down on that rear cross member...so properly assembled rear mounts will prevent the excessive drive train motion and keep it noise and vibration free. I'm done?1 point
-
I find all your pictures and stories fascinating. Amazing collection.just trying to wrap my head around all of them. Here, the few i have all need to be ran on a regular basis,at least a couple times per year. Fuel, stabilizer and batteries all come to mind as being more than a small expense in your case.1 point
-
Keith, In my 1946-54 Plymouth Service Manual the illustration posted by greg g along with the description is in the engine section, page 151. If I recall correctly, beginning in the early '50's the additional rubber washer was added to prevent the left mount bottom metal washer from touching the frame during hard acceleration as the engine torques to the right. I doubt the little Six in your '38 will develop enough torque for this to be a problem. I recommend you read all the thread I linked earlier in this thread for a lot of info about the mounts. I ended up deleting the bottom mounts in order to eliminate harsh vibration. Many aftermarket mounts are made of rubber that is too firm.....this is discussed in the thread I linked. There is a lot of confusion about the mounts, the ones we purchase now do not resemble the lower mounts in the manual illustration. Also detailed in my thread.1 point
-
Floor supports in
 1 point
 -
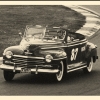
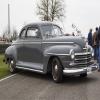
Yeah, as John notes, these are most likely prop cars, also most likely not much more than you can see in the films. That's definitely a D24 in the second screen shot, but don't know why there would be tape over that trim piece, there are only vertical lines in the center of it. Maybe to cut glare or reflection?1 point
-
All welded and painted. Installed. no shoehorn required. from a 2001 ,pt cruiser 4 wheel disc brakes. If installed photo is upside down, you still get the idea.would be easier if it was upside down.

 1 point
 -
Go ahead and sign up for Facebook. Accept zero friend requests. Don’t follow anyone either. Seek out and join special interest and hobby groups. Your FB page will become a portal into a great new experience. Whether Mopar related or otherwise. It can be a great tool. You’re missing out on a ton of old Mopar connections and classic part sales on Marketplace.1 point
-
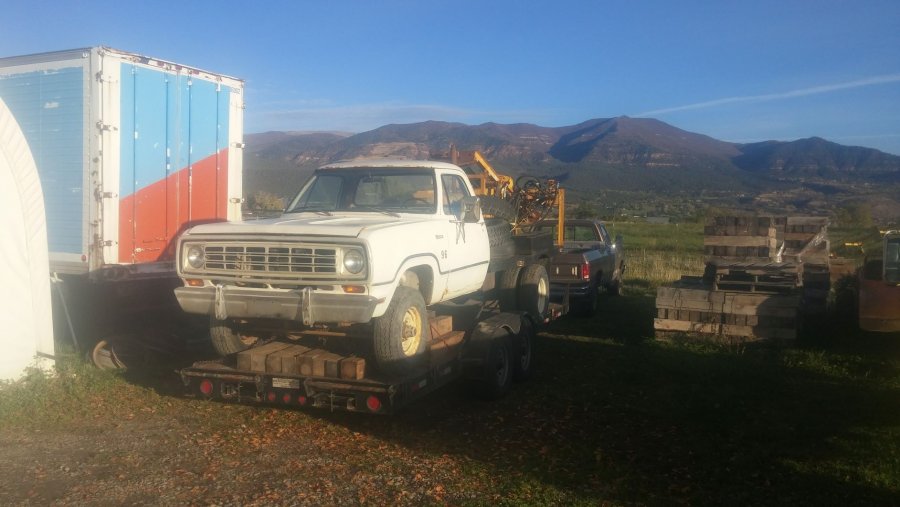
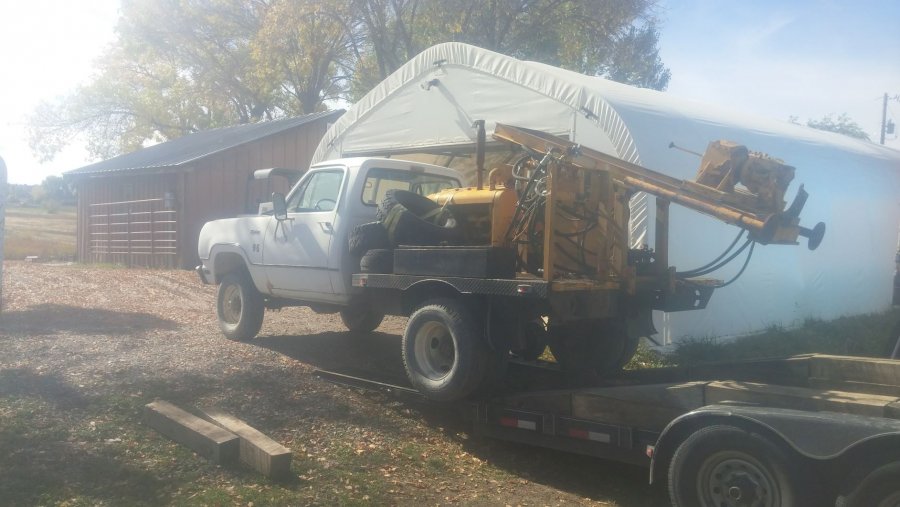
It had been several months since I left the truck and drill in Denver for repairs, and I had a truck and trailer in Denver from another project. Rather than obtain the necessary temporary permits and insurance to drive the truck and drill home, brought enough wood to get the dual-rear-wheels over the trailer fenders, to haul the rig backwards, and take the weight off the rear end of the trailer. Loaded the rig on the trailer, and prepared for Interstate 70, Eisenhower Tunnel, Vail Pass, and McClure Pass. Made it home without further problems and unloaded the rig.


 1 point
 -
I smell a cunning plan to get me active on Facebook?1 point
-
Joined, might be a good idea to remind people to put in a location. I see some prices in Euros and Pounds, pretty sure shipping would kill me on anything priced like that. Thanks.1 point
-
Robin, Great idea to form a Facebook group. I just joined. This comes at a good time because I'm cleaning up my shelves and will have a number of items to sell. Harold1 point
-
stop over we'll take the wagon!1 point
-
Thanks Greg. You eased my mind before I started jacking it up. I had built a couple pilot studs to guide the tranny back in without putting any load on the pressure plate. As per the ‘38 shop manual. I threaded them in place, and I put some blocking under them and jacked up. Mounts came our pretty easily. Right one is broken. I’ll clean it up and weld the tube to the washer. Old mounts were in very poor condition. Glad I did this. Both rear mounts appear identical. I’ll check my manual to be sure.1 point
-
my advice to you would be to spend your money on other aspects of your rebuild..... like balancing. The guides and seats cause very little trouble and your block will accommodate a .060 overbore. Cast iron is the preferred material for sleeves.1 point