Leaderboard


Popular Content
Showing content with the highest reputation on 01/13/2020 in all areas
-
Success !!! Yesterday I did what Jerry and Tooljunkie suggested. I used an old 10 speed derailleur cable and housing that I had laying around and chucked it up in my cordless drill.. I had to use the housing with about 1" of cable sticking out to make sure that cable was rigid enough use then as the cable went in I would pull it out and shorten the housing and run it in again. It was plugged with fine powdery brown residu and it only took about 20 minutes and it went pretty easy .Once it passed all the way thru I broke out a can of spray carb cleaner and ran it till it was running free. After that I put a vacuum hose cap on the end and filled the tube with carb cleaner and let it sit overnight. In the morning the tube still had the cleaner in it so there are no pinholes or leaks in the tubing. I then blew out the tubing with compressed air then I sprayed it with carb cleaner again to make sure it was clean and no more residue was coming out. To clean out the mung in the bottom of the tank I used acetone like Tooljunkie suggested. It worked great. I ran out of acetone so I used some lacquer thinner to finish it off. It came out nice and clean. Now all that's left is to weld the piece that I removed back on when its safe to do so. The hole that I cut in the top of the tank is large (see photo) so I had plenty of room to not only work out the smashed tank bottom but also reach in and clean out the tank afterward.Between the piece I removed , the hole for the sending unit and the gas filler tube there is a lot of ventilation for circulation. By this morning there was no scent of lacquer thinner or acetone. When it comes to welding on something like a fuel tank one can never be too careful. Im not sure how long to wait before I weld the plate back in . I know some folks attach a hose from a tail pipe and run it to the tank and weld while the engine is running but I dont think that will work very well because I'm going to MIG it and the shielding gas will be blown away from the stinger by the exhaust. Ive also heard of placing dry ice in the tank but sadly no one carries dry ice here anymore. It looks like I'll be waiting for quite a while just to be safe. Thanks again Jerry, Tooljunkie and 48Dodger for your help, I appreciate it. John
 2 points
 -
Way i see it is design as you build. i enjoy fabrication work. There are less forseeable problems now than yesterday. After years of wrenching this stuff gets easier all the time. Sure is a nice break from certified auto technician’s daily grind. figure i got it 2-1/2” lower, but the rad support repair moved the fenders back up at least 1/2 that. thanks for your words of encouragement.2 points
-
Bump..... sure looks like a great time! The anticipation is killing me ?2 points
-
The body is at the body shop, I have the drivetrain at my place. Trying to move the diff around reminded me that I did not want to work on it on the floor, so I got to looking at the tubing I had left over from the k-frame/engine/trans dolly and I thought, "Why not make one for the diff?" I tried to make it adjustable enough to use with other diffs, but it would require some additional "fabrication" to use on a diff that mounts under the springs. The bottom of the brake drum is 15" above the floor. The support under the input collar is a bit redundant on this diff, but I thought it might be necessary on others...and I had the scraps to build it with.
.thumb.JPG.47d6bbc52b7be301848e830160bbedcc.JPG) 1 point
1 point -
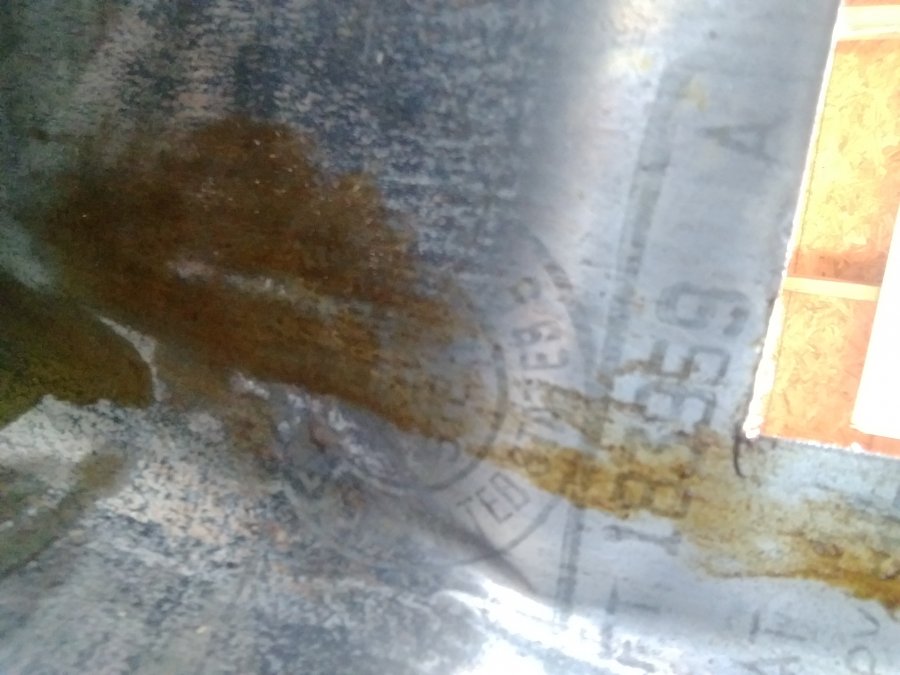
Once I got all the mung cleaned up the inside, the tank is beautiful, all the galvanizing is like new. Even the steel makers marking are still in perfect condition. Here is a pic of the inner top surface of the tank but all the metal in the tank looks just like this. I used my phones camera to make sure that I got everything clean without having to to and stick my head inside it After I took this picture I took a towel with a little lacquer thinner on it to the residue and it wiped right off.I found a grocery store in Sierra Vista that carries dry ice so I took a ride and bought some. I dropped some chunks of dry ice in the tank and with the 70 degree temps outside the tank was soon filled with the CO2 fog then I welded it up. Im really happy with the result. I metal finished the weld and gave the area a good sanding with 80 then 180 on my DA and now there is no trace of the repair. I capped the fuel filler pipe and installed a old sending unit, then I put a little air in the tank thru the fuel line fitting and checked for leaks with soapy water. No leaks except for one at the sending unit where I used a old gasket It came out really nice. I really lucked out with this tank. I didn't want to waste the last of the dry ice so put it in my massive mug filled with diet coke . When it got done bubbling and smoking my coke was really slushy, it was awesome. It was a great day. John
 1 point
 -
FYI, the screws (22-02-27) that hold the dash to the body as on 1949 and 1950 they were NOT 1/4 inch even though they looked like it. They used a #14 screw that it no longer made. I had to hit a auto junk yard with period cars go through a half dozen of them to get a handful of good screws. If you try to use 1/4 inch they will strip out the caged nut and then you are screwed especially as one does not figure this out until AFTER the car is painted. Take good care of those screws if they all came out clean. James.1 point
-
You got paid for a quick job well done!1 point
-
We were just walking around in the -37 degree day at Whitehorse City Yukon when I spotted this sign on the side of an old building and had to take a photo ?...

 1 point
 -
great clip brent! cant wait to see the full length feature. coincidentally i was looking a plane tickets earlier this week. glad im not the only one thinking about the bbq already.1 point
-
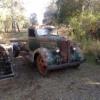
I like your truck too... My Cummins trucks all haul very well. Very nice 1938, it's good to see one kept that close to original.1 point
-
The best way to find a battery drain is to place a test light between the battery and the cable....if the lamp lights, and all things are supposedly off....you have a short...open each circuit feed from the starter, solenoid or ammeter and ignition switch till the light extinguishes...take note that if you have an door activated compartment light to test and disconnect it first to prevent false reads. Keep in mind also you may have more than one short....place a piece of tape denoting the connection point and let dangle till the light is out...when the last lifted wire extinguishes lamp....go back and add each disconnected wire making sure the lamp stays off....this will tell in this is the only fault or if multiple...a buzzer in line will do the same thing if you need an audible alert...you can use both if you wish....many modern digital VOMs have built in audible alerts in the OHM test position. Once the faulty circuit is found your VOM is excellent for zeroing in on the cause...many are simple frayed wires, some are critter induced and sometimes the critter is you pinching a wire when working in and around wiring harness mounting accessories or components.1 point
-
I borrowed an Induction heater for stud removal. Fantastic tool. Heats only applied, They are expensive, Here is a video for those unfamiliar.1 point
-
A couple Fluid Drive Couplings..shown with out the clutch pressure plate.1 point
-
Might not make it this year....stupid layoffs this month yet.0 points

.JPG.dfdfd60a98fb78349c1ec391979218f2.JPG)