Leaderboard


Popular Content
Showing content with the highest reputation on 12/18/2019 in all areas
-
When it comes to truck radiators, most folks just want them to fit inside the engine compartment and to keep the engine cooled off sufficiently without needing much attention. When I first started working on my '48, I took my radiator to a local radiator repairman for a checkup, he ran a garden hose through it and called it good, said it looked like some of his work from a long time ago, elaborated by saying the flat-finned core was probably from an old Pontiac...there was evidence in the upper tank that the original neck was dead centered, not on the driver side. In '95, I found two mostly intact parts trucks in a local wrecking yard, '48 and '53 half tons, with the distinctive honeycomb core radiators, which my '48 did not have. I snagged the radiator in their '48, but when I went back a few months later to get some more parts with my lawn mowing $$$, I was informed both trucks had gone to the crusher just a few days prior...! While doing some research on cooling system interchange part numbers, I came across some information in the April '54 edition of the '48-'53 parts manual, and it got me to look into my stash of parts as well as the radiators in the trucks in the yard. And to my surprise, even though these radiators looked the same at a glance, it turns out I've got a menagerie of radiators that are related but have different p#s, filler necks, overflow tubes, and core thicknesses. My parts manual muddies up the waters even further with some conflicting information regarding replacement radiator caps. But the one thing that I can say for certain is that even with these variations, it appears that the cooling systems for the B-series and Route Vans used non-pressurized systems from the factory. I looked into the flat-fender Power Wagons and there's indications that some systems were not pressurized thru '56 but others were depending on other criteria...I didn't want to go down that rabbit hole as I have before with other research that crossed Pilot-House parts with Power Wagons, WCs and M-37s. This is based on the parts manuals I have and information gleaned from a few Power Wagon websites. The radiator caps for these non-pressurized radiators can be identified by their size, either 2-11/16" OD (776379) or 2-1/4" OD (795519): Cap 776379 is listed for all B-1 & B-2 except R/T/V/Y Cap 795519 is listed for all B-3 & B-4 except R/T/V/Y Several vendors offer non-pressurized caps depending on year specified but not by size. Local alternatives may be available that have a slightly different look, possibly with more moderate pricing: Radiator Cap: Mopar 776379 - Stant 10232 - NAPA 7031475 Mopar 795519 - Stant 10203 - NAPA 7031400 Studying my parts manual, the breakdown for replacement radiators is by model: Radiator Core: Mopar 1272945 == B-1-B, B-2-B, B-3-B, B-3-C, B-4-B, B-4-C Mopar 1272947 == B-1-C, B-1-D, B-2-C, B-2-D, B-3-D, B-4-D The replacement radiator cap specified in a note is 795519 for both radiators...apparently Dodge was specifying the newer style production radiators with the smaller fill neck to replace the older style with the larger fill neck that had gone out of production. Looking through my stack of spare radiators and radiators in my trucks, I was scratching my head at what I was finding: '48 B-1-B: 1195170 was pulled from a '48 parts truck, has the large fill neck, a discharge right overflow tube, and 2-1/4" core '48 B-1-D: 1195178 has the large fill neck, a discharge right overflow tube, and 2-1/4" core '49 B-1-D: 1195178 has the large fill neck, a discharge left overflow tube, and 2-1/4" core '51 B-3-D: 1272446 has the small fill neck, a discharge right overflow tube, and 2-1/4" core '52 B-3-B: 1272446 has the small fill neck, a discharge right overflow tube, and 2-1/4" core '53 B-4-B: 1272446 has the small fill neck, a discharge right overflow tube, and 2-1/4" core spare (1): 1195178 has the large fill neck, a discharge right overflow tube, and 2-3/4" core spare (2): 1272446 has the small fill neck, a discharge left overflow tube, and 2-1/4" core spare (3): 1272947 has the small fill neck, a discharge right overflow tube, and 2-1/2" core spare (4): same as spare (3) As reported earlier, the 1195170 was superseded by 1272945. But I cannot locate the other part numbers in my parts books, and at a glance, these radiators all look the same with respect to tanks, core thickness, and inlets + outlets. The differences in overflow tube discharge direction has me a little stumped, as the left discharge radiators do not appear to have been repaired, so maybe these are deviations from Dodge specifications. From a practical standpoint, the left discharge seems to be a defect as any sharp right turn or traversing a slope at an angle will cause coolant to drain out, whereas the right discharge would allow more coolant to stay in the tank. The 2-3/4" core might be a repair job, but it is a honeycomb core, so maybe that too is a deviation. At any rate, these part numbers might be helpful in determining if your radiator might be relatively original, a replacement, or "custom"4 points
-
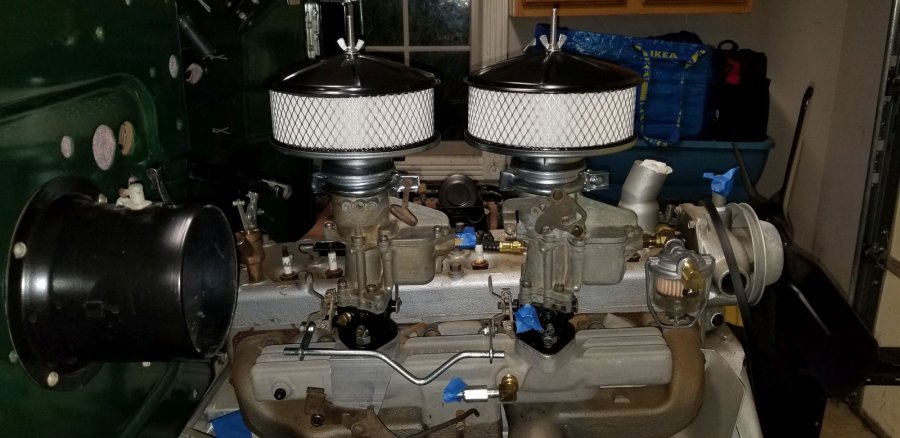
The second air filter arrived today so other than an extended handle for the filter adapter I've got all the pieces. I've decided to make a switch to the Rusty Hope dual intake manifold in lieu of the Offenhauser intake. I talked it over with Charlie and decided that's the direction I want to go. So sometime in the near future I'll be pulling the manifolds so I can paint the engine one more time to hopefully get rid of 20 years of surface rust and at the same time install Charlie's dual intake. More on that later.
 2 points
 -
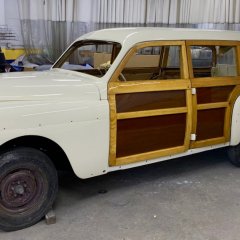
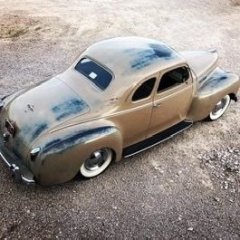
Here's the 38 after a lot of welding and some paint.
 2 points
 -
It saddens me to inform the forum that Don Coatney passed away on the 2nd of December. It is also his wish that no service will be held. Let's all take a minute to honor this man and his dedication to this forum and count our blessings as life is short. Don was a great friend, they are far and few these days.1 point
-
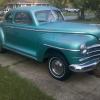
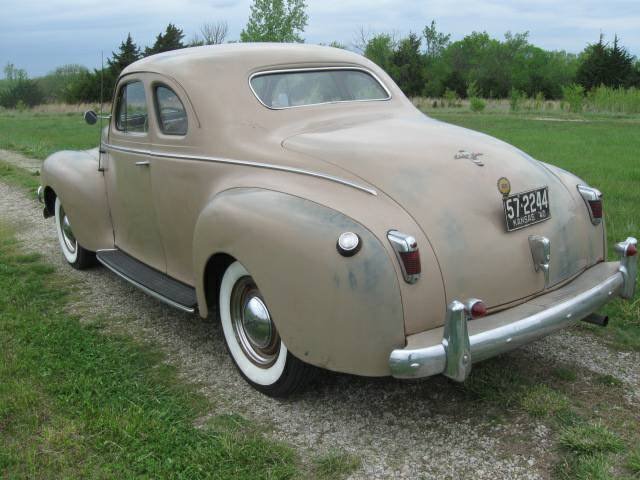
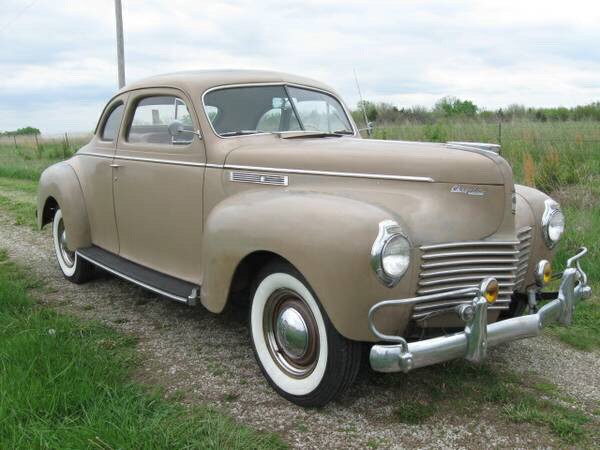
I suppose I should finally start a thread on this thing. I did a ton of research, knew I wanted a 40s car. Fell in love with 40 Plymouths, then stumbled across this on the list. Me and my son made a overnight 10 hr each way trip to Topeka KS in August of ‘17 and yanked it home. Was a 100% original untouched survivor, exactly what I wanted. With the upmost important factory overdrive (I wanted to drive this thing anywhere). Long story short it was a super clean untouched car. 1940 Chrysler Windsor club coupe. 241 flat 6 factory O/D, 3 on the tree. First pics are of the sellers listing.
 1 point
 -
Who said the next generation isn't interested in the hobby- my 7 year old granddaughter asked me the other night if she could help me "work on the old cars". We immediately went out to the shop while I was frantically thinking of things for her to do that would be fun and not dangerous. I got some 1/4" bolts, washers and nuts and had her tighten them on the intake manifold of a 218 I have on an engine stand. I showed her how the open end wrench works, righty-tighty,lefty-loosey, and how a lock-washer works. She did a great job..Needless to say, I am getting her a set of tools for Christmas!. Any suggestions for projects that she could "help" me with?. I have 2 Suburbans (a '52 and a '56) in various stages of destruction.
 1 point
 -
Doing a quick google search shows a guy selling a 972210 on eBay for a 46-48 DeSoto...and it sorta looks like one of my spares... The rad.cap data is kinda misleading much the same way in there are some variations between manufacturers' and vendors' websites, much like the shock absorber info I dug thru...pressurized rad.caps will have some kind of thermostatic spring between the cap and sealing plunger, whereas non-pressurized rad.caps will only have a positive seal and locking tangs. If I read it right, the NAPA caps are made by Motorad, and their data matched the Stant data...I looked at some generic info for tractor rad.caps just to compare and it all seemed to mirror the Stant and Motorad data, with similar pricing. So for all I know, the Stant, Motorad, Balkamp, NAPA, Murray, etc. rad.caps are all made in the same building managed by some guy who looks suspiciously like Tommy Callahan ? I was stewing on the different p#s and my nocturnal problem solver woke me up this morning to take a 2nd look at the brackets and tanks...so I examined these radiators and sure enough, there are slight differences in the mounting bracket stampings and hole patterns, as well as different # of tank vertical ribs, different upper tank inlet tube lengths, and different lower tank outlets + drain plug orientation...so these radiators may all function the same way but some are more well-built and less expensive than others ?1 point
-
Hey Tom, I quit buying my 6v batteries from the auto stores because I found they sit on the shelf for quite a while. last time I tried to buy one the date was over a year old. I found that Tractor Supply has a good turn over and the CA was 875 but the CCA is 700. They last about 5 years or so. My car sits outside all the time. (keep the Harley in garage). What I did was I had an old 36 LED solar powered security light from Harbor Freight. The light went bad from exposure but the solar panel was still good. Put a meter on it and it puts out 7-8 volts (maybe 1/2 an amp or so) dc so I put a couple of alligator clips on it and hooked it to the battery and ran the very long wire down the hood and into the door and let the panel sit on the back floorboard while driving. When I stop for the day or even a few hours I sit it on the roof and trickle charge the battery. I used some glue and glued four little magnets onto the base so it doesn't go any where. With such low amps I'm not afraid of over charging the battery, so I leave sit on the roof for days at a time when I'm not driving it. Been working good for over 3 years now. Joe Lee1 point
-
Staking the Armature Pin Ends puts an end to it falling out. Those New 73201's work. No need to second guess them. At around $70 each buy two and keep one as an extra in the trunk as I have done for 45 years. In the Old Days 588's. Flat Heads Love Fuel Pumps, as much as GM's Like Alternators, and Ford's Love Transmissions. L.O.L. (They eat them). Ahhh for the Love of Chryslerdome. Merry Christmas everybody!
.JPG.19d18ece23be8e54c1a27ae63d4ef15f.JPG) 1 point
1 point -
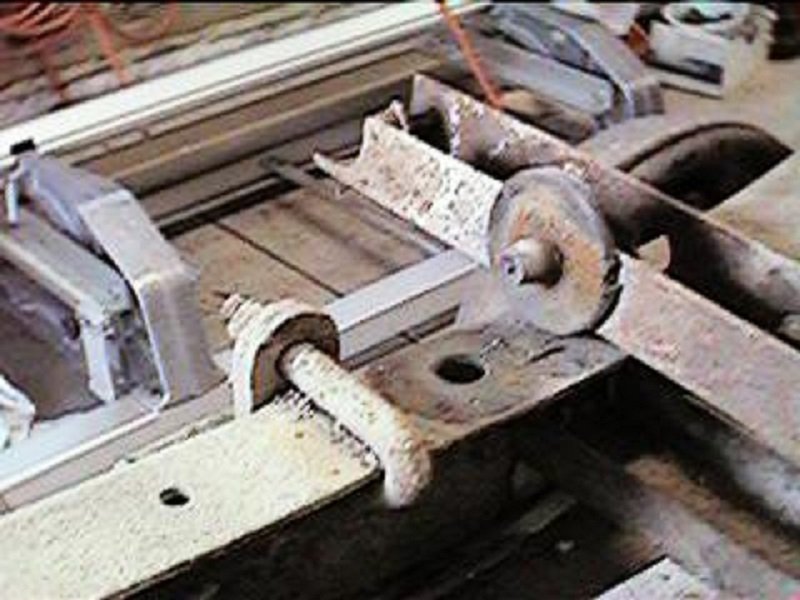
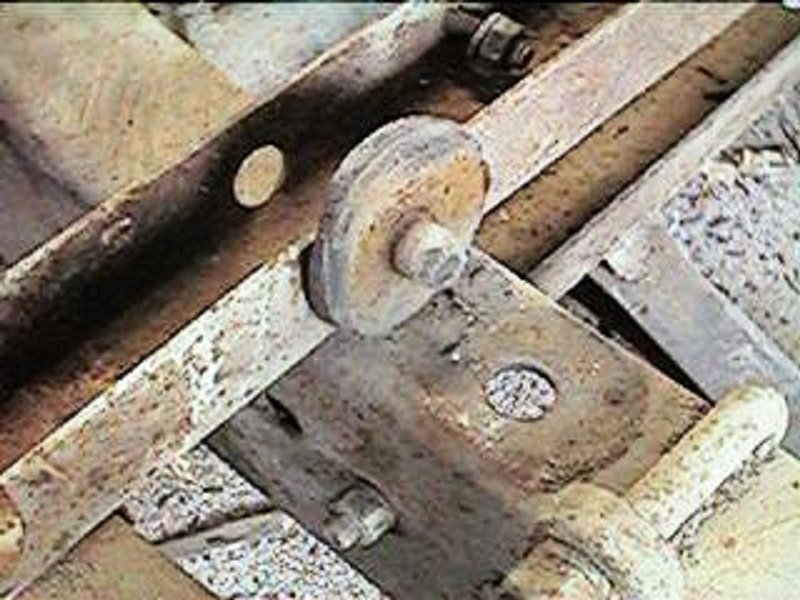
Merle, After my initial post I decided to go back and look at the few pictures I took of the truck as I was dismantling it to see if I had anything of value. I don't normally look at these pictures as they are in 320x200 format which makes it really hard to see anything in detail. The attached pictures have been enlarged to 800x600 which helps. It appears the third cross member on my truck is the floater as it has the rubber pads with the nipples and no bolts. Numbers 1, 2 and 4 seem to have some sort of belted rubber under them with the large bolts and washers for mounting to the frame. Just the other day I was digging through a box and found some of those rubber pieces. I'll have to look tonight to see if I can still find them. I wonder if at the factory they randomly chose which of the cross members was going to be the floater? Thanks! Brad


 1 point
 -
should be able to squeeze the two upright ears on this with a pair of needle nose or similar tool and draw it out from the top.1 point
-
Upholstery looks great. but returning to your transmission : I have rarely bought new snap rings and just as rarely used any kind of snap ring pliers. When I was a teenager, a set of vise grips was the jewel in my tool box. A couple of screw drivers and eye protection is all you need. still, some blood will be shed,1 point
-
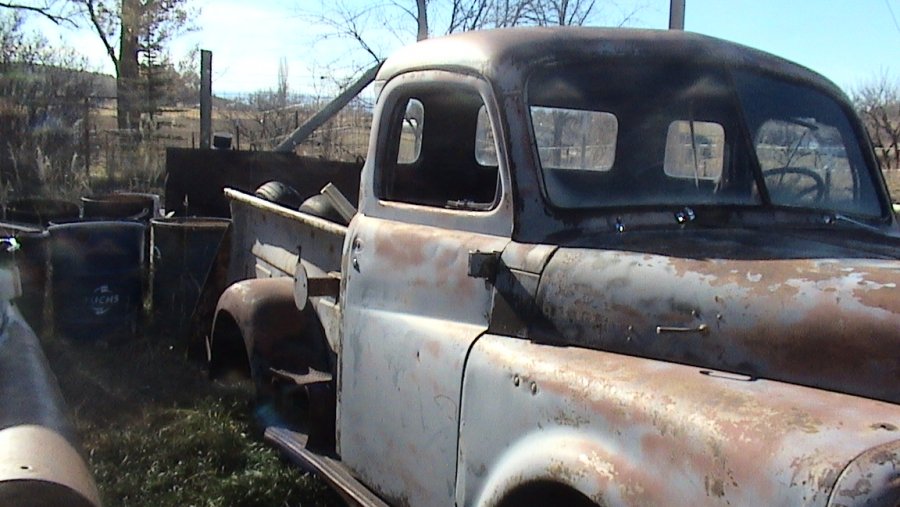
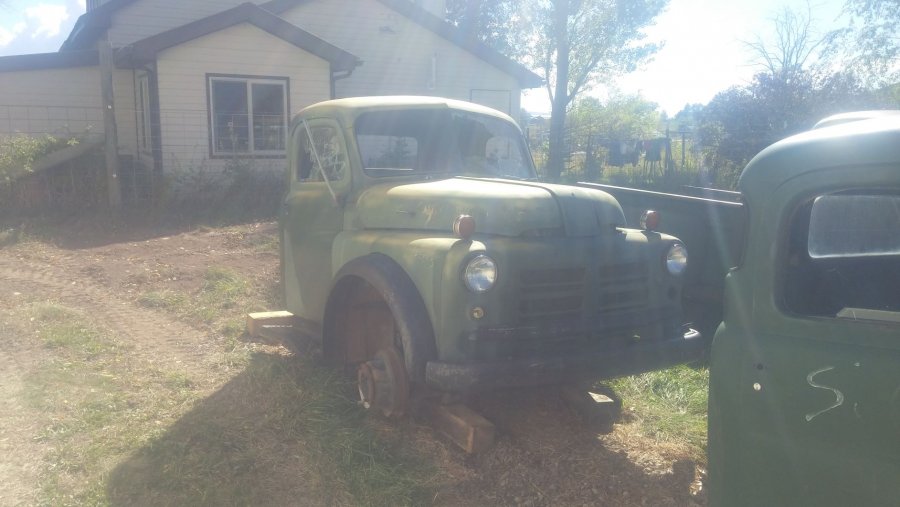
Truck 5 is a 1949 Dodge B-1-B-108 Pickup purchased from a co-worker in 2012. Truck was sold to a person in Johnstown Colorado in 2015.


 1 point
 -
I think it is great that your granddaughter is showing interest in your old cars. Get her out there whenever you can. Get her a simple set of tools as you plan. Girls need to know how to use basic tools just like guys need to learn to cook. They will still be girls and boys but with an added skill set that is important. Regarding jobs she could do, I would suggest anything that involves nuts and bolts. Simple to do and satisfying when done. Once my grandsons are a bit older, I plan on buying them a different kind of set of tools every Christmas. Using tools is a necessary skill for everyone.1 point
-
It’ll have to be Jan and Dean or The Beach Boys for the Woodie ??1 point
-
...in the beginning his ride was devoid of sound and on the first day he installed a sound system and then there was sound. He listened to this sound and said, "This is good."1 point
-
1 point
-
May the memories of Don sustain the Coatney family during this this time. I felt that I knew him through this forum. And thanks to Don, to this day, I'll really, really search through the forum before posting a question. And when I do search, a lot of the times, I'll find some contribution that Don has made.1 point
-
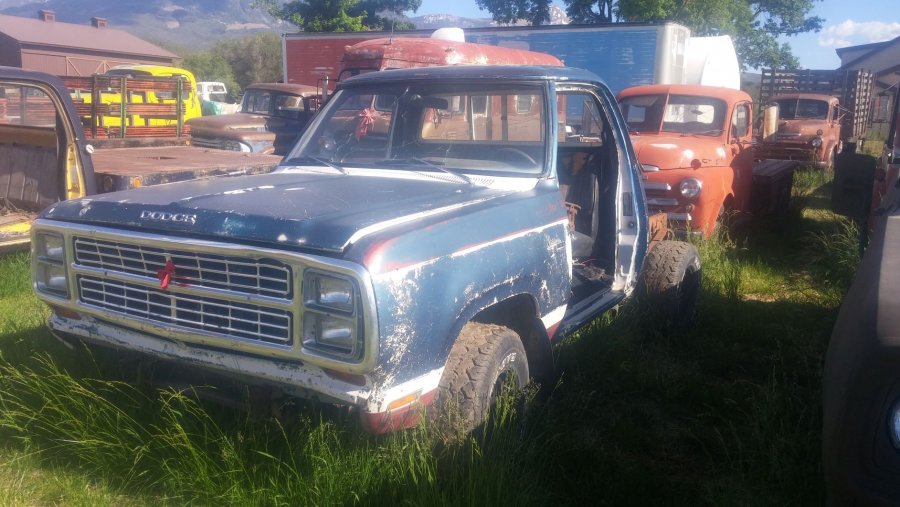
Truck 4 is a 1948 Dodge B-1-HA Parts Truck, purchased from Martin Supply Parts at the same time as Truck 3. This truck will be the sheet-metal donor for a rock-crawler, all-terrain drill on a 1995 Dodge W2500 Cummins long-bed chassis. A self-contained auger drill, currently mounted the 1974 Dodge W250 Drill Truck from Kansas, will be transferred and mounted on the rear of the chassis. The 1995 Dodge W2500 Cummins came from the coal mine where I worked for 20 years. Coal miners are very rough on equipment, and there isn't a straight piece of sheet metal on the truck, except for the shop-built, road-warrior bumpers. Even the roof is dented from being used underground. The bottom of the truck is as rough as the top. Even though the truck is very rough, there's only about 116,000 miles on the odometer. The existing driveline will be used with a lifted, multi-link independent suspension. The drill is used for soil sampling in my engineering business. While suitable for use in Kansas, the drill could use a more powerful, off-road carrier here in Colorado. The 1974 Dodge W200 will continue to be used until the improved carrier is built. Then the drill and flatbed will be transferred to the 12-valve Cummins carrier. This project is next in line and will be started this winter.


 1 point
 -
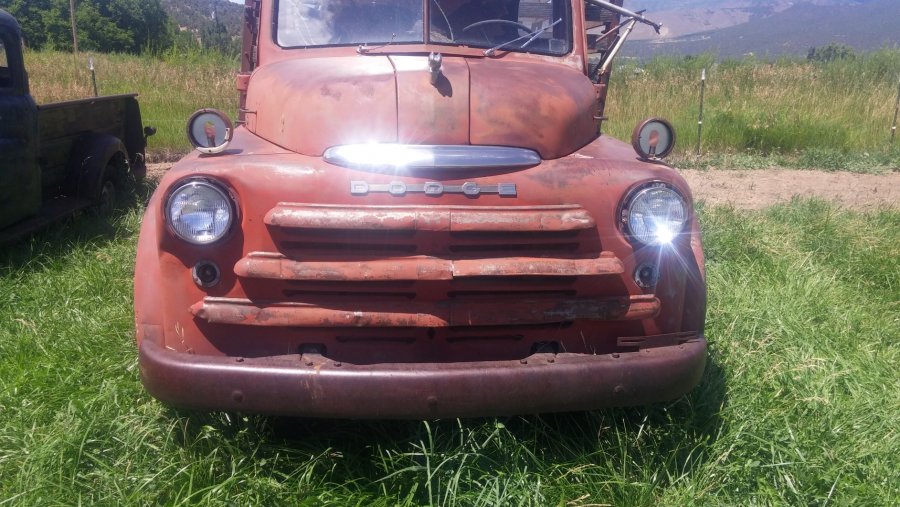
Truck 3 is a1948 Dodge B-1-FA Parts Truck, purchased from Martin Supply Parts Vintage to Recent of Windsor Colorado, http://www.martinsupplyhwy34.com/, that will be the sheet-metal donor for a rock-crawler, all-terrain buggy based on a 1979 Dodge W100 short-bed Parts Truck chassis. Haven't decided on power yet. Maybe the 1979 Dodge 318-cubic-inch gasoline engine and 4-speed transmission or the 1990 Dodge 5.9-liter Cummins 12-valve engine and Getrag 5-speed transmission. In either case, will use the existing transfer case, plus add a second transfer case from a 1975 Dodge W200 Parts Truck, to drive the full-time four-wheel drive. Leaf-spring suspension will be replaced with a lifted, multi-link-independent suspension. Project is purely in the planning stage and is open to anyone who wants to take over.


 1 point
 -
If you go to ebay and type in 1946 Chrysler, you will be able to buy various Fuel Pumps for a 251 as cores. I just saw 2 one for $10 the other for $22. Youcan observe the armatures as well in the pictures. Airtex has one like the 588 that can also be bought new for around $70. There is an Antique Car Cellar somewhere in the NE that also sells the rebuild kits for these Fuel Pumps as well. I have driven several 1948 Chrysler's for 45 years and would not put electric Fuel Pump on any of them. It is a matter of mechanical pride on my part not to go away from original. These cars are meant for mechanically inclined people. A mechanic. The choice is really between two W's - do you grab a Wrench to fix it? or do you grab your Wallet to fix it? There is no right or wrong, so sensitive types need not reply. This is only my Humble Opinion and nothing more. Tom1 point
-
My understanding is that all fuel pumps made to bolt onto a mopar side valve six will work.......there are various differences in relation to whether they are a single stage or have a wiper vaccum attachment above the fuel pump part but as for the fuel side of things whether the arm pushes on the side, above, below or wherever so long as it gets pushed by the cam lobe then it should pump fuel.......some pumps are sealed, most are held together with half a dozen screws around the edge allowing for the inlet/outlet location to be changed to suit a particular setup but when you go to push it against the mounting area and you can feel the arm pushing against the cam lobe then its good to go..........at least thats what I've found over the past 40 odd years........and I've yet to see a mopar fuel pump that cares whether it is in a RHD or LHD car...........I've never let on and the fuel pump has never worked it out either.........lol................andyd1 point
-
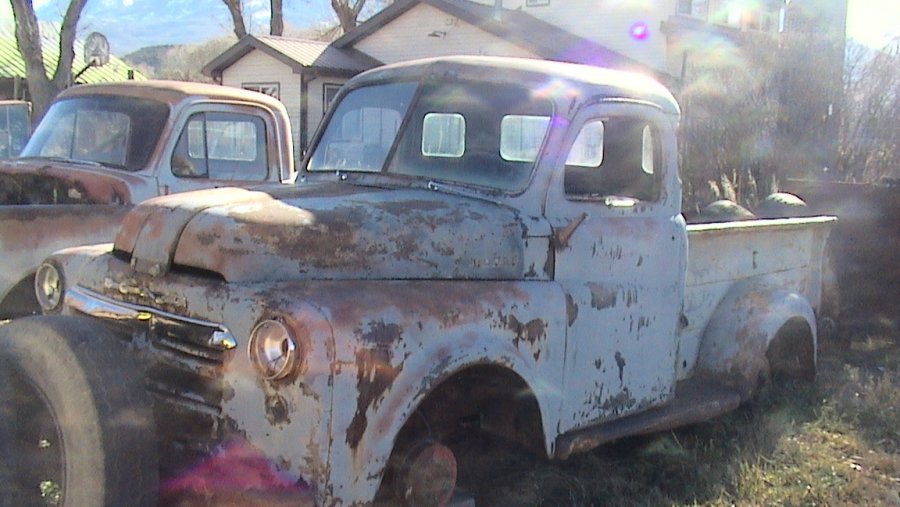
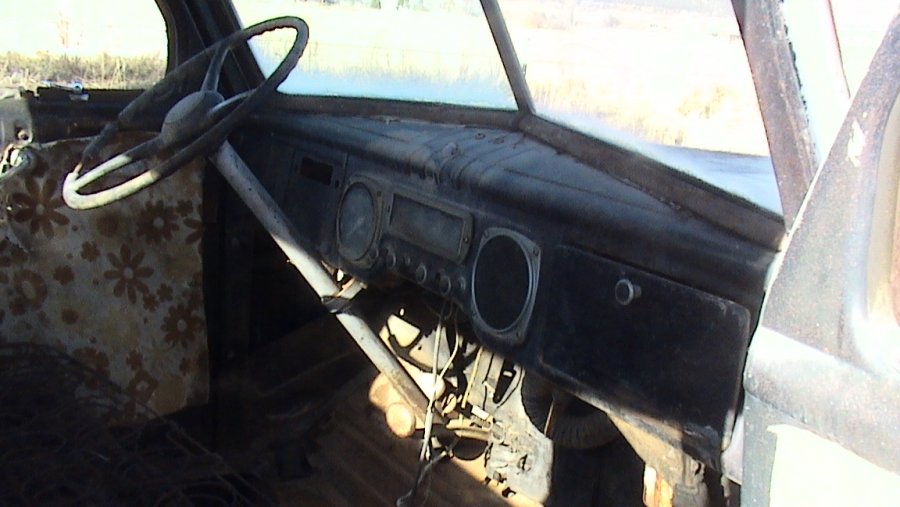
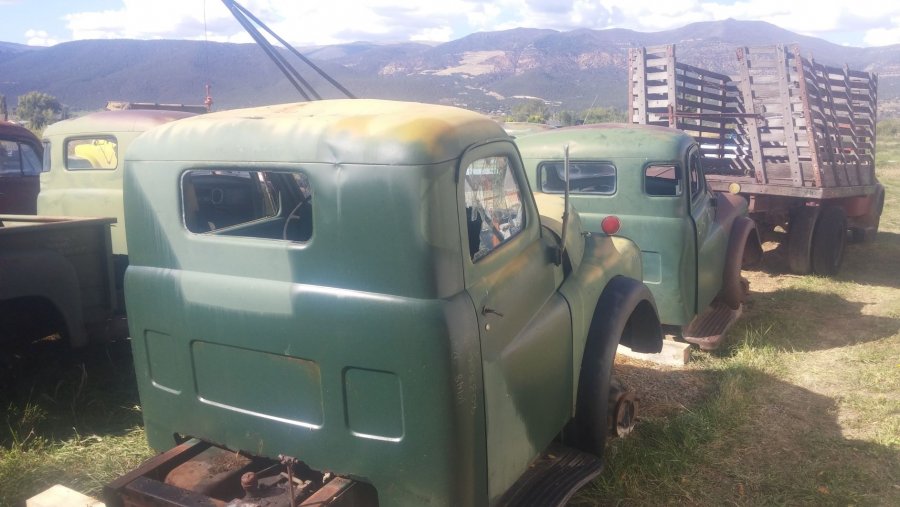
Truck Number 2 on my list from oldest to newest. 1948 Dodge B-1-F-152 Stock Truck purchase from a co-worker from Crawford Colorado. He used it for many years hauling cattle and horses. Had been sitting for a long time. Got the truck to run, drive, and backup, but no brakes. It's been sitting here since it was purchased in June 2015.

 1 point
 -
"this may or may not help"1 point
-
Swung thru “Whitehall” MT. Yesterday on our way back home and met up with “9’ box” I am consistently blown away on the generosity and hospitality of our forum members! should be home tonight.... our BTT50’s trip is over what a BLAST!
 1 point
 -
Got the interior finished. Couple of notes for installation. The lower corner pieces came with wood to put in the corner 15 1/2 inches away from the two wood pieces in the center. I only used the passenger side as the drivers side with the fuel filler was just too tight. The notch in the corner piece had to be elongated and the bottom of the corner had to be trimmed to make them fit as well. I used drywall screws to tighten up where various pieces meet as they would wobble if left alone. Also installed drivers and passenger sun visors from DCM. I did need to drill out the mounting holes in the brackets as they were way to tight for the screws but otherwise they went in well. Happy with the product and glad my interior is in - one more step closer. Now I can go on a month long camping trip feeling good.


 1 point
 -
Another update. Got the dome light installed. Not an original, the prices are way to high, it is from NAPA part number G6151. I think it looks okay and somewhat period even if it is LED. It will certianly light up the cab when needed. I put a simply push button switch mounted under the dash to turn it on and off. Also got the headliner put up and it is a little bit of a pain. Had to trim the back and cut some of the stitching to get it to fit. The back corners will be covered by the upper corner pieces so the cuts will not be visible. Would have been much easier with another person but...I was able to get it in using some colorful language which I am sure made all the difference. Put in the center wood supports for the lower back piece as well. Used 2inch sheet metal screws to secure the wood to the braces and was kinda nervous about the first one. But I measured right and did not go out the back of cab.


 1 point
 -
Here are some shots of what I am talking about with the notch in the lower piece and the upper piece fitting into it. Not sure if this is the way it should be done and if anyone has any ideas I am listening - thanks. I have also put in mats and some insulation.


 1 point
 -
I used Nickel copper lines and found them easy to use with one word of caution...bend them slowly and carefully as they love to kink if you even look away for a moment. They bend without complaint but if you move to fast they will kink. Also be careful when doing the flares as they are soft and again slow wins the day. Good Luck! Here are some pics of mine: ( note I routed the front behind the transmission and then up the frame rail rather than in front of the engine as stock)

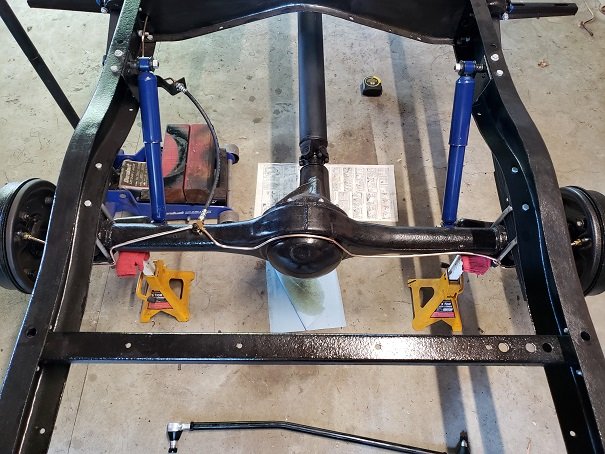 1 point


.thumb.jpeg.28cb36506a6b17cd30e7d4a22504384d.jpeg)