
Leaderboard


Popular Content
Showing content with the highest reputation on 12/04/2019 in all areas
-
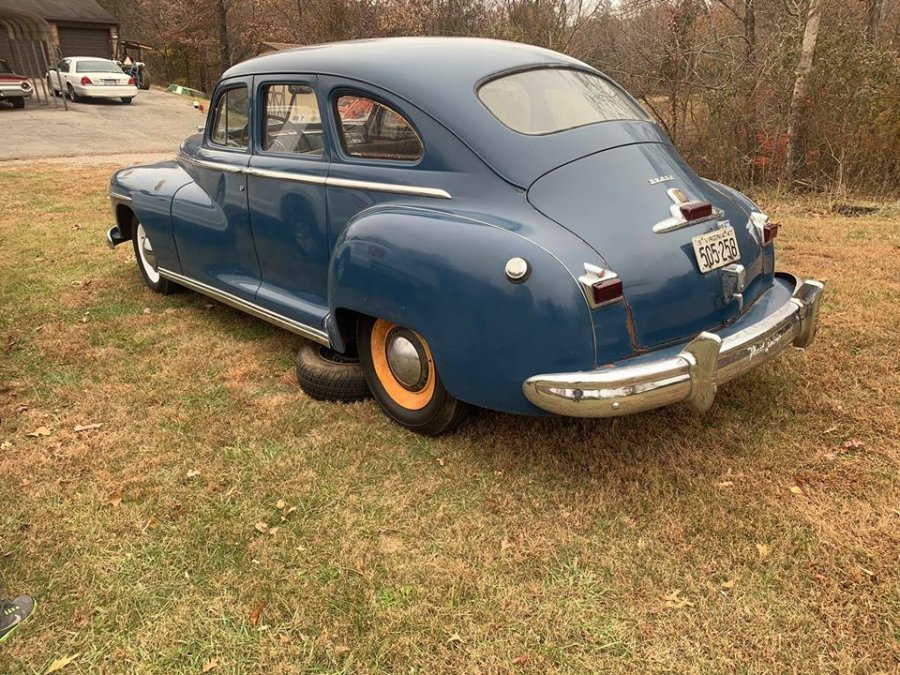
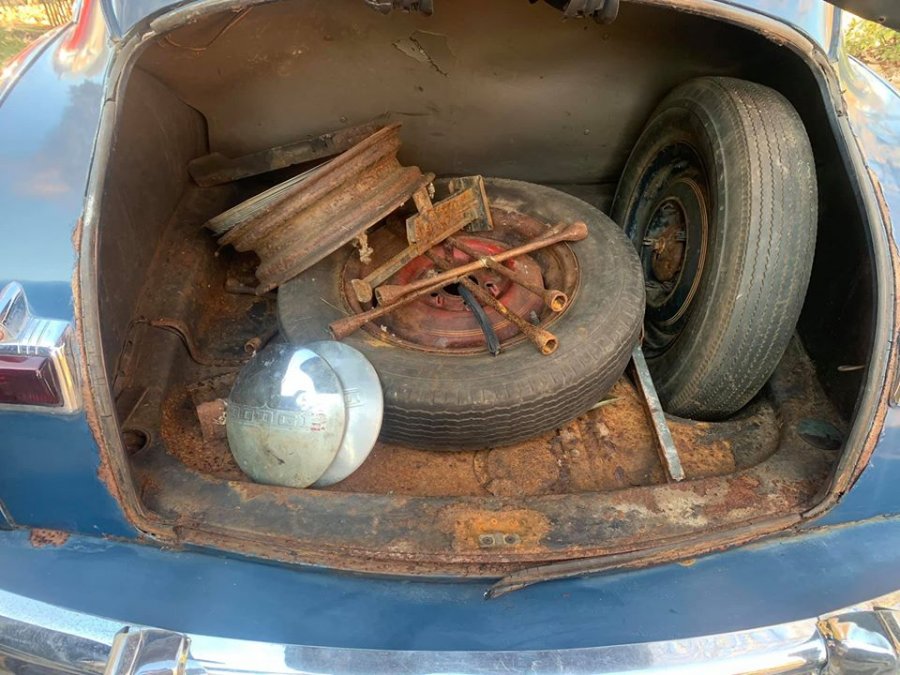
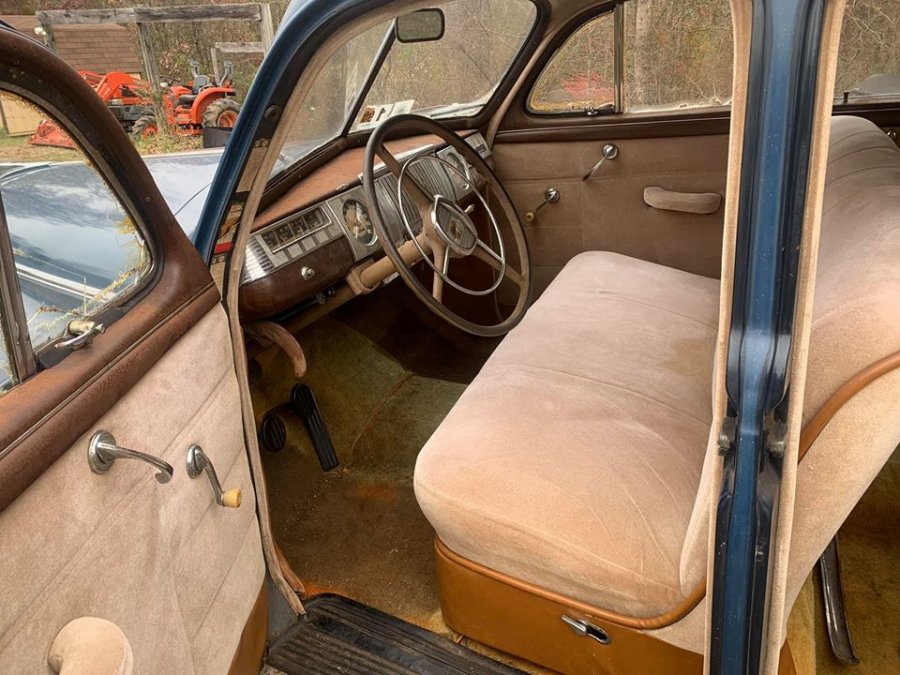
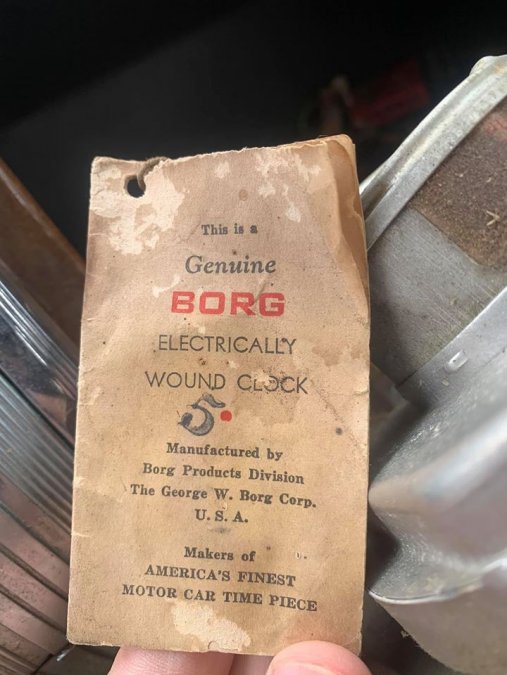
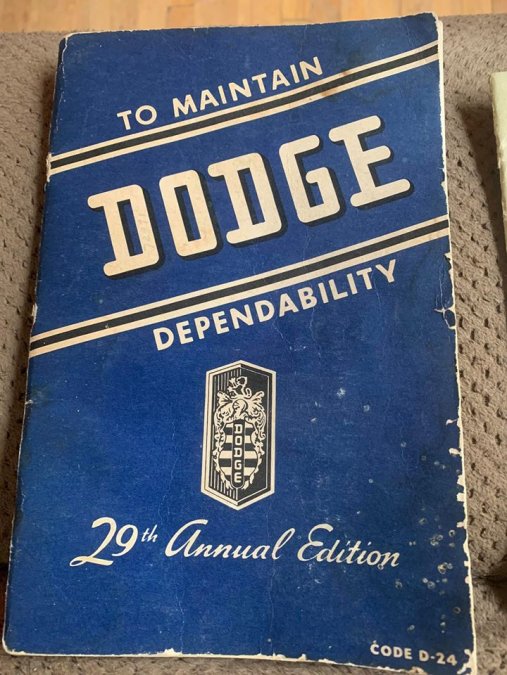
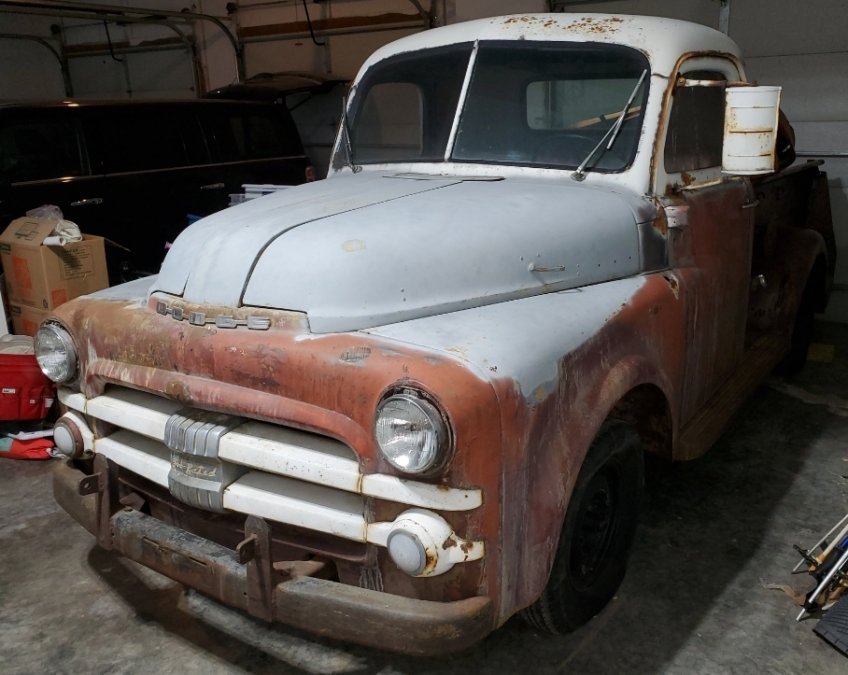
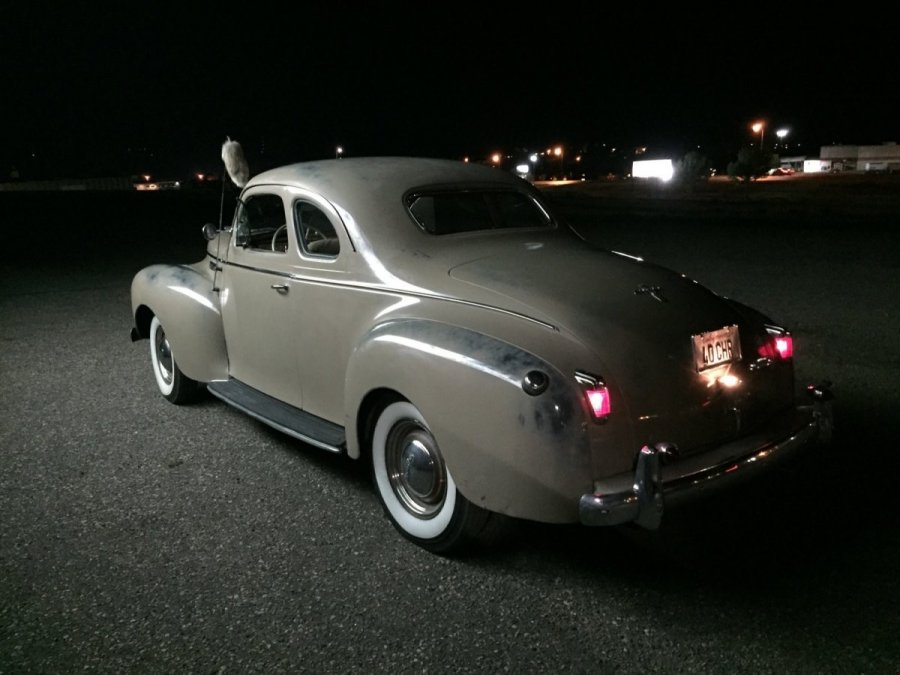
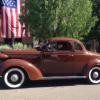
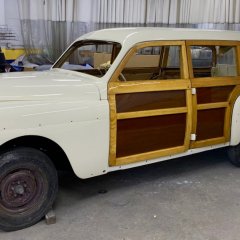
Hey everyone, my name is J.T., and I'm recently the proud owner of a 1947 Dodge D24 Deluxe. The car is a one family owned, with 75, 715 original, documented miles. Flat 6 with Fluid Drive coupling. It was originally purchased at a now defunct local Dodge/Plymouth/Fiat Dealer in Roanoke, VA. This is my first foray into classic Dodge vehicles, and my first 40's era vehicle. I know the owner's had repainted the car sometime in the 70s as a lighter shade of blue, and it was documented in the Owners Manual, however the original Patrol Blue can still be seen in the door jambs, under hood, and inner trunk. My goal is to maintain the vehicle as close to original as possible, and enjoy cruising it to local shows, weekends, etc... My first order of business will be to go through the fuel system, as she has sat since 1999, by dropping/cleaning the tank, replacing hoses, and going through the carb. She already has a rebuilt fuel pump, new points/condenser and plugs. Then I'll go through the brakes, and install new tires. I've found that the Sisson Choke is missing the linkage, and a manual choke cable was poorly installed. I plan upon carb rebuild to get the original style choke system functioning. I'm waiting on my service manual to arrive to assist in repairs, but will have plenty of questions as I dive into getting her reliable again.


 2 points
 -
Or, Option 6, cut and weld two oil bath air cleaners to fit. I posted this photo of just such a thing seen at a show on another thread awhile ago.
 2 points
 -
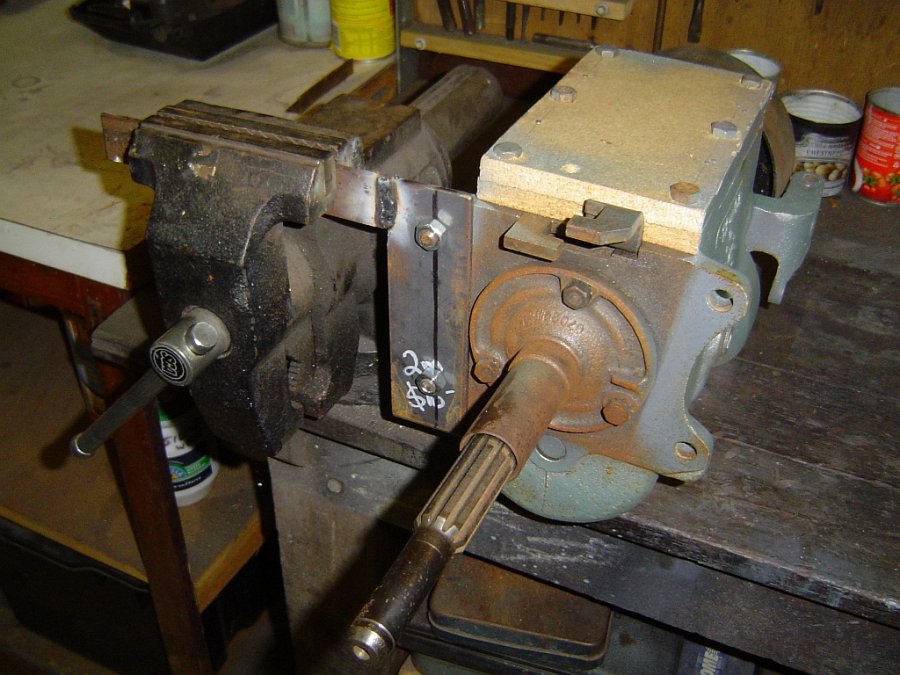
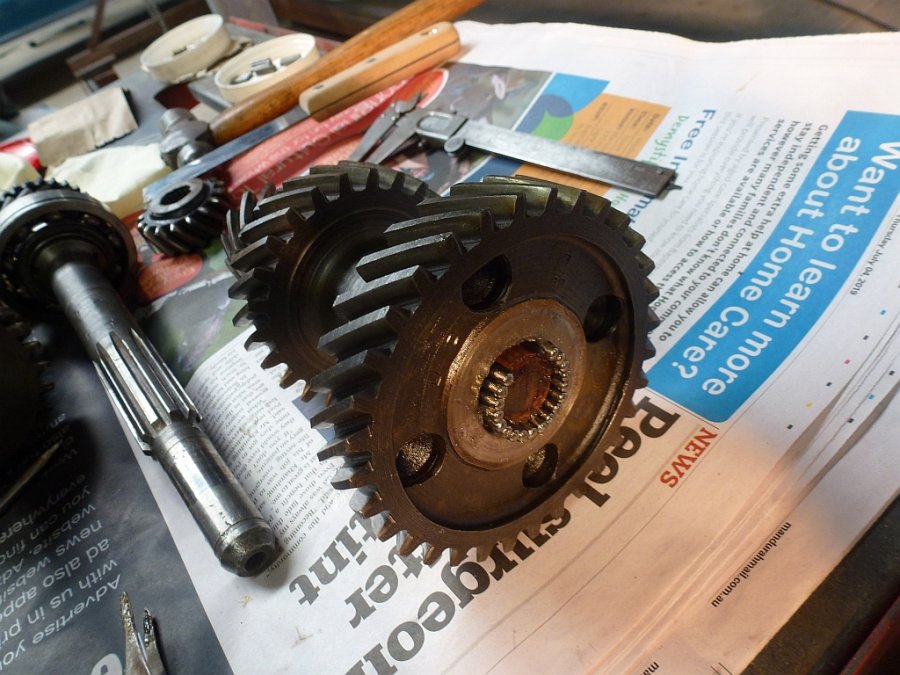
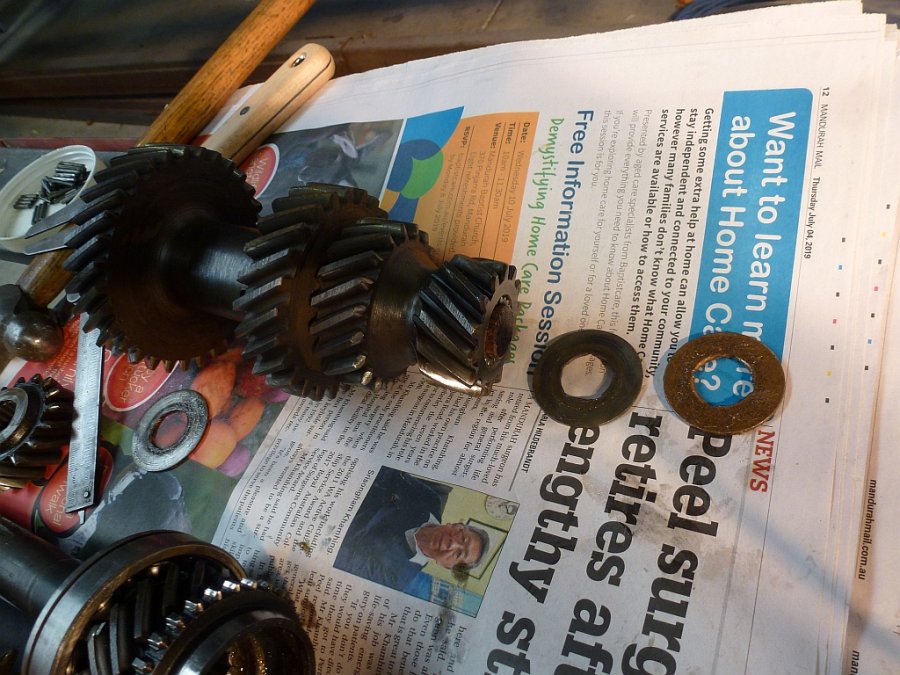
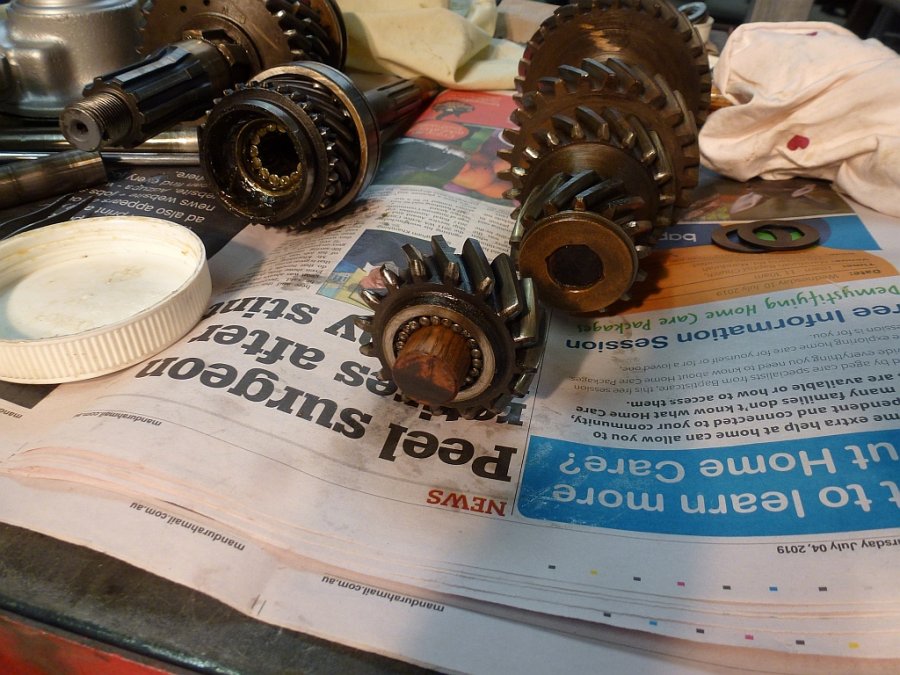
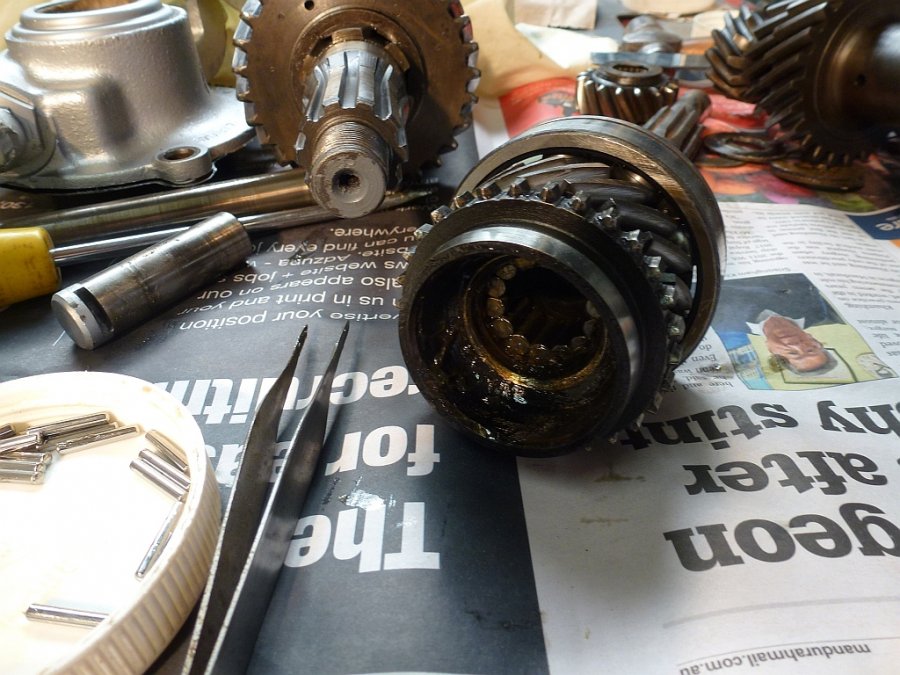
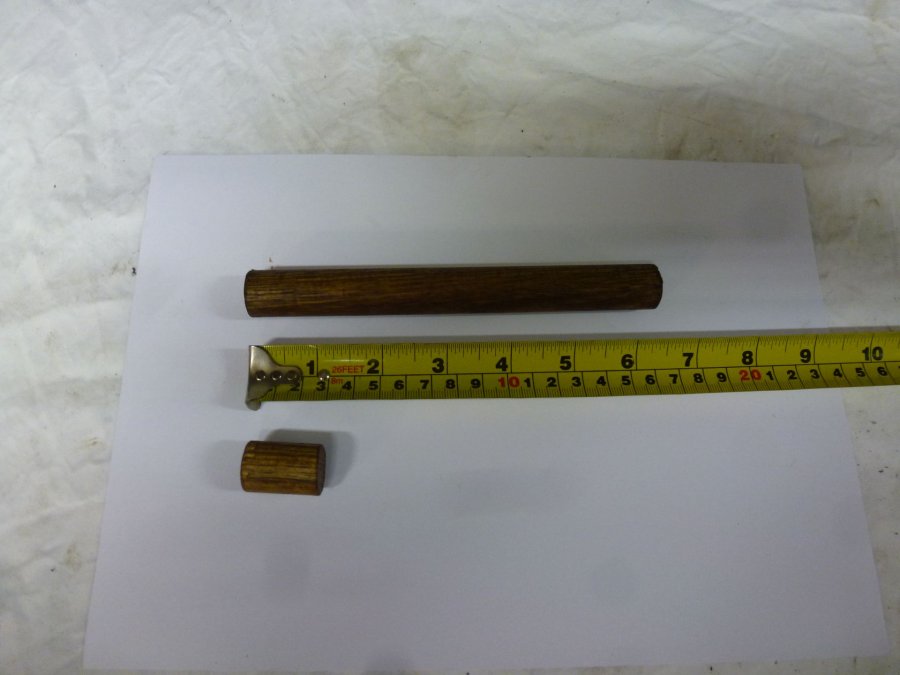
Hi Keith, I am a bit late joining this conversation but as I have just recently overhauled my 38 Plymouth gearbox I will pass on my learnings. I had previously done my 29 gearbox which is a bit simpler. I stripped the gearbox mainly because it was out and accessible and I am trying to do a thorough restoration. It had always shifted fine and sounded fine. When I stripped it, I found missing and broken needle rollers inside the input shaft where the mainshaft slots in, but no apparent damage. So am very glad I did strip it. My bearings were ok and gears were in decent shape with light damage to first and reverse so I kept them. Before going further I ordered a small parts kit. These are available from Andy Bernbaum for $65 and include all needles, thrust washers and circlips. I bought mine thru eBay from Mopar-Direct because of postage issues to Aus and am happy with the quality. First and most important is a couple of lengths of 3/4 inch hardwood dowel, one exactly 6-1/2 inches long for cluster gear and one 1-1/16 inch long for reverse idler, see pic below. The lengths of these match the overall assembled length of each gear including thrust washers and make assembly quick and easy. Secondly I found it much easier to work on the gearbox by bolting it upright using a simple L bracket mounted in the vice as per pics below. It helped to have a swivel vice. I was unable to remove the input shaft as a first step. It fouled the cluster gear and I dont like the idea of hammering the bearing as a way of getting that clearance, especially as my bearings were fine. So for me first step was to start at the back and remove the mainshaft complete with clutch assembly, taking care to hold the assembly together. Next I removed the countershaft, replacing it with the dowel, and let the cluster gear drop into the bottom of the box. This allowed me to remove the input shaft complete with bearing and circlip, then lift out the cluster gear assembly, then tap out the reverse idler shaft and likewise remove it ( cant quite remember if had to remove the reverse idler gear first???). Assembly is the reverse. The dowels make it easy to insert the needles in the reverse idler and cluster gear, and position the thrust washers at each side. for the cluster gear, the steel thrust washers go next to the gear and needles, the bronze washers go on the outside. Note there are 31 needles to each bearing and I found they fit like a glove. Pic Z1 shows needles being installed using dowel to hold them in place Z2 shows thrust washers about to be installed and Z3 shows the cluster assembly with thrust washers ready to go back in the box. To insert the larger needles in the input shaft recess is not quite so easy, The last one feels like it wont go in but a bit of pressure from a wooden dowel and it should pop in. They fit so tight they wont fall out while you assemble them into the box. See pic Z4 Next install the cluster gear assembly and the reverse idler assembly, leaving the cluster gear in the bottom of the box. Install the input shaft, then lift the cluster gear into place and install the countershaft. Make sure countershaft and reverse idler shaft rear slots line up for the retainer plate. Then replace the mainshaft. If you decide to pull the clutch gear apart you are in for some fun. I have some pics somewhere of a tool I used to reassemble it. As I recall it was a tin can of appropriate diameter. I could find it if you want.
 2 points
 -
The thermostat pictured can be replaced with a Stant 13928. But for 1949 Wraith, I use a Stant 13478 for your style housing. Those are both 180 degree.2 points
-
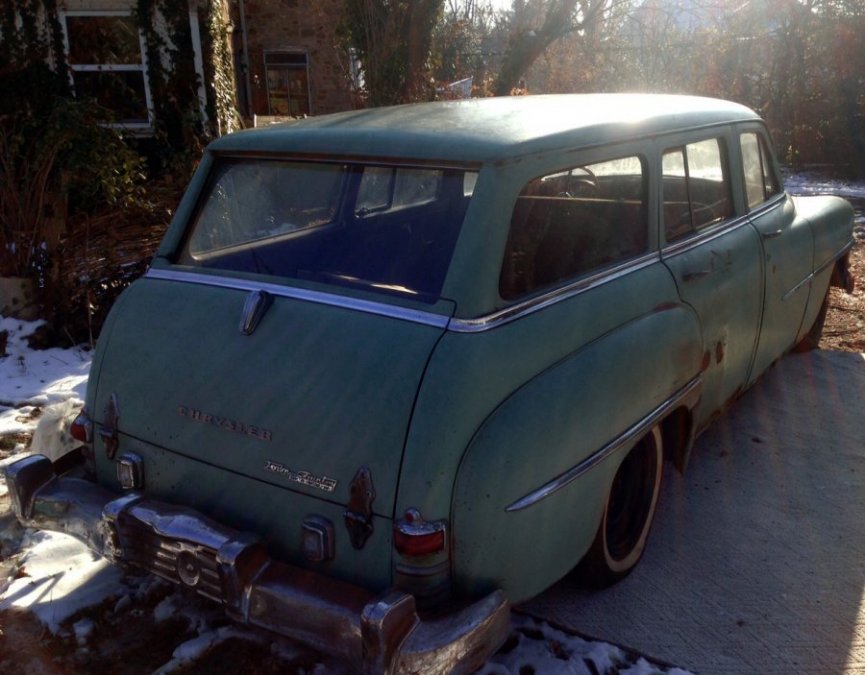
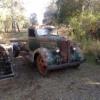
This is my newly acquired 1951 B3B. All original with an extra motor and 2 transmissions. On of which is a 4 speed floor shift which i would like to use when i get the motor running again and rewire. Lots of decisions to make...
 2 points
 -
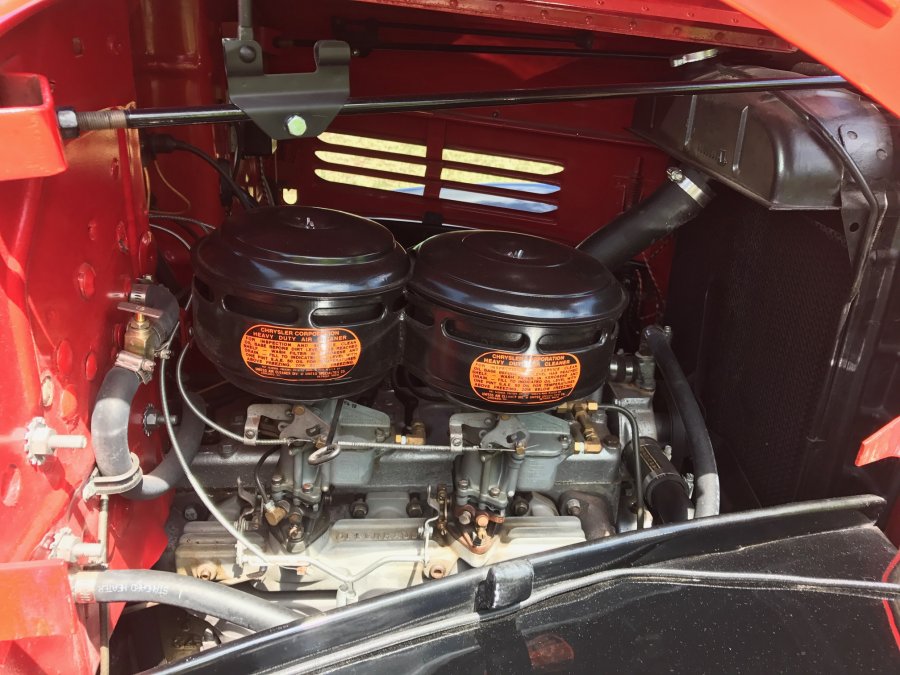
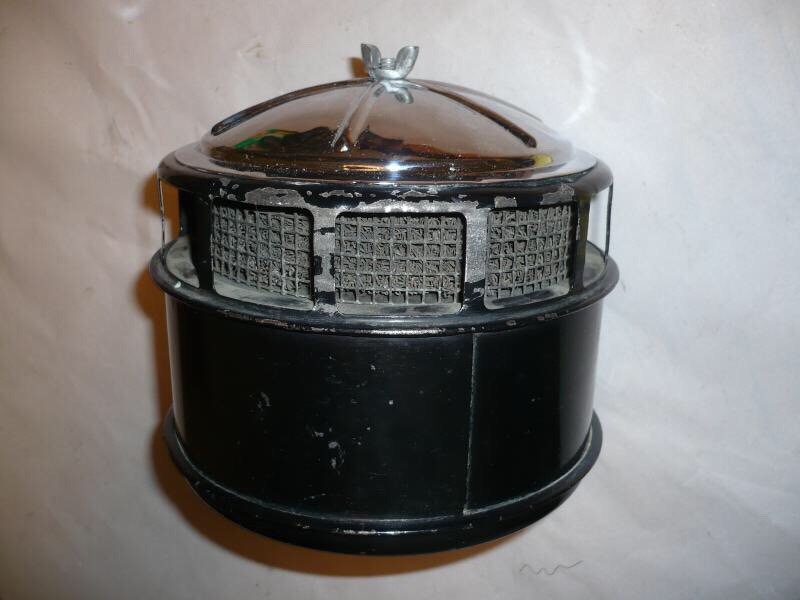
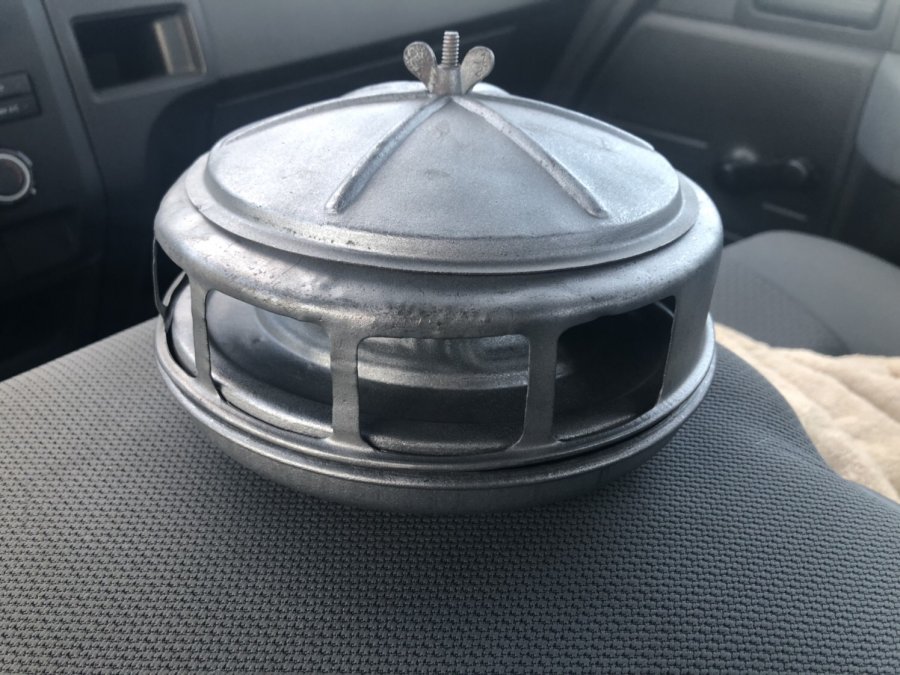
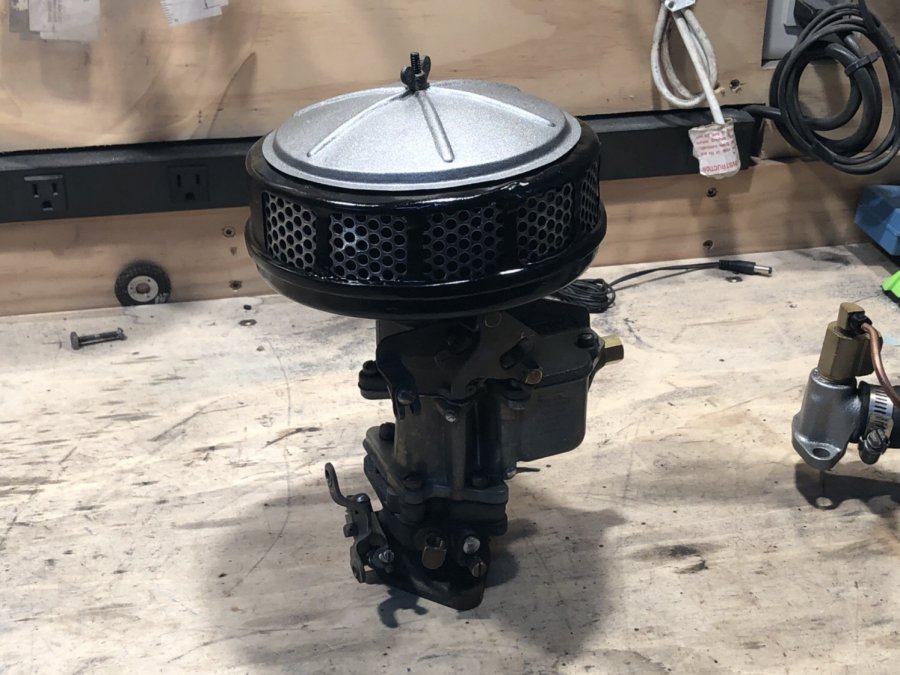
I’ve spent a bunch of time trying to find a kool air cleaner. Didn’t want to spend a ton on some early aftermarket piece. I used a stock’35-‘36 Sectioned a bit out of the middle. Added some perforated steel. Nothing over the top, just a little custom. Now I need another

 2 points
 -
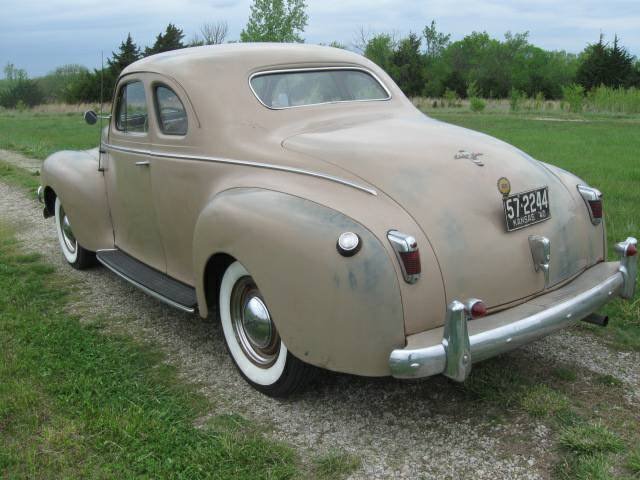
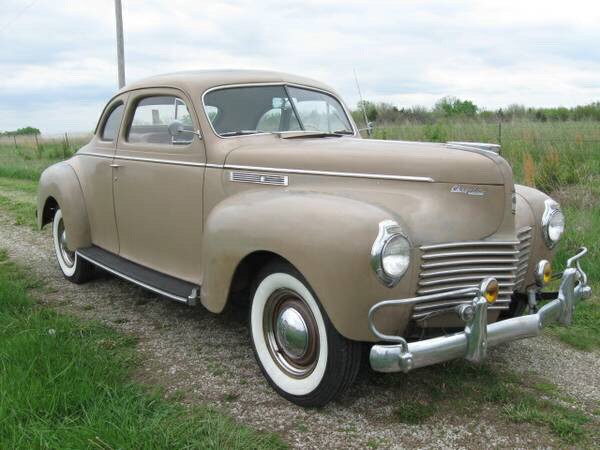
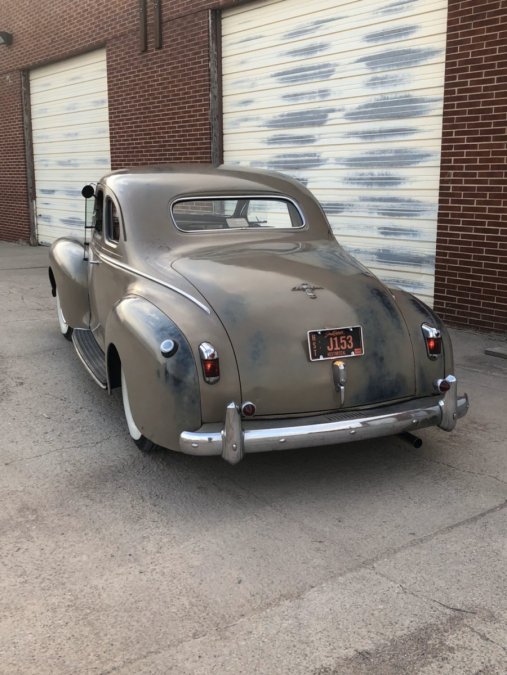
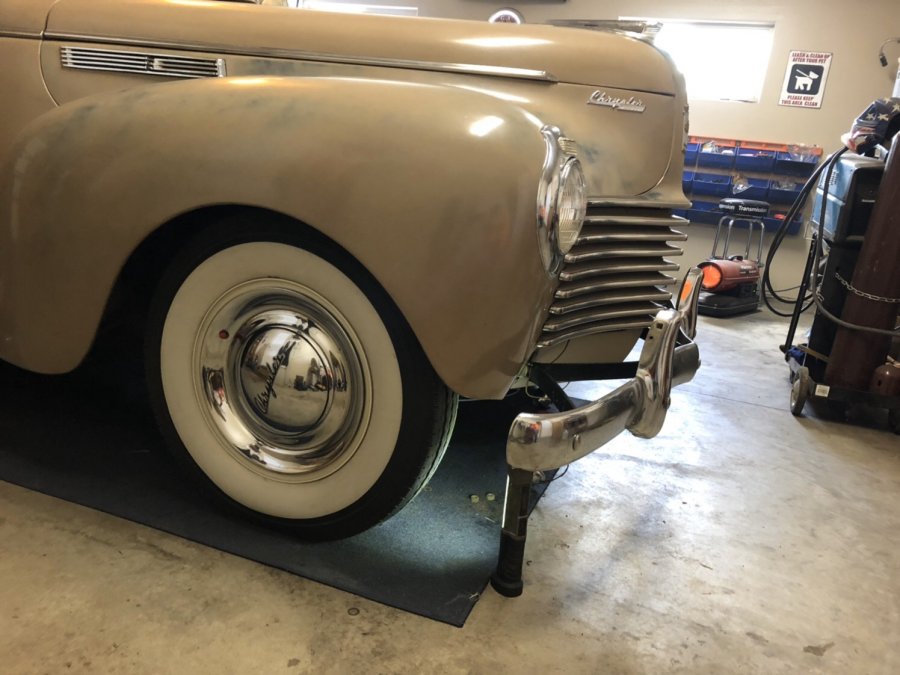
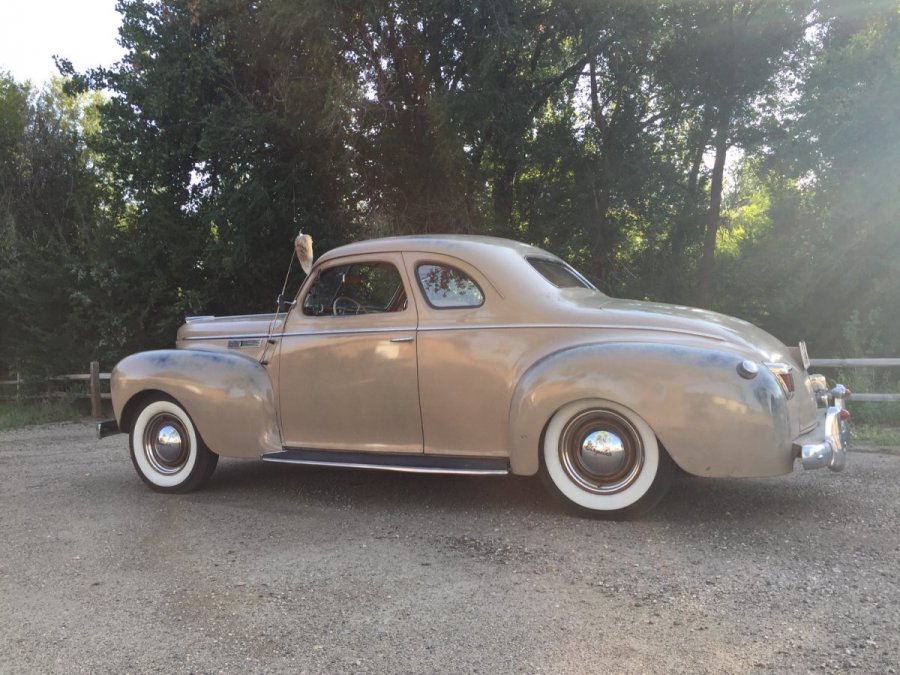
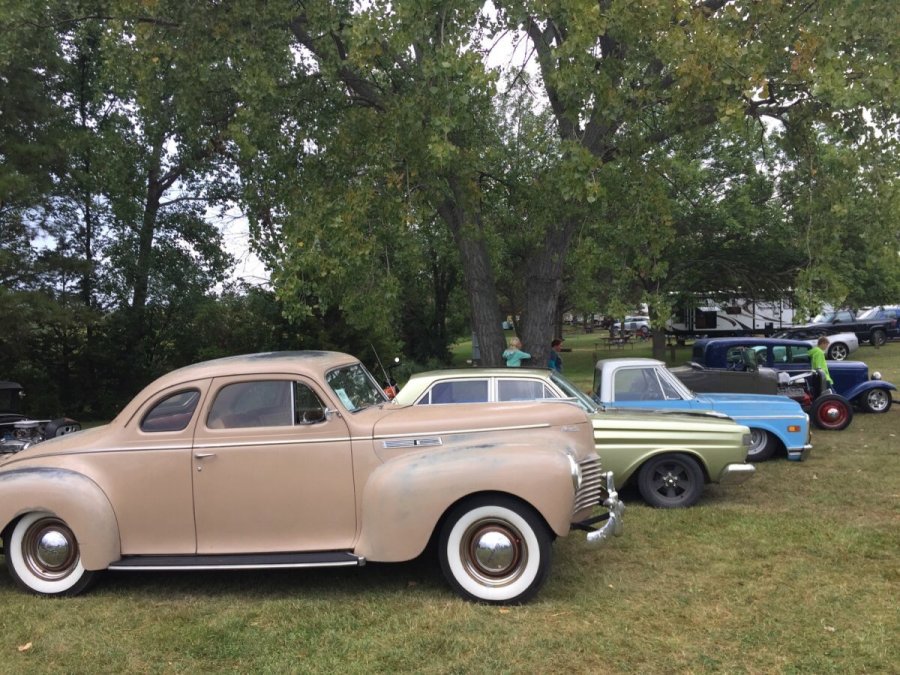
I suppose I should finally start a thread on this thing. I did a ton of research, knew I wanted a 40s car. Fell in love with 40 Plymouths, then stumbled across this on the list. Me and my son made a overnight 10 hr each way trip to Topeka KS in August of ‘17 and yanked it home. Was a 100% original untouched survivor, exactly what I wanted. With the upmost important factory overdrive (I wanted to drive this thing anywhere). Long story short it was a super clean untouched car. 1940 Chrysler Windsor club coupe. 241 flat 6 factory O/D, 3 on the tree. First pics are of the sellers listing.
 1 point
 -
Ah, I missed the spun aluminum style. To me that looks a lot nicer than polished under the hood of these trucks. My Carters have the clamp style for the oil bath cleaners which does seem to hinder finding a suitable option. I've ordered one of these adapters to see if I can make use of it. If so then I'll order a second, if not it goes into the pile with all the other non usable stuff!1 point
-
I used the 7.5" aluminum air cleaners from Tom Langdon. They use a 6" paper element. I don't have an Offy intake, though, so not sure if these would fit. On my intake, I had to file down the rim on both - they touch, but fit nicely. http://www.langdonsstovebolt.com/store/#!/Fuel-Related/c/18665965/offset=0&sort=normal1 point
-
Thanks everyone, and thanks for the kind words, Andy. Forgive the tardy response. I’ve become very busy at my regular job and even more involved at the shop and I forget to check in.... ? Not sure how many miles I have on the motor now, but I can look. It’s running like a top. Retaining the old lifters created a bit more work in repeated valve lashings until I got it where I wanted it. The turbo is still sitting on the bench where I left it.... ?.... Brian keeps bugging me about “let’s force induct a ‘37 coupe today” when I arrive on Saturdays, but there’s a little work I need to complete first. The cylinder head either developed a small crack or I missed it when we magged it away back when.... over the piston between #4 and #5. It’s a small one.... maybe 0.5-0.75” long. With the non pressure system it really doesn’t leak anything, but it made an ugly rust stain right there for everyone to see. I want to pull it, braze it up and reinstall before I try forcing extra air down the car’s throat. Oil pressure cold is still 60 psi, decreases to 50 at hot cruise, 12-15 psi at idle (factory gauge, so kind of guessing on the low end. Max matched the gauge we used when we drill-spun to oil prime prior to install. Water temp goes to 180° and stays there even in 115° weather. Trans howls a bit. I’ve been collecting NOS parts to do it again and have everything except a cluster and 1/R. I hesitated on a cluster 1st/Reverse set early in the year and missed out. The available NOS ones on ebay are ridiculously priced. It can howl all it wants, but I’ll not shell out $400 for a cluster gear. Still looks good, still gets complements at cruises. Old timers love that I pull in (after a long day at the shop) in a 6v coupe with its original flatty. One guy walked by and asked if I’d mind starting it for him so he could listen. I said “bend your ear over here, Mister... it’s running now” That night I smiled all the way home.1 point
-
My tentative plan (if I ever get that far in my truck build), is to make an aluminum base plate. Just flat 1/8" or so plate with two holes to sit on the carbs aircleaner mounting flange. Then look at a filter maker's dimensional catalog and find an oval element that works for the carb spacing and available width. Cut the base plate to fit the element. I've done some preliminary investigation and such elements are available. Then make a top plate from the same material. Drill for mounting studs and sandwich it all together. Polish the top and bolt it on. Sounds simple. bet it's gonna be harder though! I may substitute stainless steel as I have some available.. IF it doesn't seem to hard to work with. One wrinkle in this plan is the fact that my Offy manifold doesn't mount both carbs at the same height. so a spacer under one will be needed to get the single base plate to fit correctly.1 point
-
I believe John-T-53 has brushed aluminum intakes for his dual carb set-up......maybe buzz him to share a picture? 48D1 point
-
Option 5) find or make an aircleaner that fits over both. Think an oval with maybe an oval or 2 circle filters inside1 point
-
Here's a pic from when i first got it.
 1 point
 -
All of us with multi carb set ups are.... BTW, I admire your work, nicely done. I can't wait to see the car when it's finished.1 point
-
3-32-1 ...is Drive Shafts It should be Axle Shafts?1 point
-
Which is why pulling one to find out what you really have is the best way!1 point
-
Got my floor mat in. Calling it done!
 1 point
 -
and two more.,.....
 1 point
 -
It's no guarantee but I've budged a few "stuck" motors with the long prybar on the flywheel teeth trick...pulled the flywheel cover off, then rested the prybar on the bell housing to leverage against the flywheel teeth...typically this has followed pulling the head to see if there might be a chance this would work; if so, soaked with Marvel Mystery Oil for a few weeks, and if oil level dropped, I'd commence with the prybar, working back and forth to break the pistons free, then re-oiling...probably wouldn't hurt to get the valves moving with the prybar unside the valve spring area1 point
-
Sure glad I dug in further. I removed the shift rails and slid the main output shaft out the rear. Then I had full access in the tranny housing to the countershaft. I checked it for thrust clearance. Spec is .002” to .008”. I felt plenty more so I set up my dial indicator and measured .052”. Yikes. I proceeded to punch out the countershaft and was happy to find the front thrust washer was tearing itself apart. It was pretty thin and becoming cupped. It had already set an appointment for a self scheduled failure. Below are some pics. I’m all-in now. Glad too because I’ve learned a lot. I feel that fixing your own stuff, going this deep is very rewarding. Below you can see how much of the steel thrust washer is gone. It’s not supposed to have a raised center. Last pic is rear thrust washer compared to the front.1 point
-
Sure, drive ‘em over. As soon as I finish this project car and the one I have waiting for me I’ll get right on it ?1 point
-
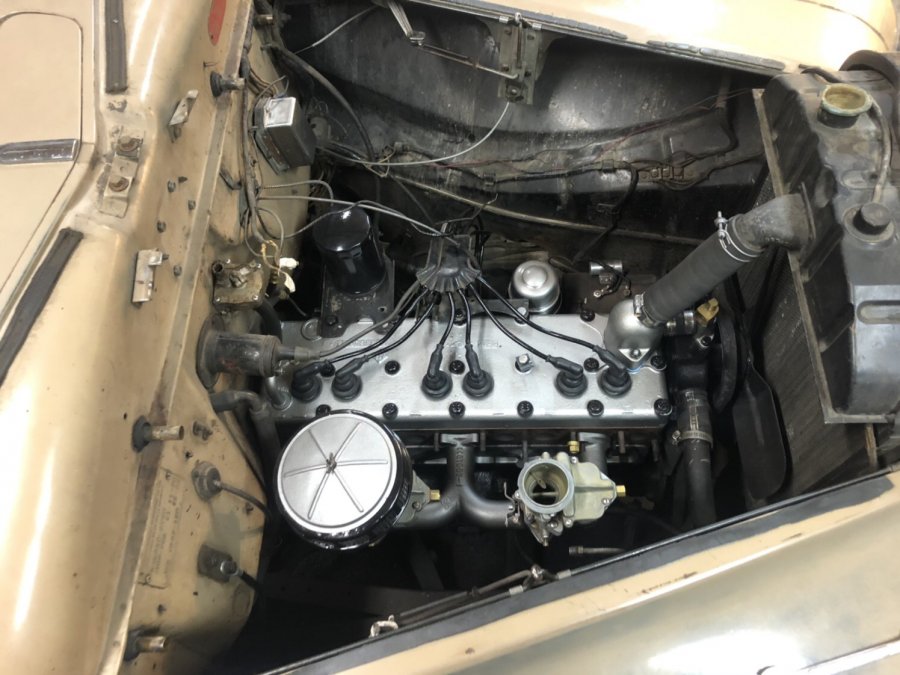
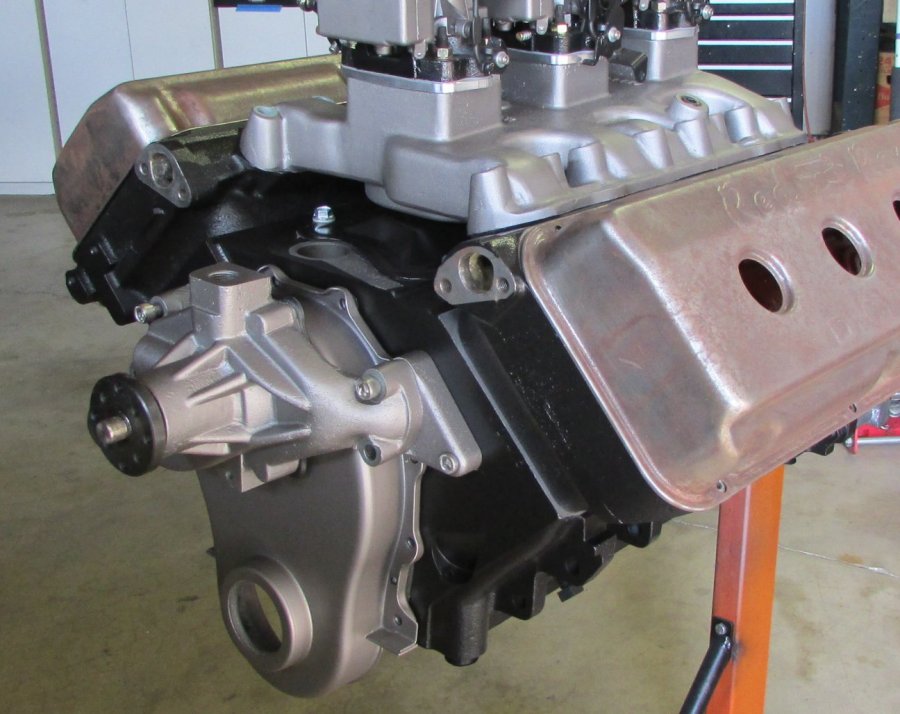
Huge snow storm today. When the power stays on long enough I’ve been out buttoning a few things up. Then decided to mock up the intake and carbs. Boy this should be fun this spring.
 1 point
 -
Be patient and talk to Hot Hemi Heads in real time next week. I think that area of the engine is pretty much the same as my Dodge Hemi. If so,... there is a kit that adapts a SBC water pump which is what I did. It requires that you modify the front cover. I retained the original thermostat housing and cut off the old water pump housing. In your case, you will also need to address the early motor mount. Again Hot Heads has kits for that or you can do a lot yourself.


 1 point
 -
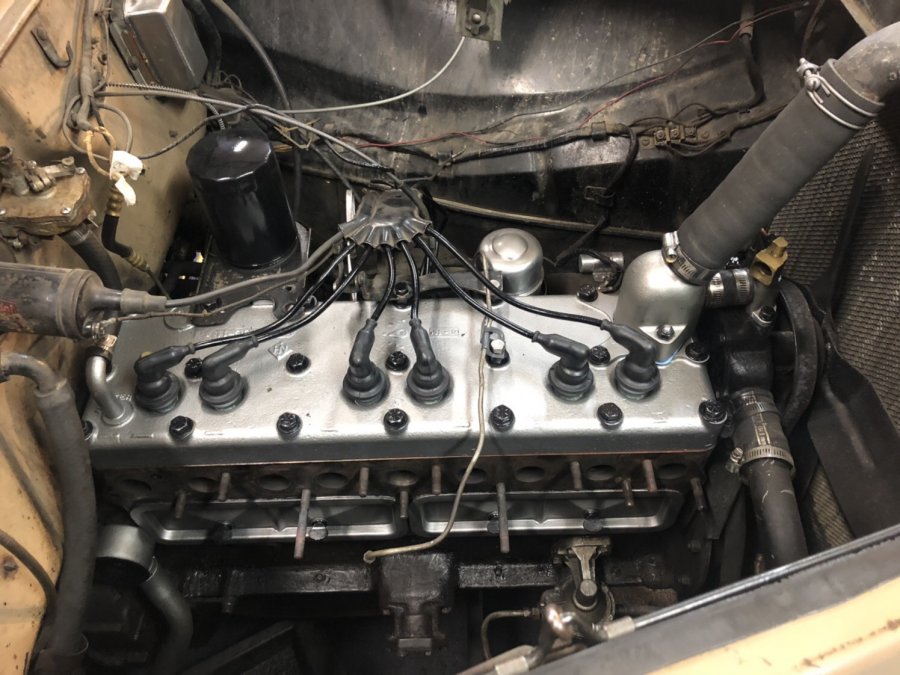
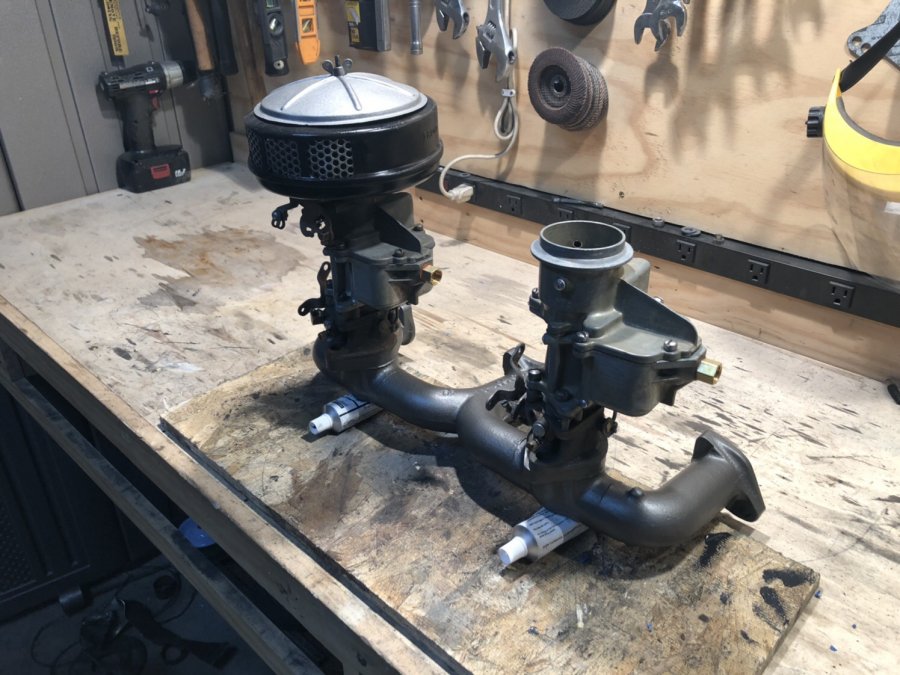
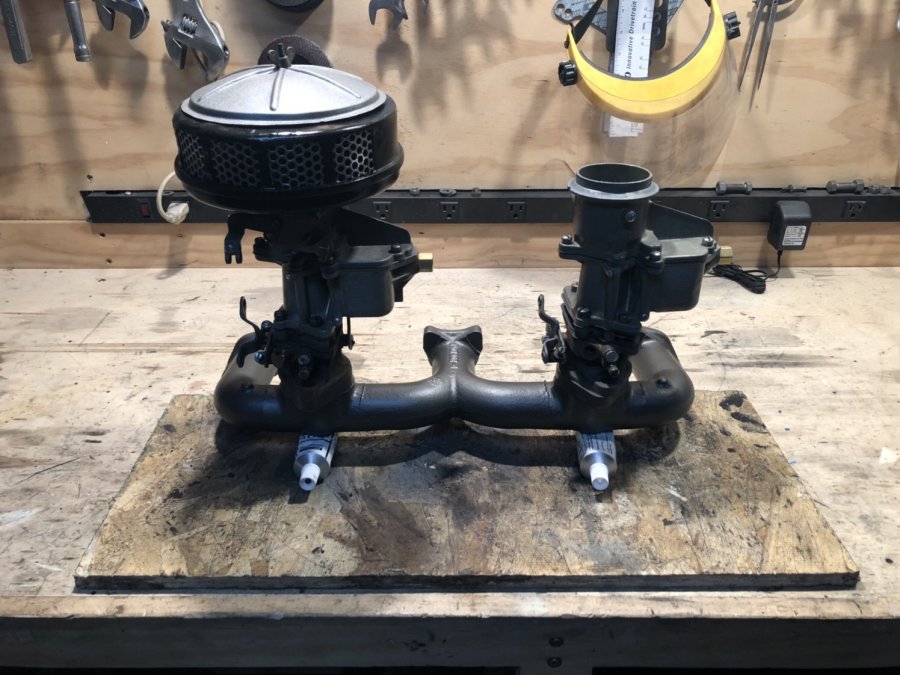
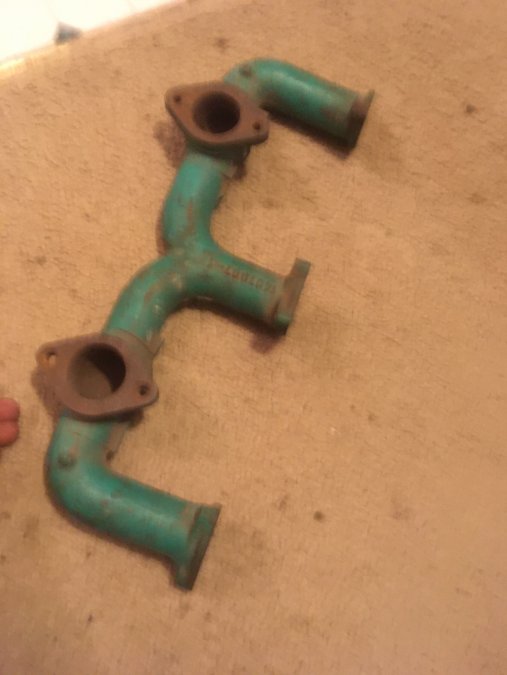
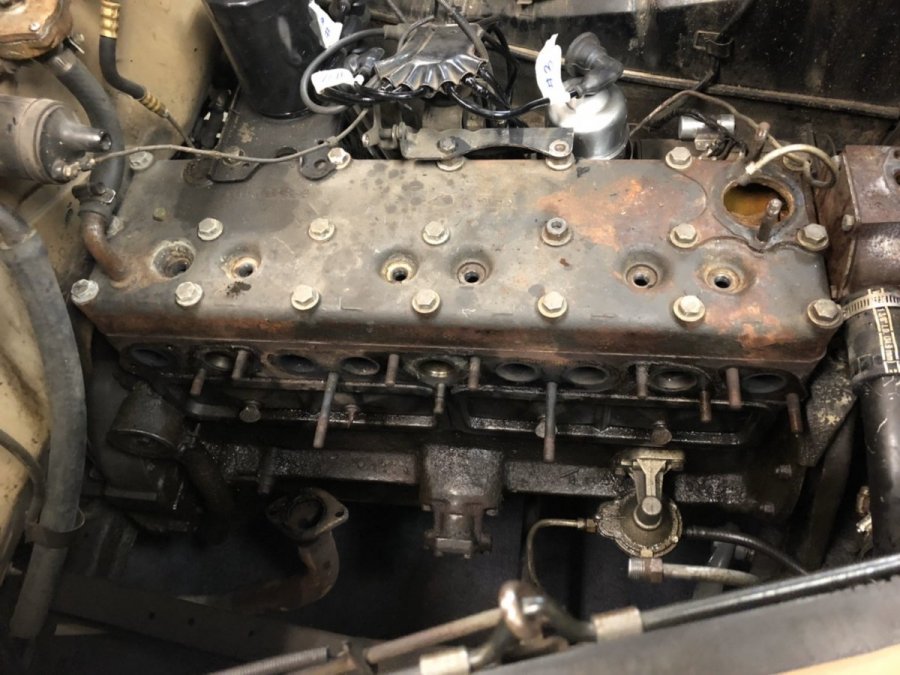
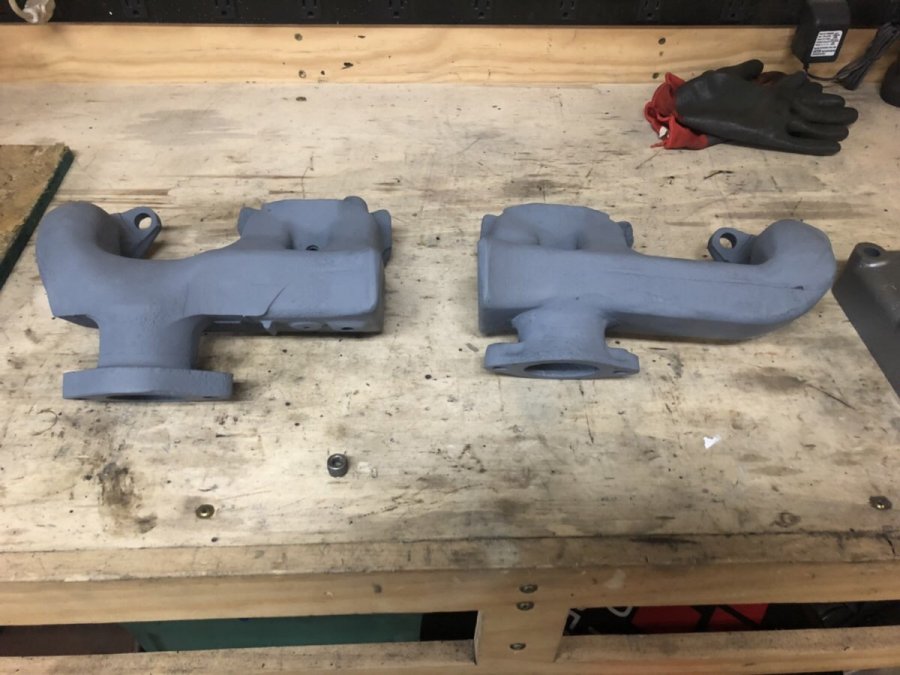
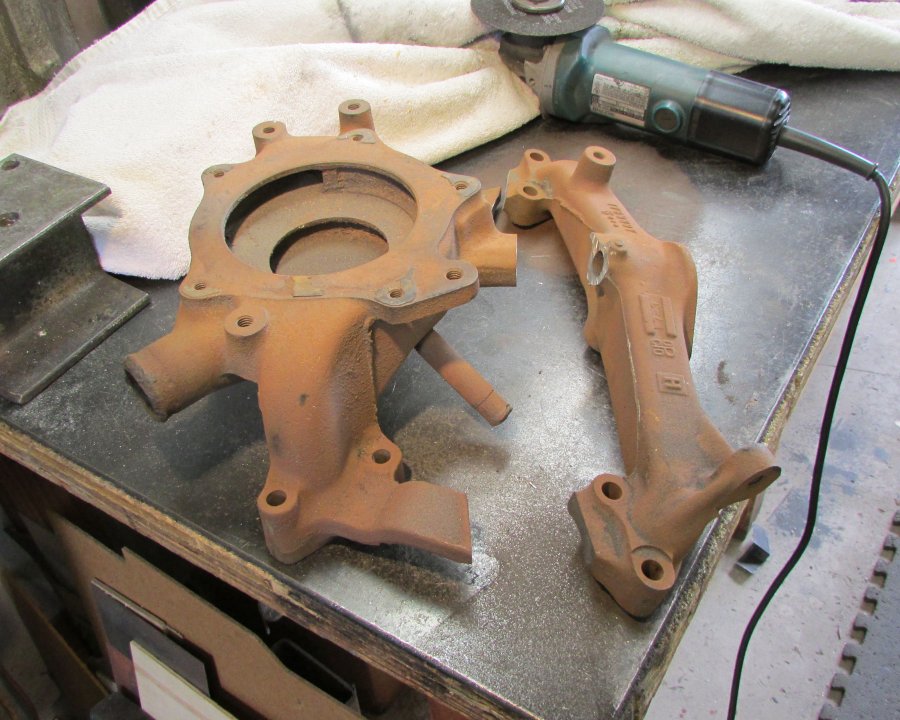
Sometime in its life, I suppose 50s or 60s someone cut the heat risers off of the intake. I cleaned it up and took it all off. Ran it through the blast cabinet, cleaned and trued up the flanges, threw on some high heat primer, and finished it with some cast blast paint. Boy I can’t wait to run this thing.
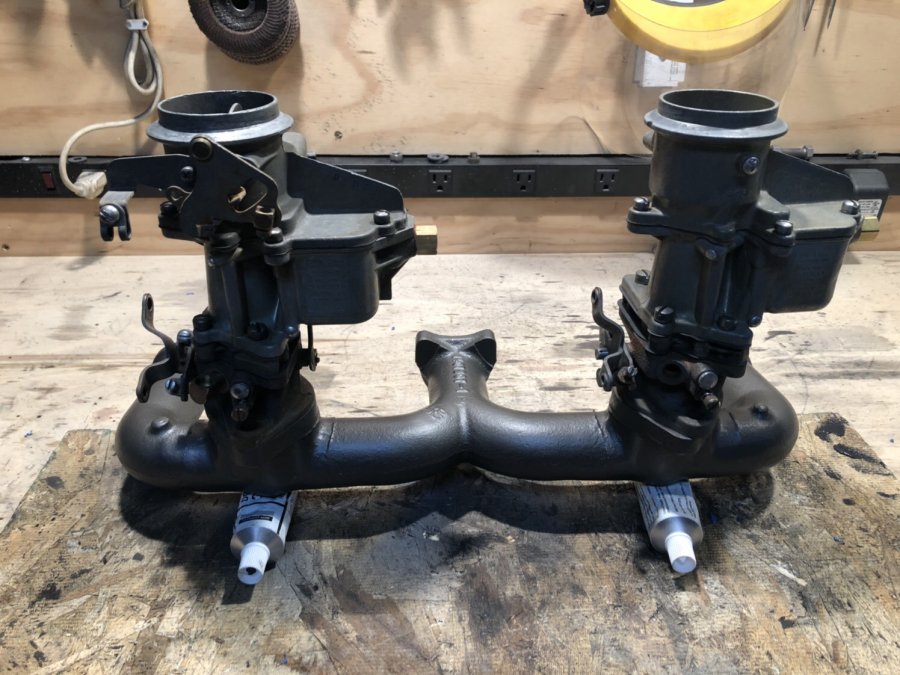
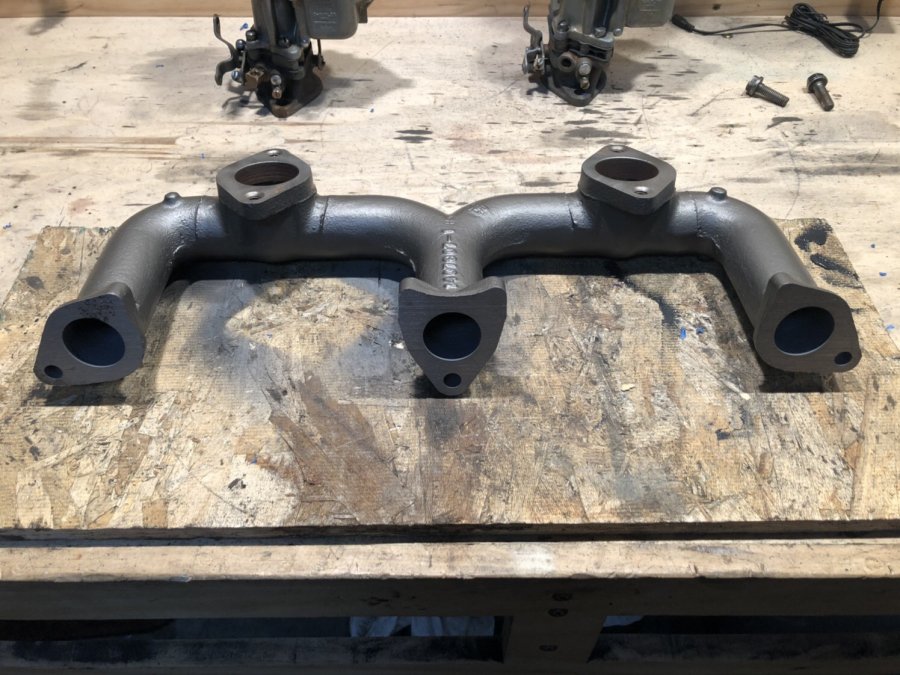
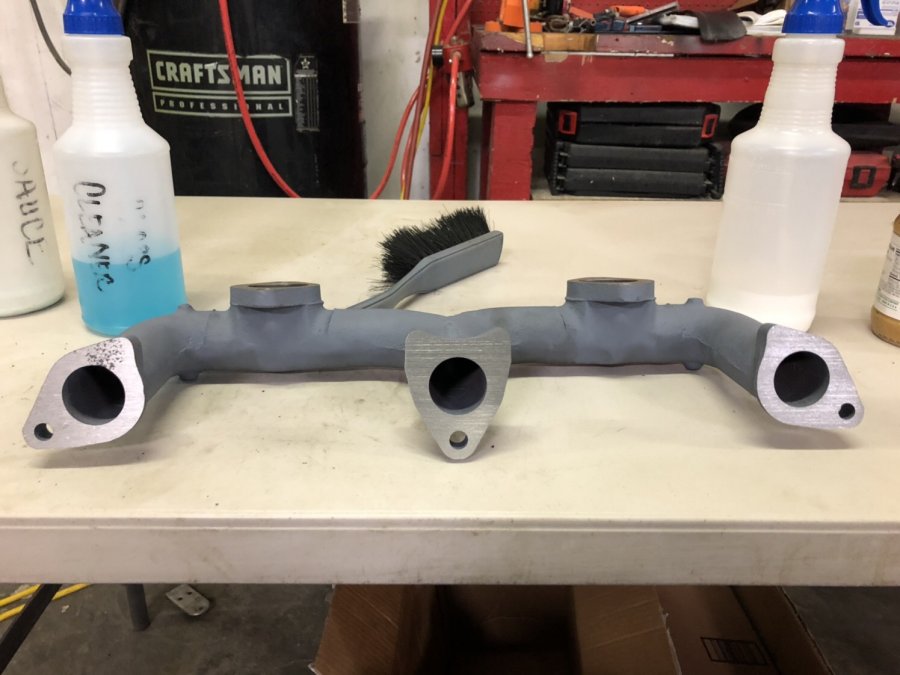
 1 point
 -
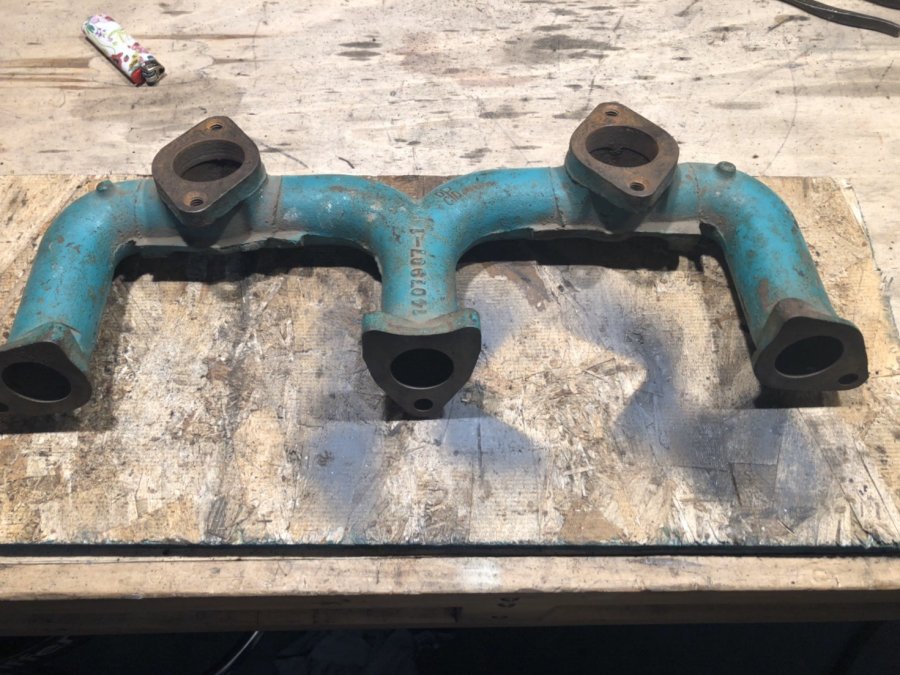
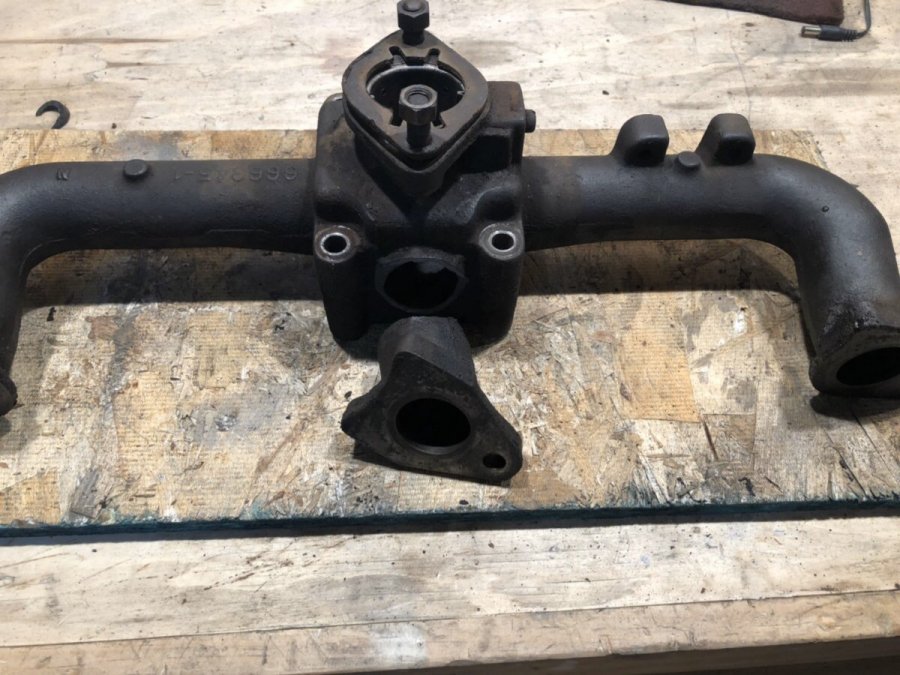
My buddy picked up my intake! He sent me this picture, I think he took it with a potato. Can’t wait to get it cleaned up and installed. (This was last weekend). (Posting this all in one morning)
 1 point
 -
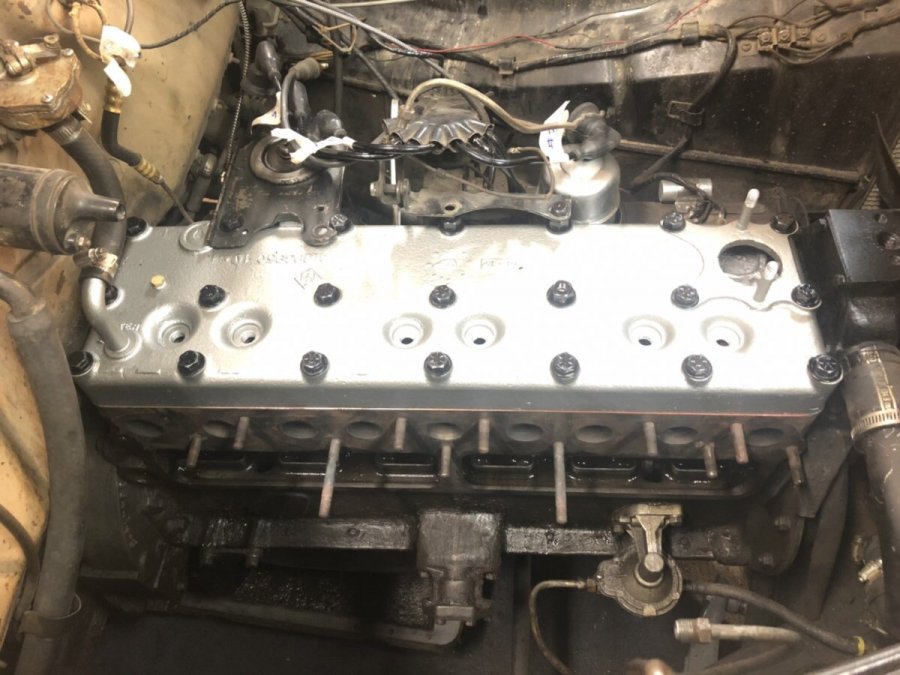
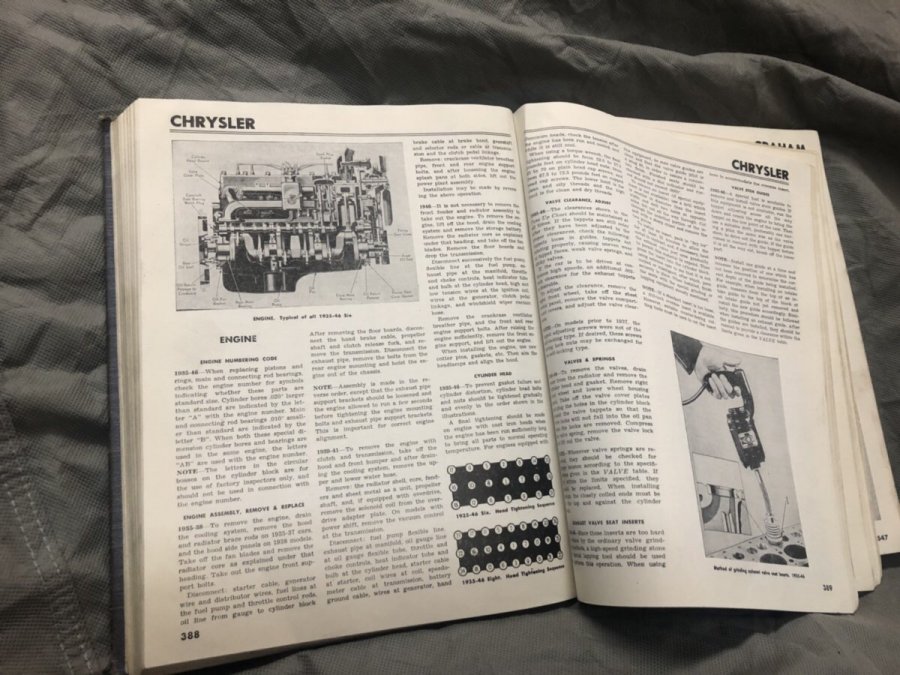
Got the old book out for some light reading as I torqued down the freshly cut head. Kinda wishing I would have taken a bit more off, really tested them 79 year old rings.
 1 point
 -
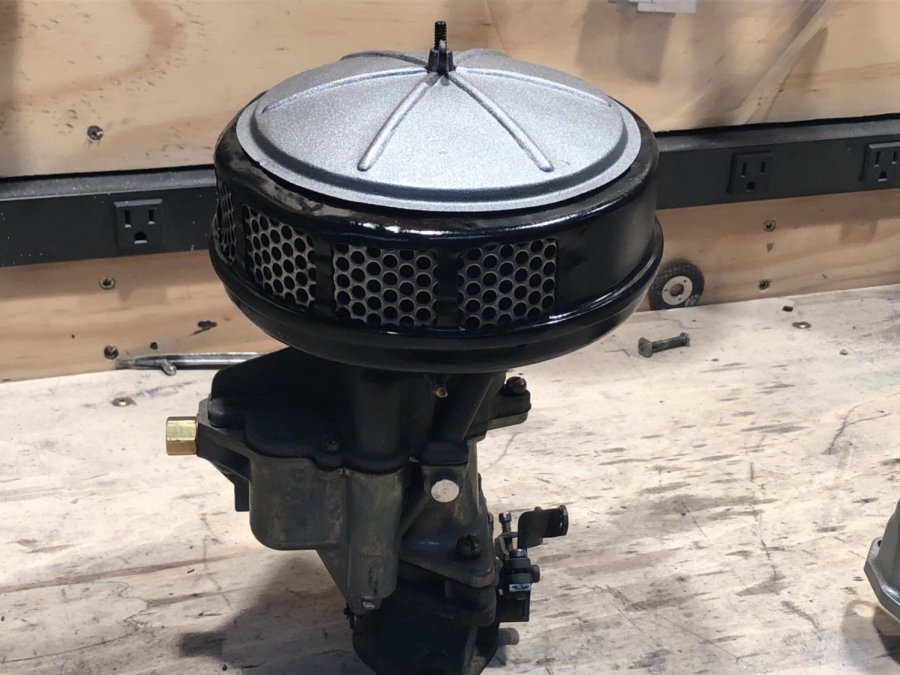
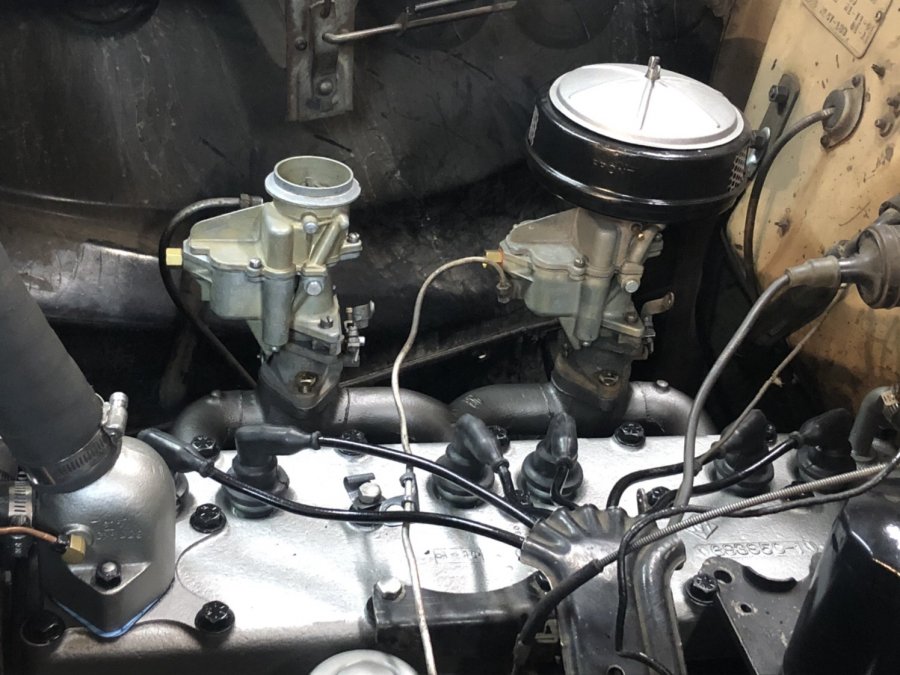
Rebuilt, re jetted, and ready. I better get back to Pierre and get that intake.
 1 point
 -
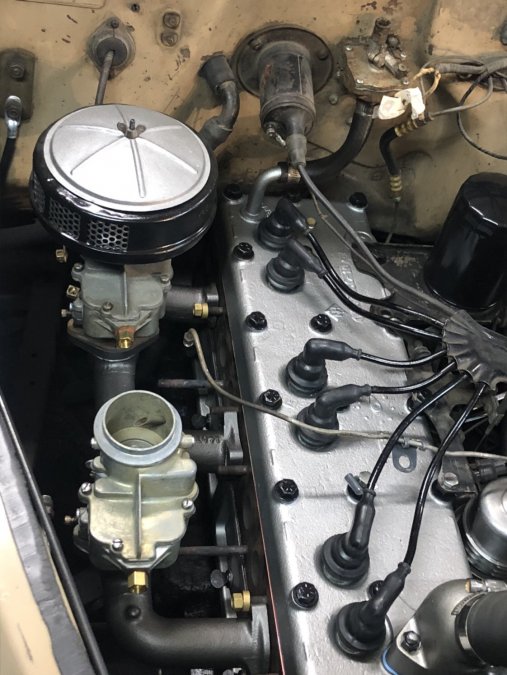
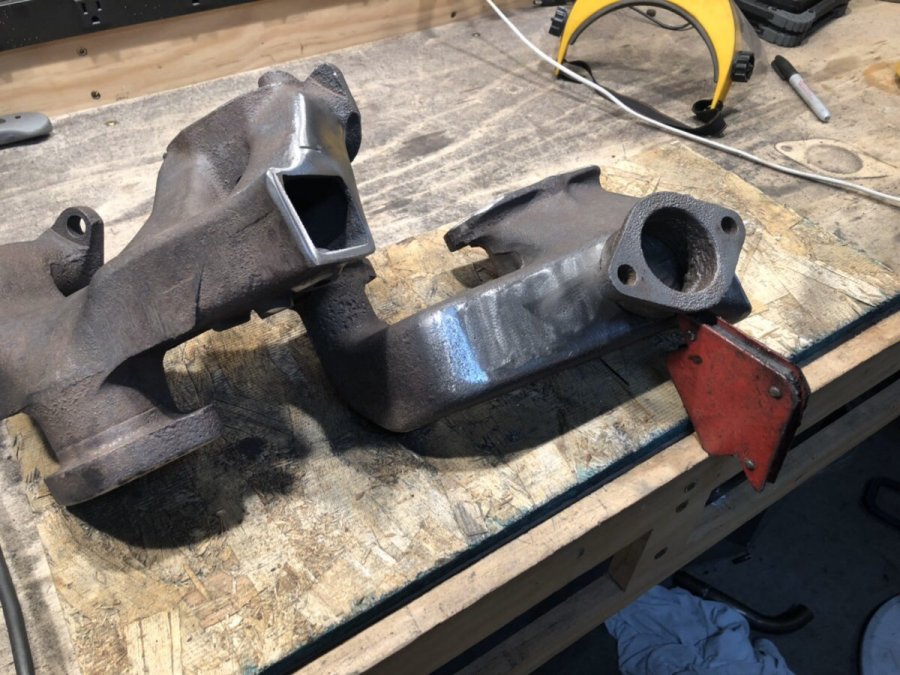
So I have been on the hunt for an affordable 2nd carter carb. Was watching for a few weeks. My buddy kept telling me to be patient, something would come along. He sends me a picture the other day and somehow had the perfect one in the back of one of his cabinets. So I sent them with a local old fella and he rebuilt both of them for me. Did some swapping and proper jetting on them to set me up right. Soooo... I now need an intake. Back when I lived in Pierre one of my neighbors walked over one day to check out my car. Long story short. The ol boy had a stock dodge truck flat 6 dual intake. Someone had cut both heat risers off of it at some point thru it’s life. So I’m making arrangements to head back home and pick that up. Lot easier to explain to the wife after I “forgot” the 13th nut on the stock intake removal. Hehe. Hopefully some pictures will come soon.1 point
-
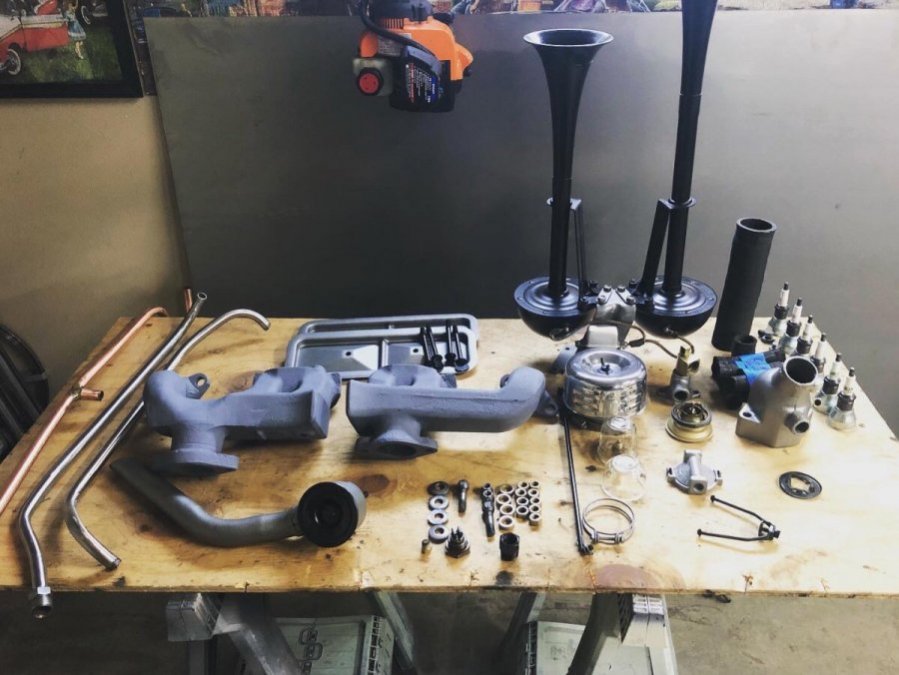
My table of sorted pieces.
 1 point
 -
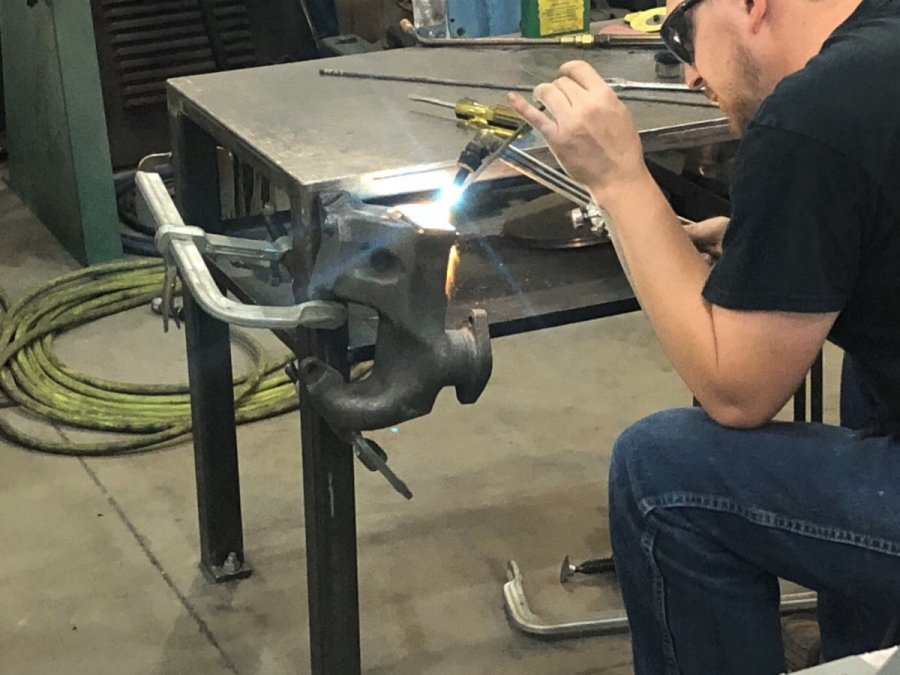
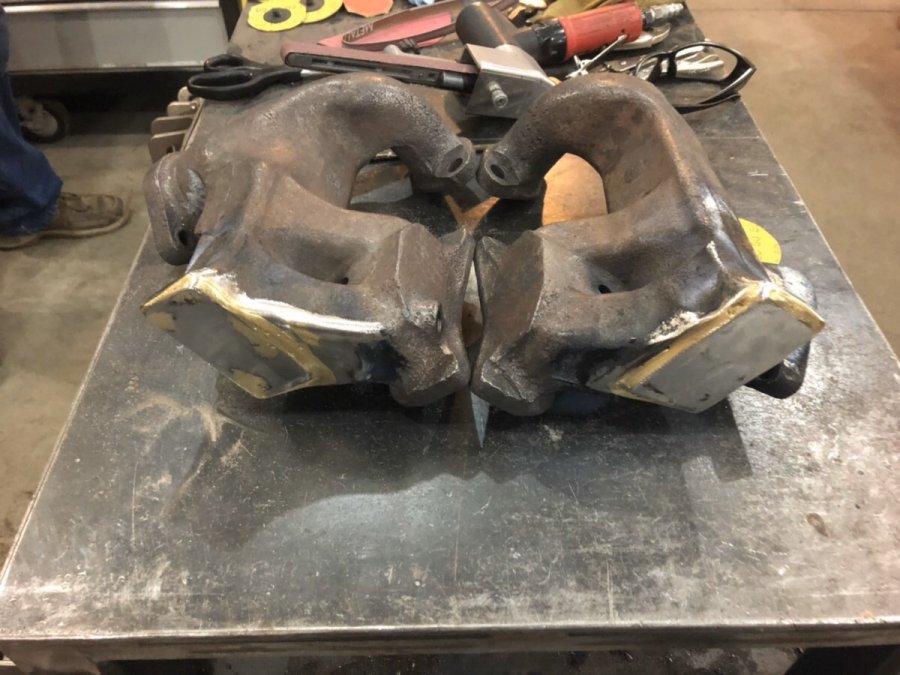
This current winters project is dealing with a leaking head gasket. So in turn I have blown it apart. Took another .23 off the head so it’s at a total of .38. Me and a good buddy split a stock exhaust manifold. And as I was removing the stock intake I found out there was a hidden 13th nut. Oops. I also bought a complete engine gasket kit to re seal the ol girl. . So now I’m pained with finding or fixing the stock intake. Or.... maybe a dual??


 1 point
 -
I also sucked in the front bumper 2.5” and got rid of the fogs and eye brows. Here are a few shots after all that.


 1 point
 -
I really wanted a late 40s custom taildragger. So next was the stance. Started with 3” posies rear leafs and 2” blocks. Here is the stock nosebleed to the after. Put a number of miles on that. Since then we have moved from Pierre SD. To the Black Hills of SD. After getting settled in I took to it again.

 1 point
 -
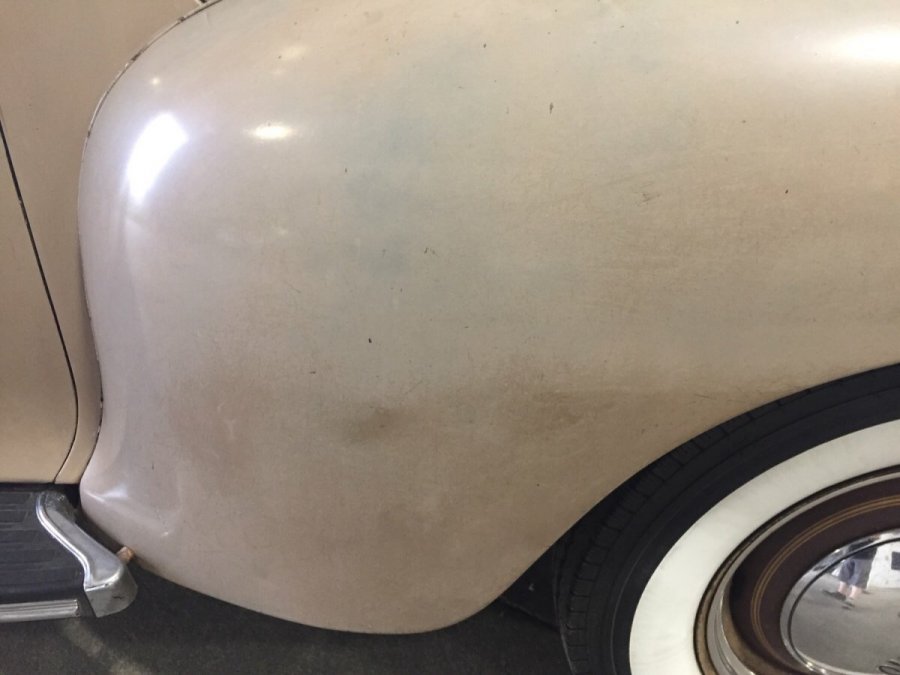
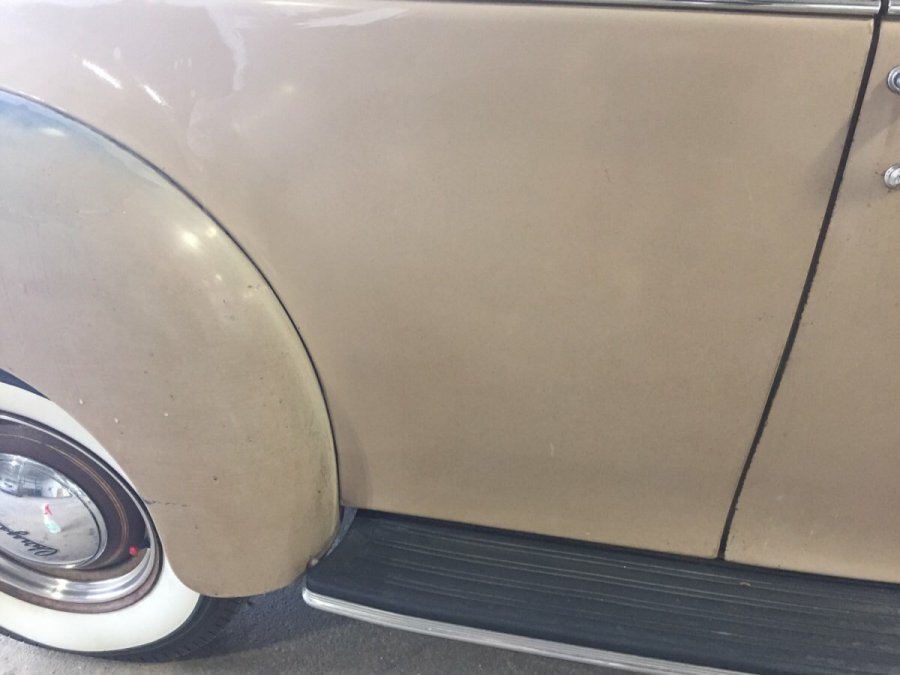
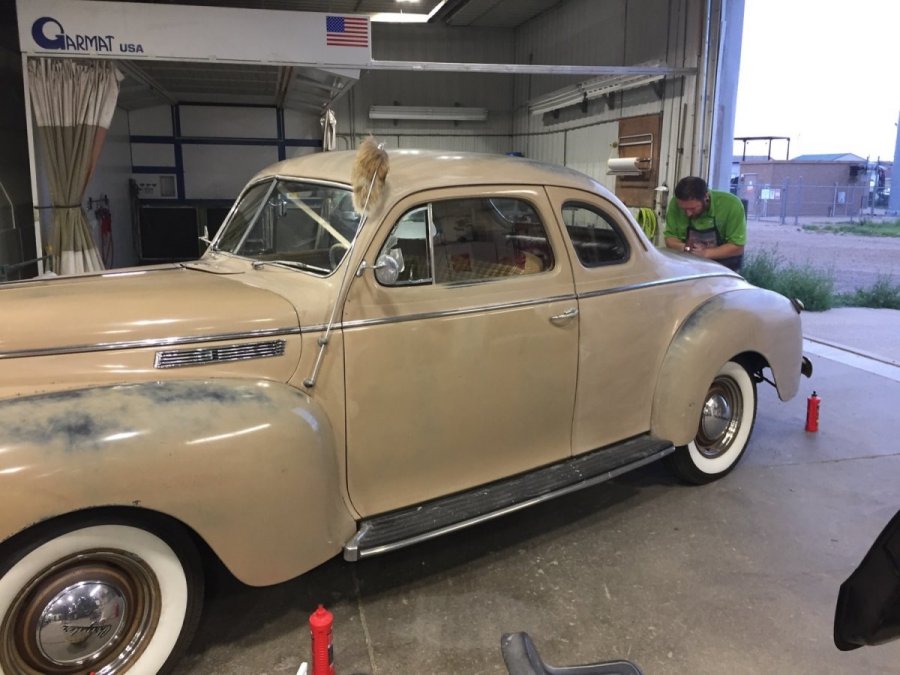
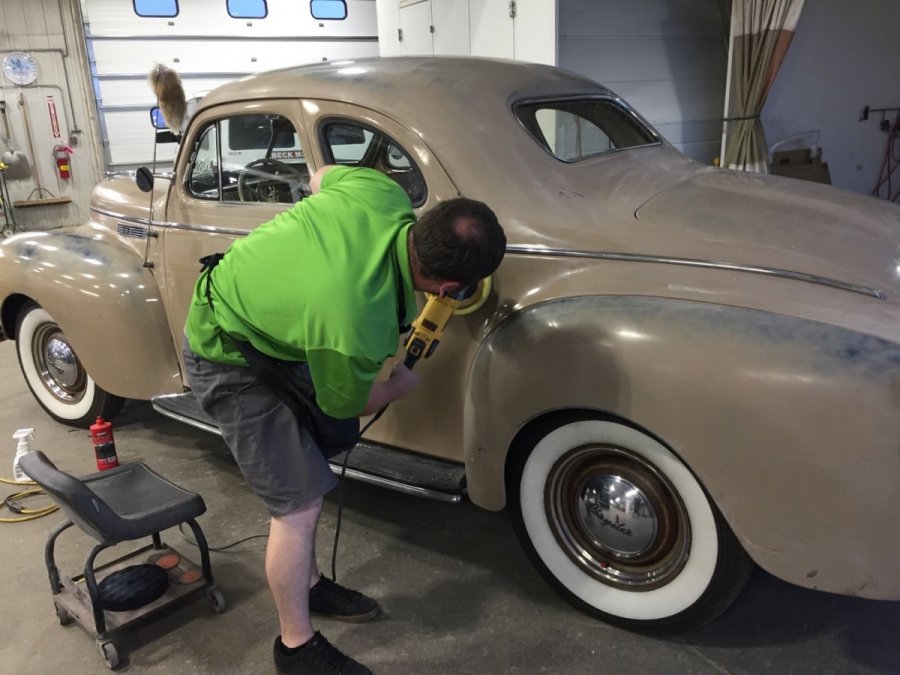
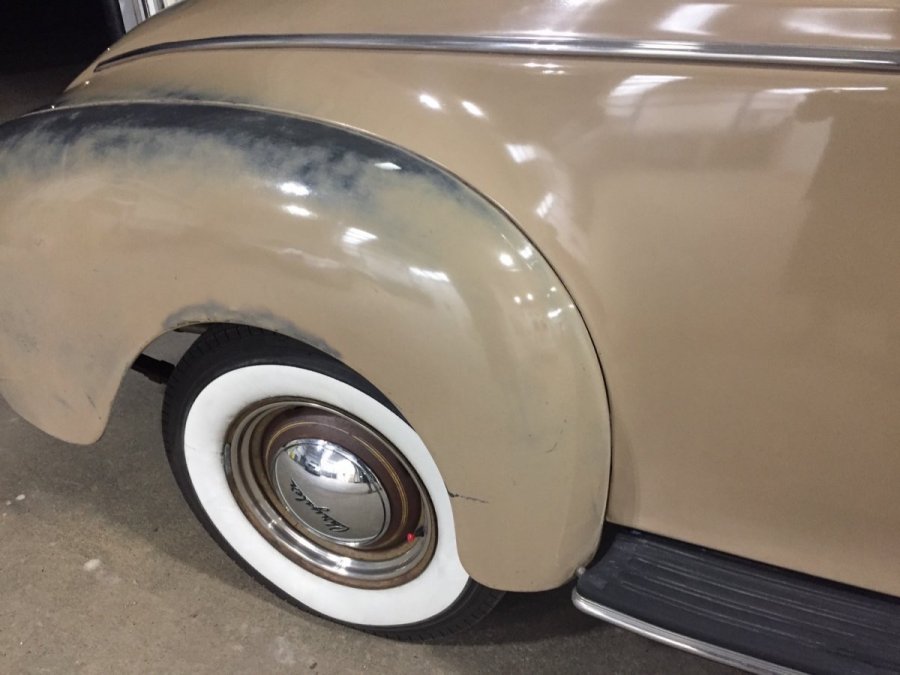
When we got it home, we enjoyed it for a few months. The previous owner had a few cars. This one had been sitting for a bit. He admittedly hadn’t washed it in 10 years. Every scratch and blemish had dirt caked into it. I scrubbed it with every high dollar whatever, but it wouldn’t clean up. So me and a buddy to the polisher to it. Essentially wet sanded it with a light scotch brite and the a 3 step cleaner/polisher. Lost some paint. But a far better looking car in my opinion. Here are some before and afters.

 1 point
 -
No problem....nothing to worry about
 1 point
 -
As I am planning on rebuilding my engine soon, I just took the time to read this in one sitting. The high level of machining is fabulous. The attention to detail is incredible. Thank you so much for taking the time to document your build, I realise how time consuming that is. Being new to these flathead 6s, I don't even know what I don't know! This thread has helped enormously. Thank you again. Cheers, Stewart.1 point
-
Tug officially got a weight certificate today, he's a mere 2,960 pounds.1 point
-
Well the day actually arrived, "Tug" is moving under his own power for the first time in about 20 years ?1 point
-
I found 2 old Crosley oil bath air cleaners, which look remarkably like the stock dual carb air cleaners from the B-Series Dodge trucks. I cut out the bottoms and welded in the Plymouth diameter bases from 2 junk air cleaner that I had lying around. They work great and keep the stock look.
 1 point
 -
It saddens me to inform the forum that Don Coatney passed away on the 2nd of December. It is also his wish that no service will be held. Let's all take a minute to honor this man and his dedication to this forum and count our blessings as life is short. Don was a great friend, they are far and few these days.0 points


.thumb.jpeg.28cb36506a6b17cd30e7d4a22504384d.jpeg)
