Leaderboard


Popular Content
Showing content with the highest reputation on 10/29/2019 in all areas
-
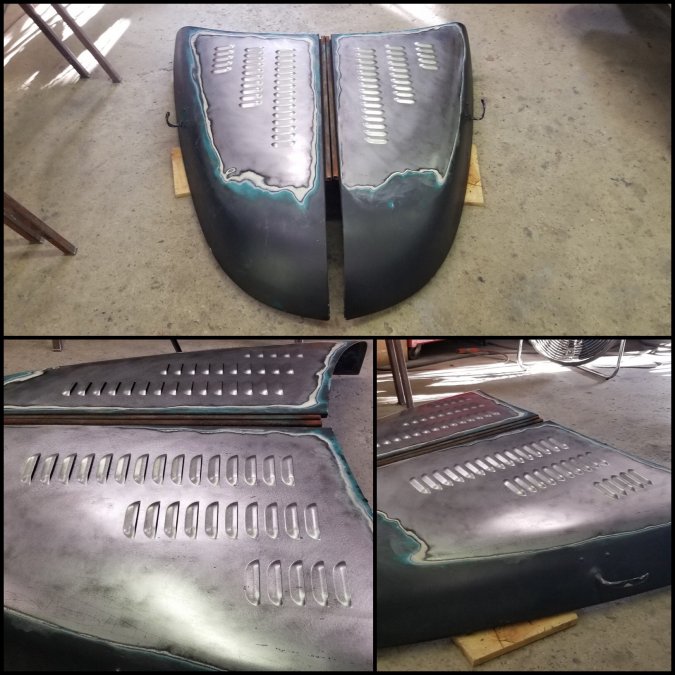
Wow he already punched them and sent me pics. I’m over the moon it looks amazing can’t wait to see in person. Now I gotta buy some epoxy primer
 5 points
 -
Today I dropped in to visit to see a friend who is an old Mopar lover. He gave me some great used parts today. I am pretty excited to acquire 6 original axle bearing shims! Of varying thicknesses. You can’t buy these, that I know of. 3 fuel pumps. 2 carbs. Some relays. I also got all the parts for the park brake system from a ‘53 Mopar. A real score for me, as I need to address the handle locking mechanism in my ‘53 Windsor. My ‘53 and my ‘38 will greatly benefit from these parts. Thanks Don!2 points
-
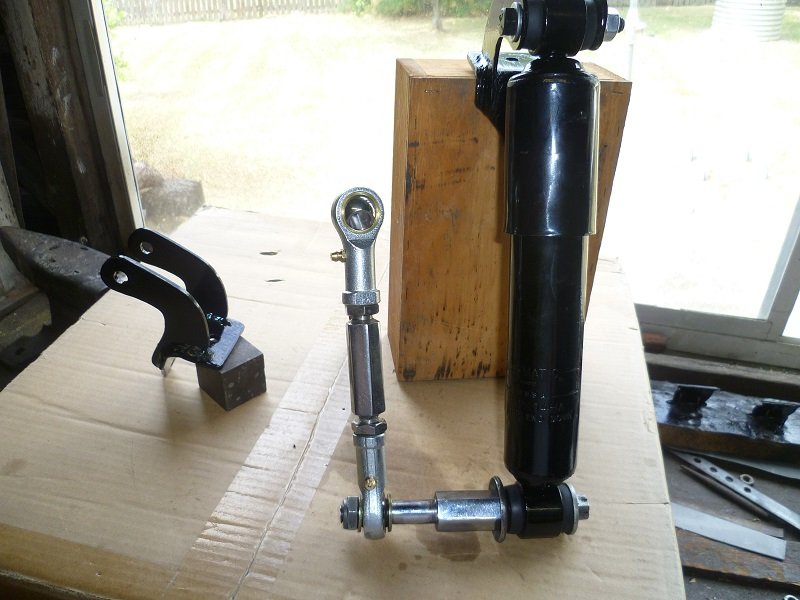
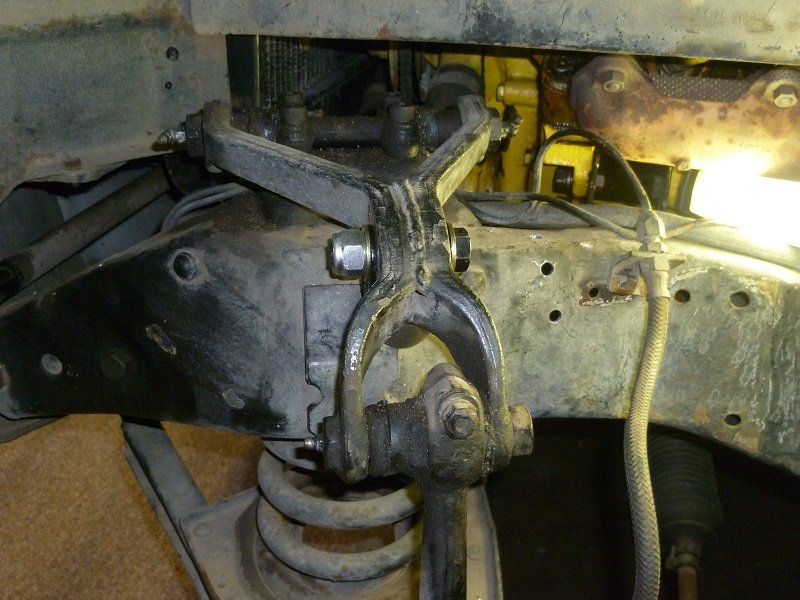
Randy........I have a 1940 Oz Dodge 4dr Sedan which was based on the US sourced 1940 Plymouth, apart from being RHD it is the same as the US 1940 Plymouth chassis and I have used MOOG cast steel upper control arms on it since about 1973/74...........I have the Moog 1941-1956 upper A arms with the 41-56 upper inner pins and bushes and the 41-56 upper outer pins and bush.......the original 1940 Upper Inner pin uses 4 bolts to attach to the chassis the same as the 1941-1956 Upper inner pin.........I have used the stock 1940 Spindle that the 1941-56 bush fits into without any problem..........the lower A arm is the original 1940 A arm and likewise the lower inner pin and bushes and out pin and bush..........I use 1941-56 stub axles with the 1939-56 king pin ......the car has a 9" shortened Austin 1800 Rack & Pinion.............I have a 1' thick Heim jointed adjustable sway bar using the lower shock mount pin as per original 1940, the sway bar is located at the chassis with neoprene bushes.............I have also only this year relocated the upper shock mount using a custom made upper mount as pictured...............my car runs 11" Oz vented disc and 11" solid rear discs..........apart from the relocated upper shock mount everything described has been this way since the mid 1970's, I have owned the car since 1971, the V8 I installed in 1973.............I trust this helps............Andy Douglas


.jpg.d4bf4f2dc4dc67147861946e293da597.jpg) 2 points
2 points -
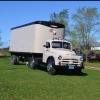
Hello all! I found this website after being gifted a Dodge Pilothouse truck and can say that its been a awesome experience looking at all this knowledge and possible help forums. My inlaws gifted the wife and I a 1951 Dodge B3F (found this based on the Vin decoder information available) that hasn't ran in over 20 years. We are planning to keep the look of the truck(frame/chassis, sheetmetal/body, and hopefully wheels) but replace everything else. Engine will be replaced with a Detroit 4-53T 2 stroke diesel backed by a NV4500, dually rear axle from a Ford F350 and really tempted to do a 4WD conversion since it will be a daily driver as much as possible. I look forward to documenting this project here and getting some feedback from you all! Ill add some photos from my phone so they are smaller and fit the file size limits here.
 1 point
 -
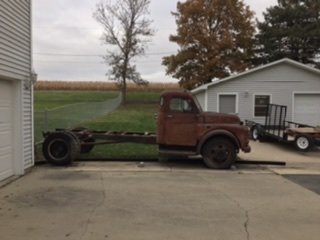
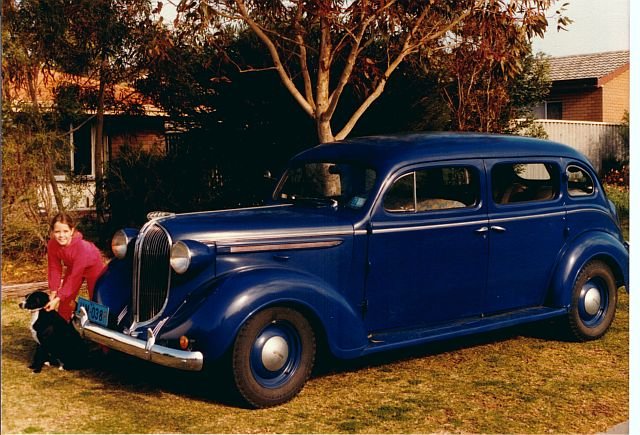
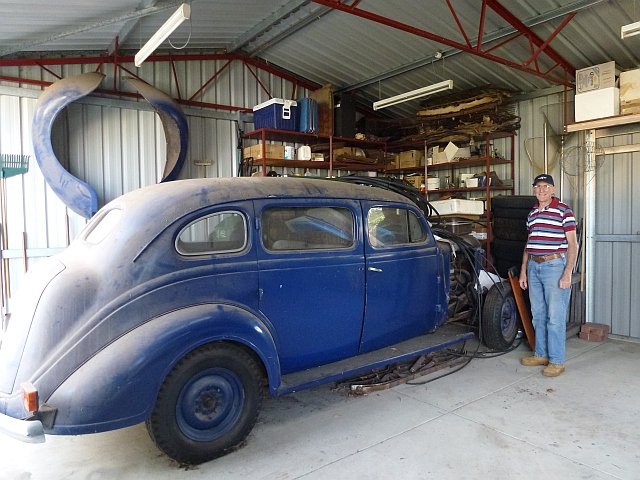
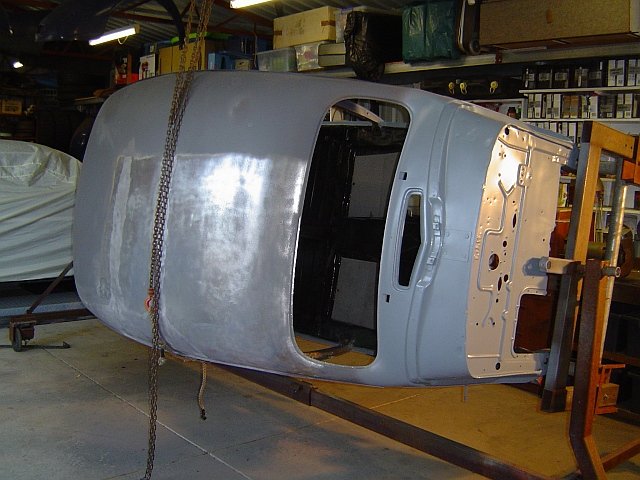
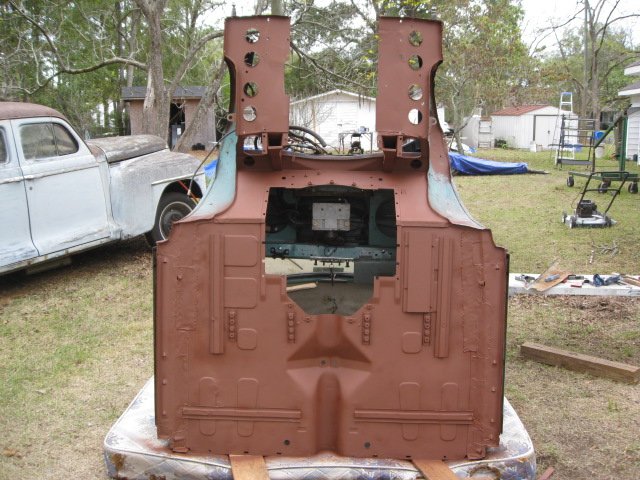
I have visited this site a few times in the past but recently started again and have been impressed with the activity, the assistance offered and the relevance to my interests. I currently have a 1929 Plymouth tourer with body by Holden Australia restored on club licence since 1999, a 1955 Plymouth Belvedere Suburban RHD built in Detroit with 259 V8 and 2 speed auto also on club licence, and a 1938 7 passenger Plymouth with Aussie Richards body, in a million pieces. This my first attempt at a post with pics so hope it works. I purchased the '38 running and licensed in Feb 1981 with the plan of having a car I could use for club events while I slowly rebuilt my 1929 Plymouth from a wreck. It was painted black, the engine barely ran and the leather upholstery was falling apart, but we drove it onto the trailer under its own steam. I cant find any pictures of it as bought but I must have been dazzled by the fact it was a 7 passenger and had all its chrome and fittings. There was no water in the radiator and It turned out the engine had a hole in the head above No 1 cylinder, every pot had broken rings, and water had corroded the bearings, crank and camshaft. The bottom of each centre door post was rusted out, and there was rust in the boot (trunk) area. By July 1982 I had it on the road with new paint (Ford Neptune Blue), new tyres and a temporary engine out of a 1936 Dodge utility (pickup) that we found abandoned up in the hills, and sheets tacked over rebuilt seat frames. My daughter in the pic below is now 41! In the next couple of years I fixed oil leaks, replaced spring bushings, brakes and wheel bearings and changed the diff from original 7 passenger 4.3 to standard 4.1 ratio as we tend to travel longish distances. By 1984 I was ready to replace the interior with upholstery in original blue leather. When I stripped the hood lining I discovered I had serious rust issues under the lead used in large quantities on the roof, which was fabricated from a standard roof cut in half with a central insert about 18 inches wide. The repairs were completed by Nov 1985 and the car was back on the road, however the upholstery guy was no longer available. In 1988 we had a surprise addition to the family, a baby girl after 17 year drought! The upholstery money went on adding a bedroom. In the meantime the car was used as a daily driver by my wife on the school run - rule was "no running in the car"! By 1995 the brake lines had rusted thru, the radiator had collapsed for the second time, the exhaust was shot, valves keep sticking and to cap it off I backed it into our Falcon wagon and badly dented the boot. I deregistered it in disgust as by that time I was making progress on the 29. Fast forward to 2012 and we have changed address, I now have 1/2 acre and a 5 bay shed. However to fit the 7 passenger in it I had to remove the front clip. The car is now a mobile storage unit for surfboards, wetsuits and a couple of broken chairs. But it still runs! I plan to post an outline of the rebuild process which started in 2012, but here is a recent pic of the body on a home made rotisserie - stripping back roof to bare metal after a VERY bad sand blast and prime job. Jim
 1 point
 -
13th ANNUAL CLEMENTS TAILGATE BBQ APRIL 4TH 2020 SATURDAY 9AM TIL WHENEVER EARLY TOW-IN BEGINS NOW AND LATE TOW-OUT ENDED YESTERDAY Show up Thursday or Friday and Camp-Out til Sunday or Monday, always need the Help! "Lucky 13teen" Its the best day ever! Old trucks and old friends! The car guys are part of the whole deal too, but man, I love the trucks! Its the place where the largest number of Dodge Pilot-House Era Trucks meet in the whole WORLD !!! (at least no one's proven otherwise ..lol) The people I've met over the last 12 BBQ's has made my life so much better. This time of year is so awesome because finishing an old truck actually has meaning to the crowd you'll see here! Fenders and bumpers to hang on, hoods to lift, parts to swap, and stories to tell! I look forward to it all. Every year is special with returning long distant travelers and new ones that are finally able to make the trip! I always look forward to meeting you all! If you have an old frail beater truck that is weak on the road.....trailer it here early! I'll keep it here on the ranch til show day and you can pick it up when you can.....save your energy for the best weekend ever! ITS A BBQ, NOT A FOO FOO CAR SHOW!! *what is a "foo foo"?* If you have a "Real Bitchin" Shoebox, Shovelhead, Stovebolt, A-Bomb, Backhalf, Barn Find, Basket Case, Chopped Up, Belly Pan, Boat Tail, Nailhead, Pancaked, Resto Rod, ........well, Bring-It-On-Down, me and my friends got a few Dodge Trucks for you'all to see!!! I love Hot Rods and Muscle Cars too.....it is an awesome time to show off the hard work we all put into these old rigs and no need to fuss, Its all Good! ...no mini coopers please...., yea, go ahead and bring one, they're kinda cool. It really is my favorite time of the year. Happy 13teen guys. "The car crowd is growing and more than welcome to come. I could easily call it "The Tailgate/Trunk BBQ"!" "I can't tell you how much I look forward to this every year, its a blast and for some, lasts a few days. Campers show up on Thursday or Friday and leave on a Sunday morning.....all enjoying late night chat sessions around the fire pit." "I hope new and old members alike are inspired to make the trip and maybe even drive their trucks the distance....you know we have your back! " "So many good stories around the fire pit the nights before and after the event. I can't tell how cool it is to have forum members stay several days and just relax....." "Looking forward to a great party! Now build it, and bring it!!!" "It was around 2007 when Bob Koch, Jim Shepard, and myself (Tim Estrada), went to Reg Evans' place to check out his "yard". While we were eating hotdogs, drinking cold beverages, solving international and regional issues....we thought "lets have a BBQ". "Get the wheels on, and the tanks full....its time to finish up and git to the Q! It ain't no beauty pageant of trailer queens, its a truck show...so flex your rust as well as your shine!" Tim aka 48Dodger1 point
-
I did the rustoleum rusty metal primer followed by oil based enamel, brushed on, for under my bed firewall and some frame. I am confident it will last a few seasons or longer1 point
-
just ordered some new parts, got a complete cab(mostly needed doors and steering wheel horn) and front clip from a seller in MN for $1750, don't really know if its a good deal but I needed new fenders and doors so hopefully they are in good shape when they arrive! These are the first parts I have ordered, little excited about this!1 point
-
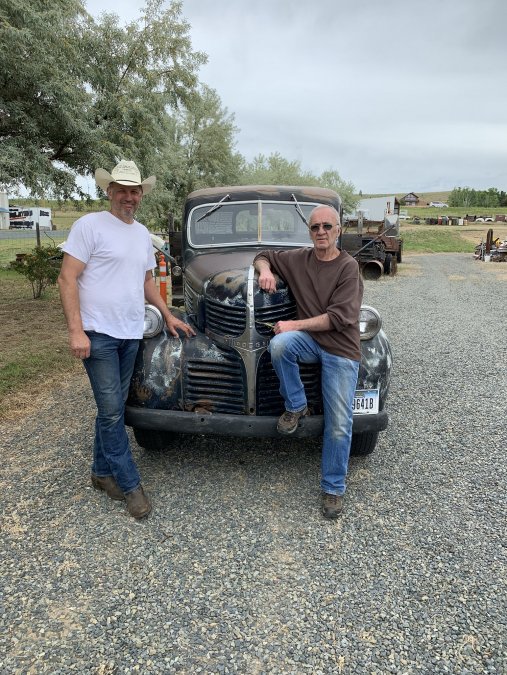
Got some photos today working with Dad. We took a day off from hunting Deer to hunt up a new heart for Ol Bessy. Gen 1 350 Small Block. Bringing her heart home, Dad Working out,.....and, Pending proper lubrication, we are prepared to commence Ol Bessy's heart transplant.


 1 point
 -
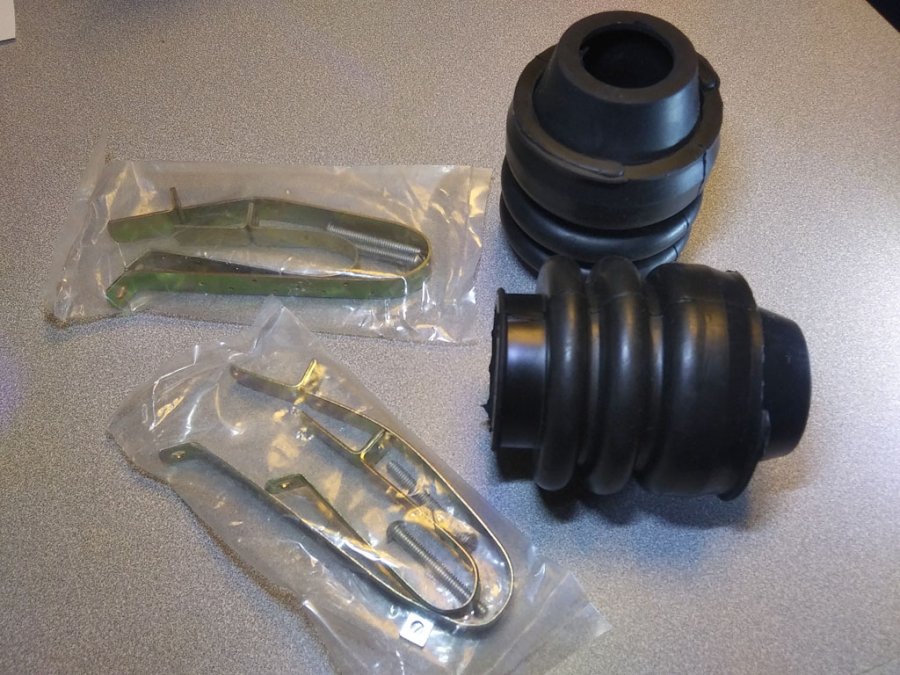
Man....that five pound chunk of government cheese is a load! I got one boot installed but my bathroom habits may need a couple of days to recover....... I was going to replace both boots but the other one isn't split and I can service the u-joint with it in place. When it splits it may be time for a new driveshaft with modern u-joints.....1 point
-
Now that’s what I’m talkin’ about - Old school craftsmanship! Next, a flush tailgate panel punched to match?1 point
-
That looks great !!! John1 point
-
Second picture after the treatment
 1 point
 -
Looks like Nick is out ahead of us on this. My boots arrived today from Bernbaum after going AWOL in shipping for a few days. There have been a couple of posts suggesting we may be getting NOS boots so I'm gonna post a photo of what I received: There is nothing here to make me think these boots are thirty years old. They look, feel, and smell fresh and the clamps look brand new. I hope they have a happy, long service life. Nick, I intend to use Valvoline high temp grease in the joints: Here's hoping my boots survive the installation attempts!
 1 point
 -
1 point
-
still a lot of paint.. stick with it...brushing is a long process for sure...but I understand the cutting of lines with items mounted in place....I did this with a brush to the tune of about 8 ounces...middle pic..thinned and brushed as a wash coat for imperfections and crevices but got full pan coverage....followed with another 12 ounces sprayed...this undercoating is only 16 ounces.....of course as seen in the top pic....I put three coats of body color on also...once tack coat, two wet coats...this cab had no connection of the left A-post to cowl, rocker inner fender or floor, metal was gone...as a precaution I did the same repair to the right cowl. Hopefully the cab get set on the chassis tomorrow. A wandering eye would spy the chassis in the background covered by a tarp...complete with poly bushing in the leaf eyes and the shocks upper and lower...got to get rid of that 4.55 rear axle though...lol

 1 point
 -
Paul that's why this shotgun was made. Right handed left eye dominant. I bought it for a friend. Should arrive from England in a month or two.

 1 point
 -
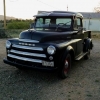
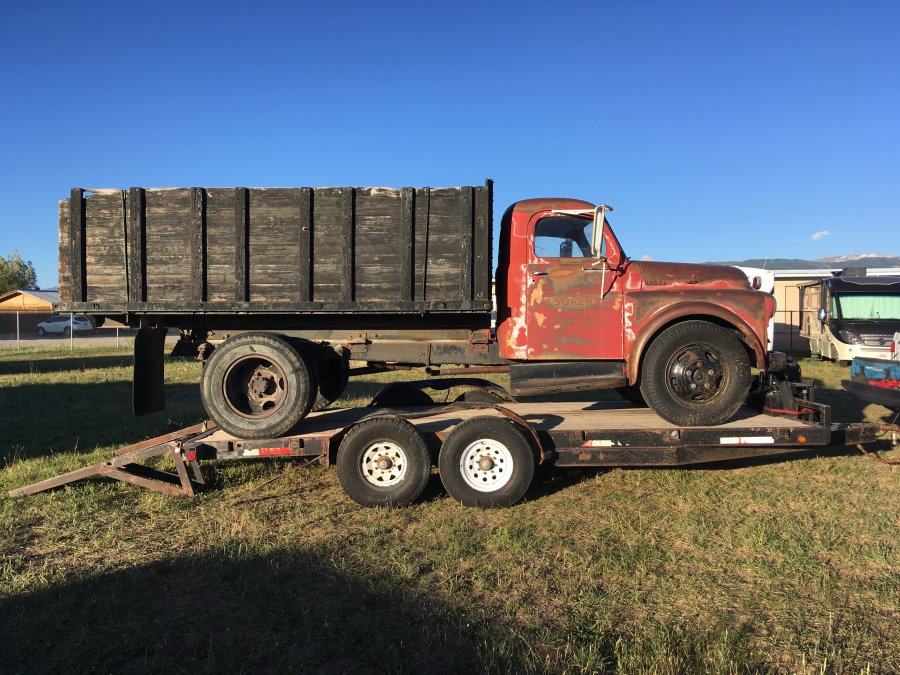
Finally picked up my B-1-J from the storage lot its been sitting in for a year and a half. Replaced the plugs and it runs so much smoother. Need to rebuild the carb but no auto parts stores have a kit for it. Engine is a 251 from a 62' Powerwagon and is mated to the original 5 speed. It was an old grain truck with a dump bed in southern Idaho. Now onto the brakes but I gotta find a heavier duty jack for this large hunk of metal!
 1 point
 -
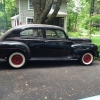
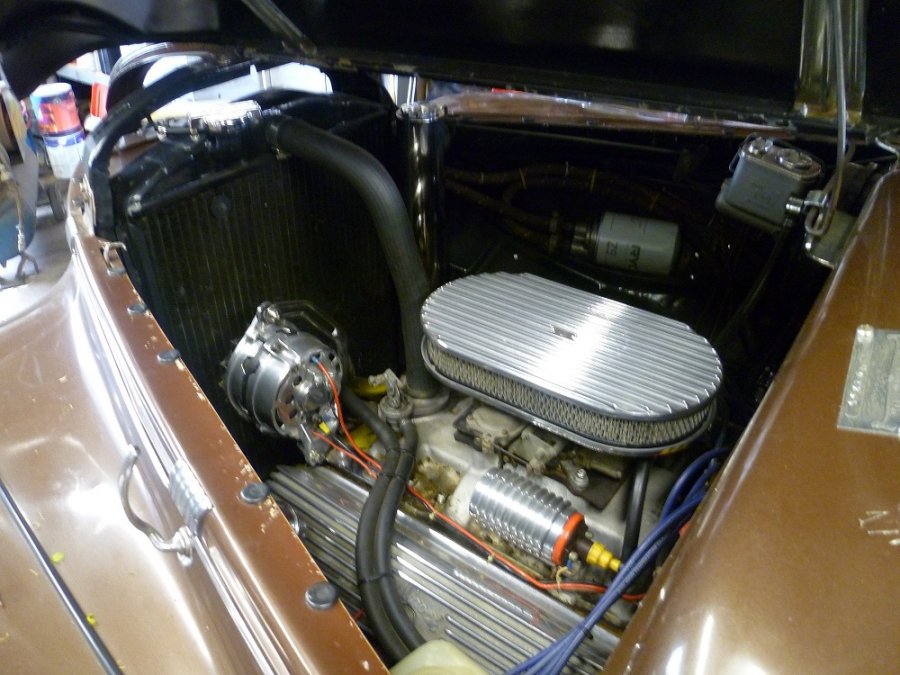
My 39 Ply is work in process, still have to paint and install the correct center horn button, steering wheel was recast. Have to put the carpet in. Was working under the hood, haven't had an opportunity to put the side panels back on. The tires are radial, 215/70/R16 from Diamond Tire, wheels are from Summit - 16 in X 6 in. , chrome outer with painted center, clips were welded on to hold the stock hubcaps. Tires are almost the same diameter as the 600X16, however wider. From the side view not much difference however from the front and back one can see the difference in width, handles and stops much better with these tires.

 1 point
 -
I think that was over with by 1950 but a good calllout for p15 owners!1 point
-
I watched a few You Tube videos. Bought a double flare tool. I practiced a few times. Wrecked a few flares. Got it right and now build all my own lines. I am confident enough now to put all new fuel or brake lines on my vehicles. The bending and shaping can seem tricky but it’s not. With a little practice you’ll have developed the skill and eye to get it right. A couple of different types bending tools is helpful. Rewarding too , when you get it right.1 point
-
After you kill the rust you need to dry it out and then seal it with an Epoxy primer. Its high in resin and designed to keep moisture out. Its technically not sandable because of its tough exterior. You are suppose to spray a sandable primer over the Epoxy primer. A good Urethane primer for shaping, then an Epoxy as a sealer (thinned) over that . In the old days, you'd use an etching primer (acid based) but that's not used much anymore. I only use etching primers in areas I can't sand very well (the inside trunks and doors etc) Its acid based which is why most don't use it anymore for complete jobs. Etching primers are thin, and didn't always hold the oxygen out like Epoxy's do now. Epoxy primers come in black......some guys stop right there and call it done, until it needs more black. 48D1 point
-
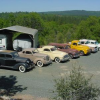
just updating some recent visits I was able to make this year... (not including the BBQ in Clements) new member "Tom San" and myself (local to me new member) made it to BTT50's this year (L to R) Myself, GGdad, Merle, "Young Ed" and Joe and swung by on the way home and met "9' box" what a great year!

 1 point
 -
Well there are a few "jobs" on these old trucks that should earn us a "merit badge" when successfully completed. Removing a badly corroded WDT is one and replacing the corner window gaskets by yourself is another. You haven't lived until you've tackled these. Jeff1 point
-
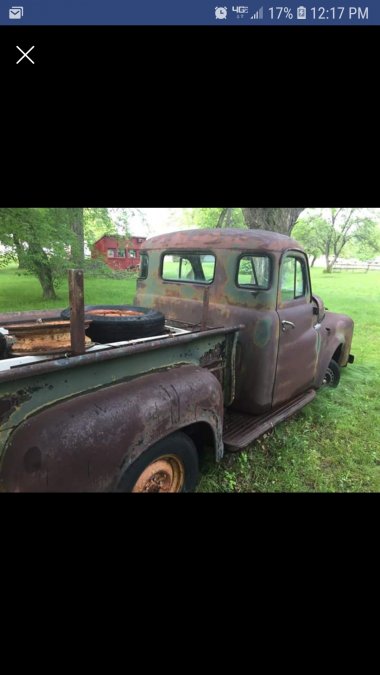
Guys this is what I'm going to be working with. But I guess you have to start somewhere. I will be the official second owner of this beauty. And have the whole history on this truck. It's going to be a long road but I'm in for the long haul. I can't wait to get it back up and running and start to drive it. Thanks for all the help so far and hope that I might be able to call on you all for some help.

 1 point
 -
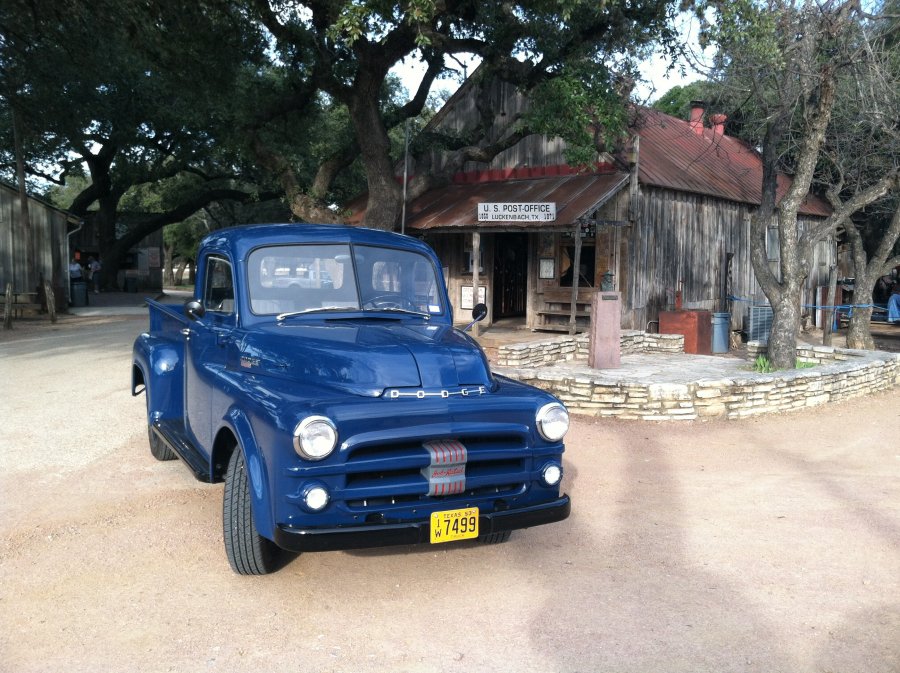
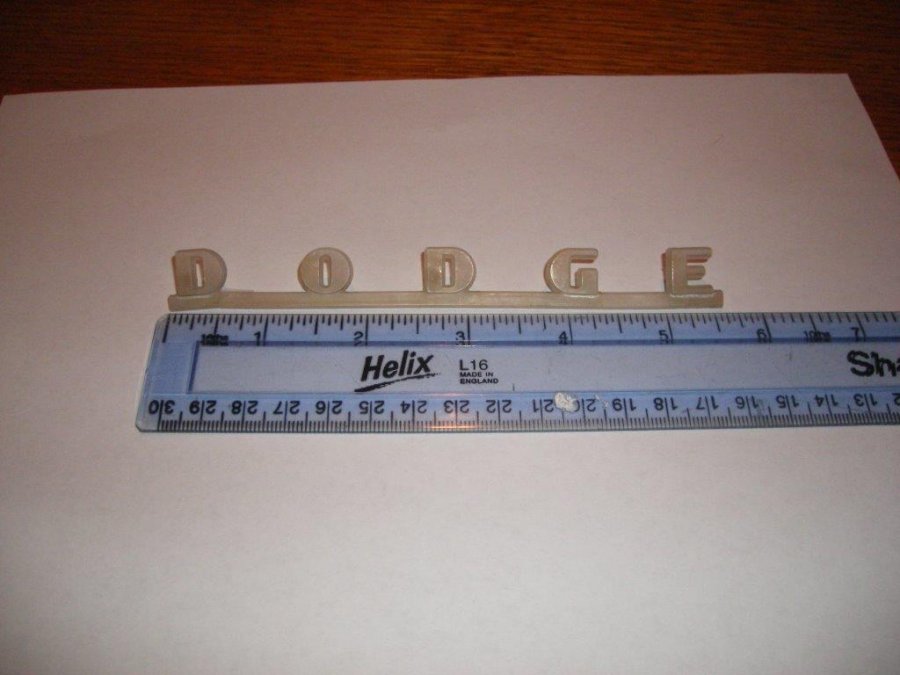
Michael - I have restored a B4B, long wheel base with Fluid Drive. Take LOTS of photos and expect frustration on a regular basis. When you rewire it, make the wires behind the dash longer than original - it will make your life MUCH easier when you put it back together or have to change a light bulb (I wish someone had warned me to do that). If you get stuck on something, I might have a photo that will help. Oh, and if you have the one year only plastic Dodge emblem from the dash (Brent's photo), be darn careful with it and not club-fisted like me. The little metal clips on the mounting prongs work great for breaking off the prongs, and clumsy fingers are great for breaking the script. On top of that, it isn't really made of plastic, its made from pure Unobtanium. Brent's photo is the one from my truck that I kinda broke twice, glued back together, painted the back white and got mounted in my truck. Photo is my truck at Luckenbach, TX. Good luck working on your "Time Machine." Bob
 1 point
 -
difference is 1/4 ton (LOL, just kidding!) suspension and wheel base is the biggies. yes, my B4D (one ton) sheet metal is the same as my B3B (1/2 ton) this is a great "resource" http://dodgepilothouseclub.org/know/ph_parts/pilothouse.htm if you haven't seen it yet1 point
-
Usually the 3/4 and 1 ton's have longer beds so the running boards are longer too.1 point
-
hey welcome Michael, if your doing a "restoration" be careful when you get to removing the emblems.... especially that dash "dodge" script! oh and please don't put the front clip "dodge" script from the 52 back on the 53..... that's just wrong!
 1 point
 -
Here is the vent window seal update. i returned my Steele seals and ordered the seals from roberts. I received them today and put them in. A perfect fit turns out the ones from Steele are about an inch too long. The Steele seals were a very high quality nice seal but just did not fit right. I strongly recommend the seals from Roberts if anyone is looking in the future.1 point
-
Stock wheels painted Rio Maroon, Coker 3 1/4" whites, Hollywood Flipper covers.1 point
-
On occasion I have been called a loose nut.1 point
-
Here you go. The wheel I get to play with the most. I have liked chrome wheels all my life.1 point