Leaderboard


Popular Content
Showing content with the highest reputation on 02/07/2019 in all areas
-
I also like that, as Frank has indicated, nice & understated, could almost imagine a mopar part # on it.............andyd2 points
-
on my 39 Desoto both tierod ends bolt from the top and are not staggered like on your car. It just looks very weird to see them that way. Rich Hartung Desoto1939@aol.com1 point
-
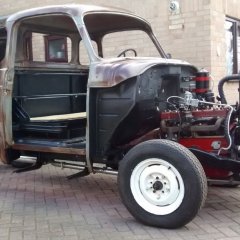
Cheers Lads, I like your replies, I have knocked through the rear of the garage into the shed so there is more room and the truck fits...just. Picture shows the buck being built and the chassis moved onto the driveway so I can get to assemble it. The rear wheels have to be removed and the axle put on skids so the roof of the cab clears the garage door....Happy days...Planning is the word. Dave
 1 point
 -
No, installation does not involve heat. Tin (I actually use 30%Sn 70%Pb electric solder) is soft and pliable, so it fills all micro imperfections at the plug/block interface when plug is expanded with a drift.1 point
-
does this help? 20190207120653.pdf1 point
-
The tapered TR studs fit into the pitman arm only one way and you would immediately see that.1 point
-
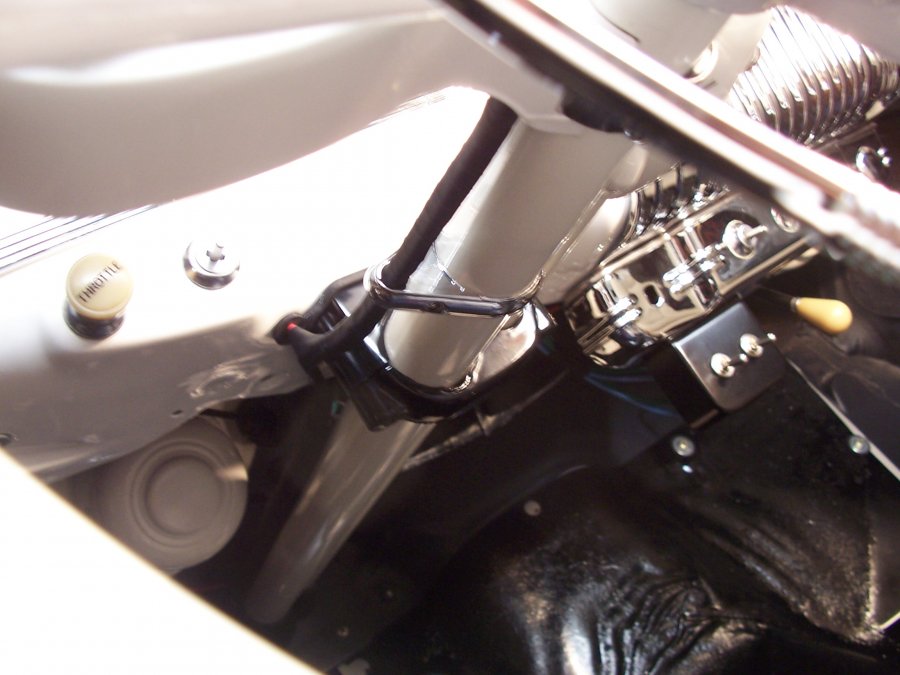
Just wanted to share a lap here on the forum with my fellow P15 members. I'm pretty much a one way valve here on the forum (always asking for help), but maybe this small thing will allow someone to have a little fun. When I added my turn signal to the column, the 6-8" of wire running down the side of the column kept catching my eye. I kept trying to figure out a way to support the wire, or even to hide it would have been the best choice. Found this bracket on ebay, it's listed as Arlen Ness Tech Chrome Radius Clutch Cable Brkt 1 1/2" billet..it cost me $9.95 delivered to my door. The bracket is made out of aluminum that's been chrome plated. My painted steering column OD measured right at 1.510 thousands. The ID on the clamp I received wasn't exactly a perfect circle. It measured from around 1.470 " - 1.495 ". So the manufacture is counting on the bracket to bolt down with a firm interference fit. (which would make sense as this is mfg'd to go on a motorcycle frame tube). Anyhoo - with the base metal being aluminum, I thought what the heck and I took a round bastard file and filed away at the inside I.D. of the clamp to enlarge the opening. Took me about three attempts to finally get the opening large enough to mount to my column. The bastard file would remove the aluminum fairly quickly, then I'd follow up with a wheel cylinder hone to smooth everything out. I didn't want to scar my paint on the column, every time I trail fitted the bracket to see if it was large enough, I would tape the hole opening of the brkt with cloroplast cloth wire harness friction tape. I finally ended up removing around .040 thousands of aluminum from the ID of the brkt hole, but with the cloth tape in place (cut to where you can't see it), I was able to slip the brkt onto the column, tighten the single mounting screw that holds the 2 sections of the brkt together, and the brkt stayed nice and snug on the column. Ten I was able to remove the brkt and there was no evidence of marking, etc. in the paint... Obviously I went through the chrome plating, when opening up the hole in the brkt, and had this been steel - I would not have even tried it. But being aluminum, well see if over time any issues of corrosion or flaking away of the chrome takes place. Again, being aluminum base stock, I would think it could just be polished out if that did happen, or if a person wanted to get it re-chromed, etc.. I've attached three pics. There are a few different styles of these on ebay. one was a bit more of the squared off billet chrome shape, one was black, and the other (like I purchased) has the rounded off smooth shoulders which I thought looked more like a part that might have come on the car. The small wire support hole opening is 3/8". I ran 14 awg wires down my column and even with my wires wrapped with a single overlap wrap, I have a small bit of play, so none of the wires are being pinched or in a bind....if you ran 16awg wire like the manual shows, you might even have enough room for some plastic tubing, which might look pretty clean and trick. Anyway - this made for a fun couple of hours. Enjoy !! Steve

 1 point
 -
It's a copper expanding plug and they do work well seen in these two pictures... also showing right and wrong plugs for the flatheads ...1 point
-
Very nice, very understated.1 point
-
I missed the part about the gasket. If it’s leaking between the diff housing and the axle housing then you will need to pull out the diff. Are there gaskets available for that? I usually use RTV or Permetex Anerobic Gasket Maker, which seals and hardens well for that type of mating surfaces. For that you will need to pull the brake drums, disconnect the brake lines, and remove the brake assemblies. Pay attention to the shims behind the brake backing plates. Then you can pull out the axle shafts. You will need pullers for the brake drums and the axle shafts. Once the axle shafts are out you can then remove the diff assembly. The axle breather is incorporated into the bolt that holds the brake line splitter Tee to the top of the axle tube to the left of the diff.1 point
-
I may or may not be able to confirm that possibly I might have potential airfare purchased...1 point
-
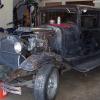
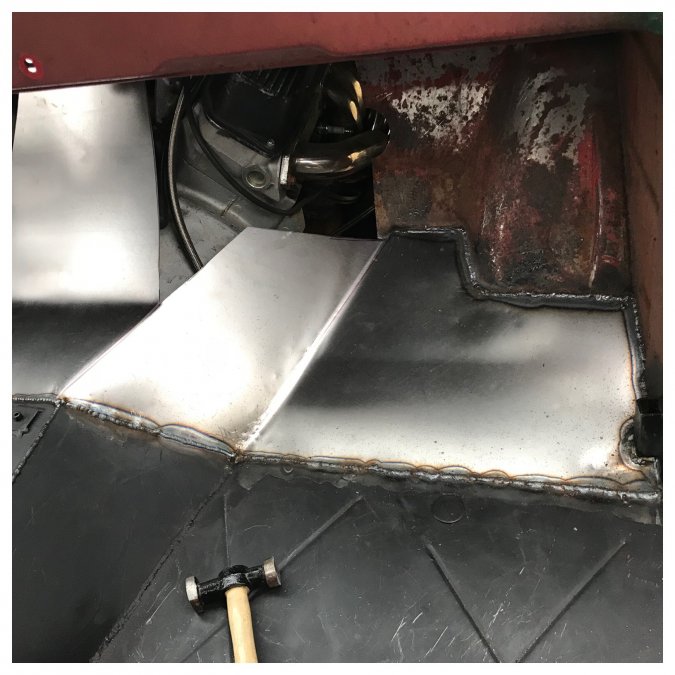
I got the passenger floor and transmission hump done today. The hump swoops up into the central stub of firewall that I left which holds the front of the cowl vent. I was able to do all that with one big piece but the complexity of the remaining firewall was messing with me because of the floppyness of the poster board. I wasn’t confident it would work out so I decided to get the first piece of steel installed then start over on paper templates. Sure would be nice to have a real brake to fold this all up but clamped steel works ok. I also drilled and tapped my seat pedestal and seat frame for four new bolts so when the time comes I can just bolt that in. I still have to extend the tabs on the top of the seat frame a little- my fresh stuffed upholstery makes the seat back ride a touch higher than stock. My rubber floor is here and has been sitting out to remove its curl for a couple days. Fitting it will be interesting since it has vertical ribs and the cab narrows toward the front. I think it will look best parallel to the truck’s center line even though the ribs will not follow the door openings.
 1 point
 -
I know you're speaking of steel hammers, and you're correct. But, my favorite tools for this are a small ball peen held on the plug and struck with a 16oz brass flat face. Using a hammer keeps my fingers out of harms way, the brass won't damage the steel peen and there is no rebound like steel on steel. Only good on out of the chassis work for the most part though, most are unreachable when in the car except with a longer drift. For those I've got brass drifts and a steel hammer.1 point
-
Two hammers should never be used to strike each other, unless of course your goal is to introduce some shrapnel into yours or someone near you body.1 point
-
In order to pull the whole diff assembly you first would need to remove the axle shafts. However, none of that is necessary to replace the pinion shaft seal. Since you already have the driveshaft off, you now need to remove the input flange on the diff. Remove the nut and slide the drive flange off the shaft. You may need to use a puller. You can then use your seal remover of choice to remove the old seal. Install a new seal and reassemble. You may also want to inspect the seal surface on the drive flange. You may need to put a Speedi-Sleeve on it. Upon reassembly you'll need to apply a certain amount of torque on the pinion nut. I don't have that spec handy at the moment. While you're at it, I would also advice that you check/clean the axle breather. If the axle can't breath properly it can build up pressure that will cause seal leakage.1 point
-
I use brass plugs and use a very thin smear of JB as a sealer and retainer especially on the old Hemi's, Straight eights and MolyBlock sixes. They all have a very shallow core plug recess and the plugs can blow out at high RPM on the V-8's. I've seen it and this program stops that. Not that it's much of a flat head issue as the recess is deeper on the sixes. Steel plugs can and will rust out. Absolutely no brass issue as for corrosion compatibility either. They must be pounded in carefully with a 3/" to 1" diameter flat heavy drift to seal/retain them properly. Just my way of doing many of them over the years for myself and customers..1 point
-
Could be worse - you could have FoMoCo!?1 point
-
I sprayed a couple of coats on the firewall, dash and door pillars.1 point
-
I have several parts trucks that have parts from so many different years...its a chore to figure out what was really the "base" year of said truck. My favorite I hauled in? It had a 53 bed and fenders, a 48/49 frame, a 50 cab and a 53 hood....I guess I should mention it also had late 70's era Camaro seats...lol. 48D1 point
-
I got a wild hair to kill 2 birds with one stone as I needed to visit the local locksmith, so I figured I'd get a key cut for the Spring Special since it didn't have one supplied by the previous owner. I carefully removed the ignition switch from the dash, and mr. butterfingers dropped it on the floorboards...that's when I noticed the cylinder had fallen out of the switch. Upon further examination, it appears that somebody took the pins out of the cylinder, and all ya needed to operate the switch was a used corn dog stick1 point
-
Looks like a 52 to me.1 point
-
1 point
-
What do the rear fenders, dash emblem, and the Dodge script on the front of the truck look like? 52 and 53 are very different.1 point
-
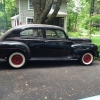
I know I posted this on the forums somewhere previously, but here it is again. I painted this on canvas in 2017. My B-1-D is looking quite cold and a bit lonely sitting there in that shed. At the time I painted this I knew that someday I'd own a Pilot House truck. ? When I painted this my thoughts were the truck is fully tuned and ready to go, and the owner (me) is in the shed making sure the tire chains are secure before firing it up. ? Hope you guys like it!1 point
-
I tin plug's edge using soldering iron. Tin layer makes tight seal upon installation.0 points