Leaderboard


Popular Content
Showing content with the highest reputation on 11/12/2018 in all areas
-
I deleted a recent thread regarding the quality of parts from one of the larger mopar specific parts suppliers. This was done for several reasons after being contacted directly by the vendor. First, several statements were made about the vendor by members who had never done any business with them. So they were expressing opinions not based on any first hand knowledge of the subject. This is not acceptable. Second, the original poster assumed the vendor would not be willing to work with him in resolving the issue. These types of situations are often resolved with a single phone call even after a lengthy time period. The mopar community and it's supporting vendors are a small group and it's to the benefit of the vendor to have the opportunity to try and fix the issue. As others noted in the thread we don't have a lot of alternative vendors like the Chevy and Ford guys. Giving vendors constructive feedback on needed product improvements will often result in better products. If not your other choice is heading to the boneyard and getting lucky. So just a couple guidelines before going off on a rant: If you have an issue with a vendor, contact them directly to see if you can come to an agreeable resolution. If you don't have first hand knowledge, don't pile on with opinions based on stuff "you heard". Realize your unsupported claims/comments could put you in a position for legal action for libel. (It also potentially exposes me as site owner) Lastly, when a vendor does the right thing, share that experience also. I learned a long time ago having an issue with a customer at some point in time is just doing business. It's how those differences are resolved that determines how the vendor should be judged.3 points
-
Thanks to all our Veterans. USAF 1969-19732 points
-
I 100% agree that thread did go overboard on some posts and we do have to give the vendor a chance to fix a problem with product before a rant, but if it’s ok I would like to say it’s also good business for the forum itself to educate members on what products to avoid when doing a build. After my own parts issues I try to spend a lot more time seeking out information on either the vendor or if possible exact parts I’m after from said vendor and nothing is better then others first hand experience, and this site is a wealth of information. I guess what I’m hoping is we just don’t lose the freedom to protect others from parts we should just avoid, it’s a big part of what the community should be about.2 points
-
I know its been done...Im trying to keep the original look of the P15 body but update everything so it can be a daily driver capable of the speeds and distances I want to go. I bought a running 06 challenger and I want to use everything I can do give the vehicle reliablity. Anyone have any ideas or maybe can point me in right direction besides backwards or reprimanding me??1 point
-
Again, thanks for all the input over the months. Quite helpful. What I need to learn now is what's missing in my heater assembly. If anyone could share pictures of what goes on under the hood from the fan motor to the firewall I can see what I can do to get ready for winter. As a follow up to all the things I have addressed since I last shared with you; I replaced the speedometer cable assembly as the old cable bit the big one and died in the housing. A crazy noise that was the last squeals of the cable are gone now. The windshield wipers work, so new blades are on the way. Changed the motor oil again, as soon as it got ugly and the fresh oil has the motor sounding sweeter, and the smoking is less with each tank of gas (350 miles now since it was dead on the trailer when it arrived in August from someone's barn, to mine). The fresh oil in the transmission removed yet another bothersome noise, and the shifting improved. Greasing the lube points eliminated yet another untraceable noise. The car never locked up the drive line again, and I NEVER touched the kick down switch on the shifting lever (which my wife is quite happy about). All in all, from so noisy and so smoky and sluggish to a sweet start and drive, the car has went from a nervous run to town to a cozy couch on the road. Thanks again, Russ1 point
-
218 ? 1953 Plymouth correct?1 point
-
Does this help?1 point
-
I just had mine rebuilt at a local generator shop. Upgraded to newer parts and technology. Spins like a gaulded cat1 point
-
My sister sent this one to me that I had forgotten all about. I sent it to her in '67 or '68. It surely beat walking through the mud. You have to remember to take your boot off the rocket tube before it is used. It only took once.
 1 point
 -
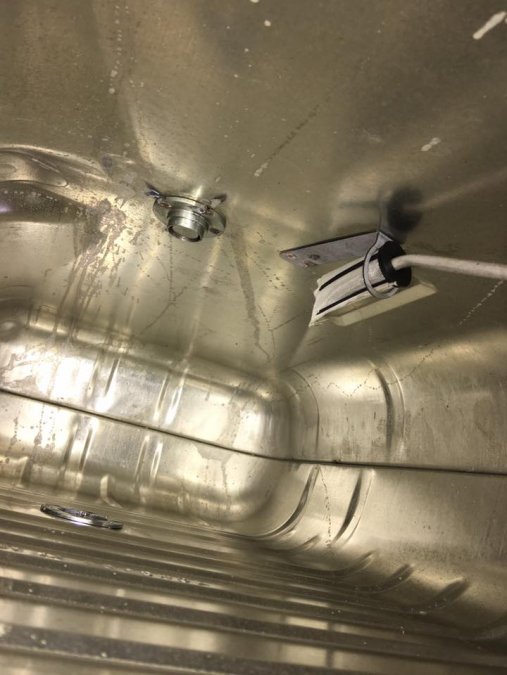
ive bought several new old style tanks from Vintage American Parts (Michael Warshaw) in NY. He advertises on eBay also. The tanks are good quality, well made, and pretty faithful to the original design. Updating this response with picture I had taken at the time I replaced the tank. They show side by side comparison and a (upside down) shot of the gas pick-up and drain internal to the new tank.
 1 point
 -
"The battle, sir, is not to the strong alone; it is to the vigilant, the active, the brave." -Patrick Henry Peace. USAF 1970-19741 point
-
Thank you! I guess if the deck seemed like it needed a cut I would have, but I didn’t relish the idea of removing 21 head studs... ?1 point
-
This was sold online today. I didn’t exactly know what it was worth, but would have really liked to have it. It sold for $3950, I bid it up to $3850. The owner said that it did run.
 1 point
 -
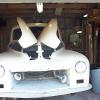
Boy am I disappointed, you guys don’t know a manual flux capacitor when you see one?1 point
-
just an FYI I've never really seen them not have a working code. That code will stop on 1-6 but there seems to always be one that works. I just google 5% off rockauto and pick a code. Easier than digging though my emails!1 point
-
This might or might not help.1 point
-
Why not drill the block to match the head. Use the proper gaskets as templates for the holes.1 point
-
A repair at the thermo housing mount shouldn’t be an issue if the repair is right. Read about mine here:1 point
-
Cheers for the ideas everyone, Im not keen on the Jag rear end it will mean too much additional work on the chassis to get cert, ill likely try a holden rear end however the jeep might be an option too but not as available over here, probably still run leafs as im going to use this as a work truck...... And as for the clothing options thats pretty standard attire in NZ !!!! Bloody hot in my workshop haha. (the proper stuff goes on for the big welds and yes have a few burns here and there)1 point
-
On my Oz assembled 1940 Dodge the dash is held to the cowl brace by about 5 or 6 screws that go along the edge below where the rubber fits and theres a 1/4 or 5/16th bolt on either side below the dash which screws into the side of the cowl.........these top screws and the side bolts are nothing special at least on my car, after the dash is installed/ bolted in and the inside windscreen garnish molding is installed the molding is held onto the dash and the side and above the screens by countersunk round head screws, originally I think they were straight slotted screws, about 1 & 1/4 " long , I think 10 gauge in size, however my original front screen garnish molding was very rusty and I replaced it with one from a 1947 Oldsmobile sedan suitably chopped, narrowed & chromed to fit and I use the 1 & 1/4" long 10 gauge screws but stainless Phillips headed countersunk round head screws......the garnish molding covers the area where the dashboard screws are and I know that originally there was a cloth anti squeek strip that went between the dash and this windscreen molding which was similar to that used as an antisqueek on the front and rear fenders and it had a 1/8th-3/16th round edge that protruded along the garnish molding/dash seam................this cloth strip would have held moisture and helped to rust the dash and garnish molding so I never replaced it and its still fine 40 yrs later.............does any of this help?.........lol................BTW regards from Oz, Andy Douglas
 1 point
 -
I thought I have read from some past forum posts that the non- bypass port blocks could be used with a non-bypass head with the correct head gasket (I think it was the early non bypass gasket but could be the opposite!). Just need to use the water pump with the correct backing plate and the block non-bypass thermostat housing with the by-pass on it. ? Maybe some one with that experience will join in with Correct info.. DJ1 point
-
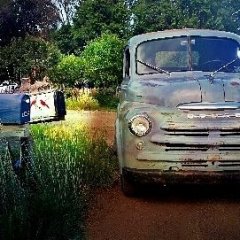
She's a beauty. The truck looks nice too.1 point
-
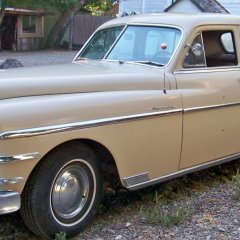
I got pretty lucky with mine. It's a 52 B3JM that I paid $2,000 for a year ago, and it was 20 minutes from my house. Not a single part is missing. It has it's some rust, but it's definitely restorable. Can't wait to start this project! I'm also a green tractor owner! I have a 1953 50.
 1 point
 -
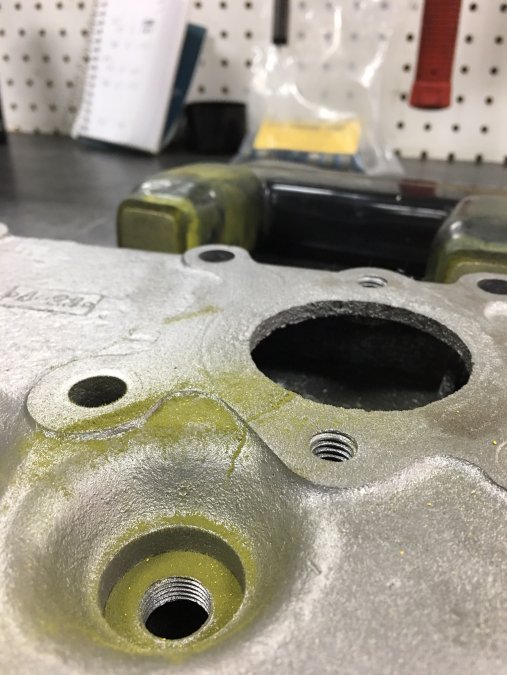
Brian (the shop owner) and I discussed a clean up head cut once the bottom end was complete, so we located my cylinder head to have a look at it. His sharp eye caught what looked like a crack under the water neck. Figures... He pulled out his magnaflux equipment, and sure enough there's a crack extending down into the #1 plug hole. Being water jacket it should'n't be a problem to have it welded up. That should get done this week and then we can cut the head for a nice gasket seal surface.
 1 point
 -
Here is a example of one of the cracks and the bed hold down bolt hole...the crack is NOT from shipping thanks Guys
 0 points