Leaderboard


Popular Content
Showing content with the highest reputation on 01/12/2018 in all areas
-
It's fixed to the pedal arm, not the floor. Learned the hard way.2 points
-
1 point
-
Your choice. Do your own thing -you own it and will drive it. I t is your time and expense so get 'er done! DJ1 point
-
I got my pedal draft seals from Andy Bernbaum. They are of a very high quality. After removing the pedal pad from my brake arm I was able to stretch the seal enough to get past the threaded portion. It requires some effort but it's not too bad. Running the seal under some hot water prior to the installation helped a bit. Afterward, I was able to maneuver the seal past the floorboard to its intended location at the base of the pedal arm. After observing it in operation from down under, I am quite surprised at how effective it appears to be. It is firmly gripped in position on the arm, and yet is pliable enough to form a surprisingly good seal on the floorboard. Two thumbs up. Thanks again to all for the input and observations.1 point
-
1 point
-
My guess, and that’s all it is, is that the frame for the seat bottom from a 4-door sedan , while probably having similar dimensions, may not have the provisions for the pivoting of the split-back of the club coupe’s seat. If you could get a club-coupe seat-bottom frame to use as a sample, you could probably alter the sedan seat-bottom to accommodate the coupe seat-backs. Just a tho’t . . . .1 point
-
maybe the prototype to the Whack-a-Mole game...where the heck is PETA when you need them1 point
-
No trimming is required or advised, when the pan is tightened everything slides into place creating a leak free seal. The end pieces float are left long to allow them to slide and fit tightly into the radius of the oil pan as it tightened down. If the end pieces are cut they won’t wedge themselves and seal properly and most likely leak oil.1 point
-
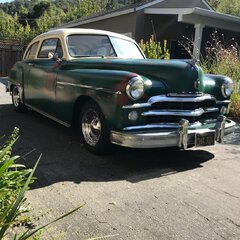
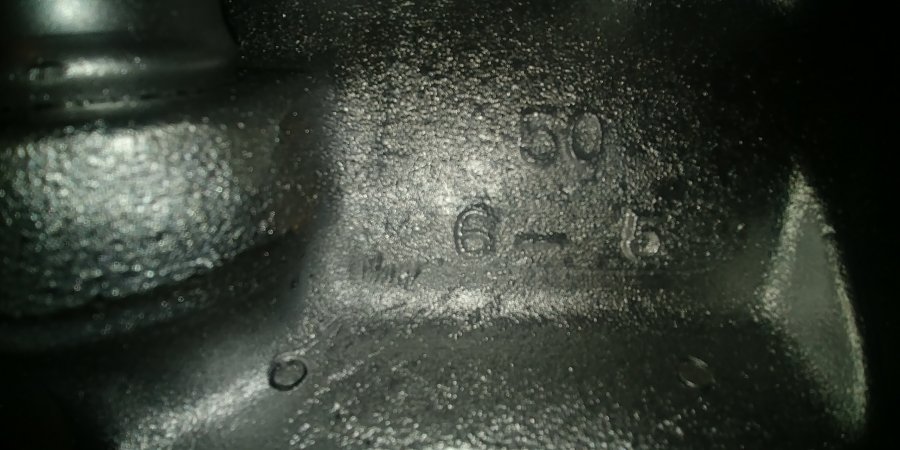
Howdy Shull - The fact that there is no stamped number of the block likely means at some point in time the block was cracked or could not be bored out any further and someone bought a replacement block. The casting number on the block and the head actually do not really provide you the information one might hope it does. For the year of the block, on the oil filter side of the block, right close to the oil pan and close to the oil filler there will be the date of casting. It was used for internal purposes as blocks became generational items that often were used over several years and several engine sizes. The last generational change for the 25 1/2" Canadian engine was october 1951.At that point the block was carved internally to allow for the 4 3/4" stroke motor for the 265 ci motor, however that block was also used for the 238 and 250 ci motors. Same block same bore for those 3 just different stroke. After 1955 the year was actually dropped as there was no further block generation. So if your block has a month and day but no year code is was cast after Jan 1955. So your back to the strokes using the method BobK outlined will tell you if it happened to be a 238 (4 1/4" stroke) 250 ( 4 1/2" stroke) and 265 ( 4 3/4" stroke) although you could also have a 228 ci motor or several other cubic inches with a spitfire head on it. As well while the 238, 250 and 265 are 3 7/16" bore stock you would have to remove the head to know for sure the cubic inch. I would however do as BobK suggested as a start. Pull the brass plug and measure the stroke. That really narrows things down quickly. Tim
 1 point
 -
This count???? Nearly drown several times. Doors leak but that also lets the water out! One doesn't sign up for this but it has never intimated me from enjoying the moment. Ya get hero points too!
 1 point
 -
Hey Guys. Thanks for the comeback. I can't seem to find the "Wichita Trimming" site. Keep getting "Tree Service" sites. Gotta go to Lowes today, might spend a little extra time looking around. 12/07/1941 A date which will live in infamy. (Don't forget to "Thank a Vet" tomorrow) (On this day, in an early-morning sneak attack, Japanese warplanes bomb the U.S. naval base at Oahu Island’s Pearl Harbor—and the United States enters World War II.)
 1 point
 -
Hey Senior Member with too much spare time on your hands! Have not looked at "the ebay" but think I did find my hood bumpers on a link on the forum. Trying to get a hold of "Roberts Motor Parts." They have them listed.1 point
-
As an owner of a B1 truck with an original 4 speed crash box (aka non syncro tranny with compound low) one story you hear is you can shift without using the clutch. Having learned to double clutch to avoid the "grind them till you find them" syndrome of shifting I have to say I was always intrigued by the myth of clutchless shifting. For our owners who always lived in the world of fully synchronized transmissions, double clutching is the technique used to shift a transmissions with "straight cut gears' or no synchronizers. Internally the transmission is pretty simple and very reliable in service. To double clutch you use the clutch normally to get rolling and when you are ready to to shift your depress and release the clutch once to take it out one gear and a second time to go into another the next gear. The process basically slows down the shift so the gear speeds match and allow them to slide into the next gear. Downshifting is similar except you have to remember to bring up the engine revs as you go into the lower gear. But what about clutchless shifts? Well, as professional OTR drivers know it is not a myth but a useful technique to drive your truck with less wear and tear on the clutch. Success is all about getting the engine speed right and feeling the gears as you slide them in the gearbox. Again use the clutch normally to get rolling. As you near the shift point lift off the gas slightly and slide the shifter into the gate for the next gear. As the speeds match the shift will smoothly drop into the next gear with no grinding and no clutch needed! Don't be frustrated if the first few times you miss and grind the gears. With a little practice you will be able to tell with engine speed and feeling it in the shift lever when it is time to shift. Downshifting is also possible but requires a little more finesse with engine speed and shift lever. Remember since your are going down in gears you need to raise engine rpm to match the the gear when you downshift. So instead of a slight lift off on the throttle you need to give it a little bump up. Again with the gear speed and engine speed match you can fell it in the gearshift lever as it will easily slide into gear without a grind. And what about the compound low (AKA, granny gear)? It's function is to help you get moving when you have a big load on board. A while back I had half a yard of sand loaded in the bed. When I started to pull out of the loading area in first it was immediately evident I would have to slip the clutch quite a bit to get rolling. Dropping into compound low we just pulled out like a normal start, just slower. Once we got past the the initial start up resistance from a dead stop it was easy to drive. Have any of you mastered the art of clutchless shifts?1 point
-
As far as the building goes, I'll leave that to others. I have not built one of those buildings. But........when it comes to electrical, I'd go with at least 110 volt split up on two or more 20amp circuits in the garage. Also, if you already have a contractor doing the work, it's not that much more to run a 220 volt line at the same time. You may not need the 220 circuit now, but if you decide to run a heater or some tool in the future, it will come in handy. A 110/115 heater will not heat a garage, you'll need that 220/240 line. You are already retired. But......whatever money you draw out of your 401 will count as income on your taxes. Depending on your tax bracket and financial folio you could end up paying around 40 to 45% in taxes on what you draw out. In short, if you took $10,000, you'd have to pay uncle Sam roughly $4,000 or more in income tax. Not only that, but if you took early retirement and are under your full retirement age, you may even have to pay back part of your monthly social security check to the IRS come tax time. So.........taking large sums out all at once from a 401 can cost you big time. May be best to take out a loan and pay the interest on it. So.....that part is hard for any of us to answer. It's best to talk with your accountant, or your bank representative. They are better equipped to answer that question since they know your financial situation.1 point
-
I may be in the minority on this one. But.........it's what I got. Also, they do show it on Steele's website. So.......must be some others with me in the minority somewhere. Otherwise they would not stock them.1 point
-
I'm not so sure you need a nut behind the dash on the knobs. Mine does not have them. Just the ones that go on the outside of the dash. The radio is actually held in place by a bracket under the dash on the back side near the firewall. As for alignment that is done by the radio face. Would be impossible to get it crooked. All my radio has is the nuts that tighten against the front side of the dash, a spacer cover over that, then the knobs. He's a shot I got from a sight on the Pilot House site that shows the 802 radio. Same radio is used in the trucks for those years in question as are in our P15's. There's also a lot of other good 802 radio facts (brochure) on this link. http://dodgepilothouseclub.org/know/802/imgcol/contact_1.htm1 point
-
Robert, All I know is that I was told to buy the one piece for the center bar when I called to order it. That part was leaking a couple of years ago on my coupe. They sold me just the center section. I have the stainless trim. When I received it, it was too long, so I called them back to question them again. Got the same answer as before, with the added comment that they were made that way for different models and needed trimming off. On the back side (part facing into the car) the holes are perforated for the screw holes that hold the two center bars together, and the were spaced exactly where they needed to be. When I took the center bar off my coupe, the one on it was also a separate piece. So........what was on my coupe was also a two piece gasket. In fact, once I removed the center bar to replace the gasket, I noticed it was just leaking around the screws that hold the two together. So........to expedite the job, I simply added some black gasket sealer around the holes and put the center bar back on, and never took the rubber out. That plus, was afraid I'd break the windshield getting it out. So, my original two piece gasket is still there. The new one is still in the plastic wrapper it came in, since I stopped the leak. So, based on my experience the gaskets were two piece too. At least mine was/is.1 point
-
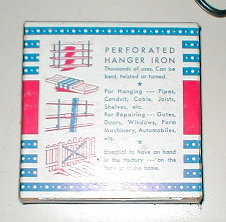
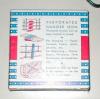
AKA: Hanger Iron and Universal Strapping. Can be used for multiple tasks as shown by Joe. I've used it for many things other than pipe hanger too. This box is one I haven't opened yet. Says it's 10 feet long. Can make lots of tank straps with that much.
 1 point
 -
Joe, to be honest, if I had thought of it I probably would have made straps with the same stuff you did. I have two full rolls of that on the shelf that's been there since I don't know when. Plus, like I said it's a lot easier to work with that stuff.1 point