Leaderboard

Popular Content
Showing content with the highest reputation on 09/18/2017 in all areas
-
I was over at a friends shop and he was working on this.....
 2 points
 -
Try moving the drivers side bulb to the passenger side for a test. Someone may replaced the plug at the back of the bulb and connected it backwards. You said that you adjusted the light, you may have aimed the bulb down, making the high beam element focus like a low beam. When simply replacing a bulb you should not have to re-aim it.2 points
-
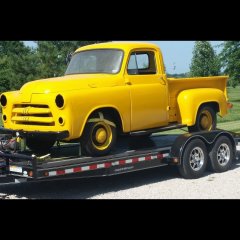
The other day we were driving through Winona, MN (just 35 min from my home) and my son spotted this Pilothouse truck in the alley behind a small car dealer. I swung the car around so we could take a closer look. Not sure if it is for sale or not as the area where it sat had other old cars/trucks there, including 2 pre-war Mopars (one was a Desoto). Don't ask me why I didn't take pics of those as well; I wasn't thinking. The lean-to where the pre-war cars were was attached to the dealership, so all the cars might be his personal stash, not sure. The last time the truck was licensed was 1990. Looked like it had the typical rust and wear and tear, but overall it has potential. I'm gonna try and get back there and find out the story behind it. Can anyone tell me what year it is? My first guess was 1949 but I'm still learning about the grill differences, etc. on these trucks. Also, is that bumper factory? I guess I was excited to see it because you just never see these trucks around here....1 point
-
I had a 1940 Dodge business coupe in my garage, in New Jersey, for over 40 years. I recently shipped it to my son in San Diego. The car has a P23 engine. He was able to get it running but noticed water in the oil. He pulled the head and noticed corrosion around the bolt holes. I have a head from a 40 Dodge engine. Could he use that as a replacement? Would any 218 head work?1 point
-
Hi folks, recently I happened to locate a pile of vintage magazines from the 1940's through 1960's. I rifled through them to try and find any information about Mopar products. I singled out info mostly around the years of my 1953 Windsor, and took them home. I thought I might scan the articles and share them on the internet so others could enjoy them. I am thinking maybe I should go back and get the whole pile of books. There are many. I believe I saw some as far back as the early '40s. It might be fun and interesting for members here. If this is interesting let me know, I'll keep on scanning and consider getting the rest of the magazines. Hopefully the images are readable. I scanned them as jpegs. I am open to other suggestions of how to proceed if anyone has some ideas to improve the format. I will post more Mopar articles as time permits. If anyone wants their own copy, you may be able to right click and save on your computer? Or just contact me and I will email the images directly to you. I'll begin my project with the first article here. The Magazine is Popular Mechanics. Dated May 1953, priced at 35 cents. This month featured an article on "What Owners Say About The Plymouth". Here is the article:1 point
-
Vintage Power Wagons has the part. It is Part # CC602069A for $15 on page 20 of their catalog. Their web site is https://www.vintagepowerwagons.com/, mostly Dodge powerwagon parts but there is some interchange. I got mine from them.1 point
-
I located an article on the 1953 Meadowbrook and Coronet. I will be posting it. As of this writing I only have car reports on 53 and 54 years. If I get a chance to track down the owner of the magazines I will post some info on other years. - K1 point
-
Well pretty clear it was rebuilt by a Chrysler authorized company in Ontario. Pistons bored .030 over, both rods and mains ground .010 undersized and assigned a non chrysler engine number. The .030 bore adds about 7 or 8 cubic inches depending on the stroke. You can measure the stroke by pulling the small plug in the head, over cylinder #6. Insert a piece of wire about 7 inches long, till it contacts the piston, then rotate the engine and measure the stroke. With the stroke measured, you can determine if it is 251 or 265. 4 1/2 = 251, 4 3/4 = 265. I would then try to hook up the starter and do a compression test. If it turns out well, install that puppy! Make sure there is oil in it to do a proper compression test sequence, and either hook up or block the oil pressure gaugelin before turning the engine over with the starter. Also, mind how far you screw the compression gauge adapter in if too far in it can contact the valve, not a good thing.1 point
-
The complete list of town sedan models : Plymouth - 1942 Special DeLuxe : 5,821 Dodge (Export - Plymouth body) - 1942 Special DeLuxe : 55 Dodge - 1941 Luxuryliner Custom : 16,074 - 1942 Custom : 4,047 - 1946-1948 Custom : 27,800 DeSoto - 1941 Custom : 4,362 - 1942 Deluxe : 291 and Custom -:1,084 Chrysler - 1941 Royal : 1,277 - Windsor : 2,704 - Saratoga & New Yorker : 2,326 - Crown Imperial Special : 894 - 1942 Royal : 73 - Windsor : 479 - Saratoga : 46 - New Yorker : 1,648 - 1946-1948 Town & Country Six : 4,049 - Town & Country Eight : 100 Plymouth and the Plymouth-based Dodge export models had their bodies built by Briggs, but Dodge bodies were built by Dodge at their Hamtramck plant and DeSoto / Chrysler bodies were built at Chrysler's Kercheval body plant on East Jefferson Avenue, across the street from the East Jefferson plant. Special / low production bodies were contracted out to various body builders. Chrysler bodies were trucked from the Kercheval plant across the street to the East Jefferson plant while DeSoto bodies were trucked across town to the DeSoto plant on Wyoming Avenue. Chrysler of Canada built their own bodies, but built town sedans only in 1941. The 1941 Town Sedan is a Crown Imperial Special - basically a New Yorker town sedan with fancier upholstery and the Crown Imperial engine - 6.8 :1 compression ratio, aluminum head, 140 bhp. Also note the Crown Imperial wheel covers.1 point
-
Jeez I just bought one in as new unused condition (NOS) for under $23.00. A real one not the new ones being sold.
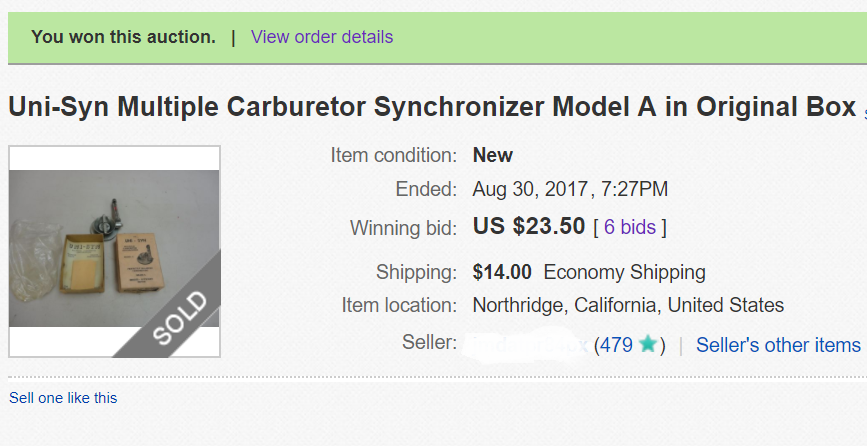 1 point
 -
38?1 point
-
I modified the bracket from one of these kits: http://www.ebay.com/itm/1937-1948-Chevy-Car-Disc-Drum-Power-Brake-Booster-Frame-Mount-Pedal-Assembly-Kit-/141495487626 I had to make a plate to go on my pedal that extends down a little to actuate the cylinder the opposite way. The master cylinder is the one from the kit which is the "corvette style" 1" bore. The front and rear reservoirs are the same size. These seem pretty common, the number on my box was GH3511. The 7" booster is as big as you can go with the space available. Those residual pressure valves seem to work pretty well, too.. The only part of the kit I didn't use (besides the pedal and some chunks of the bracket) was the proportioning valve. I did put in a proportioning valve in the rear circuit (http://www.speedwaymotors.com/Speedway-Purple-Adjustable-Brake-Proportioning-Valve,23498.html), but the one that comes in the kit tends to leak, is hard to get in there and is not adjustable. I used a junction block like this one (http://www.ebay.com/itm/972054ERL-Earls-Performance-3-8-24-Inverted-Flare-On-Branch-Tee-Brake-Adapter-/231932545684?epid=1711820529&hash=item360041ca94:g:uKoAAOSw5HJXKRtY&vxp=mtr ) to tie the front brakes together . One last thing to keep in mind is you'll need to change how your switch works. I used one of these: https://www.chevsofthe40s.com/detail/19787/Brake_Light_Switch.html Which are sold by lots of places, but quality is not always the best. but you could also do it like this https://www.performanceonline.com/Brake-Light-Switch-with-Fitting/ and not change your wiring (much).
.jpg.f83198dd957bb502e7d7290a71a4b43e.jpg) 1 point
1 point -
A small point of clarification: copper-nickel brake lines are approved by the DOT. The older regular copper brake lines are not DOT approved.1 point
-
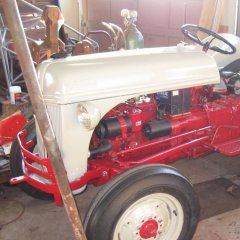
Yes, contact Charlie at olddaddy@rustyhope.com He has a great kit with detailed instructions and parts list. You will also want to figure out a way to put a dual chamber master cylinder in. I did it 2 different ways on 2 different trucks. On the firewall is pretty easy and works well, but is obvious and ugly. Better is to put it under the cab with a bracket: You can use the original pedal if you add a piece. For more pictures see my blog: http://dogwalkfinds.blogspot.com/2017/02/projects-update-02242017.html
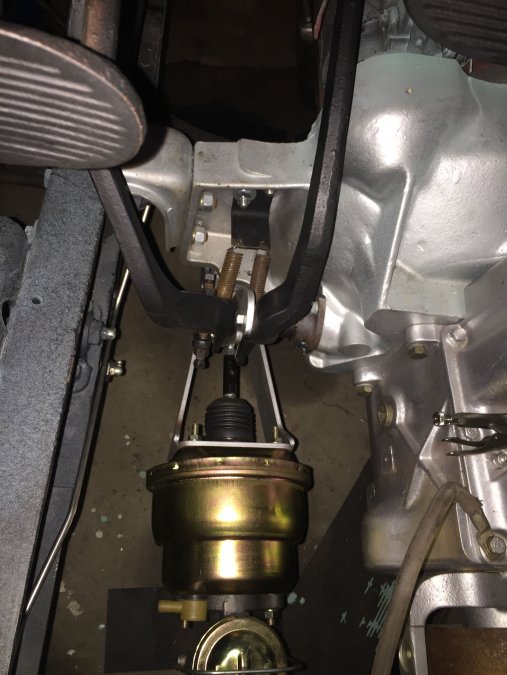 1 point

.thumb.jpg.02780c0baf3122fbde88acb87bec571d.jpg)