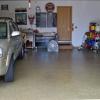
Dennis_MN Posted May 13, 2008 Report Share Posted May 13, 2008 Just finished with my Charlie Akers installation and got the truck back on the road today. Now I love to stop without worrying which front wheel would grab and pull to one side. Now she stops straight and with confindence. I was really impressed with the engineering of this kit from the pieces manufactured by Mr Akers and his selection of parts to complete the job. I was disappointed with the choice of calipers from General Motors but they fit mostly. (I had to grind down some casting imperfections to make them fit into the radius of the plate) My only problem was that following the installation instructions, I mounted the calipers towards the front where they interfered with the shock absorbers. By looking at pictures on the Motor Mount thread, I figured that the 39-47 pickups had the shock mounted in the rear of the front axle while the pilot house had them mounted on the front. I reversed the caliper mount and put them in the back where the brake hose lined up better with the original connections. The only problem here was the access to the installing the slider pin but it was no problem to drop the steering temporarly to make that connection. Here is a shot of the completed job. Quote Link to comment Share on other sites More sharing options...
Dennis_MN Posted May 13, 2008 Author Report Share Posted May 13, 2008 Here are a couple of pictures of the interference with the front mounted shock absorbers. Dennis Sullivan Quote Link to comment Share on other sites More sharing options...
Dennis_MN Posted May 13, 2008 Author Report Share Posted May 13, 2008 Here is a close up of the interference with the steering knuckle for installing the lower caliper bolt. By the way, I did all of the drilling and tapping with the spindles installed on the truck. That part was easy, finding the big drill bits to borrow was tricky. I rented the tap from the local rental but they didn't have drill bits. Dennis Quote Link to comment Share on other sites More sharing options...
grey beard Posted May 13, 2008 Report Share Posted May 13, 2008 Dennis, Looks very sanitary. Thanks for sharing the pics. Coupla' questions: Did you retain the single reservoir master cylinder? If not, what did you replace it with? Also, are you still able to use your stock Dodge rims without interferance? Thanks again, Quote Link to comment Share on other sites More sharing options...
Dennis_MN Posted May 13, 2008 Author Report Share Posted May 13, 2008 Yep, I was able to use the stock master cylinder and the stock rims. The only other problem that I had was to attach the hoses to the stock brake lines. I had to get 1/4 to 3/16 adapters because the brake lines on the truck are bigger than the Oldsmobile brake lines. I broke one brake line but was able to fabricate a new one. I am really impressed with this kit. Dennis Quote Link to comment Share on other sites More sharing options...
woodscavenger Posted May 14, 2008 Report Share Posted May 14, 2008 Did you put a proportioning valve in place? Quote Link to comment Share on other sites More sharing options...
Dennis_MN Posted May 14, 2008 Author Report Share Posted May 14, 2008 Did you put a proportioning valve in place? Nope, just used the stock parts from the master cylinder up to the flex hose leading to the calipers. I know many were installing those but I figured that I would start with stock and Charlie Akers thought it should work just fine and it has. I've only had a couple of days of use but I think they are working great. Dennis Quote Link to comment Share on other sites More sharing options...
Bouncy B Posted May 17, 2008 Report Share Posted May 17, 2008 Dennis, How much did you spend on this conversion? I know exactly what you're talking about wondering which side is going to grab first. Braking is an adventure. I'm wondering whether I should redo the original system or switch it to disc. I'm not a purist, I'm a pragmatist. Whatever works, works. Richard Quote Link to comment Share on other sites More sharing options...
Dennis_MN Posted May 17, 2008 Author Report Share Posted May 17, 2008 Dennis,How much did you spend on this conversion? I know exactly what you're talking about wondering which side is going to grab first. Braking is an adventure. I'm wondering whether I should redo the original system or switch it to disc. I'm not a purist, I'm a pragmatist. Whatever works, works. Richard Lets see now, the kit from Charlie was $200 and then there was the NAPA bill. I didn't shop around just because I know the guy who owns the local NAPA. My total bill for parts came to $350 and then I had to rent a tap for $4.50. So it looks like about $600 by the time I pay for beer for the guy I borrowed the big drill bits from. Took it on a 100 mile jaunt today and my am I happy that I made the change. It stops with confidence now and I was in a crowd looking at antique aircraft. Dennis Quote Link to comment Share on other sites More sharing options...
Dennis_MN Posted June 6, 2008 Author Report Share Posted June 6, 2008 Here is the picture showing the brake hose position Quote Link to comment Share on other sites More sharing options...
jmooner3 Posted February 5, 2010 Report Share Posted February 5, 2010 Great post! Thanks for sharing. Has anyone found a dual master cylinder that will fit in place of our single? Having redundancy in breaking just makes sense. I've got a 49 1/2 ton that I want to swap to discs at some point too. The brake lines are all pretty ripe on my truck. I'm thinking of replacing it all. Anyone have any advice on that? What size are the lines? It looks like mine have some splices and such..the one from the MC to what looks like a 4 way fitting looks bigger than the others but with all the rust I can't tell what size they are... Any sources for new brake hoses at the four corners? If I'm going to swap to discs should I buy something that fits the calipers rather than adapting a larger one if I'm going to buy them anyway? As always any advice and pitfall avoidance welcome! thanks;) Quote Link to comment Share on other sites More sharing options...
Merle Coggins Posted February 5, 2010 Report Share Posted February 5, 2010 I have never heard of anyone finding a dual chamber master cylinder that fits the stock location without modifying something. As for the brake lines. As I recall all of the lines are 5/16" except for the one from the M/C to the distribution tee, that one is 3/8". And the small ones the jump between the wheel cylinders in the rear brakes are 1/4", as I remember. I think I got my rubber hoses from Auto Zone, so there are available out there. However, if you are going to do a disc conversion you'll need different hoses for the front, so you may want to make up your mind what you're gonna do before buying the front hoses. I got all of my steel line from Napa. You'll need a good tubing cutter and inverted flaring tool to finish the job. A tubing bender is also a plus. It'll help bend the lines without kinking them. Also, on somewhat of a side note... I was talking with a long time customer recently and we got talking about old cars and such. I mentioned that I was doing a disc brake conversion on my truck. He has a mid '60's Galaxie with drum brakes. He said that he replaced the master cylinder with a dual chamber unit and it drastically improved his braking performance with nothing done at the wheels. Quote Link to comment Share on other sites More sharing options...
Dave72dt Posted February 5, 2010 Report Share Posted February 5, 2010 Everything I've read about disc/drum systems requires a metering/proportioning valve in the system for the brakes to work properly. The rear brakes are supposed to apply slightly before the front to help keep vehicle in a straight line when stopping and pressure needs to be proportioned to keep rear brakes from locking up before the fronts during hard stops. I'm thinking that truck is going for a loop during a panic stop in a rainstorm. Quote Link to comment Share on other sites More sharing options...
PatS.... Posted February 5, 2010 Report Share Posted February 5, 2010 MP Power Brakes has some good info on how to safely plumb disc brakes. Here's the under-floor version: http://www.mpbrakes.com/uploads/documents/underfloorpdf.pdf More good info here: http://www.mpbrakes.com/technical-support/configurations.cfm If the master cylinder is BELOW the caliper, there is valve needed to compensate for that, among other valves. You are mixing apples and oranges and some equalization is needed to do it right. The time you'll find out it ain't right isn't the drive around the block. Quote Link to comment Share on other sites More sharing options...
William Davey Posted February 5, 2010 Report Share Posted February 5, 2010 I finally installed Charlie's kit on my 55 C3-B8, but have not had the chance to road test it yet (upstate NY in winter). The kit was well designed, but I also had to grind on the GM calipers and also clearance the caliper bracket a little. My later style 55 truck also required different brake hoses that took a little trial and error to select. Charlie was very helpful through the whole process and as we corresponded frequently. If anybody wants pictures or part numbers, just PM me Quote Link to comment Share on other sites More sharing options...
mikesinky Posted February 6, 2010 Report Share Posted February 6, 2010 i put the discs on the front of mine and had to do a little grinding too. you need to install the residual valves in the lines if you didnt already. 2lb for the discs and 10lb for the drums. Quote Link to comment Share on other sites More sharing options...
Olddaddy Posted February 6, 2010 Report Share Posted February 6, 2010 I really enjoyed working with Dennis on his installation. I learned a few things from him and that is a good thing. The kits are as close to being "universal" as I can make them, but there's always something that can be done better or differently. That is what hot rodding is all about really. The kits are $175 including shipping to lower 48 US addresses, higher elsewhere. I'm always happy to work with someone who is figuring it out and making it work, a real pleasure. These kits make owning my 50 Plymouth wagon affordable, and possible really. I appreciate the opportunity. Thanks, Charlie. Quote Link to comment Share on other sites More sharing options...
Dennis_MN Posted February 7, 2010 Author Report Share Posted February 7, 2010 As long as this old thread was active, I also posted about a year later to replace the straight Grease Zirc with one on a 45 degree angle so that the king pin can be greased. http://www430.pair.com/p15d24/mopar_forum/showthread.php?t=17667&highlight=grease Here is the link Dennis Quote Link to comment Share on other sites More sharing options...
NiftyFifty Posted May 4, 2010 Report Share Posted May 4, 2010 Just ordered my kit from Charlie and he had mentioned a few guys have used this kiton the 1 ton trucks, anyone on here have any suggestions or major changes that need to be done to do this? Thanks Quote Link to comment Share on other sites More sharing options...
dwilliamson03 Posted May 5, 2010 Report Share Posted May 5, 2010 I'm in the process of doing mine on my 1948 B-1-D. I am going to have to bring my spindles to a machine shop to have them put on a lathe or get different spindles all together. My spindle diameter is 1.315 so the inner bearing for this kit which is 1.25 won't work. Charlie has been great with working on this. Once i get that done I don't see any other problem. Can't wait to get them on. Quote Link to comment Share on other sites More sharing options...
NiftyFifty Posted May 5, 2010 Report Share Posted May 5, 2010 I'm in the process of doing mine on my 1948 B-1-D. I am going to have to bring my spindles to a machine shop to have them put on a lathe or get different spindles all together. My spindle diameter is 1.315 so the inner bearing for this kit which is 1.25 won't work. Charlie has been great with working on this. Once i get that done I don't see any other problem. Can't wait to get them on. I thought they had the bearing figured out for the larger spindles? without any machining....if not I'm picking up a parts truck on Friday that's a bit newer...and a 1/2ton I think....maybe it will work. Quote Link to comment Share on other sites More sharing options...
Merle Coggins Posted May 5, 2010 Report Share Posted May 5, 2010 Check with Charlie. When I got my kit, for a 3/4 ton truck, he told me I would need the larger inner bearing and spacer. When I went to put it all together I found that I really needed the 1.25" bearing and spacer. I mailed the larger spacers back to Charlie and he sent me the right ones. I got the right new bearings and it all went together fine after that. Merle Quote Link to comment Share on other sites More sharing options...
NiftyFifty Posted May 10, 2010 Report Share Posted May 10, 2010 I'm in the process of doing mine on my 1948 B-1-D. I am going to have to bring my spindles to a machine shop to have them put on a lathe or get different spindles all together. My spindle diameter is 1.315 so the inner bearing for this kit which is 1.25 won't work. Charlie has been great with working on this. Once i get that done I don't see any other problem. Can't wait to get them on. I think you jinxed me I measured my spindles and their 1 516's so now I'm not sure what's going to work. I'm not really excited about machining down my spindles, would much rather find the proper bearing which I'm sure can be done, that must be the only thing that needs to change...can't see why it would affect anything else. Quote Link to comment Share on other sites More sharing options...
jakenoklahoma Posted May 10, 2010 Report Share Posted May 10, 2010 As for master cylinders, early dual chamber CJ5 or early non power brake dual chamber Corvette might fit in the space there. I think I still have one of those CJ ones somewhere. When using a newer MC drum brake type, remember to remove the 10 pound valve in the port you use for the front wheels, and plumb in a 2 pound if not your calipers may drag. see link here for good info: http://www.earlycj5.com/technical/brakes/early-cj-disk-brake-swap/ exerpt: "Remember that if you are using a dual master cylinder from a drum-brake vehicle, you will need to remove the 10-lb. residual-pressure valve from the front port of the MC and plumb a 2-lb. unit inline to the front brakes I used a Wilwood PN: 260-1874. (The photo at left is from my incomplete installation). If you don’t remove that 10-lb. pressure valve, the front brakes will drag, as there is no spring to return the calipers like there is in a drum installation. If you just remove the stock valve and don’t install a 2-lb. valve like I did, you may end up having to double-pump the brakes all the time to get any pedal, as there is nothing to stop too much brake fluid from flowing back to the master cylinder when you release the pedal. Note the frame-mounted dual-chamber master cylinder from a 67-71 CJ-5. The purists may cringe; I just couldn’t bring myself to put a single-circuit system back into my CJ-2A when I was going this far with a “restification”. The old saying “no guts,no glory!” just doesn’t apply here I’m afraid. Also, remember to install the calipers with the bleeder facing UP, so that it will bleed properly. If you reverse the calipers and have the bleeder facing toward the ground (a very common mistake) you will never get the system bled and your pedal feel will be horrible. Simply swap the calipers from side to side to correct this. DUH! Guess that’s why the calipers have different part numbers!" Quote Link to comment Share on other sites More sharing options...
Merle Coggins Posted May 10, 2010 Report Share Posted May 10, 2010 (edited) I think you jinxed me I measured my spindles and their 1 516's so now I'm not sure what's going to work. I'm not really excited about machining down my spindles, would much rather find the proper bearing which I'm sure can be done, that must be the only thing that needs to change...can't see why it would affect anything else. A quick look through my parts manual, and a cross reference through Napa, shows that all B-Series 1/2 and 3/4 ton trucks use the same wheel bearings. (1.25" ID inner & .75" ID outer) The 1 ton trucks use different bearings. (1.3125" [1 5/16"] ID inner & .8125" [13/16"] ID outer) A further search shows that the axles are the same from 1/2 ton thru 1 ton except for a serial number break on B1's and B2's and another change for B3's and 4's. Further looking showed different spindles for each size truck with additional differences for the serial # break. However, the king pins are the same through 1 ton with the exception of the serial # break. Depending on what your truck's serial number is, I would think you could swap in a set of spindles from a 3/4 or 1/2 ton truck as long as they match the serial # break so that the king pins match up. I have an axle in my B2C parts truck that I could pull the spindles from. I'd have to check the serial # on that truck to see where it falls in the # break. I also have a front axle from a B3C that I could pull the spindles from if you need them. My standard parts pricing would apply. (Reimburse shipping costs and consider making a donation to the Pediatric Brain Tumor Foundation at www.firstgiving.com/merle ) Here are the serial number breaks that effect the axle and king pins. The break occurs during the B2 generation. B-2-B = Up to 82182127/and after 82182127 (Detroit) or Up to 85303826/and after 85303826 (San Leandro) B-2-C = Up to 83351873/and after 83351873 (Detriot) or Up to 85507099/and after 85507099 (San Leandro) B-2-D = 81288101 and 8128920 - 81289309/and after 81289309 (Detroit) or Up to 86009034/and after 86009034 (San Leandro) Merle Edited May 10, 2010 by Merle Coggins Quote Link to comment Share on other sites More sharing options...

Recommended Posts
Join the conversation
You can post now and register later. If you have an account, sign in now to post with your account.