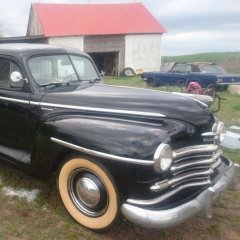
Mortimer452 Posted February 17, 2017 Report Share Posted February 17, 2017 Got a little work done on the old girl today. Stuck a charger on the battery. Replaced the plugs, squirted a bit of oil down all the cylinders, changed the oil. Appears to be original 6V system, has 6V battery installed, but it's pretty new (2014) so possible the previous owner just didn't know if it was converted. Not sure how to tell for sure, does not look like a modern alternator (link to pics here) Insert key, turn on, push button, it groans over a few times. Pour a little gas down the carb, push button, it very grudgingly groans and turns over several times. Stuck a test plug on one of the wires, held against block, push button again, no spark. Meter reads no voltage on either terminal of the distributor coil with the ignition on. Battery reads 6.04 volts, not sure what fully charged should be on a 6V battery, but it's been on a trickle charger for a few hours now. Try attaching a jumper from battery to positive terminal on the coil, push button again, still no spark. Pulled distributor cap, hard to see everything way under there but nothing looks out of place or worn/broken. Troubleshoot a bit more, turns out the ignition switch is a little hinky. It clicks to the right, but also has a "start" position beyond that that springs back like any other car would, not sure the purpose of this. After market ignition switch maybe? Anyway, I discover it takes a little jiggling to get it to actually seat properly in the "on" position. Once it's in the "real" on position, I get voltage to the distributor coil, but alas, still no spark. So, I'm thinking bad coil? What's a good resource for parts like this, I'm guessing this isn't something I can just run down to O'Reilly's for. Once it's running, brakes are probably next on the list. Right now, the pedal just falls straight to the floor. Thanks again for the warm welcome and help! Quote Link to comment Share on other sites More sharing options...
Oldguy48 Posted February 17, 2017 Report Share Posted February 17, 2017 I would take a close look at the points, and make certain the contacts are clean, and properly gapped. If the points don't "make & break" as the distributor cam turns, there won't be any spark from the coil. Make sure the wire in the distributor that connects to the points isn't touching ground inside the distributor housing. If the coil is indeed defective, I'm guessing your local NAPA store should be able to help you. And if you have a "Tractor Supply" store in your area, they also should carry 6V ignition coils. Good luck, and keep us posted on your progress. Wayne Quote Link to comment Share on other sites More sharing options...
Mortimer452 Posted February 17, 2017 Author Report Share Posted February 17, 2017 Hang on a sec . . . am I reading correctly that the positive terminal should be connected to the chassis on this car? Man I feel like such a greenhorn with this vehicle Quote Link to comment Share on other sites More sharing options...
Oldguy48 Posted February 17, 2017 Report Share Posted February 17, 2017 (edited) I would take a close look at the points, and make certain the contacts are clean, and properly gapped. If the points don't "make & break" as the distributor cam turns, there won't be any spark from the coil. Make sure the wire in the distributor that connects to the points isn't touching ground inside the distributor housing. If the coil is indeed defective, I'm guessing your local NAPA store should be able to help you. And if you have a "Tractor Supply" store in your area, they also should carry 6V ignition coils. Good luck, and keep us posted on your progress. Wayne Edited February 17, 2017 by Oldguy48 Oops. wrong. Quote Link to comment Share on other sites More sharing options...
DrDoctor Posted February 17, 2017 Report Share Posted February 17, 2017 Typically, these 6v cars were indeed positive ground systems. However, some were changed to negative ground systems, either by accident, or on purpose. Ours is one of those converted cars, but we don’t know if deliberately, or by accident. The main victim of this change was the radio, which was literally fried when we got it. Other than that, tho’, everything works just fine. And, I rewired it using a Ron Francis 6v harness, and went from a single fuse to over 8 (that I used), and again – all works just fine. All 6v radios I’ve seen are designed for a positive ground, but since ours is negative ground, it’d require isolating the entire radio case from the car in order to work, and it’s just not worth the effort. As for parts, I’ve gotten almost everything I’ve needed from my local auto parts store, it’s an independent store run by a friend, so I’d think that you’d be able to find something similar being that close to Wichita. Thx. Quote Link to comment Share on other sites More sharing options...
Mortimer452 Posted February 23, 2017 Author Report Share Posted February 23, 2017 Did some more troubleshooting and discovered the spark issue is definitely with the cap/rotor, ordered a rebuild kit from OldMoparts.com (awesome site btw) Got a pretty good puddle of antifreeze going under the car just from turning it over several times with the starter. Can't see for sure where it's coming from, definitely not hoses, got me a little concerned that maybe the block is cracked, never know with cars that have been sitting for a long time. Coolant is green and clear. Hopefully just the water pump. Distributor rebuild kit should be here today, hopefully I can get 'er fired up. Quote Link to comment Share on other sites More sharing options...
dale Posted February 23, 2017 Report Share Posted February 23, 2017 Id be running down that anti-freeze leak or you could be working and spending on a dead horse. Keep us informed. Quote Link to comment Share on other sites More sharing options...
greg g Posted February 24, 2017 Report Share Posted February 24, 2017 (edited) Did you order your distributor parts by model and year or by distributor model number?? Several very similar looking and interchangeable dist asemblies were used across the years. But the caps rotors points are not interchangeable with other dist models. The dist model numbers in d stamped on a tag riveted to the body of the dist. Should be I A G or IAT or similar filled by some digits. Edited February 24, 2017 by greg g Quote Link to comment Share on other sites More sharing options...
Mortimer452 Posted March 4, 2017 Author Report Share Posted March 4, 2017 Distributor cap/rotor kit I ordered didn't fit. I did include the distributor part# in the order but he must not have checked. Should have checked the engine code - looking a the engine stamp (P23) looks like I have a 1952 motor. Got the correct cap & rotor installed, promised by 11yr old son he could be the first one to fire it up, and he did. Not exactly purring like a kitten but it does run. Probably needs a carb rebuild, maybe timing adjustment. Source of the coolant leak appears to be the water pump, so that's good news! Had to cut my work short tonight, negative battery cable clamp broke when I was hooking up a new 6V battery. Quote Link to comment Share on other sites More sharing options...
Mark Haymond Posted March 4, 2017 Report Share Posted March 4, 2017 (edited) It is not unusual for a water pump seal to fail after a car has not run in years. These engines were used for cars, trucks, agricultural equipment, and forklifts. So you can probably get one at NAPA or your local store. Get a pump, don't bother with a repair kit. Edited March 4, 2017 by Mark Haymond Quote Link to comment Share on other sites More sharing options...
Mortimer452 Posted March 5, 2017 Author Report Share Posted March 5, 2017 Got it running fairly decently now. Have to use a bottle, gravity fed, fuel pump is definitely not working. Blew an absurd amount of rust and other crud out the exhaust when I revved it up. Didn't actually drive it, but put it into gear and eased up on the clutch, it has friction, so once I get the brakes done, hopefully it'll be drivable. Quote Link to comment Share on other sites More sharing options...
Mortimer452 Posted March 10, 2017 Author Report Share Posted March 10, 2017 Replaced fuel pump, adjusted points, definitely running strong now, purrs like a kitten. Gas tank is leaky and full of crud, so I have a quart mason jar secured in the engine bay as my temporary tank Something odd I noticed - the wipers only work if the engine is actually running. Everything else works when I turn the ignition on, but the wipers, they start moving only after it's fired. I haven't looked much yet - are they vacuum or somehow mechanically operated by the motor? Still have no brakes, need to clear out my shop a bit, but I think I'll try to gingerly drive it up onto the lift this weekend so I can start on brakes and replacing the gas tank. Quote Link to comment Share on other sites More sharing options...
casper50 Posted March 11, 2017 Report Share Posted March 11, 2017 vacuum wipers. I got rid of mine and put in chrysler electric. I hate vacuum wipers. 1 Quote Link to comment Share on other sites More sharing options...
Mike36 Posted March 12, 2017 Report Share Posted March 12, 2017 Hope you're in the flat part of KANSAS, because vacuum wipers are a real pain in hill country! Quote Link to comment Share on other sites More sharing options...
T120 Posted March 12, 2017 Report Share Posted March 12, 2017 A couple of times I've been caught in rainstorms travelling on the highway in a vehicle with vacuum wipers. I find Rain-X works well in keeping the windshield clear . 1 Quote Link to comment Share on other sites More sharing options...
Don Coatney Posted March 12, 2017 Report Share Posted March 12, 2017 I installed a vacuum reservoir in my car. Has a check valve to capture and store the highest vacuum the engine produces. Makes a big difference in the operation of the vacuum wipers. I can get 4-5 swipes after I kill the engine. And as mentioned RAIN-X really helps. Quote Link to comment Share on other sites More sharing options...
Mortimer452 Posted March 13, 2017 Author Report Share Posted March 13, 2017 Thanks, Don, definitely going to look into that vacuum reservoir. Something like this is what you used? http://www.ebay.com/itm/221447914783?_trksid=p2055119.m1438.l2649&ssPageName=STRK%3AMEBIDX%3AIT Quote Link to comment Share on other sites More sharing options...
Don Coatney Posted March 13, 2017 Report Share Posted March 13, 2017 4 hours ago, Mortimer452 said: Thanks, Don, definitely going to look into that vacuum reservoir. Something like this is what you used? http://www.ebay.com/itm/221447914783?_trksid=p2055119.m1438.l2649&ssPageName=STRK%3AMEBIDX%3AIT That is exactly what I used. But I don't think I paid that much 15 or so years ago. Quote Link to comment Share on other sites More sharing options...
Mortimer452 Posted March 14, 2017 Author Report Share Posted March 14, 2017 On 3/13/2017 at 0:31 AM, Don Coatney said: That is exactly what I used. But I don't think I paid that much 15 or so years ago. I can't think of anything that was the same price as 15 years ago . . . 1 Quote Link to comment Share on other sites More sharing options...
Mortimer452 Posted April 8, 2017 Author Report Share Posted April 8, 2017 (edited) Got some more work done. Filled master cylinder and bled the brakes, and to my delight they appear to be working great. Pedal is nice and firm now, goes about halfway down before engaging the brakes. Nearly sheared off one of the lugs on the driver side removing the first wheel. I was plugging the hell out of that thing with the impact wrench before I noticed the "L" on the head of the bolt and decided "Wait, maybe it's left hand thread on this side." Left front was missing one lug (er, bolt I guess), anyone know a good source for this? Pulled it out of the barn and took it for a short spin around the property. Everything seems to work as it should, no funky noises. Pulled it back in and onto the lift, started on removing the fuel tank. Definitely some funkiness going on there, fuel line is steel coming out of the tank, then rubber-hose-clamped onto some 1/4" copper pipe (like, refrigerator icemaker line) which goes most of the way up to the fuel pump, where it switches back to steel again. Little more rust than I was hoping to see on the underside, behind the rocker panels in a few spots is eaten up pretty bad, couple of the body mounts are all but gone. Will try to post some pics later when it's light out. Edited April 8, 2017 by Mortimer452 Quote Link to comment Share on other sites More sharing options...
classiccarjack Posted April 8, 2017 Report Share Posted April 8, 2017 Glad you got to actually drive it. Just keep going along. I hope that your rust isn't really bad. I guess we will have to wait to see your pictures. Quote Link to comment Share on other sites More sharing options...
Mortimer452 Posted April 9, 2017 Author Report Share Posted April 9, 2017 Here are a few pics of the undercarriage Frame and all suspension components are pretty solid, the only really bad areas are just behind the rockers, and the spare tire tub has a half-dollar sized hole in the bottom. Trunk pan is otherwise solid. Floors are solid as well although it looks like they may have been repaired/replaced. Got the old gas tank removed, wasn't the easiest job but came out OK. Bolts were way too rusted and had to cut the straps. New gas tank going in soon! Quote Link to comment Share on other sites More sharing options...
classiccarjack Posted April 9, 2017 Report Share Posted April 9, 2017 The pictures I saw didn't look all that bad. Better than what I have... Quote Link to comment Share on other sites More sharing options...
casper50 Posted April 9, 2017 Report Share Posted April 9, 2017 Yes indeed Jack. He actually has metal where it's suppose to be. Unlike us. lol Quote Link to comment Share on other sites More sharing options...
Mortimer452 Posted April 10, 2017 Author Report Share Posted April 10, 2017 (edited) OK, started assembling the replacement fuel tank tonight. Came with the car so I don't know much about it - not sure how well it's going to work. Pics attached. I've seen these style tank listed as a replacement tank before, definitely not factory style but roughly the same dimensions, I think it's just a "universal" aftermarket tank. No part#'s on anything other than the sending unit which is part# SN39NG. The tank has the brand "TANKS" embossed on the side, maybe this model: http://www.tanksinc.com/index.cfm/page/ptype=product/product_id=226/category_id=68/mode=prod/prd226.htm Filler tube is in roughly the right spot, fuel line hookup is in the right spot, sending unit is (maybe) in the right spot, but this vent thing on the top . . . not sure how to make that work. Same goes for the straps, not sure the best way to attach these. Anyone used these before? Edited April 10, 2017 by Mortimer452 Quote Link to comment Share on other sites More sharing options...

Recommended Posts
Join the conversation
You can post now and register later. If you have an account, sign in now to post with your account.