JBNeal Posted September 22, 2016 Report Share Posted September 22, 2016 (edited) Fluid Drive bell housing (note removable cross member for transmission removal) Edited August 20, 2021 by JBNeal revised pictures 2 Quote Link to comment Share on other sites More sharing options...
ssnowden Posted September 22, 2016 Author Report Share Posted September 22, 2016 Thanks. They are obviously very different, aren't they? I don't believe I've seen one before up close. Quote Link to comment Share on other sites More sharing options...
ssnowden Posted September 23, 2016 Author Report Share Posted September 23, 2016 I'm getting my driveshaft made and the guy at the shop had a question because he said that the driveshaft is really long. It measures 72 inches from my drum to my yoke on the on the rear, so he asked me if this thing had a two piece driveshaft. Since it never had a driveshaft I don't know that answer. The truck is the 116 inch wheelbase so did those have two piece driveshafts? Quote Link to comment Share on other sites More sharing options...
Reg Evans Posted September 23, 2016 Report Share Posted September 23, 2016 Nope, the 116" wb trucks had a one piece driveshaft. Quote Link to comment Share on other sites More sharing options...
ssnowden Posted September 23, 2016 Author Report Share Posted September 23, 2016 Thanks. His calculator said it would top out at 3000 RPM. That's not a problem, right? What's the max RPM on a flathead? Quote Link to comment Share on other sites More sharing options...
Merle Coggins Posted September 23, 2016 Report Share Posted September 23, 2016 I've had mine up to around 3500. Quote Link to comment Share on other sites More sharing options...
Reg Evans Posted September 23, 2016 Report Share Posted September 23, 2016 I think you could get one up to about 6000 rpm for a second or two. 1 Quote Link to comment Share on other sites More sharing options...
TodFitch Posted September 23, 2016 Report Share Posted September 23, 2016 3 hours ago, ssnowden said: Thanks. His calculator said it would top out at 3000 RPM. That's not a problem, right? What's the max RPM on a flathead? Don't know the max RPM but the engineers tested the design at max BHP (typically 3600 RPM) in 50 hour tests and the one factory HP chart I've seen goes up to 4200 RPM. 1 Quote Link to comment Share on other sites More sharing options...
Dave72dt Posted September 24, 2016 Report Share Posted September 24, 2016 It's not the engine rpm. It's the driveshaft rpm. He's saying the driveshaft should top out at 3k for the length and diameter before it may start up some harmonics based on modern theories of rotational dynamics. Yes, I know engine rpm equals driveshaft rpm in top gear. Usually there's a safety margin built into those calculations and I don't know if engine hp and torque figure into them. Have him close up his tolerances on runout a bit if you can and you should be fine. 1 Quote Link to comment Share on other sites More sharing options...
Los_Control Posted September 24, 2016 Report Share Posted September 24, 2016 (edited) If you have a really good imagination, you might say 1 piece. I took these pics today of a B1C 116" wheel base, sorry did not think to just take 1 pic of the drive line for you. Pic on the right you can see the end of the old muffler, pic on the left you can see the end of the muffler and further up the line. The driveline you can make out between the fuel tank and exhaust. Nowhere is there a crossmember to hang a carrier bearing on, for a 2 piece driveline. Where the driveline conncts to the tranny, is just another 12" or so up the line and would be silly to have a 12" long 2 piece driveline hiding under the cab that the pic does not show. Edited September 24, 2016 by Los_Control Quote Link to comment Share on other sites More sharing options...
Los_Control Posted September 24, 2016 Report Share Posted September 24, 2016 bit by the 3mb upload 1 Quote Link to comment Share on other sites More sharing options...
ssnowden Posted September 24, 2016 Author Report Share Posted September 24, 2016 8 hours ago, Los_Control said: If you have a really good imagination, you might say 1 piece. I took these pics today of a B1C 116" wheel base, sorry did not think to just take 1 pic of the drive line for you. Pic on the right you can see the end of the old muffler, pic on the left you can see the end of the muffler and further up the line. The driveline you can make out between the fuel tank and exhaust. Nowhere is there a crossmember to hang a carrier bearing on, for a 2 piece driveline. Where the driveline conncts to the tranny, is just another 12" or so up the line and would be silly to have a 12" long 2 piece driveline hiding under the cab that the pic does not show. That's what I was looking at on mine too. No carrier bearing cross member space. I ordered the single drive shaft. Quote Link to comment Share on other sites More sharing options...
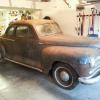
ssnowden Posted September 25, 2016 Author Report Share Posted September 25, 2016 (edited) I got the doors and windows off the cab this weekend. Boy, those doors didn't want to come off! They've obviously never been off. The rubber on the rear window was so hard, I thought I was trying to cut metal at first. I had to get my oscillating saw (one of the best tools ever made) and cut it like I was cutting hard wood. I also tested out my HF soda blaster to see if it was possible for me to do the blasting or have to plan on having it done. It did really well as long as my air was dry. I just have a couple of small air dryers on that line and as soon as the desiccant turned pink from blue, the soda just about stopped flowing. I will say though as long as my air was dry, it was doing a great job. So, I have to upgrade my air drying, which I already knew I had to do anyway. I was able to strip several coats of paint and primer off down to metal in about 10 minutes from the inside door. The doors are in pretty good shape, except the bottom of both doors are completely rusted out. However, the door skins are in really good shape and straight, with just a little rust at the bottom. Edited September 26, 2016 by ssnowden 1 Quote Link to comment Share on other sites More sharing options...
ssnowden Posted October 1, 2016 Author Report Share Posted October 1, 2016 (edited) I did a test fit of the new driveshaft. It fits great. I'll be getting the rear end cleaned up and painted. Edited October 1, 2016 by ssnowden 3 Quote Link to comment Share on other sites More sharing options...
Los_Control Posted October 1, 2016 Report Share Posted October 1, 2016 That is really looking good, I think I may check into the soda blaster myself. Looking forward to watching this thread. Quote Link to comment Share on other sites More sharing options...
ssnowden Posted October 9, 2016 Author Report Share Posted October 9, 2016 I'm missing a few things on the truck. I found the inner fenders and a seat from a 1949 locally, will they work in a 53? Quote Link to comment Share on other sites More sharing options...
ssnowden Posted October 9, 2016 Author Report Share Posted October 9, 2016 (edited) On 9/30/2016 at 11:06 PM, Los_Control said: That is really looking good, I think I may check into the soda blaster myself. Looking forward to watching this thread. The soda works great on paint, but I got the 110 lb HF media blaster and used aluminum oxide and garnet from Tractor Supply for the harder blasting. As expected, the soda wouldn't cut the heavy rust in the cab. It's funny, the heaviest rust on the truck is on the dash. It is deeply pitted and far worse than anywhere else on the truck. With dry air, the HF media blaster worked great on the heavy rust. I was able to blast the heavily pitted rust on the dash down to bare metal. In a couple of hours, I just about got the whole interior of the cab down to metal. With a 20% coupon, I got the blaster for about $100 and surprisingly it came nearly fully assembled. It took about 10 minutes to put the handles and wheels on it and I was ready to blast. It will push so much media out with the media valve fully open, it was just pumping the media out full hose. I had to close the valve to 2/3rds closed to throttle it down to get a good mix of air and media. Edited October 11, 2016 by ssnowden Quote Link to comment Share on other sites More sharing options...
ssnowden Posted October 16, 2016 Author Report Share Posted October 16, 2016 I finished up blasting today. There are just a few spots to patch and overall the cab is straight. I have the KBS chassis coater kit for the floor, so I got all the scaly surface rust blasted off of the interior floor and I will let the KBS kit convert and encapsulate the remaining rust in the floorpan. The HF 110lb media blaster did a good job. I will make a couple of changes to it. The dead man's valve tip that covers the nozzle is too soft and my media ate a hole in it. I'll get a piece of ceramic and glue to it. Luckily I was able to complete the blasting and was just finishing up when the rubber hose burst down around the valve where it connects to the tank. That's understandable since I've shot quite a bit of media through it. I consider it a wear item and a lot of grit went through it. Also if you get one, change the cheap hose clamps to regular ones. The one on the dead mans's valve slipped off and the hose with media shooting out and the cheap hose clamp flew up and hit me in the throat. Kind of like insult to injury. . 3 Quote Link to comment Share on other sites More sharing options...
Los_Control Posted October 16, 2016 Report Share Posted October 16, 2016 Looking great, keep up the good work! 1 Quote Link to comment Share on other sites More sharing options...
pflaming Posted October 18, 2016 Report Share Posted October 18, 2016 If you blast deeper, you may find a Ford under that rust. LOL 1 Quote Link to comment Share on other sites More sharing options...
ssnowden Posted November 3, 2016 Author Report Share Posted November 3, 2016 Well, I did my first sheet metal welding. Really it's the first welding I've done of anything that matters. I figured I'd start where you can't see it. I learned a lot and I think the other side won't take nearly as long as this one did. I found it to be pretty satisfying. I decided to make the area around where the cab mount is a bit thicker so I added an extra layer. Before: After: 1 Quote Link to comment Share on other sites More sharing options...
ssnowden Posted November 29, 2017 Author Report Share Posted November 29, 2017 (edited) It's been a while since I provided an update. I had another project (48 plymouth) that I put ahead of this one, but now I'm back on the truck. The cab is in primer and I've stripped the paint off the outside doors and front fenders and front. For the most part, the cab is in great shape. The dash had some heavy pitting though. I hadn't used it before, but I shot some Slick Sand high build polyester primer hoping I wouldn't have to skim coat the whole dash. I built it up where I thought I got the thickness of most of the pits. I sanded on it for about 4 hours and I was very happy with the results. You can see from these first two photos, the pitting was bad. I have one more coat of Slick Sand to put on after I finish sanding the whole cab, and I'll use a finer grit sandpaper on the next coat to eliminate the sanding marks left with the 220, but the dash is going to go from rough as a cob, to velvety smooth. Next, as we all are prone to do, I changed my mind on the drivetrain. I've decided to put a little more power under the hood. The flathead is cool, but I didn't find myself wanting original as my end result. I want more of a resto-mod with an automatic and more power. So, I happened upon a guy locally via CL that had just pulled this 400 big block and A727 transmission from a 69 Satellite. His customer that has just bought the car decided to upgrade to a modern Hemi drivetrain from a wrecked Challenger. This 400 has about 3000 miles on a rebuild, new carb, stainless headers, a Purple Shaft camshaft and the transmission was just rebuilt too. So, I'm looking forward to having a bit more pep under the hood when it's done. Well, that's about it for this update. Edited November 29, 2017 by ssnowden 1 Quote Link to comment Share on other sites More sharing options...
ssnowden Posted December 5, 2017 Author Report Share Posted December 5, 2017 I'm starting the fitment for the mounts. Surprisingly there is plenty of room for the big block. I think it's going to fit in there nicely. This first pic is the engine is hanging higher than it will actually sit. I had to remove the oil filter and will need to do a little cut to make the remote oil filter connector fit. I think the radiator can go in the same mounting bracket as the original as I placed the engine pulley in the same location as where the flathead sat. With the down draft stainless headers, a mini-starter and moving the engine over 1 1/2" to the passenger side, I think the original steering box, or one that size will fit in there too. I was able to keep the original mounting plate for the steering box intact. Quote Link to comment Share on other sites More sharing options...
ggdad1951 Posted December 5, 2017 Report Share Posted December 5, 2017 you doing any frame re-enforcement for that bad boy? Quote Link to comment Share on other sites More sharing options...
ssnowden Posted December 6, 2017 Author Report Share Posted December 6, 2017 (edited) Yes. I plan on boxing the frame. Given this my first build, any other insights are appreciated. Edited December 6, 2017 by ssnowden 1 Quote Link to comment Share on other sites More sharing options...

Recommended Posts
Join the conversation
You can post now and register later. If you have an account, sign in now to post with your account.