choptop40 Posted December 24, 2015 Report Share Posted December 24, 2015 Hey hey , nice work , we'll worth it , I've had my 49 for 14 years , replaced a bit of rust also, got a Desoto grille on it now , keep up the great progress , appreciate the pics.... Quote Link to comment Share on other sites More sharing options...
casper50 Posted December 25, 2015 Report Share Posted December 25, 2015 looking good Paul. We'll both get there in the end. Quote Link to comment Share on other sites More sharing options...
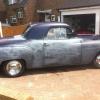
choptop40 Posted December 25, 2015 Report Share Posted December 25, 2015 Gotta better pic , Quote Link to comment Share on other sites More sharing options...
choptop40 Posted December 25, 2015 Report Share Posted December 25, 2015 400 small block , 700r4 ..shift kit , camaro rear built by Richie Bilotti , 373 gears....across the pond holiday wishes... Quote Link to comment Share on other sites More sharing options...
mm289 Posted December 25, 2015 Author Report Share Posted December 25, 2015 Will do Casper That grill looks good from what I can see, have to get a picture in the daylight Cheers boys, Paul. Quote Link to comment Share on other sites More sharing options...
mm289 Posted December 29, 2015 Author Report Share Posted December 29, 2015 Another picture of the rear quarter with the bondo stripped off. How does the original rear quarter panel fix? Does it weld onto the top of the rocker or is it formed as one piece with the rear of the rocker? Cheers, Paul Quote Link to comment Share on other sites More sharing options...
mm289 Posted December 29, 2015 Author Report Share Posted December 29, 2015 More progress, having welded in the 3rd/middle outrigger extension/replacement I decided the one I had made for the 2nd outrigger was not good enough so decided to remake it. Same process, made out of three seperate pieces and then mocked up in situ. The last time I made it from a template based on the remains of the original, but given I have had to put in new inner rocker and other panels it wasn't a great fit. So this time I decided to make it based on mocking it up as an actual part then welding together the pieces. Came out quite well, here is the finished part in place. Will need to weld it in but want to get all the other bits tidied up first. Cheers, Paul. Quote Link to comment Share on other sites More sharing options...
casper50 Posted December 29, 2015 Report Share Posted December 29, 2015 Looking good Paul. I can see the light at the end of the welding tunnel. Not much welding left for me. Quote Link to comment Share on other sites More sharing options...
mm289 Posted December 30, 2015 Author Report Share Posted December 30, 2015 Ha, need to repeat this all on th other side next!! I am seriously thinking about taking the whole rocker out and making a new one rather than patching...... Do you have any pics of how your rear qtr (in front of the fender) fixes to the back of the rocker panel? Cheers, Paul. Quote Link to comment Share on other sites More sharing options...
casper50 Posted December 30, 2015 Report Share Posted December 30, 2015 I'm at work now Paul but, I can get you some in about 6 hours. Quote Link to comment Share on other sites More sharing options...
casper50 Posted December 30, 2015 Report Share Posted December 30, 2015 Sorry it took longer Paul I forgot. Quote Link to comment Share on other sites More sharing options...
mm289 Posted December 30, 2015 Author Report Share Posted December 30, 2015 No worries buddy, so is the rear qtr all one panel with the rocker or is it welded in on top? Thanks, Paul. Quote Link to comment Share on other sites More sharing options...
casper50 Posted December 30, 2015 Report Share Posted December 30, 2015 Paul my 47 is one panel. Quote Link to comment Share on other sites More sharing options...
mm289 Posted December 30, 2015 Author Report Share Posted December 30, 2015 Great, thanks buddy, got some more done last couple of days so just about to upload....... Quote Link to comment Share on other sites More sharing options...
mm289 Posted December 30, 2015 Author Report Share Posted December 30, 2015 Did some more work on the floor panel. I have struggled to find original pics of a '49 Dodge floor so used my old floor (what was left of it) as a template and guessed the rest. Have tried to include detailed photos incase anyone else doing this repair wants to use them as a guide. The key challenge is the panel moves in 3 different directions, particularly in the front right corner where it dips down to meet the rocker/closer panel (left to right dip), drops down to meet the toeboard (back to front dip) and then curves up to form the toeboard. This is then complicated by the strengthening swages. All easy to do when you are pressing panels with a 100 ton press in the factory but not when you are making by hand Started by stretching the front right area over a sand bag to get some curve in the panel and putting in the front swages. This got me the rough shape but left me with a slightly high dome and lots of walnuts from the hammering. Planished most of these out and shrunk the area as much as I could to bring the dome down. Then have flanged all the edges to sit it below the existing floor and pressed in the swages oin the toe board part. It isn't perfect by a long way but looks reasonable and is a lot more accurate than the pressings I have seen on Plymouth Doctor. Still need to push in the remaining two left/right swages at the back, but these are on flat metal so should be easy , this is is mocked up in situ with the replacement top of the rocker and the new outrigger all in place - almost looks complete Next job is to put in the last couple of swages, tidy up the closure panel under the toeboard and then weld in the floor. Still got some patching to do on the rocker so will probably hold off closing that in until the patchwork is all done. Cheers, Paul. 1 Quote Link to comment Share on other sites More sharing options...
casper50 Posted December 31, 2015 Report Share Posted December 31, 2015 Looks pretty good to me. Better than mine. Quote Link to comment Share on other sites More sharing options...
mm289 Posted January 3, 2016 Author Report Share Posted January 3, 2016 Finished closing up the panels around thr front of the rocker/inner wing and then could fit the remade end to the outrigger/cross brace. Glad I took the time to redo it this is a much better fit. Cheers, MM Quote Link to comment Share on other sites More sharing options...
mm289 Posted February 7, 2016 Author Report Share Posted February 7, 2016 Having got all the panels pretty much in place it was time to start closing it all up. Started off by spotwelding the new outriggers to the replacement inner rocker where I could get the spot welder in and then puddle welding elsewhere. Then tidied up the repair panel I had put into the bottom of the rocker - this ended up being a right PITA as I had flanged the repair panel and then decided I want to seam weld it so you couldnt see the join - lots of welding and grinding later With all the welding done I then hit the bare metal with a couple of coats of 2K Epoxy Primer and then a coat of black rustoleum. Once that was dried I could think about doing the floor. Had Dave around today ('47 Desoto http://p15-d24.com/topic/39753-hi-all-new-to-the-forum-from-england/?hl=wilma ) for a couple of cups of coffee and to compare notes. Then got on with putting the final swages into the floor panel I made. Experimented with a hammerform made out of ply and an air hammer with a special anvil I ground in it. Worked pretty well really. Can see the floor and tools in the pic below. Then got the floor in place and have started to weld in. Am using a mixture of TIG and MIG, I dont want the joins to show so TIG is the preference but some of the old floor isn't good enough to TIG weld too so having to do bits in MIG then grind back. Hopefully will finish the welding this week and move onto the back of the rocker and rear fender area. Cheers Paul. 1 Quote Link to comment Share on other sites More sharing options...
casper50 Posted February 7, 2016 Report Share Posted February 7, 2016 Coming along Paul. Quote Link to comment Share on other sites More sharing options...
Dave Armstrong Posted February 7, 2016 Report Share Posted February 7, 2016 Looks good Paul. Those swages look just right Quote Link to comment Share on other sites More sharing options...
mm289 Posted February 8, 2016 Author Report Share Posted February 8, 2016 Yeh, I was pretty happy with them, one went a little too deep but you will never tell when it is under carpet Paul. Quote Link to comment Share on other sites More sharing options...
mm289 Posted February 25, 2016 Author Report Share Posted February 25, 2016 Finally got the passenger side floor welded in today so that is that side all done. Now I can get onto fixing the rear of the rocker and the wing. Cheers, Paul. Quote Link to comment Share on other sites More sharing options...
casper50 Posted February 25, 2016 Report Share Posted February 25, 2016 Looking good. Nice feeling when they start looking complete again. Quote Link to comment Share on other sites More sharing options...
mm289 Posted February 26, 2016 Author Report Share Posted February 26, 2016 Looking good. Nice feeling when they start looking complete again. Yes very satisfying, although no where near as much progress as you - I think I was about right with the thread title Paul. Quote Link to comment Share on other sites More sharing options...
mm289 Posted February 26, 2016 Author Report Share Posted February 26, 2016 (edited) So now onto the rear qtr panel and the rear of the rocker. BIG QUESTION is how does the rear quarter fix to the rocker? On this pic you can see that there is a jagged end to the rear quarter which has been tacked to the rocker in line with the bottom of the door and then filled over. The other side looks like it has been done the same just with mountains of filler covering the join. I can't believe this is how it was done in the factory so anyone got any advice. (this is specific to a 3 window business coupe as it has the large rear qtr panel between the door and rear fender. Cheers, Paul. Edited February 26, 2016 by mm289 Quote Link to comment Share on other sites More sharing options...

Recommended Posts
Join the conversation
You can post now and register later. If you have an account, sign in now to post with your account.