White Spyder Posted June 12, 2014 Report Share Posted June 12, 2014 Well, I have decided to take the plunge and return the 'ol girl to her original color. First on the list of many things to do was repair the only real rust issue that she has. Due to the PO not having the correct trunk rubber and annually leaving her out for a month each year in the rainy season, (she was part of an annual Christmas display with Santa) the lower rail beneith the trunk lid was rusted through. So the surgery started. Once removed new metal had to be fassioned and welded in. Now removal of all the brightwork and then the paint prep moves to the next phase! Lots of elbow greese to sand all the serfaces. Quote Link to comment Share on other sites More sharing options...
greg g Posted June 12, 2014 Report Share Posted June 12, 2014 If that is the only rust issue you have your are fortunate. Looks like you handled it. Hope the rest of the prep work goes well. Quote Link to comment Share on other sites More sharing options...
Andydodge Posted June 12, 2014 Report Share Posted June 12, 2014 40yrs ago I had a 48 Windsor here in Oz, there were supposedly only a couple imported, although mine had an extra pair of taillights each side beside the standard pair and another spare pair in the trunk, so that made at least 3 of them in Oz but it was a nice old car, have got a pic somewhere, will have to have another search.....lol..........it was black with the Highlander upholstery, even the radio and clock still worked........sold it after about 18mths and assume its restored somewhere now as it was too good a car to scrap........andyd Quote Link to comment Share on other sites More sharing options...
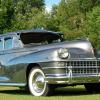
White Spyder Posted June 16, 2014 Author Report Share Posted June 16, 2014 (edited) Worked on removing all the trim. The build tag shows an 8 for the color code which is "gunmetel" I know that the car was repainted in 1950 because of a damaged rear fender that was replaced but thought that the old paint had just oxidized over the last 65 years. Not so! I am going back with the original color. I found a website that gives modern paint mixing codes to match for old cars. I will be using a special primer coat designed to go over old paint from that era. Then base and clear. original color under the hood trim front side Edited June 16, 2014 by White Spyder Quote Link to comment Share on other sites More sharing options...
White Spyder Posted July 26, 2014 Author Report Share Posted July 26, 2014 First hand sanding of the car is done. Need to know from those that have done this how much paint is needed to cover the car with a single coat of paint? Just trying to figure how much to get. The plan is for 2-3 coats of base and at least the same number of clear. Quote Link to comment Share on other sites More sharing options...
Dave72dt Posted July 26, 2014 Report Share Posted July 26, 2014 Depends on how much of the car is being painted and how big the car is. 15 1/2 foot Falcon hardtop = 1. gal, included jambs, underside of hood and trunk. 20' Sedan de ville Caddy with vinyl roof, jambs 1 1/2 gal. Rule of thumb I heard was aprox 7 0z of paint per panel per coat. Much better off with too much than too little and having to reorder and some colors cover better than others, yellow seems to be rather poor in coverage, for example, so it would need more. That gray should cover pretty well. Want to share that website? Quote Link to comment Share on other sites More sharing options...
White Spyder Posted July 26, 2014 Author Report Share Posted July 26, 2014 Thanks. That would come to 98 oz to paint a Windsor. Lot of paint! Here is the link to the web site I found. http://paintref.com/paintref/index.shtml Quote Link to comment Share on other sites More sharing options...
feshemek Posted July 27, 2014 Report Share Posted July 27, 2014 What is the name of the "special primer for old paint" that you have? Quote Link to comment Share on other sites More sharing options...
Frank Elder Posted July 27, 2014 Report Share Posted July 27, 2014 Better remove those tail lights before welding...1 blob of slag will pit or break the lenses or ruin the pot metal bezels. Quote Link to comment Share on other sites More sharing options...
ledfootslim Posted July 27, 2014 Report Share Posted July 27, 2014 Hmmmm.....my Desoto was originally the gun-metal grey, as was a a friends Plymouth- must have been a popular color. Does anyone have a car with the original gunmetal paint, or a picture? I haven't been able to find what it actually looked like. Quote Link to comment Share on other sites More sharing options...
DJ194950 Posted July 28, 2014 Report Share Posted July 28, 2014 Primer color has a lot of coverage effect on a base color coverage. Always try to use a primer color close to the finish color= less paint to achieve the final color without streaking etc. Since you chose a specialty primer for old paint, discuss coverage with your paint supplier. No time to skimp just for lowest price point of brands and local supplier with knowledge of paints they sell. Remember most of the paint they sell for local refinishers locally better work well. They do listen to their feedback. My local stores can explain the in and outs of various top coats. Get the product application-spec sheet. Tells how to apply their products. coverage, which undercoats(primer) work best with the paint. Best of luck, more info = most likely a great finished product! DJ Quote Link to comment Share on other sites More sharing options...
Dave72dt Posted July 28, 2014 Report Share Posted July 28, 2014 Thanks. That would come to 98 oz to paint a Windsor. Lot of paint! Not that much. It's only 2 oz over 3 qts. You have big panels so it may be more than the 7oz per panel and I think it was ready to spray ounces, not the way it comes from the can so with the proper reduction, you get more volume. If you can get your paint from a local jobber, it's not so much of a hassle getting more if you happen to run out. Check after your first coat how much you've used compared to how much you have left. If you don't have enough to do complete coats, stop at this point and get more paint. Then mix what was left and what you just got mixed together so you end up with a consistent color. Follow the P-sheets directions as far as topcoat windows. Some may require a scuffing of the base before more topcoat can go on. I wouldn't start with less than a gal. on that car, especially if ordering. Shipping haz. materials once is bad enough, shipping it twice is foolish. Buying the extra qt to start with makes more sense. Having a bit left over for scratch repair, assembly marks or touchup later in life is not a bad thing and mistakes and doing panels over use paint too. Quote Link to comment Share on other sites More sharing options...
White Spyder Posted August 12, 2014 Author Report Share Posted August 12, 2014 Slow and steady, after hand sanding I removerd a few mor major parts. I have time scheduled in the paint booth for next Monday. I'll shoot primer and then it will sit for a week before shooting color. Quote Link to comment Share on other sites More sharing options...
White Spyder Posted August 12, 2014 Author Report Share Posted August 12, 2014 Not that much. It's only 2 oz over 3 qts. You have big panels so it may be more than the 7oz per panel and I think it was ready to spray ounces, not the way it comes from the can so with the proper reduction, you get more volume. If you can get your paint from a local jobber, it's not so much of a hassle getting more if you happen to run out. Check after your first coat how much you've used compared to how much you have left. If you don't have enough to do complete coats, stop at this point and get more paint. Then mix what was left and what you just got mixed together so you end up with a consistent color. Follow the P-sheets directions as far as topcoat windows. Some may require a scuffing of the base before more topcoat can go on. I wouldn't start with less than a gal. on that car, especially if ordering. Shipping haz. materials once is bad enough, shipping it twice is foolish. Buying the extra qt to start with makes more sense. Having a bit left over for scratch repair, assembly marks or touchup later in life is not a bad thing and mistakes and doing panels over use paint too. Very good advice. Thanks. Quote Link to comment Share on other sites More sharing options...
Dan Hiebert Posted August 12, 2014 Report Share Posted August 12, 2014 It took one gallon to put two coats on my D24 4-dr sedan. (Acrylic enamel) It was barely enough, and is starting to wear through after 22 years. (But that may have more to do with my, at the time, first time painting skills.) I haven't done less than three coats since, the last being my daughter's 2dr Falcon that used a little less than 1 gallon. There is a formula for the "area" of the car, length, width, height at hood/trunk/roof + number of coats + reduction ratio. It generally works out to a bit more than needed, but that can be used for door jambs and such. It may be available on-line somewhere, but I got it from an old automotive painting manual, and have only painted a car every 5 years or so (meaning I don't remember it off-hand). I'll look it up when I get home this evening. Quote Link to comment Share on other sites More sharing options...
Joe Flanagan Posted August 12, 2014 Report Share Posted August 12, 2014 Dan, did you use a single stage on your D24? Quote Link to comment Share on other sites More sharing options...
Bingster Posted August 12, 2014 Report Share Posted August 12, 2014 What trunk weatherstrip did you use? Quote Link to comment Share on other sites More sharing options...
White Spyder Posted August 13, 2014 Author Report Share Posted August 13, 2014 I got it from Steele Rubber Quote Link to comment Share on other sites More sharing options...
Bingster Posted August 13, 2014 Report Share Posted August 13, 2014 Have a catalog number? Quote Link to comment Share on other sites More sharing options...
Don Coatney Posted August 13, 2014 Report Share Posted August 13, 2014 Have a catalog number? Go here http://www.steelerubber.com/parts-list Quote Link to comment Share on other sites More sharing options...
Dan Hiebert Posted August 13, 2014 Report Share Posted August 13, 2014 Dan, did you use a single stage on your D24? Yes, I used single stage. Single is significantly less expensive and I'm not painting show cars, so it suits my purposes. That formula I mentioned works for how much it would take to apply one coat. Just multiply the result by however many coats of whatever you want to apply - but I couldn't find my old auto painting manual last night. It was just an old HP book that I got from an old-time auto painter. It was so "usefully basic" that it may still be in print. I'll keep looking, now it bugs me that I can't find it..... Quote Link to comment Share on other sites More sharing options...
Joe Flanagan Posted August 13, 2014 Report Share Posted August 13, 2014 I think I'll use single stage on my next paint job--a 56 Chevy pickup. Expense is definitely a factor, plus not having to do it in two stages. Quote Link to comment Share on other sites More sharing options...
White Spyder Posted August 18, 2014 Author Report Share Posted August 18, 2014 Full day today fillling all the small dings and taping he up. I will spray primer first thing in the mornint. This is what I am using. Quote Link to comment Share on other sites More sharing options...
DJ194950 Posted August 19, 2014 Report Share Posted August 19, 2014 Used that product several times, sprays and sands well. The one drawback vs. a 2 part hardened primer is that this will easily chip will a big buildup of the primer at edges. As long as your aware. DJ Quote Link to comment Share on other sites More sharing options...
Dave72dt Posted August 19, 2014 Report Share Posted August 19, 2014 That works really well for initial blocking and leveling. A couple coats of a 2 k primer afterwards for final blocking is recommended. It sands really easy but it's porous and moisture can wick through it so it needs to be topcoated with something that will seal it. Quote Link to comment Share on other sites More sharing options...

Recommended Posts
Join the conversation
You can post now and register later. If you have an account, sign in now to post with your account.