Mark Haymond Posted October 21, 2015 Report Share Posted October 21, 2015 I also got the U joint from a kit, a Fat Man Fabrications Cavalier kit. Unfortunately the part number is not listed, it is simply called a "Borgeson U joint" in the instructions. One end fit the square actuator of the rack, the other end fit the diameter of the stock steering shaft perfectly. I saved a little exhaust header clearance space by cutting off the outside steering column tube about half way down the engine column. I did not want to weld the U joint to the steering shaft, so I drilled and pressed in a split pin to back up the set screws on the shaft side of the joint. My steering column had to tilt at a steeper angle but I got the arm length and tilt to suit me. The stock steering wheel keeps the stock look. A Lokar "nostalgia" floor shifter for my 904 tranny with chrome lever and simple black knob looks stock to the casual viewer. Quote Link to comment Share on other sites More sharing options...
littlemo Posted October 21, 2015 Report Share Posted October 21, 2015 Looking Good falconvan. glad to see your still making progress ; that's going to be some "Ride" when you're finished !!! Quote Link to comment Share on other sites More sharing options...
Plymouthy Adams Posted October 21, 2015 Report Share Posted October 21, 2015 (edited) Guru, have been a long time contributor Members1,283 posts Posted Yesterday, 09:18 PM It's going to be close, Mark. I may have to do a column drop and a smaller diameter steering wheel to bring it in below the last header tube and not have several u-joints in the steering shaft. The 400 was definitely wider than a 318; I put a 318 in my 51 and it was much easier. You don't recall what u-joint you used to fit the cavalier rack, do you? I did one on my 48 but it came as part of a kit. there is a difference in the frame and engine compartment of the P15 compared to the bubble top cars beginning in '49..the very shape of the hood tell you of your limited space and speaks inner fender mods needed...the 400 is wider at the exhaust manifolds...the headers will make most installs a bit more difficult including those for which the very tubes were specifically designed. Edited October 21, 2015 by Plymouthy Adams Quote Link to comment Share on other sites More sharing options...
falconvan Posted October 21, 2015 Author Report Share Posted October 21, 2015 It's definitely a tight fit, Tim. I'm going to have to get creative with the drivers side exhaust pipe, for sure. Quote Link to comment Share on other sites More sharing options...
fstfish66 Posted October 27, 2015 Report Share Posted October 27, 2015 just read all of this topic,,man oh man you have been busy,,, Quote Link to comment Share on other sites More sharing options...
scotty t Posted October 27, 2015 Report Share Posted October 27, 2015 I've got a full size mid 90's Chev/GM 1/2 ton/Suburban 5 spd OD manual in my Roadster and I love it. It's what you got if you ordered those vehicles with a manual trans. Made by Getrag. I've been told there is an equivalant for the full size Dodge trucks which probably had a 360. Probably same bell housing bolt pattern as your 440. If you're considering a manual, I'd recommend you check it out. Stick even comes outta the floor where it should. Mine is currently on the garage floor at the moment and I could do measurements if you wish. thats what i've got behind my chrysler hemi, i used a "hot heads" adapter. i also used one in a 55 chevy behind a 348 tri power. good cheap transmissions. https://en.wikipedia.org/wiki/New_Venture_Gear_3500_transmission Quote Link to comment Share on other sites More sharing options...
falconvan Posted November 3, 2015 Author Report Share Posted November 3, 2015 Once I got the trans apart I found the case was cracked where the pump bolts in so I ended up buying another trans for parts from one of the local Mopar racers. I took the best parts from both along with a rebuild kit, B&M shift kit, and a 2800 stall converter to get it all together. Now she's bolted down for good and I can start putting everything else together. It was my first trans rebuild; fingers crossed that it all works. I used a 727 service manual and several You Tube videos for guidance. Quote Link to comment Share on other sites More sharing options...
casper50 Posted November 3, 2015 Report Share Posted November 3, 2015 aren't youtube vids marvelous things? 1 Quote Link to comment Share on other sites More sharing options...
1FSTRYD Posted November 3, 2015 Report Share Posted November 3, 2015 (edited) Plus those trans are probably the simplest to build. Built my own for years. Watched a guy once and realized how simple they were Edited November 3, 2015 by 1FSTRYD 1 Quote Link to comment Share on other sites More sharing options...
falconvan Posted November 3, 2015 Author Report Share Posted November 3, 2015 Yeah, much easier than I thought it would be. And yes, You Tube is pretty cool for stuff like this. Some performance transmission shop posted a 19 part video that walked you through the entire teardown, inspection, and reassembly. Pretty cool of them to spend all that time and then post it for free. 1 Quote Link to comment Share on other sites More sharing options...
fstfish66 Posted November 10, 2015 Report Share Posted November 10, 2015 sounds to good to be true,to rebuild a 727 easily,considering looking for a A500 or 518 trans over drive, hope it works out for u,,, Quote Link to comment Share on other sites More sharing options...
falconvan Posted November 16, 2015 Author Report Share Posted November 16, 2015 (edited) I thought about the overdrive; if they had made a factory one with the big block bell housing I would have gone for it. But this was the cheapest route. Lots of little stuff done lately; wires, misc fittings, R&P mounted, etc. I got the floor put back together and worked on modifying the Jag shifter today. The cable is a little short so I'm going to try and use a B&M cable on it. Edited November 16, 2015 by falconvan Quote Link to comment Share on other sites More sharing options...
theMightyCasper Posted November 17, 2015 Report Share Posted November 17, 2015 Man, I've missed a lot of updates! Looks like you're going to have one fun car when it's all said and done. As usual, very nice work! Quote Link to comment Share on other sites More sharing options...
falconvan Posted November 30, 2015 Author Report Share Posted November 30, 2015 Thanks; it's coming together. I was looking at distributor options and found a place that machines this little bracket that bolts on the stock distributor allowing use of an HEI module. Super slick and only $25. I've got all the engine wires run and and am not too far away from a test fire. 2 Quote Link to comment Share on other sites More sharing options...
dale Posted November 30, 2015 Report Share Posted November 30, 2015 Alot easier to find an overdrive trns. Quote Link to comment Share on other sites More sharing options...
fstfish66 Posted December 3, 2015 Report Share Posted December 3, 2015 Thanks; it's coming together. I was looking at distributor options and found a place that machines this little bracket that bolts on the stock distributor allowing use of an HEI module. Super slick and only $25. I've got all the engine wires run and and am not too far away from a test fire. do you have the info on the maker or seller of the hei bracket ?? thanks Quote Link to comment Share on other sites More sharing options...
mrwrstory Posted December 3, 2015 Report Share Posted December 3, 2015 (edited) Made mine starting with a piece of square alum. tube. Check OT Forum, the new "DYI fabrication" thread. Edited December 3, 2015 by mrwrstory Quote Link to comment Share on other sites More sharing options...
falconvan Posted December 6, 2015 Author Report Share Posted December 6, 2015 do you have the info on the maker or seller of the hei bracket ?? thanks Sure, here you go: http://designed2drive.com/ Quote Link to comment Share on other sites More sharing options...
fstfish66 Posted December 8, 2015 Report Share Posted December 8, 2015 Sure, here you go: http://designed2drive.com/ thanks Quote Link to comment Share on other sites More sharing options...
falconvan Posted January 19, 2016 Author Report Share Posted January 19, 2016 Got back on this one today. I freshened up a Holley 780 I had but had to make a new bracket to relocate the coil since the bowls hang out further. Also made up some fuel lines for the carb. Im hoping to get all the fuel lines ran and the pump installed this weekend. Quote Link to comment Share on other sites More sharing options...
falconvan Posted January 25, 2016 Author Report Share Posted January 25, 2016 I got the alternator brackets made; I decided to go with a GM alternator so Id have an internal regulator. I also pulled the fuel pump for the SHO motor out of the tank and replaced it with a straight 3/8" line and will mount an external pump. As soon as i get the fuel line run and the pump mounted, it should be ready for a short test fire. Quote Link to comment Share on other sites More sharing options...
falconvan Posted January 25, 2016 Author Report Share Posted January 25, 2016 I got the alternator brackets made; I decided to go with a GM alternator so Id have an internal regulator. I also pulled the fuel pump for the SHO motor out of the tank and replaced it with a straight 3/8" line and will mount an external pump. As soon as i get the fuel line run and the pump mounted, it should be ready for a short test fire. Quote Link to comment Share on other sites More sharing options...
1FSTRYD Posted January 25, 2016 Report Share Posted January 25, 2016 I would have left the efi pump in the tank ran a return line and regulated it down. Much more reliable and quiet compared to inline pump. Looks good though Quote Link to comment Share on other sites More sharing options...
falconvan Posted January 25, 2016 Author Report Share Posted January 25, 2016 If the pump had been sized for a v8, I would have. It was for the 190ci v6 and only had a 5/16 line on it. Quote Link to comment Share on other sites More sharing options...
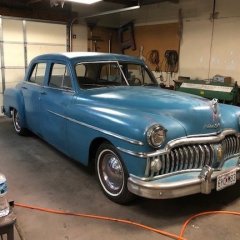
falconvan Posted February 6, 2016 Author Report Share Posted February 6, 2016 First fire up today; sounds pretty good. Next order of business is to figure out how to fit the steering column around the headers and the starter. Quote Link to comment Share on other sites More sharing options...

Recommended Posts
Join the conversation
You can post now and register later. If you have an account, sign in now to post with your account.