48ply1stcar Posted May 16, 2013 Author Report Share Posted May 16, 2013 REAR WIRING HARNESS IN PLACE OK, all of the required wires are in place. Although I used white wires for both parts of the dome circuit I marked one side with black tape. Once the headliner is in place I'll only see the wire for power under the dash. Quote Link to comment Share on other sites More sharing options...
48ply1stcar Posted May 16, 2013 Author Report Share Posted May 16, 2013 AND Now this is on hold while I pull the motor and put together/modify the 1956 motor. (Back to the Next Big Thing) Quote Link to comment Share on other sites More sharing options...
Young Ed Posted May 16, 2013 Report Share Posted May 16, 2013 Have you sourced your windlace yet? Quote Link to comment Share on other sites More sharing options...
48ply1stcar Posted May 17, 2013 Author Report Share Posted May 17, 2013 ED Yes I have. I bought the Cashmere color (http://www.perfectfit.com/15308/154170/Bindings-Trims/Windlace--Automotive-Cloth-Covered.html) 15 Yards for $55 plus shipping. I have so many parts and pieces ready to go - just not enough time. Harold Quote Link to comment Share on other sites More sharing options...
falconvan Posted May 17, 2013 Report Share Posted May 17, 2013 Nice job, Harold. That's the only way to go; work through one area at a time. Quote Link to comment Share on other sites More sharing options...
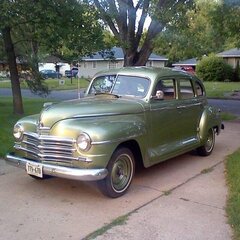
48ply1stcar Posted May 23, 2013 Author Report Share Posted May 23, 2013 She's still comming along. 1 Quote Link to comment Share on other sites More sharing options...
mrwrstory Posted May 24, 2013 Report Share Posted May 24, 2013 Windlace question,..... while working on my sound deadening project I found myself staring at the forward door jam and wondering,..."does the windlace flange get trapped between the end of the dash board and the door jam?" Seems to make sense 'tho it also means I've gotta unbolt the dash in order slip the windlace flange between those two elements. Is this a proper assumption? Quote Link to comment Share on other sites More sharing options...
48ply1stcar Posted May 24, 2013 Author Report Share Posted May 24, 2013 (edited) I'm at work, but looking at this picture it looks like the dash may have to remove the dash. I not looking forward to that. I'll check my car tomorrow. Edited May 24, 2013 by 48ply1stcar Quote Link to comment Share on other sites More sharing options...
Jerry Roberts Posted May 29, 2013 Report Share Posted May 29, 2013 That doesn't sound right . An upholsterer shouldn't have to remove the dash to install new windlace . Quote Link to comment Share on other sites More sharing options...
mrwrstory Posted May 30, 2013 Report Share Posted May 30, 2013 That doesn't sound right . An upholsterer shouldn't have to remove the dash to install new windlace . I keep staring at mine and have the same opinion. The only way I can see to resolve it is to trim some the flange off the windlace and span that 8" without the flange being captured. However,....I don't like that option as I'd expect the door closure to push the windlace out of alignment. I haven't tried yet but I'm thinking that maybe just loosening the bolts that attach the dash at either end might yield a small gap that the windlace flange might slip into and be captured. Quote Link to comment Share on other sites More sharing options...
Young Ed Posted May 30, 2013 Report Share Posted May 30, 2013 Bill I believe loosening the large screw that goes towards the outside of the car will get you enough of a gap. Perhaps a carefully applied pry might be required too. I keep staring at mine and have the same opinion. The only way I can see to resolve it is to trim some the flange off the windlace and span that 8" without the flange being captured. However,....I don't like that option as I'd expect the door closure to push the windlace out of alignment. I haven't tried yet but I'm thinking that maybe just loosening the bolts that attach the dash at either end might yield a small gap that the windlace flange might slip into and be captured. Quote Link to comment Share on other sites More sharing options...
mrwrstory Posted May 30, 2013 Report Share Posted May 30, 2013 Bill I believe loosening the large screw that goes towards the outside of the car will get you enough of a gap. Perhaps a carefully applied pry might be required too. That's what I was thinking,..... anyone else Quote Link to comment Share on other sites More sharing options...
48ply1stcar Posted May 31, 2013 Author Report Share Posted May 31, 2013 The dash is still screwed to the body at the top. Although it may not be timely for you, I've put the interior on hold for the engine replacement, but I'll add pics when I install the wind lacing. Quote Link to comment Share on other sites More sharing options...
Plymouthy Adams Posted May 31, 2013 Report Share Posted May 31, 2013 it makes the gap "pry able" the dash itself in this area has compound angle, bend and reinforcement that it is not a very giving area..as directly above and under the windshield garnish there are 7 mounting screws here.....the end of your wind lace tacking strip and the start of the cleats is approximately middle of the dash itself and can best be described by the top hinge cover plate as the divider point..the dash fit is a bit tight once the windlace is installed and you want to be careful to have a think substrate between the dash and wind lace when installing the other end depending on the end you insert first..DO pin the starting end of the dash with the 5/16 screw before going to the other side if working by yourself... Quote Link to comment Share on other sites More sharing options...
mrwrstory Posted June 2, 2013 Report Share Posted June 2, 2013 Came across this P15 sedan this weekend. Owner confirmed that the upholstery guy did at least loosen the dash and slip the windlace flange behind the dash and door jam. Quote Link to comment Share on other sites More sharing options...
48ply1stcar Posted December 4, 2013 Author Report Share Posted December 4, 2013 Just an update Just tacked the windlace in place so I could take a look at what the panels are going to look like. I think I'll continue with motor over the winter and hopefully I'll have all the the interior ready to install in the spring. 3 Quote Link to comment Share on other sites More sharing options...
steveplym Posted December 6, 2013 Report Share Posted December 6, 2013 Looks great. Quote Link to comment Share on other sites More sharing options...
Joe Flanagan Posted December 6, 2013 Report Share Posted December 6, 2013 That looks really nice. I'm in the same ballpark with my interior right now. I've got one panel made and installed. All my windlace is in, and I'm awaiting the headliner. Really nice to see your project come together. Quote Link to comment Share on other sites More sharing options...
USMC1188 Posted June 17, 2014 Report Share Posted June 17, 2014 This is an old thread, but there is a ton of good information here, thanks for posting. Any new updates? Quote Link to comment Share on other sites More sharing options...
48ply1stcar Posted June 17, 2014 Author Report Share Posted June 17, 2014 Not right now, back to working on the engine. That thread is the "Next big thing" I have gotten a lot of good input on a engine swap. Quote Link to comment Share on other sites More sharing options...
48ply1stcar Posted February 22, 2015 Author Report Share Posted February 22, 2015 Piling up parts and stuff to be installed in the spring, also received my headliner and and visors from WLS yesterday. The color is "Sand", and maybe should be a little darker but I wanted a light color. I haven't driven my car since July 2012, and I can't stand it anymore. The high tomorrow is going to zero, so there's little chance I'll try to heat up an un-insulated garage. 1 Quote Link to comment Share on other sites More sharing options...
46Ply Posted February 26, 2015 Report Share Posted February 26, 2015 Being new here, I just found this thread. Love to see the progression. Gives me enthusiasm to start from scratch on mine. Great job on the upholstery! Very very nice. Quote Link to comment Share on other sites More sharing options...
48ply1stcar Posted July 26, 2016 Author Report Share Posted July 26, 2016 How time flies when nothing gets done. I brought out my original never installed floor mat. I've now had it so long I don't remember when I bought it, and it looks worse every time I bring it out. I had the mat outside in the heat a couple of times hoping it would soften the rubber, but I think the floor mat is just going to get a coating of spray rubber. Quote Link to comment Share on other sites More sharing options...

Recommended Posts
Join the conversation
You can post now and register later. If you have an account, sign in now to post with your account.