Cpt.Fred Posted July 3, 2013 Report Share Posted July 3, 2013 Nice progress!! Your car is going to be great down to the last details, Chapeau, Sir! Cool... I love 40 sedans Quote Link to comment Share on other sites More sharing options...
pflaming Posted July 4, 2013 Report Share Posted July 4, 2013 Last night on chat it was suggested that I should get a metal shear and brake. Where does this MADNESS stop? I have friends who have such so will mark my metal sheet, then have the pieces sheared out. Maybe one of them has a bead roller. . . Friends are money in this hobby. Sure would be nice to trade Dilla bait for shop time! Quote Link to comment Share on other sites More sharing options...
Niel Hoback Posted July 4, 2013 Report Share Posted July 4, 2013 When does the madness stop? Do you REALLY want it to stop? 1 Quote Link to comment Share on other sites More sharing options...
DJ194950 Posted July 5, 2013 Report Share Posted July 5, 2013 (edited) Last night on chat it was suggested that I should get a metal shear and brake. Where does this MADNESS stop? I have friends who have such so will mark my metal sheet, then have the pieces sheared out. Maybe one of them has a bead roller. . . Friends are money in this hobby. Sure would be nice to trade Dilla bait for shop time! Paul, when you're about ready to do sheet metal work where a bead roller would be nice to have, contact me. I have a Haborfreight setup not being used an no current plans to use it. Maybe use could also borrow my Eastwood Tool brand shrinker and stretcher tools (best used after a 45%-90% bend is in a peice of sheet metal) also not being used! A friend used them some on his 55 Chev. project, but now idle and his next project that may need them is second on his project list. It's going to be a while before used again! Cost-- You got to come get them in modesto! Also, you don't need a shear, just a 4 1/2" grinder with a cut off wheel, full face shield and a couple of minutes to cut a 4 ft. piece of 18 ga. sheet metal! Repaired both floors etc. on my 2 50 Ply's using those. Stay on the East coast until at least Sat. if you don't want the Shock of coming back to 100-109 degree weather in CA.!! Best to ya, Doug Edited July 5, 2013 by DJ194950 Quote Link to comment Share on other sites More sharing options...
40plyrod Posted July 5, 2013 Author Report Share Posted July 5, 2013 Thanks Fred you got a darn nice 40 there yourself Quote Link to comment Share on other sites More sharing options...
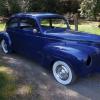
mrwrstory Posted July 5, 2013 Report Share Posted July 5, 2013 Looks like we've got a 40 Sedan subsidiary. But I'm guessin mine is further from running than any. Quote Link to comment Share on other sites More sharing options...
40plyrod Posted July 7, 2013 Author Report Share Posted July 7, 2013 Mr. Bill I'm keeping my eyes open for a build thread. Can't wait to see what you'll do with this one. Quote Link to comment Share on other sites More sharing options...
40plyrod Posted November 3, 2013 Author Report Share Posted November 3, 2013 Been a while since I've been on the forum. life's been busy but I still have managed to get some work done on the car. The firewall is now finished and painted. I also mounted the body back on the frame for the final time. I also rebuilt the gauge cluster I'll be using. I put new mechanisms behind the original faces. I also changed the font on the original faces. Unfortunately I didn't take any pictures during the process but here's a few from the afterwards. I guess the most exciting news was that I was finally able to take the first drive it. It's pretty rough ie: no windows etc but still an awesome feeling. The last couple of days we thrashed away pretty hard on it so that my buddy could have a ride in it before he moves to Alberta. A very good day. Here's the first ride Make sure to listen for the exhaust dragging on the driveway.( the car sits like I like but is too low to drive easily) 2 Quote Link to comment Share on other sites More sharing options...
1940plymouth Posted November 3, 2013 Report Share Posted November 3, 2013 Congrats on the drive, keep up the good work Quote Link to comment Share on other sites More sharing options...
Niel Hoback Posted November 3, 2013 Report Share Posted November 3, 2013 That is very, very nice. Quote Link to comment Share on other sites More sharing options...
mrwrstory Posted November 4, 2013 Report Share Posted November 4, 2013 What a thrill to see the 40 running,....and your family involved. Mine's a ways off at this time but you give me encouragement. You done good young man Quote Link to comment Share on other sites More sharing options...
40plyrod Posted November 4, 2013 Author Report Share Posted November 4, 2013 Thanks guys. Now begins the terrible task of block sanding. Quote Link to comment Share on other sites More sharing options...
GlennCraven Posted November 4, 2013 Report Share Posted November 4, 2013 What a thrill to see the 40 running,....and your family involved. Mine's a ways off at this time but you give me encouragement. You done good young man I second that emotion. Quote Link to comment Share on other sites More sharing options...
40plyrod Posted January 12, 2014 Author Report Share Posted January 12, 2014 Been awhile since I have updated my progress...block sanding is a very monotonous and slow process, I now know why rat rods are so popular. Luckily I'm in no real rush so I have been limiting my block sanding sessions to an hour or hour and a half at a time as well as taking on another fun project with my 2 girls. Pictures below don't show a lot... one side of car partially blocked and the "new" project. Quote Link to comment Share on other sites More sharing options...
40desoto Posted January 15, 2014 Report Share Posted January 15, 2014 Thanks guys. Now begins the terrible task of block sanding. Wish I was close .. I would trade you some blocksanding work for an intake like yours or a MC bracket to weld to frame. Quote Link to comment Share on other sites More sharing options...
40plyrod Posted January 15, 2014 Author Report Share Posted January 15, 2014 Wish I was close .. I would trade you some blocksanding work for an intake like yours or a MC bracket to weld to frame. If you were closer I'd take you up on that, my elbows and wrists never ached building the manifold or the mc bracket . Quote Link to comment Share on other sites More sharing options...
40plyrod Posted February 9, 2014 Author Report Share Posted February 9, 2014 I love Plymouth's 1940 engineering department. I'm in the final stages of the first round of block sanding and had to remove the wiper posts so I could block the upper cowl, I have never removed a wiper and set of post so easily Quote Link to comment Share on other sites More sharing options...
knuckleharley Posted February 10, 2014 Report Share Posted February 10, 2014 ...KnuckleHarley- you can get those clamps in a lot of places now. I've seen them in eastwood's catalogue also in harbour freight. I bought mine from KMS tools here in Canada. You don't have to buy the expensive one the cheap ones work just fine. Thanks for the reply. I just now noticed it. I've been pretty busy with other stuff the last few months and haven't checked in here much. Quote Link to comment Share on other sites More sharing options...
Robert Horne Posted February 10, 2014 Report Share Posted February 10, 2014 I spent countless hours block sanding my 38. With my poor eyesight, I would have to wait until late evening, with the sun setting, to find missed spots to work on the next round, and I asked help finding blemishes, from anyone that stopped by. It was well worth the extra time to do a good job. Quote Link to comment Share on other sites More sharing options...
40plyrod Posted April 19, 2014 Author Report Share Posted April 19, 2014 No updates for a while because, well... block sanding is tedious and boring to look at and I took the family on a little vacation to southern California. During the trip I was even able to meet up with mrwstory. Actually meet up isn't quite right... Bill went way out of his way to show me a good time! In just one day I got a ride in a 32 ford roadster, a trip to the Goodguys Del Mar car show in his Plymouth coupe, introduced to his friends (great bunch of people) fed beer and taken out for dinner. He even arranged for wife and kids to be picked up by another friend from their shopping trip so they could come for dinner too. An awesome day and I'm truly thankful. I came back from the vacation revved up to make some progress so here are the pics. First pics is a shift knob I made up to commemorate the trip. It's a token I found at Disneyland and I inset in a common ford truck knob. Next pics are of woodgraining the dash. It's not an exact restoration of the wood graining originally found on the dash, but I'm happy with it. 1st step is to cover the dash in a truly ugly mustard color base paint. Next is the rubber based ink (dark brown). I get it from the local print shop. I thin the ink with camp stove fuel (naphtha, white gas etc) and use cheese cloth to spread it on the dash. Final step (not seen yet) is to wait 5-6 days for everything to evaporate and the clear coat the dash starting with thin coats. Then wet sand and polish...done. 4 Quote Link to comment Share on other sites More sharing options...
mrwrstory Posted April 20, 2014 Report Share Posted April 20, 2014 Awesome dude! Quote Link to comment Share on other sites More sharing options...
pflaming Posted April 20, 2014 Report Share Posted April 20, 2014 The mustard color was cool. When all the parts are on, this will not be so stark and will look fantastic. Keep us posted. Love the creativity. Quote Link to comment Share on other sites More sharing options...
TodFitch Posted April 20, 2014 Report Share Posted April 20, 2014 . . . 1st step is to cover the dash in a truly ugly mustard color base paint. Next is the rubber based ink (dark brown). I get it from the local print shop. I thin the ink with camp stove fuel (naphtha, white gas etc) and use cheese cloth to spread it on the dash. Final step (not seen yet) is to wait 5-6 days for everything to evaporate and the clear coat the dash starting with thin coats. Then wet sand and polish...done. That is the same technique that I used for my dash and window garnishes which were supposed to be a walnut burl pattern. The nice thing about it is that if you don't like the pattern the ink makes you can wipe it all off and start over. I used "press wash", also available at your local print shop, for my thinner but it smelled about the same as Coleman stove fuel so I'm not surprised that worked for you. http://www.ply33.com/Repair/woodgrain Quote Link to comment Share on other sites More sharing options...
fstfish66 Posted April 20, 2014 Report Share Posted April 20, 2014 will be super nice when its done,, Quote Link to comment Share on other sites More sharing options...
BobT-47P15 Posted April 20, 2014 Report Share Posted April 20, 2014 Looking good. Glad to see it's now driveable. That's a 46-48 Plymouth steering wheel and horn center too. Quote Link to comment Share on other sites More sharing options...

Recommended Posts
Join the conversation
You can post now and register later. If you have an account, sign in now to post with your account.