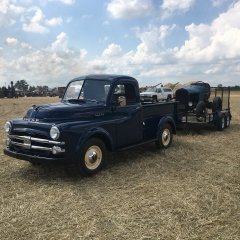
52b3b Joe Posted March 30, 2011 Author Report Share Posted March 30, 2011 I've got my eye on a Pilot House trailer that I want to paint to match my driver project, just as a novelty and to have a trailer to haul stuff, with these as examples: I was thinking the same thing if I buy it. He is asking $250 but I'm just not sure if I want to spend that money on that when I could use it for a "better cause" such as paint, but I will see. It would be nice to have the extra parts and have to do less work to my current bed, but I don't own a money growing tree...and it would cost $100 in gas to get it. Quote Link to comment Share on other sites More sharing options...
aero3113 Posted March 30, 2011 Report Share Posted March 30, 2011 I saw this one at a show this past weekend. Quote Link to comment Share on other sites More sharing options...
JBNeal Posted April 19, 2011 Report Share Posted April 19, 2011 Wow ! and to think your truck was way over here in Calif. just a few years ago getting ready to head to your neck of the woods. Small world... I thought I had seen this truck before... Quote Link to comment Share on other sites More sharing options...
Dave72dt Posted April 19, 2011 Report Share Posted April 19, 2011 As much as I like my Pilothouse, every time I see that photo it reminds me of how much more I'd prefer to own that Plymouth if I had to make a choice. Quote Link to comment Share on other sites More sharing options...
52b3b Joe Posted August 12, 2011 Author Report Share Posted August 12, 2011 Well, I've been pretty busy so I haven't got a whole lot done on my truck. I've been busy on other cars for friends, but here is where I'm at. I started my body work and bought some paint. I'm trying to get the cab back on this weekend, wish me luck....something will probably happen and it will be next weekend though... Quote Link to comment Share on other sites More sharing options...
HanksB3B Posted August 12, 2011 Report Share Posted August 12, 2011 did anyone mention the obvious: OMG!, Stainless Steel Wiskers! Who is that guy that restores Stainless to near perfection? It'll cost you though, Hank Quote Link to comment Share on other sites More sharing options...
52b3b Joe Posted August 13, 2011 Author Report Share Posted August 13, 2011 Here is what I got done today after work. I'm pretty excited the cab is finally back on the frame! Pictured are my two friends (muscle), and me. Quote Link to comment Share on other sites More sharing options...
catfishcuz Posted August 13, 2011 Report Share Posted August 13, 2011 (edited) Is that Petty Blue i love it. Butch Edited August 17, 2011 by catfishcuz Quote Link to comment Share on other sites More sharing options...
Todd B Posted August 13, 2011 Report Share Posted August 13, 2011 I sooooooooo wish my 1/2 ton was at that stage. looks great. Quote Link to comment Share on other sites More sharing options...
52b3b Joe Posted March 12, 2012 Author Report Share Posted March 12, 2012 Well, its been a while since I have done an update on my truck. And sometimes going forward means you have to go backwards. I had to stop working on it during the colder months so my parents could have their attached garage back, so all the old cars had to get stuffed in the pole barn with my truck. Therefor, I had to stop on the body work. I also have been hitting the books pretty hard to get through my classes at school, and with my part time job, its been hard to do anything. But this past weekend, I got the garage all to myself again, so its time to get back into the the truck! Now to the going backwards stuff, while sitting, my rebuilt master cylinder decided to go drain itself, so I ordered a new one and installed that, so that's done. I also forgot to put the steel inserts in the rear engine mounts when I put the engine back in. I can tell you that was a big mistake, that was a PAIN to do with the cab, and brake lines on the truck, it took me most of a day to correct that! I did manage to get a few small parts restored over the winter too though. I had the generator rebuilt, and the regulator adjusted last week. The horn is ready to go on, and a lot of small parts like that are ready as well. I also decided to buy a wiring harness, so I picked one up from Rhode Island Wire, and its very nice (did cost a bit of money though). Most of the body work is done on the cab, so hopefully soon I'll get some pictures of it done with paint on it! I don't know how so many dents got on the roof, but my DA and sanding blocks are ready to go along with the new compressor my dad bought! Wish me luck! I'll try and post pictures this week. Quote Link to comment Share on other sites More sharing options...
52b3b Joe Posted March 15, 2012 Author Report Share Posted March 15, 2012 Well, the past two days, I've been moving forward with the body work. I don't know what this truck's history is, but the cab has more dings and dents in it than I've ever worked with before. It was definitly used as a truck! I did about all you can do with a hammer and dolly, but I had to use some filler. It’s not thick, but as you can see, it’s all over the place! I got the roof done and started work on the back of the cab. My arms feel like they're about to fall off from all the boarding, but it’s definitely worth it! Here are some pictures, of the cab and one of the wiper assembly I just got done with. Quote Link to comment Share on other sites More sharing options...
Dave72dt Posted March 15, 2012 Report Share Posted March 15, 2012 Pretty typical of these old trucks. They don't look too bad until you start blocking the surface. Why the roof gets pounded I have no idea but dents just above the front bed panel would be typical along with dings and scrapes in the fenders. I think I wore my fingerprints off with all the sanding. It's the only way to get it right though. Good luck wioth it and keep the pics coming. Quote Link to comment Share on other sites More sharing options...
Young Ed Posted March 15, 2012 Report Share Posted March 15, 2012 I did about all you can do with a hammer and dolly, but I had to use some filler. It’s not thick, but as you can see, it’s all over the place! Nothing wrong with filler as long as its used correctly(which you certainly are). Quote Link to comment Share on other sites More sharing options...
52b3b Joe Posted June 20, 2012 Author Report Share Posted June 20, 2012 Well, it's been a while since I updated my progress on the truck. The cab is all blocked out in 320, and is looking pretty good, I got the front panel done also. The front panel was VERY rough, but it came out much better than I thought. The lower driver side was pulled out about 6 inches and there were dings and waves everywhere. I got the all of the small panels done on the truck that go in the wheel wells and engine compartment. I have one fender done and fitted as well. In all, its going good, but slow and steady. Quote Link to comment Share on other sites More sharing options...
ggdad1951 Posted June 20, 2012 Report Share Posted June 20, 2012 lookin' good! Quote Link to comment Share on other sites More sharing options...
Dave72dt Posted June 20, 2012 Report Share Posted June 20, 2012 All those waves almost makes you think they were there when it was new. They're a pain to get out. To keep it looking authentic, how many of the stretch marks and cracks do you take out from the original stamping. With closer tolerances on panel fitment than the factory likely had, we're putting them back together better than when new. With the attention you're giving it, it'll look fantastic. Quote Link to comment Share on other sites More sharing options...
52b3b Joe Posted June 20, 2012 Author Report Share Posted June 20, 2012 (edited) All those waves almost makes you think they were there when it was new. They're a pain to get out. To keep it looking authentic, how many of the stretch marks and cracks do you take out from the original stamping. With closer tolerances on panel fitment than the factory likely had, we're putting them back together better than when new. With the attention you're giving it, it'll look fantastic. As far as stretch marks, if they were in a damaged area that needed some filler, I took them out. Otherwise I left them in for the "factory look". For all of the cracks, I either brazed or welded them to try and stop them from getting worse. I figured the panels won't be in the exact same position and may be under a little pressure to make them fit how I want them to, so I wanted them all stopped. On my truck, someone had welded the front panel to the front fenders after an accident the truck was in, so the entire front end was a mess. I had to put new lower corners on the front panel that I brazed in. When I got the front panel done and started to try and fit the front fenders, things were looking BAD (I put a lot of patches in the original fenders already too). There was alot of filler in the front fenders before I touched them and I knew I would never be happy with them, so I bought the fiberglass replacements (I'm still not set on the idea of fiberglass but it is what it is....I'm no auto body man). I'm VERY happy with the fit of the fiberglass though! lookin' good! Thanks! Your truck is looking much better though!! Do you guys like my work bench??? The tailgate laid on the back of the frame! I'm in need of more room. Half the garage is dedicated to my door repairs right now and the other half is the truck and parts. I had to remake the lower door frames and about 6" of the lower door skins. Edited June 20, 2012 by 52b3b218 Quote Link to comment Share on other sites More sharing options...
buds truck Posted June 20, 2012 Report Share Posted June 20, 2012 looking good!!!! excellent job!! Quote Link to comment Share on other sites More sharing options...
karl head Posted June 21, 2012 Report Share Posted June 21, 2012 looks good to me....great looking job Karl Quote Link to comment Share on other sites More sharing options...
dave5711 Posted June 22, 2012 Report Share Posted June 22, 2012 Very nice Quote Link to comment Share on other sites More sharing options...
52b3b Joe Posted July 30, 2012 Author Report Share Posted July 30, 2012 Well, I got the cab painted this weekend, good results on the second attempt with it. I called my buddies over and we placed it back on the frame. I couldn't help myself, so on a small spot on the firewall I used a little rubbing then polish compound, and the paint is perfect with minor work. Now I can start getting the truck back together and run the wiring and gauges. I need to clean up the garage first though.... I did decide to change the paint color and had the original color matched, some might think I'm crazy, but I don't think I would have ever been happy with the brighter blue. Heres a couple of pictures, just try to block out me in the second one! I got forced into the picture. Quote Link to comment Share on other sites More sharing options...
buds truck Posted July 30, 2012 Report Share Posted July 30, 2012 looks AWESOME!!! You have every right to be proud. I love the color too!! Quote Link to comment Share on other sites More sharing options...
Dave72dt Posted July 30, 2012 Report Share Posted July 30, 2012 The problem with doing a small spot with rubbing and polishing compound is now you have to do it all. All those hours of prep have paid off well for you. Looks really goood. Congrats. Quote Link to comment Share on other sites More sharing options...
52b3b Joe Posted August 1, 2012 Author Report Share Posted August 1, 2012 All buffed out and polished without going through anywhere! It looks ok, its not perfect. There is still a little residue from the polish on it which makes it look not as shiny in the pictures. As I said before, there is a HUGE learning curve....trial and error. Thats the only way to learn though. I put the filler neck and grommet in just to see my new chrome gas cap, and it was worth it. Quote Link to comment Share on other sites More sharing options...
ggdad1951 Posted August 1, 2012 Report Share Posted August 1, 2012 looking good! Starts to feel like a truck again at this point if you ask me! Quote Link to comment Share on other sites More sharing options...

Recommended Posts
Join the conversation
You can post now and register later. If you have an account, sign in now to post with your account.