53 Truck-O-Matic
-
Posts
65 -
Joined
-
Last visited
-
Odds and Ends for the B4B
53 Truck-O-Matic replied to 53 Truck-O-Matic's topic in Mopar Flathead Truck Forum
Oh, okay, thanks. I found a set at DCM. -
Odds and Ends for the B4B
53 Truck-O-Matic replied to 53 Truck-O-Matic's topic in Mopar Flathead Truck Forum
Which part are you speaking of? -
Rear Wheel Cylinders for 53 B4B
53 Truck-O-Matic replied to 53 Truck-O-Matic's topic in Mopar Flathead Truck Forum
The shims there are as they always have been, though I haven't pulled it apart to count them since this post. But surely a play of between 1/8" and 3/8" that I don't think was there before the new seals, can't be because of not enough shims, can it? -
Rear Wheel Cylinders for 53 B4B
53 Truck-O-Matic replied to 53 Truck-O-Matic's topic in Mopar Flathead Truck Forum
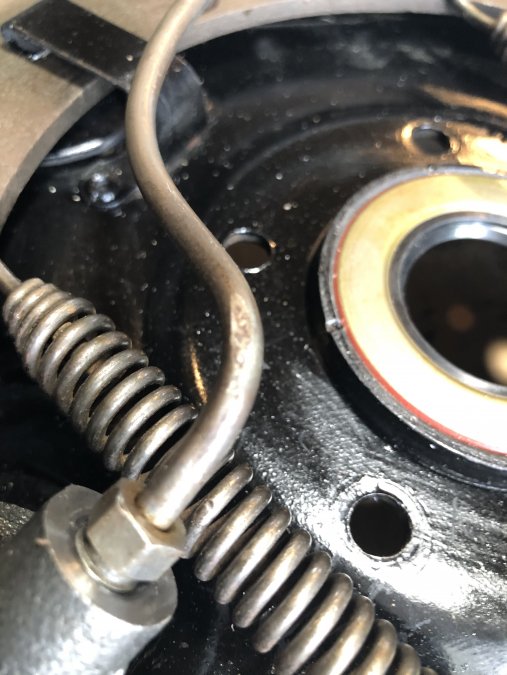
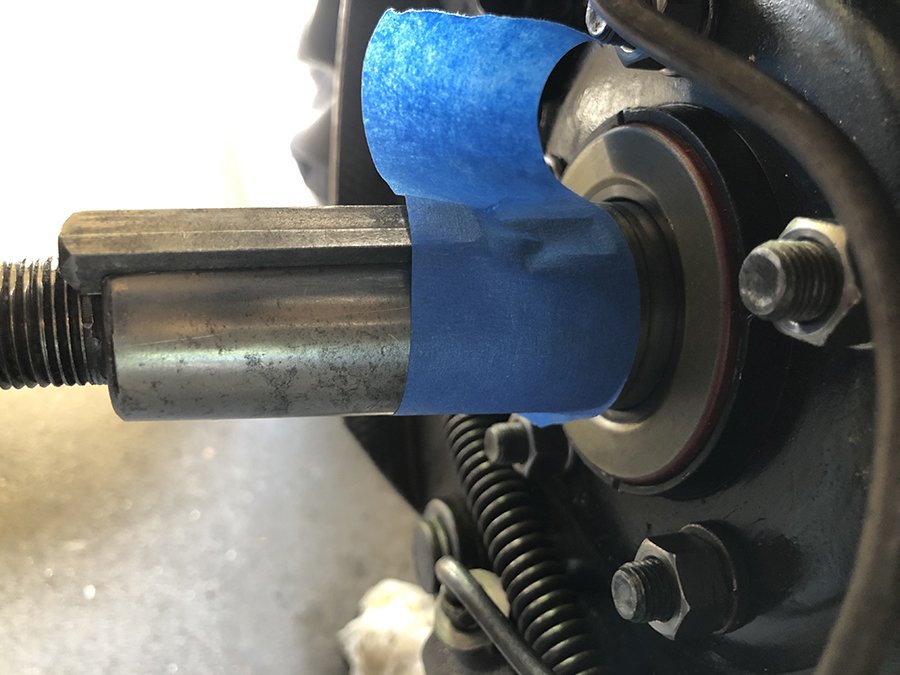
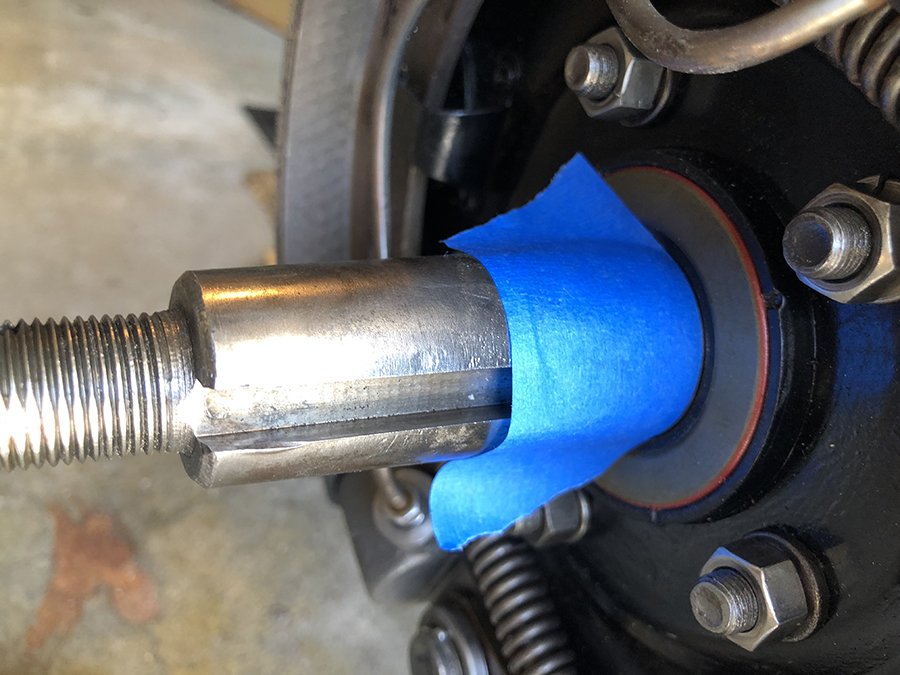
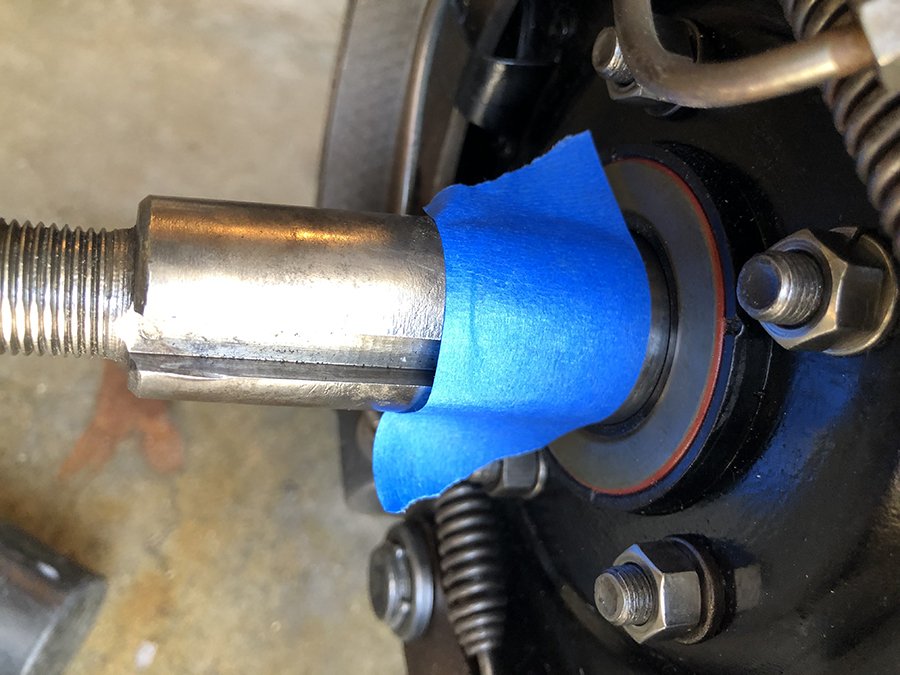
NEW QUESTION involving the rear wheels. Having installed new bearing seals, I notice play in the rear axles, that is, I can pull them out a bit, as per the photos. The blue tape marks the axle position so you can see the gap, almost a half inch on the Right Rear after pulling on them. Are the new seals the wrong size?
-
Rear Wheel Cylinders for 53 B4B
53 Truck-O-Matic replied to 53 Truck-O-Matic's topic in Mopar Flathead Truck Forum
All thanks to you, MC! Don't let the fact that I didn't read your post carefully enough discourage you from future ideas!! Jamie -
Rear Wheel Cylinders for 53 B4B
53 Truck-O-Matic replied to 53 Truck-O-Matic's topic in Mopar Flathead Truck Forum
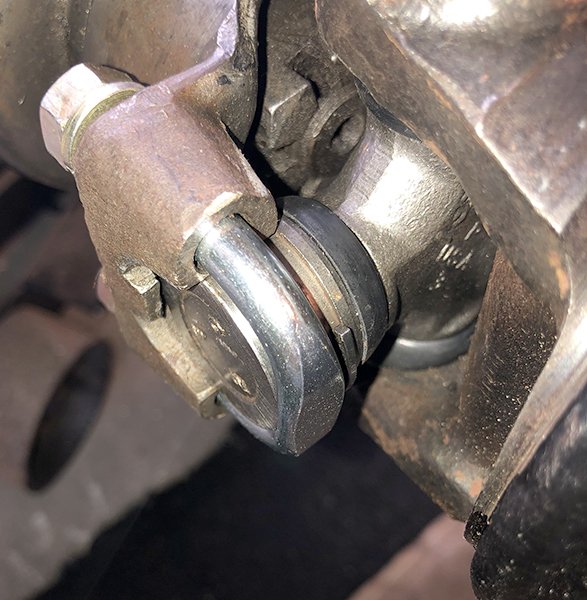
Well, if I'd read Merle's post from last Friday more carefully, "(Also, looking at your u-joint it seems to be a combo unit with external circlips on one half and internal circlips on the other half. You’ll need to remove those internal clips to get it set into the drive yolk" ) ...which he then repeated yesterday!! But it took me more blundering around in the dark to realize those retaining clips were the problem! Just removed them, and now the U Joint fits the yoke POIFECT! I had to take the Yoke off the differential to see what was really going on, and that made me a little nervous, visions of having to reassemble a differential etc! I also cleaned up a couple of nicks and bumps in the cradle of the yoke which couldn't have helped. Drive shaft solved! Now back to bleeding the brakes, which I'm trying to do with the aid of a pressure tank, ie, homemade from a garden sprayer. The threads to the fill-hole on the master cylinder are a mystery, so I filed down a 1/2" pvc fitting to get it to thread in, we'll see if it works..........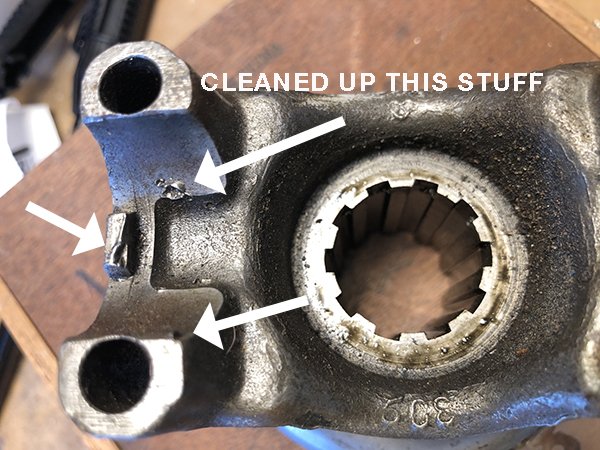

-
Rear Wheel Cylinders for 53 B4B
53 Truck-O-Matic replied to 53 Truck-O-Matic's topic in Mopar Flathead Truck Forum
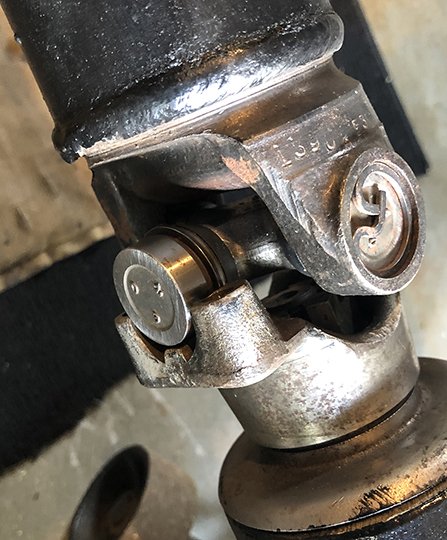
You may be right about the fit. The numbers visible are 429 EGI (or ESI, I don't think that's a 1), and USA P3. The U joints were replaced back in California (2009), by a shop that did some brake work (some of which I have just re-done!) , and there were no part numbers on the receipt. I may have picked the wrong shop. I assume the front and back U joints are the same, but I haven't confirmed that yet. And I assume they are supposed to be? I have no reason to believe the yoke is incorrect, having bought the truck in 1974. And here's another pic before I added the brackets, When I was re-connecting, I did feel the U Joints were not just happily sliding in to the yoke.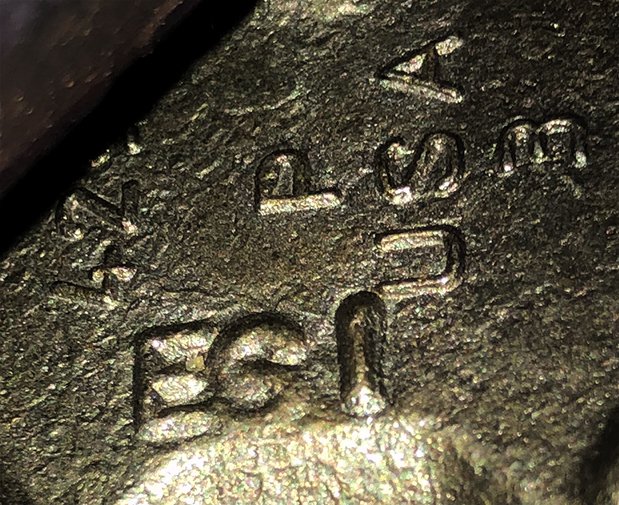
-
Rear Wheel Cylinders for 53 B4B
53 Truck-O-Matic replied to 53 Truck-O-Matic's topic in Mopar Flathead Truck Forum
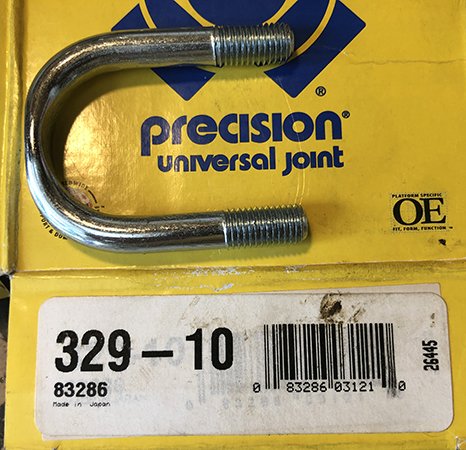
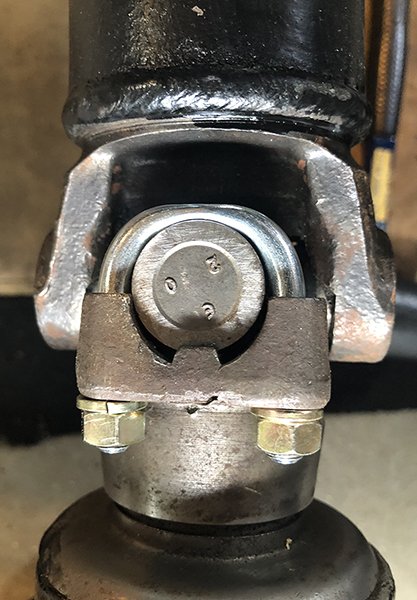
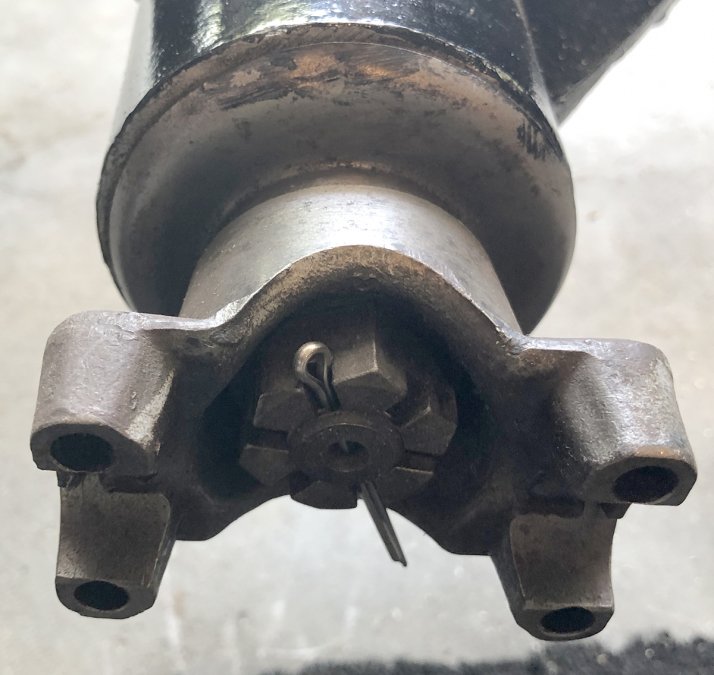
1st of all, thanks to Merle for the tip about getting the springs to compress to make room for the drive shaft. I didn't have an excavator bucket, (wish I did!), but after jacking up the rear axle to get some movement that way, I took a 2x4 and some clamps and pulled the axle and chassis together just enough to get the shaft in there. WHEW! 2ND OF ALL, JB's #'s got me to a local parts store that had a Precision equivalent to the Spicer bracket #. It looks a little cheesy to me, but I got it on there, and it seems to hold the U Joint in there nice and snug. See if you all think it looks right by the photos.

-
Rear Wheel Cylinders for 53 B4B
53 Truck-O-Matic replied to 53 Truck-O-Matic's topic in Mopar Flathead Truck Forum
Wow! That's a bunch of very useful info! "Did some digging" is right! THANK YOU! I'm back at it! -
Rear Wheel Cylinders for 53 B4B
53 Truck-O-Matic replied to 53 Truck-O-Matic's topic in Mopar Flathead Truck Forum
OH! I'm also wondering where to get those brackets to hold the shaft to the U Joint! -
Rear Wheel Cylinders for 53 B4B
53 Truck-O-Matic replied to 53 Truck-O-Matic's topic in Mopar Flathead Truck Forum
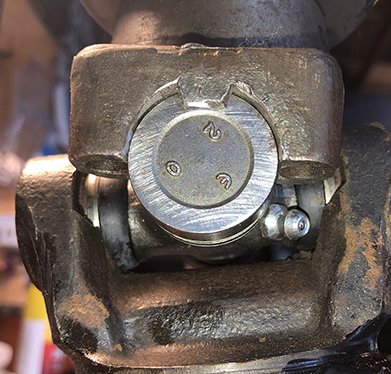
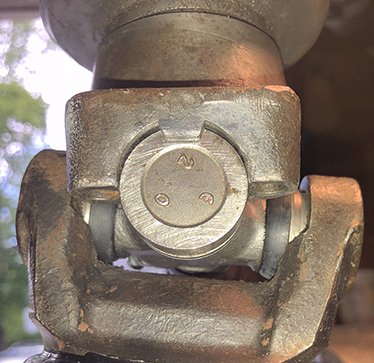
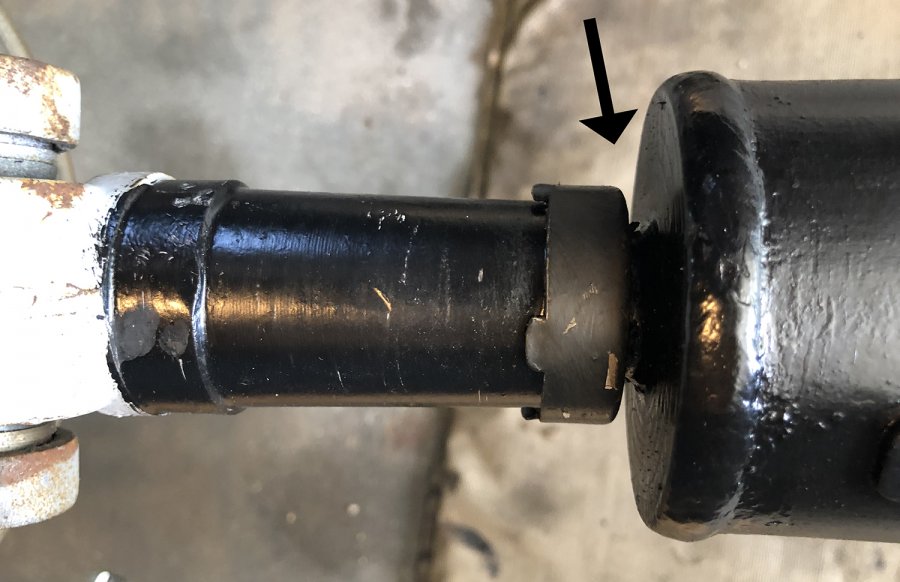
Thanks for the pressure bleed info. I'm going to try it. I don't know quite how you detected the mis-fit trouble with the U joint, but I investigated, and you may be right, though it's a very small difference if it's too big. I would like to try and see if it fits, but I am drawing a blank on how to for the drive shaft back in there. I'm willing to loosen the rear axle to do it, but I can't believe that's the proper way. It seems like you're supposed to collapse the drive shaft all the way, then expand it to fit the u joint together. But I've got it collapsed all the way, (I think- see photo with arrow at engine end), and as the pictures show, it won't go. What am I missing here?

-
Rear Wheel Cylinders for 53 B4B
53 Truck-O-Matic replied to 53 Truck-O-Matic's topic in Mopar Flathead Truck Forum
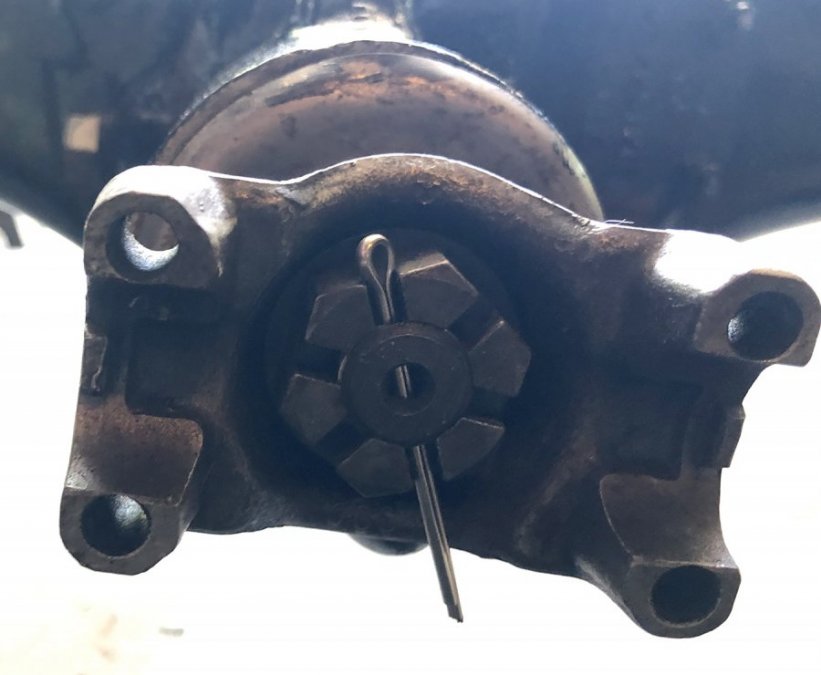
BRAKES and BLEEDING - Now that the new cylinders are installed and everything's back together, (I hope!), time to bleed. My question is, anyone have experience good or bad with pressure tank method of bleeding?? Bought a hardware store pump tank, about to try it. New Unrelated DRIVE SHAFT problem. I seem to have lost the little brackets that hold the rear U Joints to the Differential. (Yeah, " how could you do that?? I took all that apart a long time ago, but I'm mighty surprised to find them missing!) I don't see a source for them anywhere. (photos attached.) ALSO, it's been so long since I removed the Drive shaft, I've forgotten how one re-installs it, that is, how do you make room do get the rear coupling reattached?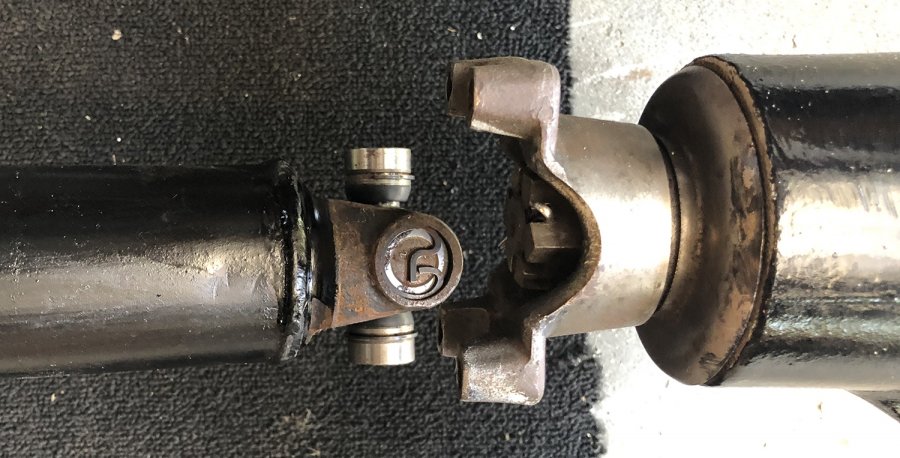
-
Odds and Ends for the B4B
53 Truck-O-Matic replied to 53 Truck-O-Matic's topic in Mopar Flathead Truck Forum
After reading the info you all have supplied, especially JB, I realize I had incorrectly thought those lubricating washers belonged to the spring shackles, but they belong to the brakes, so I'm good, and now I have the ones I need, definitely reusing what I have. The shock washer, maybe I'll poke around a couple of shops and see if they have any old ones laying around. THANKS! -
Odds and Ends for the B4B
53 Truck-O-Matic replied to 53 Truck-O-Matic's topic in Mopar Flathead Truck Forum
Done and done. You guys conquered my fear of the unknown on that one. I used the wood, though I have used sockets for similar tasks in the past. THANKS!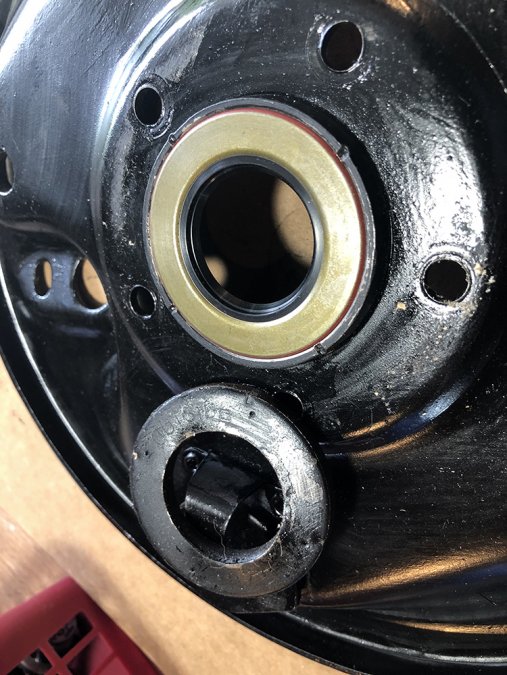
-
Rear Wheel Cylinders for 53 B4B
53 Truck-O-Matic replied to 53 Truck-O-Matic's topic in Mopar Flathead Truck Forum
I see what you mean. (pic attached). Tough call, you're probably right.......