

ebruns1
-
Posts
214 -
Joined
-
Last visited
Content Type
Links Directory
Profiles
Articles
Forums
Downloads
Store
Gallery
Blogs
Events
Classifieds
Everything posted by ebruns1
-
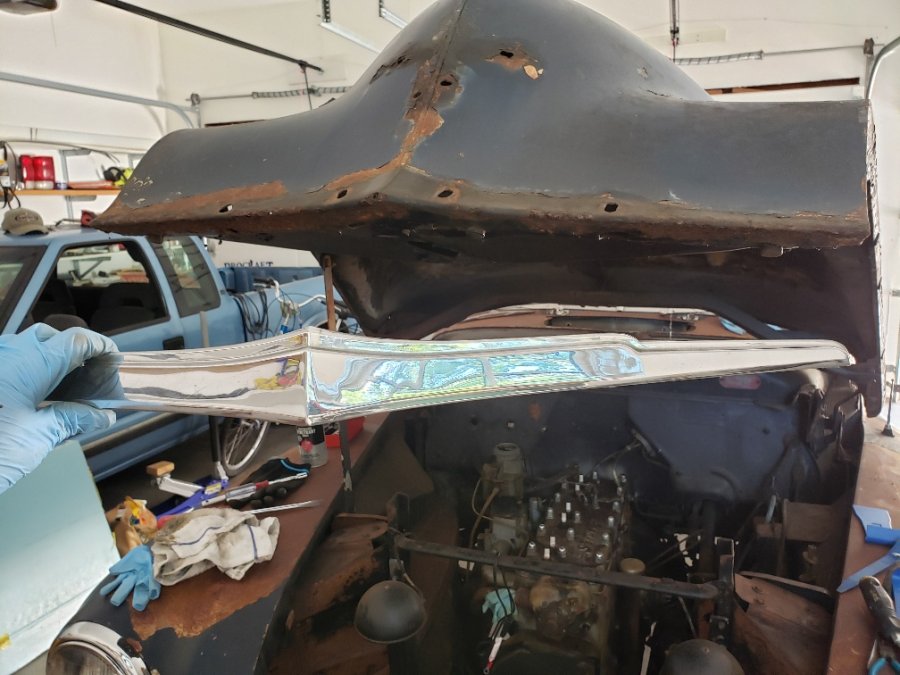
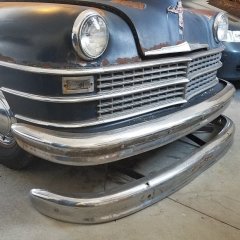
Hood "mustache" trim is off! Only snapped 1 out of 4 studs too haha. Dang, I knew it was gonna happen...the first 3 studs and nuts looked ok but the last one was badly rusted and just snapped off when I torqued it. Not sure how to fix this, maybe I'll just leave it as is and only install the other 3 nuts on it. Unfortunately, it is one of the ends and not the center. I really don;t think it would go anywhere though... Notice on the photo the inside of the trim was packed with pine needles and dirt that got behind it. Too bad the PO left it out under a tree somewhere... NEW problem... The hood ornament came off just fine. I can't figure out how to get the center hood strip off. There are no nuts from underneath so does it just "clip" on like the belt trim that I have to pry off? I tried to get under it and it really seems tight. If you guys can verify one way or the other I would appreciate it. I have enough things to fix already and I don't need to add one more! I don't want to put a crease in it. Thanks!
-
Thank you Fellas! That nylon clip that PlyJim recommended sounds perfect if it fits. Why? Because I like the idea of a push-in non-metal clip that doesn't need a backer nut. Half of my original clips were almost disintegrated from rust. The others had the stud break loose and had to be cut off. I hope to save the next guy in 50 yrs. who wants to re-paint this car a lot of trouble by going with nylon plastic. They are hidden anyway and this car is never going to win points for originality... I will probably need to use some original metal "H" clips just for correct positioning but the rest can be nylon. Also, most of them need to be "push-in" style since once the upholstery is done there will be no access to where you would need to install the nuts and washers. Casper - I checked the links you sent...I actually have the original stainless cowl belt line trim piece. I was referring to my photo that shows the cowl CLIP set up with the two large flat head screws and the reinforcement bar the lays over both clips. It looks like 2 "H" clips underneath that flat bar stock. I'm sure I can fab that up if it is really necessary. Why is it there? Just to give the front fender joint that meets the cowl some reinforcement? That's the only reason I can figure...otherwise I can just use any 2 clips. Unless someone sells that as a complete unit? Dodgeb4ya - Thanks for the tips on the nose trim. I will check again under the hood lip to find those retaining nuts. I've had bad luck in the past, they always seem to break the welds on the studs and just snap off. I guess I have no choice but to try it and hope for the best... Also, I did read your post on removing the bell retainer on the rear of the door handles. There must be a trick because I tried to remove one from my trunk handle and I could not get it to rotate at all. Guess I'll have to have the chrome shop remove them for me. PS - does anyone sell replacement bell retainers? I may have to cut mine off and was wondering what to do. I seem to remember someone recommending drilling a hole and using a cotter pin instead to make it easier and also removable in the future. Seems like a much better idea...guess I'd need a rubber or nylon bushing on the shaft first?
-
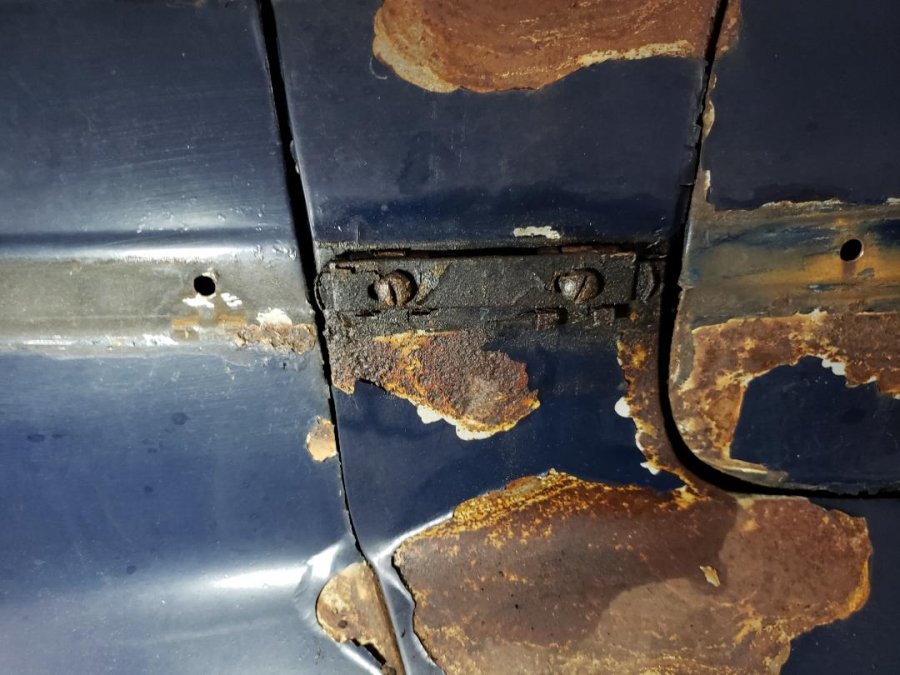
Hey Fellas, 1. Had another productive weekend cleaning up and stripping trim off the coupe. Did they really need to have a clip every 6"??? Seriously, those belt line stainless mouldings were never going to blow off even at 100 mph! I may close up every other hole and install half as many. It seems like every hole is just another leak waiting to happen. One strange situation I had was that the last 3 clips closest to the rear were the spring type with the aluminum nut accessible from inside the trunk. All the rest were the original "H" press in style. Was this a stock install, or did the PO change them out when the car was repainted? It seems like the H style are offset, meaning that the prongs are more towards the top of the H clip and not exactly centered on the clip. So does that even matter or do I need the H-style to get the belt strip to sit properly over the panel seams? Those original H=style clips are way more pricy than the spring style. What did you guys use on your cars? 2. How do I get that stainless front hood trim off? It looks like you can't access any nuts on the back side so I guess you need to pry it off? I'm a bit nervous about creasing it if it is bolted on since it's in perfect shape now. Some trim on my Ford F1 had welded studs and would only come off by removing the nuts, or im my case grinding them off! What a pain. 3. The cowl belt line stainless looks like it has a reinforcement bar across them. I had to grind off the screw heads since they were rusted solid. Am I going to have to fabricate a replacement? I had to destroy they other one when I was grinding. 4. Looks like I may need to re-chrome these door handles. They are really the worst of my chrome, although everything needs new chrome I dont have that in the budget and only going to do the worst looking parts. Anyone have a reasonable company they recommend? Any idea on cost? Only looking for rough idea obviously I'm sure they will have to quote me on them.


-
Thanks fellas! So you are saying there's no option to change the rotation of the star...only to loosen the strike plate and move in towards the interior? I was thinking that maybe the star was on a spline with multi-position adjustment. It still seems weird that one is vertical and the other is angled... I will clean them up tonight as you suggest and try to get the screws out of the strike plate and see if it can be repositioned. I guess there are oval mounting holes in the A-pillar to allow for side to side adjustments? If worse comes to worse I'll pull the whole mechanism and try cleaning it...that's a good rainy-day workbench project and I have limited time on my feet before my legs give out. JT
-
I actually like my all chrome knobs better...not sure how the PO remembered what each one was connected to. Trial and error perhaps!
-
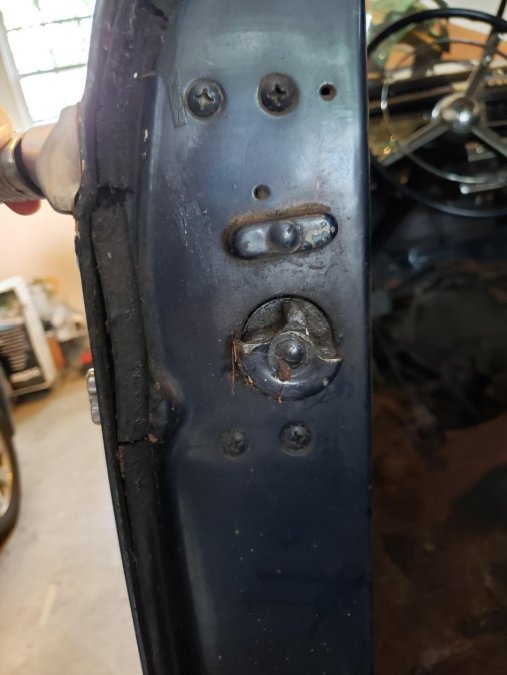
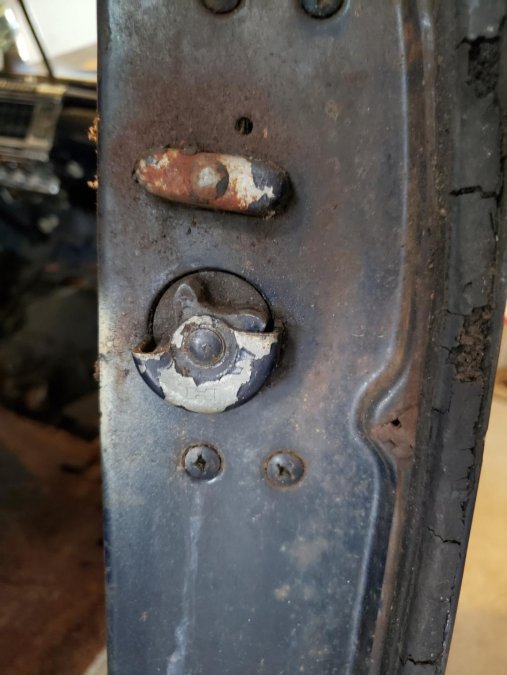
Hey Fellas, Take a look at these pictures please. My driver door closes tight but the passenger side does not. When I shut the passenger door it catches about 1" from closed . The spring on the striker is working and looks to be good with little wear. Oddly, the driver strike spring is stuck in the up position yet that door shuts tight. The only difference I can see is that the top star "arm" on the passenger door does not seem to be in the vertical position but is slightly angled away. Is there any way to adjust the rotation of the star? I searched through all the threads I could find and I do not see any mention of adjusting the rotation position of the star. It seems like it needs to move about 20 degrees to match the driver side. If I loosen the screws on the striker plate will I be able to adjust it tighter or does it only mount in one position? Hoping I can fix this without tearing apart all the door hardware... Thanks for any advice!
-
What a nice surprise! I finally turned my attention to the dashboard last night. There was a weird brown coating on all the bake-lite trims on the dash you see in the first photo. I thought they were all toast but I started cleaning the dash with some industrial de-greaser crud cutter and much to my surprise the brown gunk eventually came off! Everything looks pretty decent already but I think I will try some polishing compound and see if I can buff them up a bit. Sadly, the glove box door cover does have the typical cracks in both upper corners. It is serviceable for now but may have to try some epoxy filler and a re-paint in the future. Also took off the chrome Kleenex box holder for now. Question: The other thing I was not sure about are the control knobs. Most of the photos I have seen all have labeled control knobs...not the solid chrome ones that I have on mine. Was this a factory option? Were there labels that might have peeled off over the years? How would you know what each knob was for? Too many to remember without some kind of ID. Maybe they were replaced at some point who knows... They do look nice however, so I will keep them! JT


-
If it wasn't good enough for you, I doubt anyone else would want it...scrap it!
-
Happy to hear some input on leaving the front clip attached! My only comment so far...what makes you think I would not support it? I agree that leaving the front clip attached would put a lot of stress on the cowl... but I would either attach an engine hoist or use a speed jack to keep it supported. I didn't mean to just leave it hanging.... So, other than the radiator U-mount, what else is up front that needs to be unbolted from the frame?
-
Beautiful!!!! You are a lucky guy!
-
1947 Coupe - Are all doors like this? And next problem...
ebruns1 replied to ebruns1's topic in P15-D24 Forum
It's off! I jammed a screwdriver handle under the side that the screw came out and then I just cut through the bolt with a long sawzall blade. Cut like butter! So here's an odd question follow up. Almost 100% certain this is the original interior. Each of the front arm rests were held on with a flat head screw in the rear hole and a phillips screw in the front hole! Do you think someone swapped out the front screws at some point? And why would they not swap out the rear screw while they were at it? Very strange! -
1947 Coupe - Are all doors like this? And next problem...
ebruns1 replied to ebruns1's topic in P15-D24 Forum
Here's the problem...my inner part was broken so when I was looking straight down on the hub I thought it was meant to be that way. I eventually was able to maneuver the handle, hold the flashlight and push the retaining pin out. Thanks for all the advice! One crisis avoided...on to the next one! My driver side door arm-rest will not come off! the screw on one side just turns...the U-nut must have broken off and is just spinning inside the door. Any tips for this or is it going to be pulling out the sawzall and getting the blade behind it to try and cut it off? It doesn't look like I can get a grinder inside the housing to remove the head. Don't know what else to try....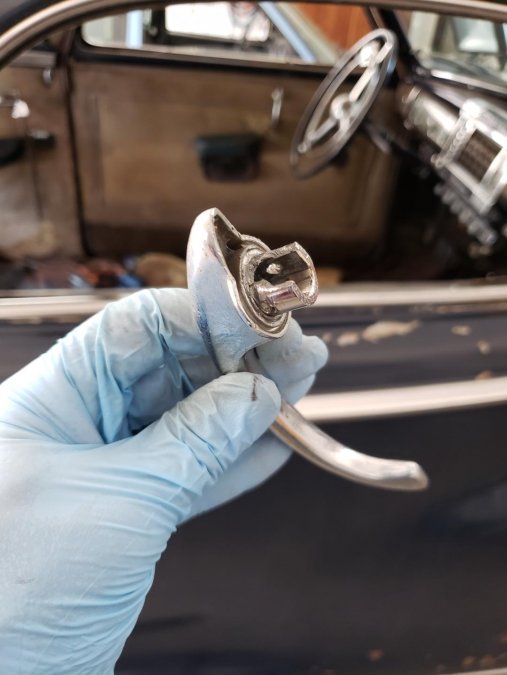
-
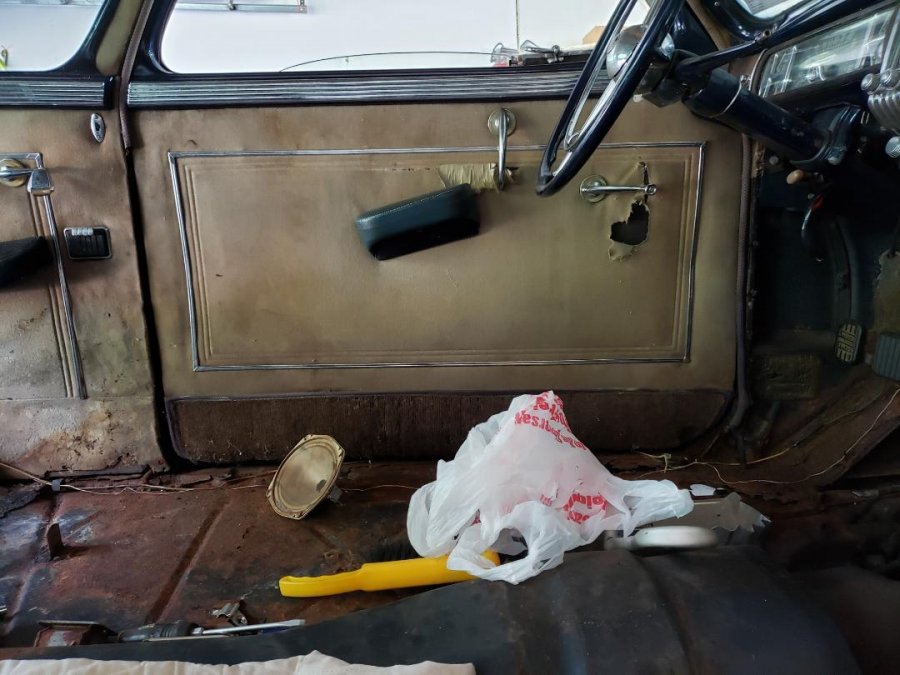
Hello again, 1. Take a look at my original door upholstery. On both doors the area to the front of the window crank is destroyed from the window crank rubbing the fabric. Does this happen on all Chrysler Coups? I'm going to have to have new door coverings made and I don't want this to happen again. Is there any secret to stopping this from happening again? What has worked? 2. How do I release the opener lever handle from the door? I pushed back the bezel and there is no pin that I can see to push out like on the window crank. Does it attach some other secret way? I hope I don't have to cut them off... PS - anyone sell new repro door upholstery or is my only choice to have them custom made at a local shop?


-
That's a great help Casper50, thanks! I'm going to attack it again this weekend. Were your sleeves bonded to your studs and brackets like mine seem to be? The rubber mounts crumbled away but the sleeve is almost welded to the bracket from years of rust. How's you get them loose? I'm not used to these mounting studs on cars, I'm more familiar with the truck cabs that have a long bolt that drops down through the floor which is what I was expecting here. I guess I can't hit the studs with a mallet and drive them up through the floor?
-
PS - once I get the body off the engine with all accesories, fluid drive, and frame will be posted for sale. Keep watching and hopefully in a few weeks will be available. Engine is locked up BTW so will need work to get it running...but the engine was running when it was new!
-
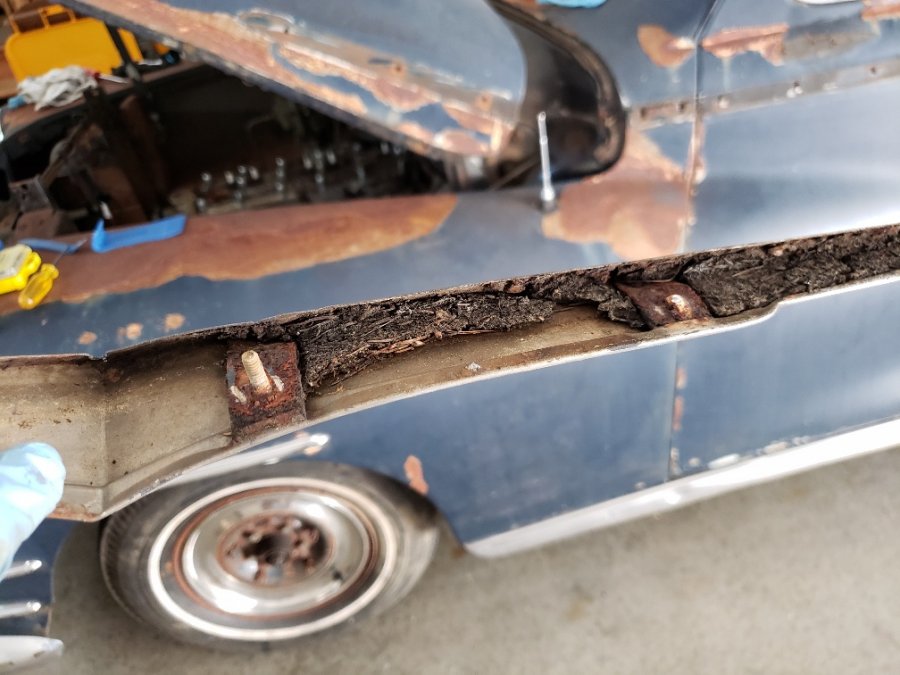
Need help again fellas! Very exciting! Finally getting somewhere on this project! Got the seats out (mouse nests and droppings included!) and will be removing the door panels next. Started on the frame bolts and I've got the outer 8 underside frame bolts between the wheels off (rear 2 bolt on each side required grinding). I remember reading here there were some additional hidden bolts as well but I can't seem to find the thread using the search. Would someone please tell me where to look or where the bolts are located? My manual doesn't really show much. It's a Chrysler 2-door coupe if that matters... Also...I want to leave the front clip attached when I lift the body off. I will remove the hood to save weight (already got trunk off, it need a new bottom edge - all rotted and missing bottom 2'). Do you think this is possible? I'd rather not unbolt the fenders and inner fenders and grill to get the body off. Am I being unrealistic? I am sure there will be many opinions...but I'd like to hear if anyone else has tried it... Thanks!


-
Thanks for all the information and mis-information! haha I'm still a bit scared to try bending that old 70+ yr. plastic to get it out of the housing...I can envision it cracking in my hands as I push in the ends. Has anyone here actually tried this with any success? I guess I'll try removing the one from the broken housing first. If the good lens cracks then I am stuck with the faded and cracked lens already in the replacement housing...
-
Both mine have what looks to be factory gaskets. I"m sure the lens has never been removed from either the old one or the replacement.
-
Excellent, thanks Dodgeb4ya!
-
Need some help fellas! My original center brake light housing cracked (don't ask - dumb mistake using a front end loader to push into garage!). So I bought a nicer replacement off Ebay except for the lens on the new one is cloudy and has some hair line cracks showing. Here's the problem...It looks like the lens is a press fit into the housing. I'm afraid to squeeze it on the side too much in fear of cracking the two curved ends of the plastic lens. Anyone have any tips on removing this? Also it the rubber gasket is pretty much dried and cracked does anyone make replacements or do I have to use clear caulk to try to keep it waterproof? Thanks for any suggestions! JT


-
My '47 Dodge convert has the same mechanism. Now I need to check my boots too! If you find a source let us know...
-
Do not try to press out the studs without drilling out the studs first! I had a mechanic (85 yr. old) who said he could do it no problem on his press. He cracked my drum and destroyed it. Took me a long time to find a replacement and he cut it for me at no charge to make up for cracking the original one... Jim T
-
Fellas, Would someone please tell me what these numbers on the engine mean? I'm looking to possibly buy this for my D-24 if it fits. Is this a good idea? He says it may be "re-built" by father in law who passed so there's no verification of what it actually had done. But it's still probably better than mine! Thanks. D34-300779 50 11-7 1326306-4
-
Nice work both Andy and Wiggo! Can you post a better close up photo of how you made the rain gutter clamps please? This gives me hope of building my own one day. Of course, I need to get my '48 Dodge up and running, but I may copy your idea for my '50 Ford pickup which I just got re-wired and on the road. Jim T
-
That's awesome bud! And I love the double driver side mirrors haha! JT
