

woodie49
-
Posts
484 -
Joined
-
Last visited
-
I put a '53 OD unit into my '49 Woodie several years ago. It had always worked great. Just recently, it will not shift into OD after I have been driving for 15 or 20 minutes. When things are cold, or not completely warmed up, the unit shifts into OD as it should. After a while of driving at freeway speeds, when the unit drops out of OD because i stop or slow down it will not shift back into OD at any speed, whether in second or third. I am suspecting this is an issue with the governor. I think I can override the governor by wiring in a manual switch to the appropriate terminal and to ground, that I can trip from in the car. When the unit stops functioning, I will try overriding the governor (at correct speed) using the switch. That should help me confirm or rule out the governor. Am I likely to mess up the internal workings of the governor by doing this?
-
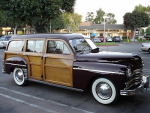
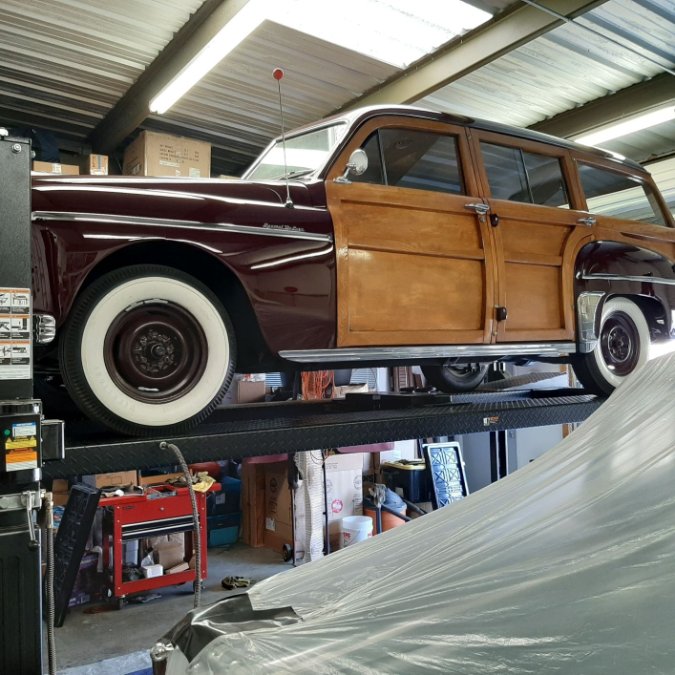
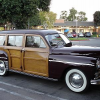
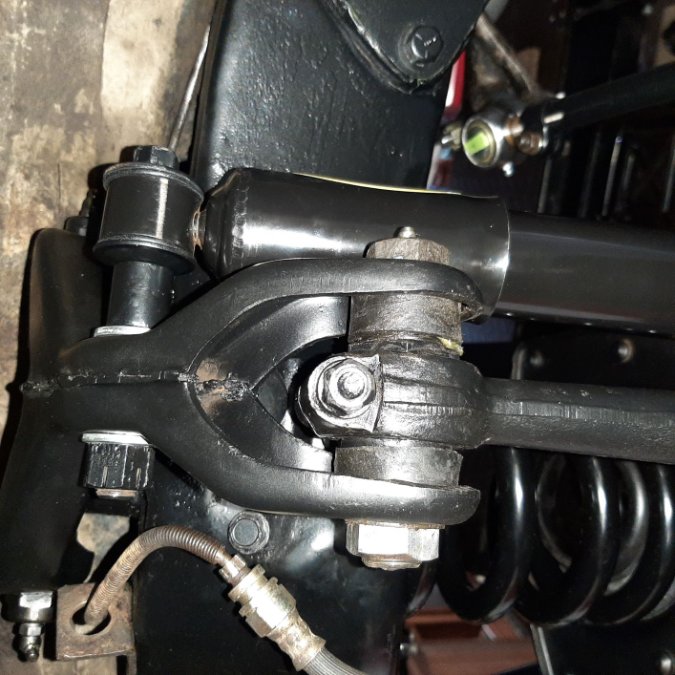
Finished up the front end work a couple days ago. I replaced the King Pins, coil springs (used the MOOG progessive 850's), shocks and tie rod ends. Rebuilt the brakes cylanders as well, since I had it all apart. Really happy with the result. It is very stable through 65MPH, haven't had the chance to go faster. Stops good! Noticeably better over bumps. I did adjust the toe-in, but I have no good way to check the caster/camber. I have regular nylon ply tires on it, so a good set of radials is probably next on the list. Thanks to all you guys who helped with this?. So glad I did not hone out the supports to accomodate the oversized Pins. Here are a few pix of the finished product, including one on the lift - I should have taken this while it was on the road, but the stance was not noticably affected by using the MOOG springs. I have a little less than a 1/2 inch drop from the back of the rocker infront of the rear tire to the front of the rocker behind the front tire. I read some varying results with the springs - for me they are just right in terms of stance and feel.


-
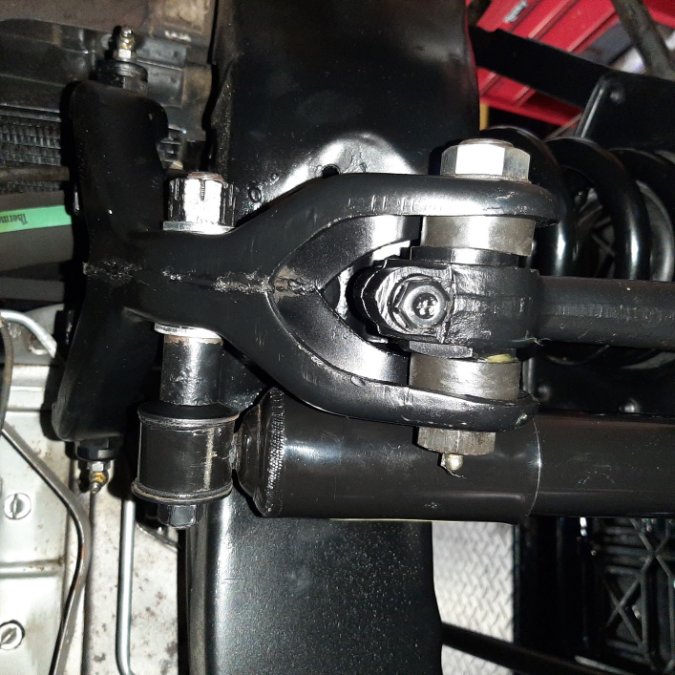
I don't see anything in the manual that says to center this or to indicate that it is otherwise adjustable. Unfortunately I did not get a picture of that area before I began the project. I guess if out of position, it would likely affect the castor. I'll know when I ultimately get it aligned.
-
1952 Plymouth Overdrive Upgrade questions.
woodie49 replied to 1952Cranbrook's topic in P15-D24 Forum
I put a '53 OD unit in my '49 Plymouth Woodie. Everything bolted right in, I did not need to change the drive shaft. the linkage all worked fine. My unit came with the OD solenoid, but I have seen OD units offered without them. You will need an OD cable to put under the dash to turn your unit "off" and "on". That allows you to lockout the unit when you don't want it, like maybe a very hilly area where you want the trans to help you slow down. The cable goes down to the OD part of the trans . Usually this will be in the "on" position, which is fully pushed in. then the unit operation is essentially automatic. The lockout in inside the trans, if you have an OD, you should have the lockout. You will need a governor, which will most likely come with the trans. It controls when the unit energizes the solenoid to allow the shift into OD. You do need one, I am not aware of any workarounds for it.. You will need an OD relay. Mostly this does not come with the unit, if it does, its a great deal. If it doesn't, you can use a substitute relay that will plug in under the dash for very little money. You can get the kick down switch if desired. That sits at the carb and grounds your OD circuit temporarily stall the engine and allow the OD to drop out for hard accelerating. I chose not to use this. Instead, I have a switch under the dash that I can use to ground the circuit and then when i let off the gas, the unit shifts out of OD. When I engage the unit through the switch, it just closes that part of the circuit so that when the governor closes the points to actuate the solenoid, the unit will shift into OD. I prefer this to the kickdown switch. This set up will not risk damaging the transmission as you might using the cable to "turn off" the unit. You will need to create a small wiring harness for the unit. I am not good with auto electrics and i got it done, so really anyone can. If you don't get the relay with the trans, PM me and I can send you the info for the work around I used (assuming you leave everything 6 volt). Probably one of the best upgrades you can do for drivability and enjoyment. You can keep up with traffic and not worry that you are redlining an 80 year old peice of machinery.- 38 replies
-
- 1
-

-
- overdrive
- overdrive swap
- (and 3 more)
-
Don't know. Once i managed to get the support into the fork with the two seals, there did not seem to be a bunch of play. I'll need to go back to the manual to see if there is some quidance here. I did not replace the bushings or the pins in this assembly.
-
Finally got the knuckles back from a semi-local machine shop. This was the third trip. First time they were "ready", I could not press one of the pins in manually at all, and the other required near super-human strength. The guy there thought that once I "pounded in all together", the weight of the car on the joint would loosen it all up sufficient to make steering quite easy. We talked for a while and they tried again. Second time seemed like they had not touched it further. I was going to take it back and try elsewhere, but they wanted to send it to a shop they use for all their "unusual" jobs. Third time seemed like a charm. These fit quite snug with no side to side movement, but I can push them through the knuckles and supports with some effort. All the grease holes line to the fittings, and it all went back together pretty good. In addition to the king pins, I replaced the coil springs, shocks, and tie rod ends. I can not fine any tech specs for the tie rod ends (but the sleeves get 20 lbs.), but I an guessing about 30-40 lbs with a cotter pin should do it. Also, I am not sure about the tightening bolt on the top of the knuckle support. I think it ultimately just insures that the alignment adjustment holds, so I assume about 20 lbs. should be enough for this. Anyone actually have any specs for any of these? I'll work a bit with the alignment and rebuild the rear brakes, then its back on the road, Really looking forward to it. Thanks to all here who have offered all kinds of help. Really a great resource as well as confidence builder.

-
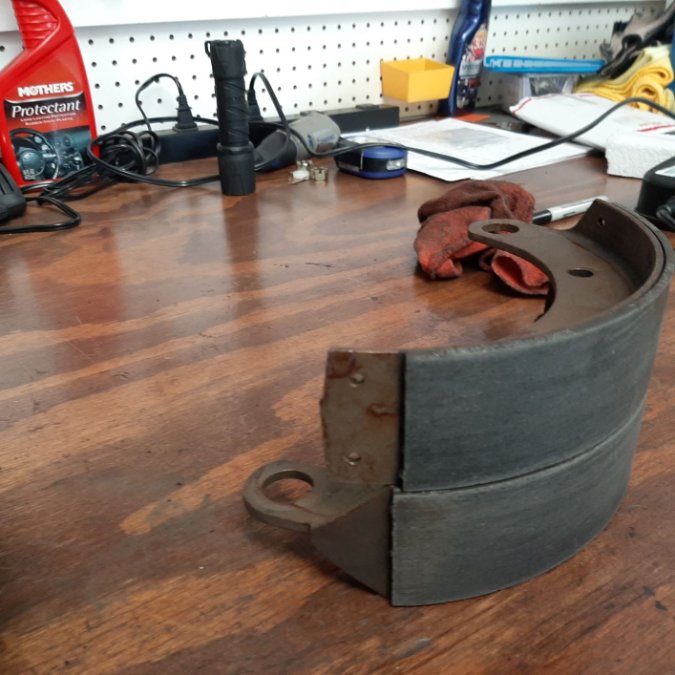
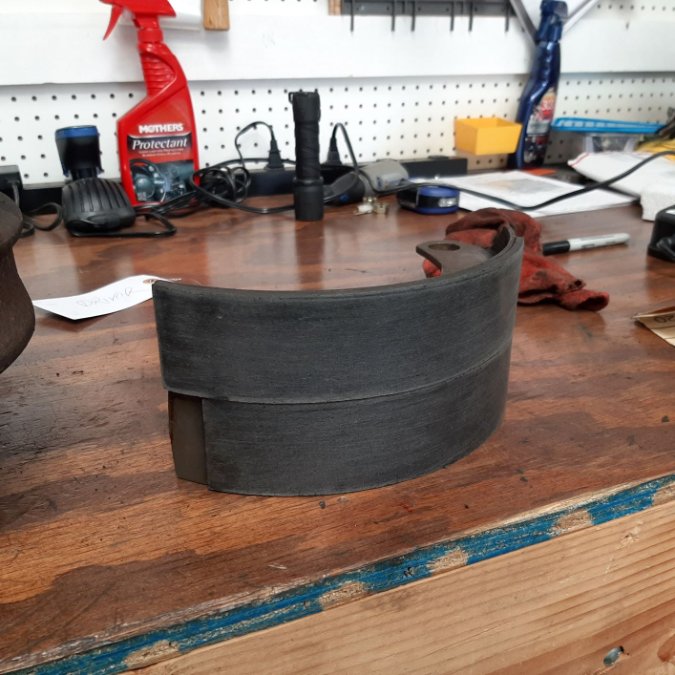
Attached are photos of the two sets of brake shoes from the front of my '49. These are off because i am doing the king pins, the brakes have no problems. You can see the passenger side shoe linings are the same size and centered about the same. However, on the driver side, the lining of one shoe starts significantly further behind the anchor bolt area (and looks like the lining might have been broken at that end at one time) and extends almost to the end of the shoe, while on the other shoe, the lining starts quite close to the anchor area and ends about about 1/2 from the other end of the shoe. Both the linings are very definately affixed to the respective shoes. I am sure that nothing has been moving for a few thousand miles. The inside of the drums show no issues as well. But, something doesn't look right. I think I will have the lining extending to the end of the shoes be the leading edge for that shoe, and I think that is how it was when i pulled it off. Since everything is permanently affixed, and I have used these since I've owned the car, i believe there is no reason to feel they are unsafe. Any thoughts on this?


-
James, this car has always handled good and is a fun car to drive. I plan on using the standard bushings to reassemble, assuming they are properly reamed. However, if i experience any issues, i will try the Torrington top bearings. I am pretty sure it would be an improvement. But I do prefer everything to be bone stock on my cars. I do realize there is a lot to be said for improving the original, but this car will likely see less than 1000 miles a year, and mostly local. In the days when I used to drive to various Woody shows, this would have been more important to me. I do appreciate the insight.
-
Just to follow up on this. i got a set of NOS PN 626 975. They are .795 diameter. They fit like a glove. They are tight, but i don't need to pound them in. I returned the oversized pins. It still bothers me that the replacement parts are .015 larger diameter than the originals. Given the design, i don't really see that an oversized pin would ever really be needed. I just think these are being made to the wrong spec. I assume that we will be seeing more of this problem going forward. I still need to have the bushings pressed in and reamed. Hopefully I have found a place to do that. All the info on this is much appreciated. Without it, I probably would have gone down the road of honing out the supports to a bigger bore, not needed.


-
Yes, I have the packaging for both sets of pins. The packaging is identical and is plain brown box - no info of any kind on it except for a stamped number "53" on it. One I bought a while back, not sure when or where. The other I just bought from AB. I talked to them before I bought this set about the issue I was having, I am sure if they were selling oversized pin sets, they would have mentioned it to me given that I had explained my issue to them before they sent the pin set to me. I am getting various size specs as i go through this. In this thread, we have a .7945 and a .795. I know I have a .7965. It is possible that both my calipers are both off a bit, but they agree. Once I settle on a set, hopefully it will fit.
-
So some of the aftermarket are also to .795 spec. That is helpful. At least one Ebay vendor has come back with 795, also aftermarket. So, I will be able to source a set and hopefully that will do the trick. I would just think that they would all be the same. Someone mentioned that oversize pins might have been not unusual, but I would assume that if someone is selling oversized, they would know.
-
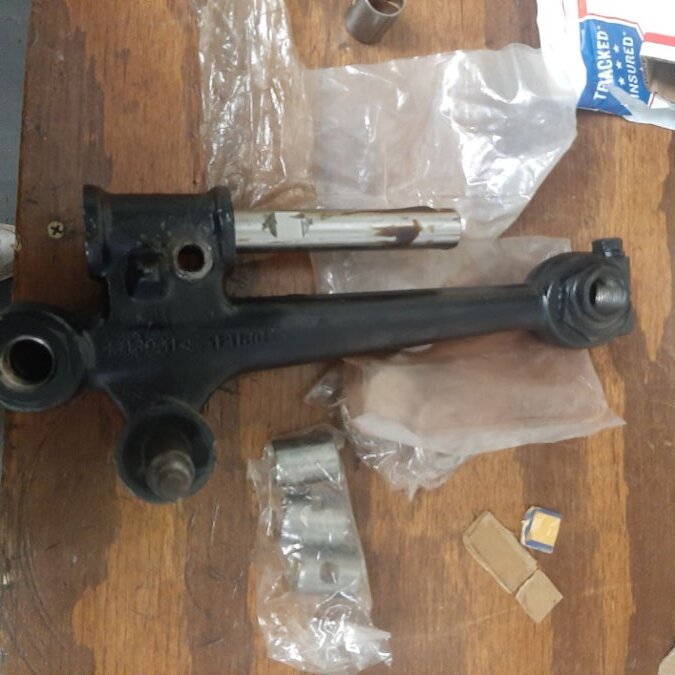
James, I tried to go down this road in an earlier thread, but I don't think a lot of people have parts cross reference books that helped. The part numbers on the support are: 1313951 12232 (pass) and 1313951 12130 (dvr). You can make out the number for the support n the first posting in this thread. These numbers DO NOT match my parts book, which calls out 859079 12235 (pass) and 859079 12259 (dvr). I thought that these must have come off another Ply/Dodge. They certainly look correct for the car and I don,y t know the Dodge parts. I have found a MOOG catalogue online that provides a lot more data (this really helps). What I do find in that catalog is that the specs for all the 6 cyl Plymouths from 1939 (P7) to 1954 (P25); all the Chrysler 6 cyl from 1940 to 1954; Dodge 6 cyl from 1934 to 1955 and the 6 cyl De Sotos from the same years all use a king pin with the spec .795 (diameter) X 5 7/8 (length). Other than those, the 7 passenger and eight cylinder models all used pins that were a significantly larger diameter (usually .936). The only pin that I saw in all this was a tad smaller was for a 1934 Model PF Plymouth, which had a pin of .733 x 5 7/8 and had the notch offset from the center. I believe that the suspension in that year was sufficiently different that this support could not have come from that car. So, if the MOOG catalog is right, then the spec is .795. I think I just need to find NOS pins that have the original diameter for the part, as the current sets I have all have a diameter of .7965. If the originals are still too large (it couldn't be by much) then I will have the Supports honed to fit. So, while the supports are a mystery (maybe they are Dodge?) as to the part numbers, I think they are similar to the originals. I am anxious to see if a NOS pin set will fit through. If not, then I'll have them honed. Not sure there is much further to go with this.
-
I guess I just wasn't clear. I am talking about the King Pin. The comment was whether I was aware that there were bushings that needed to be reamed to make the pins fit. I was trying to communicate that the bore that was too small was not on the steering knuckles, which do use a bushing that needs to be reamed, but on the knuckle support, which does not have a bushing. The pin simply goes through it and is then locked into place by the tapered pin. But, the bore in the support (for the king pin) is a couple thousandths smaller than the King Pin. Pounding it in does not seem like an option to me. So, that is why i am trying to find a pin set with a diameter small enough to go through the support without requiring that i have the support honed out to a larger diameter.
-
James - thanks for the PDF. The woodie is a fairly small car. It steers better than most my other similar era cars (which are mostly Packards) and, once this is back together, might see a couple thousand miles a year. I think once back together, I will have no hard steering issue. but, if so, I know where to look. I did follow your thread with interest. At first I was glad it wasn't me, know i wish I wasn't me. But, I will get it sorted out soon enough. Thanks,.
-
The ends of the pin, held by the steering knuckles, have bushings that need to be pressed in and then reamed to the pin size. The knuckle support has a bore to accept the pin, but it does not have a bushing. The pin goes thru and then you use a wedge shaped insert against the flat of the pin to tighten up the fit and insure the pin remains stationary in the support arm (I think you probably know this, but trying to be clear). That is the bore that is too small for my pins. It is .7945, the pins I have are .7965. (sorry, I reversed the measurements (7s and 9s) in my first paragraph above - I am slightly dyslexic and usually notice this since I am aware of it. So, .7945 is the bore, .7965 is the pin). The pins are very hard. I do not think it makes sense to pound or otherwise force the fit. Something has to give, I don't think it will be the pin. So, it is the support that I am considering boring out to accommodate the pin. Also, this should be a hand assembly - not press fitted. It might need to be assembled/disassembled one or twice to adjust the endplay with shims. I am hoping that a NOS set of pins will fit my Knuckle Supports without the need to modify the bore. I just prefer not to modify if i don't have to. If I can find a vendor who has pins that are .7945 diameter, I assume that will do it. My guess is that this is probably the diameter of the original pins which were PN 626975. The post by Dodgeb4ya probably bears this out. The box looks like original stock, so I assume the pins in the box are also original stock, and he measures them at .7945. I have a set of pins, bushings, etc., so can make this work with only the pins. But, if I find the original kit (PN 933 435) that would be preferable. These is a set on Ebay, but the seller has not been able to measure them for me.