

Dave72dt
-
Posts
4,450 -
Joined
-
Last visited
-
Days Won
20
Content Type
Links Directory
Profiles
Articles
Forums
Downloads
Store
Gallery
Blogs
Events
Classifieds
Posts posted by Dave72dt
-
-
Since you don't weld (preferred), an alternative repair method would be to make a panel and glue it in with panel adhesive (not the stuff you get from a hardware store but the kind a body shop uses to fasten panels). You still have to cut the bad metal out. Leaving the rotten metal in and covering over will rot both pieces. If you decide to make a panel and pop rivet it in, still cut the rot out and seam seal top and bottom. Fiberglass has been done and some swear by it. Your choice.
-
I'll assume it's pretty dirty and caked with old grease around that end. Start cleaning. Remove the grease fitting and start looking for threads inside that end as well as a slot. Something on that end will unscrew to allow the ball socket to be adjusted/removed. There may be an external set screw locking the adjustment. do a Google search for drag link sockets so you know what to look for.
-
If your local shops won't do split rings anymore, maybe they still have their old cage stashed somewhere that they'd be happy to get rid of.
-
It was probably round originally and has been subjected to years of being compressed into a square cut groove. I wouldn't want to subject cork to the pressure that is developed in an oil pump. Are those Ebay rings square cut or round? Calipers to measure ID and OD of groove.
-
My 93 F250 rear shock upper mounts sit about 2 " inboard and below the frame rail. To install these on my truck would require mounting them on the inside of the C shaped frame, open side of the frame is on the inside so I would guess the standout to the shock stud to be about 4 inches. you'll have to wait till it stops raining and dries up a bit if you need more accurate measurements.
-
 1
1
-
-
The drag links I'm familiar with had one end with cotter pin and slot cut into the end that a wide screwdriver blade or drag link socket fit into for adjusting and the other end would be a tie rod style. If the end that has play is similar to the tie rod style Sniper put up, replacement is your needed. If the other style, I believe some replacement sockets and cup, spring may be available. Post a pic of the bad end if you can.
-
1
-
-
8 minutes ago, kencombs said:
Closed at rest there is current but the closed points don't interrupt the flow so spark.
And when you turn the key back off, the current flow is interrupted
-
1
-
-
The best I have found so far is Wizards metal polish. I've tried Mothers and Never Dull and the Wizards works far better than either of the other two.
-
Will it do after the truck has been started? Does the engine need to be brought up to temp or just started?
-
2 hours ago, Ivan_B said:
Never saw the points firing a plug when turning the key 🙄
Is this a stock setup, besides the ignition? Are you running an electric fuel pump or any other things connected to the ignition switch?
I consider points a switc0h. Open, close, on, off. Ignition switch on, ign switch off. Logic tells me my previous post is a possible scenario and every electrical circuit in the truck is available when the key is on.. I don't know whether or not Pertronix would or could respond similarly. How repeatable is this condition? Now that it's sat for a while will it do it before starting the engine or does it have to be run for a while. Will it do it after sitting for ten minutes or a half hour? Will it do it a second time, turning the key on and off immediately after it does it?
-
1
-
-
By turning the ignition on and then off you did the same thing the points do when opening and closing, letting the coil fire a plug, and if a gas mixture is in that cylinder when it fires it'll rock the engine. That's my guess.
-
2
-
-
That's the correct direction.
-
5 hours ago, kouseneric39 said:
Another key part I forgot to explain is if I start the car in gear the trans is spinning free and quieter than I've ever heard this car when I press the clutch pedal goes all the way to the floor however if I apply the e brake the trans shaft stops completely without affecting idle or stalling so this is the reasoning behind me looking into the pedal assembly itself because it seems the clutch must be partially engaged or the car would immediately stall
If you could put some periods in your post it would help separate the one thought from another. Are you saying the trans runs quieter when starting it in gear with the clutch pedal up than it does when starting in neutral with the pedal up? Does the pedal come all the way up? Is the free play correct? If you found of ring of brass on the input shaft, it's probably too tight and likely slightly deformed from the install.
-
It sounds like you're having difficulty getting the trans into gear because the clutch isn't releasing. If you had to pull the trans in with bolts, the clutch disc may be binding on the trans input shaft or the pilot brg is binding on it. The trans needs the correct oil and amount in it to provide some resistance to help slow the gears and the clutch itself must be properly adjusted for free play.
Using a disc that was saturated with oil is going to be a problem and may be the problem you're having. The most likely is the disc binding on the shaft, One other possible I have seen is the disc installed backward.
-
OP's first post mentioned flaking on the bottom shell of # 6 so I don't think he's going to be able to just leave them alone and since the engine was stuck he may need to go further in depth. The visual inspection is the start. How far the OP needs to go can be determined later.
7 minutes ago, Sniper said:The 230 I bought to build had shimmed bearings, never saw that before.
You've led a sheltered life. There's a lot of things that were done to salvage engines years ago that people shudder at today.
-
 1
1
-
-
It MAY say the size if the crank has been ground before. That however won't tell you if the crank journals are worn. Each journal will require multiple measurements taken and recorded. Keith probably has video of the process. You may also want to watch a video on the correct usage of micrometers, how to read them. Using them correctly will ensure an accurate measurement.
-
29 minutes ago, Sniper said:
I dunno, call me a snob but I's rather spend my tool money on real quality tools. Like Starret or Mitutoyo. Yeah, they cost a bit more but are definitely quality tools.
I would too, and have. I was also making my living with them. It was the style of caliper that I was pointing out and he probably doesn't need to spend a bunch of money on a likely one time build buying high end tools. Cheap or not, they'll still be more accurate than the slide caliper for crank measurements. A slide caliper is still a handy tool for quick measurements and it won't hurt him to have one in his toolbox.
-
-
2 minutes ago, Cooper40 said:
@Dave72dt I have a torque wrench but I will be torqueing with the engine still in the car. Is it possible to do the mains and fit a torque wrench in there?
Yes, you may need an extension to clear steering and suspension components.
-
If you're finding flaking you'll also want to check the mains. For a cursory main brg inspection I'd choose any except the rear main since that would disturb the seal and if it wasn't leaking before, pretty sure it will after if you drop that one to check it's condition.
I'll assume you have a torque wrench.
-
Since the easiest position to replace the bearings is at the bottom of the stroke, two cylinders will have the best access, the other 4 will have severely compromised access. Replace the bearings in the two at the bottom one at a time, rotate the crank until another two are at the bottom, do those and then rotate again to get the last two. It only takes about 4 inches of fuel line that way.
-
2
-
-
Start checking out lift supports similar to those used on the rear hatches of SUVs. They come in varying lengths and strengths. Some fabrication may be needed to attach them, i.e. welding and cutting. Electric could also be used, again, some are used to auto close tail hatches, and passenger entrance doors on vans or tonneau covers.
The problem with fabrication is it's likely to mess up that lavender paint and if it's custom mixed you better have some on hand.
If you're looking for specific parts, you'll be reminded to post them in the classified section, not in the main forum. Other forum may tolerate want ads and for sales in the main. This one does not.
-
1
-
-
There should have been an expansion valve or orifice tube changed as well. One of the common problems now is the tubes in the condensers are quite small and can not be flushed well so if the old compressor trashed itself, you new condenser may also be trashed. For warranty reasons most suppliers have a list of parts that all have to be replaced to validate it. A clutch bearing can give the appearance of a locked up compressor also. You can drain the oil from a compressor for measurement to determine how much is in the unit. Some new compressors come oil in them and some without so it might not hurt to do a drain and measure on the new one if you go that route.
-
barely remembered. I did look it up as a refresh.
Captain Kangaroo, Mr green jeans, Mr Peabody, Rocky and Bulwinkle, Mighty Mouse- long time ago
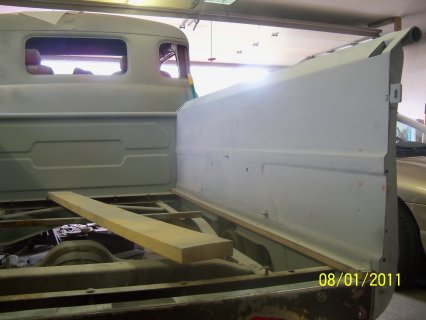
Front corner floor pans
in P15-D24 Forum
Posted
It still has holes in it and the bottom has not been blasted. If moisture can get in and sit, it'll rust. Panel adhesive has been used for years now. A lot of roofs are now glued on as well as some doors, rocker panels.