


Lloyd
-
Posts
533 -
Joined
-
Last visited
1 Follower

Recent Profile Visitors
2,452 profile views


-
Hey Pete. I came at my hinge pin mirror with a different approach than welding. Drilled straight down thru the threaded end of a VW hinge pin with a bit large enough for the brass insert on the VW mirror. Then dropped an original pin down thru the hole. These were pins I got off eBay. Had to grind the cap portion a bit smaller in diameter to get it to fit. Then taped up the threads and filled the hole with silver solder. Used a tapered bit to drill down thru the solder to fit the VW mirror brass insert. it was a bit and a learning process. Went thru a few hinge pins before I got two that would work. The brazing wasn’t my idea, I had read it in a comment to an older post. Dont remember who it was. here’s a pic:
-
Never mind, I found them on the https://www.robertshaw.com/products/listing/?q=4590-067 website. The ferrule comes with the nut. I guess the ferrule will "breakaway" when you tighten it. Never seen that before but it certainly looks like the critter I'm looking for. Having a little trouble finding a place in Houston to get them. The Robertshaw website shows 2 locations in Houston one is Grainger, but it seems Grainger has discontinued the item. The other is United Refrigeration but not sure if they sell to walk-ins. Might be contractors only - don't know. Google search shows a few other locations. I'll make some phone calls when they open up. In the photo above the installed fitting on the left is one of those fittings. Did you just screw it into the back of the gauge to compress it? I appreciate your input, thank you.
-
Yep you could chase the threads for the fitting and it should give you a new one. That would work for the nut. But where did you get the compression collars?
-
That certainly looks like it. Thanks LazyK for finding that. Looks like the best bet. Thanks for your input Jerry. I’m fairly certain it is 3/16”. I’ve picked up a couple 40” straight links of brake line and some fittings from AZone and and they are the same size as the original. The whole reason I’m trying to find the collar is so I can run straight tubing from the gauge to outside the firewall. The original was cut somewhere along the line and they put a rubber hose and more tubing to reach the firewall. I did do a search on the forum yesterday and found plenty on brake line flare and fittings but nothing on this fitting. I always do a search before I post. Usually works out, also come across posts that have nothing to do with what I’m looking for but lots of info all the same. Ill keep an eye on eBay Richard. You were right about the thread count. I tried some new flare fittings in my thread checker. They were 3/8 fine thread. The original nut would not screw in. It fit but the threads would not catch hold. It did thread into a metric #4 fine thread but it was a loose fitting. thanks to everyone for your help.
-
Hello Ivan. Yes I would agree. I wouldn’t try to use it on my brakes neither. But I would be willing to try it on my oil pressure gauge. Just have to put a drip can under it just in case. Solder isn’t a bad idea but I doubt if I can get it off without buggering it up. Somewhere, somehow or some time - like maybe 1939 someone put that collar on that tubing. If it does leak then I’ll just put the original back on and do a hard splice rather than a rubber hose on the connection under the dash. thanks for your input.
-
Thanks LazyK, I did look thru McMasters and Grainger to. Plus Amazon and some other sites. Didn’t see it.
-
Ok. I just watched a utube. How to make a bubble flare using a double flaring tool. This guy said just flip the crimping part of the tool over so your flaring against the backside of it. The flat side. It did make it concave starting from the top and getting bigger towards the nut just opposite of a regular flare. It might work but the flare he did didn’t have the size of the original one. Still might work though. I scan try it and if it leaks I’ll have to cut the tubing under the dash and put the old one back in. Then add another connection to the rest of it. still like to know how and what that original collar is about and if I can still get one.
-
Hey Rich. Thanks for the tip on the brass nut. What about the collar? The bell shaped fitting on the end? I thought it might be a compression style seal but I just did a web search for bubble fittings and all it shows is the nuts. First time I’ve ever heard of it. Does a bubble fitting use a collar? A simple flare won’t work the way it fits into the gauge. It has to be bell shaped and crimped or compressed onto the tubing. I just don’t see how putting the nut on some tubing and screwing it into the back of the gauge will keep the tubing from pulling out of the gauge.
-
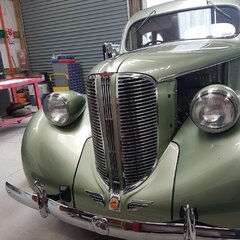
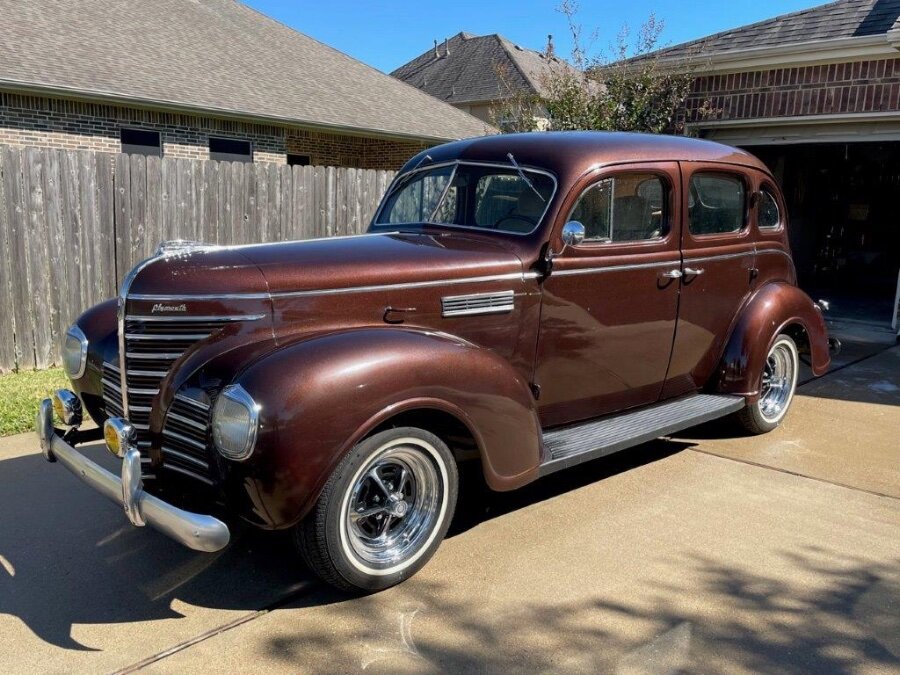
Hey everyone, The oil pressure line on my 39 P8 was cut below the dash and had a short rubber hose on it with flare fittings then it went outside the dash where another rubber hose was connected to make a turn down to the oil pressure outlet. Its always had a small drip below the dash from one of the fittings to the hose. Tried tightening it up a while back and it didn't really help. I have been wanting to swap it out for a single line to outside the firewall then place a rubber hose on it to absorb vibration before connecting to the engine. The problem has been the connection that screws into the back of the gauge itself. I don't know what type of compression fitting that is before the nut and if I need a special tool to put one on. But if I want to run just a single connection from the gauge then hard-pipe from the gauge to the firewall I'll need to swap out the entire line. Does anyone know what type of fitting this is and how to install it on the end of some tubing? (BTW that's 3/16 inch tubing)

-
Right you are. I had been wondering why I saw some of the belts cut off? I was thinking I might have a few words to say if I buy one of the seats with the belts built in and they try to cut them. Thought maybe it might be a liability thing or something.
-
You may be right Eneto. I saw a few cars where the belts had been cut. I don't know if there is an expiration date.
-
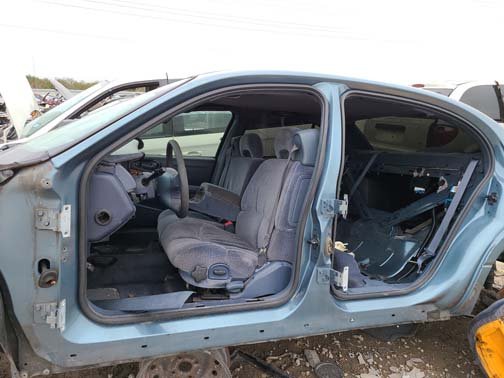
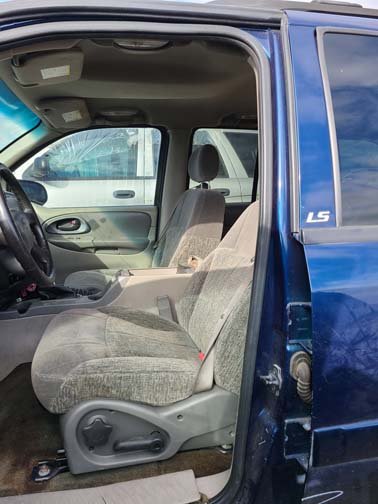
Thanks Tim. Hadn't even considered that but they should work. No thanks Eneto, I believe I found what I need at the salvage yard. Just got back from the salvage yard. The seats I found that seem to fit the bill the best are in a 2006 Colorado, 2003 Trail Blazer, 2000-2004 Suburban. The Colorado seat is a split bench type seat with a folding armrest but it does not have the belt built into the seat so I would need to purchase two sets. It measures right at 48". The retracters are 2-1/2" deep and I have a total of 53" from pillar to pillar. It may fit but I will have to take another look at it. The Trail Blazer and the Suburban both have the seat belts including the retracters built into the seat. The Trail Blazer looks like it will fit including the console and to top that I found a Trail Blazer where the seats are already unbolted. But the Suburban will not fit if I include the console. I would have to build something probably out of wood. But the Suburban seat is more cushy and comfortable. Where the top belt goes into the seat also looks better on the Suburban. The Trail Blazer has a small vinyl dome right beside the headrest where the Suburban's seat extends up beside the headrest and has a slot where the belt comes out. The only car I saw that might work was the 02 Buick Le Sabre. Looks like the seat and console will fit and the seat belts are built into the seats. Only thing I didn't like was the way the belts came out beside the headrest. Looked like a balloon. I'm still shopping. Today I spent trudging car to car, truck to truck, opened a lot of doors. But I did narrow it down. Looks like trucks and SUV's are offer the best options for what I'm looking for. Have to go back tomorrow and just compare the three. At least it won't be looking all over vehicle by vehicle, row by row. I like the Suburban seats. All the consoles I've seen are mostly vinyl anyway so I'm going to take another look at those. When I measured the seats it looks like side by side they will take up about 48". So that should give me about 4-5" in between that maybe I can fabricate a piece of wood. Cup holders is what I'm shooting for.. I asked for some ballpark figures and they told me around 100-150/seat with belts, retracters and tracks. Depends on the condition which mechanicals is all I really care about. I'll be putting new covers on them. Didn't get a shot of the Suburban seats but here's one of the Le Sabre: Here's the Trail Blazer: I could have snapped a few more shots but got to busy opening doors. I'm tired... but it was fun!
-
Yeah your right, they are available on the 2 point but not the 3 point.
-
Hey Pete. That does help. I wanted 3 point with retracters. I wonder if the top anchor could mount at the top of the vertical side piece? The extensions on the retracters, how did you get those?
-

Bias Tire Conversion and Differences in Size
Lloyd replied to 51_Meadowbrook's topic in P15-D24 Forum
Lot of these around: https://www.discounttire.com/learn/tire-size-calculator This ones good to: https://tiresize.com/calculator/
