James_Douglas
-
Posts
1,923 -
Joined
-
Last visited
-
Days Won
22
Content Type
Links Directory
Profiles
Articles
Forums
Downloads
Store
Gallery
Blogs
Events
Classifieds
Everything posted by James_Douglas
-
I was screwed as a kid once with car insurance. So, every since, I have been "on it" insurance wise. Rich is very correct that anyone who has a classic car MUST understand the difference between "Agreed Value" and "Stated Value". I have the 1947 on State Farm and it is an agreed value policy. Since we do not own a modern car (<20 years old) I have to have one car on a "regular" policy to get an Antique policy from Heacock for the restored 1949 Convertible. Heacock "gets it" that I live in the middle of San Francisco and walk or take Muni for 90% of our transportation. The other classic car companies do not. I read an article 2 years back on a guy who kept his car in a large shop garage a few miles from his home. One weekend he went to a show and got home late at night. He parked the car on the side of his house under a car port, behind a locked fence. His home was in a gated key-code community. The next morning the car was gone. His company said the would not cover it as he was in violation of his insurance contract. The car had to be garaged. I called my insurance company and made sure they had the addresses of my garage at our flat here in SF. A spare garage I rent 10 blocks away and our house out in the country. Photos of all the garages and the addresses on file with the insurance company. I had a long talk with an classic car insurance man who was just retiring after 30 plus years in the field. He noted several things for me to watch out for. 1. Inform your insurance of all garages and never leave it out over night. 2. If taking a long trip with the car, show or not, notify your insurance people at least one week prior to the trip and tell them the general plan for the trip and how long you will be out on the road. 3. If you have a car on a "regular" insurance policy, not classic, then every 24 months have an appraisal. Not just a "fair market appraisal, but a rebuilding and replacement one. This may be much more money than the market value. ***!!!! Now here is the catch---if the regular insurance company takes your premium payments after you have submitted the appraisals in all likelihood they will pay off for the amount you were paying for. They will drop you for sure after a claim, but in court they will have a hard time getting a judge to allow them to not pay out if you paid for $xx amount of coverage and gave them well in advance an appraisal backing it up. If they did not balk at the appraisal, they are on the hook. My 2 cents worth. James
-
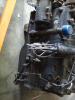
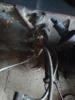
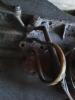
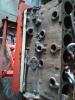
I will post some better photos later. The ones I posted stink. The one engine is no doubt a 265...I scored on that one. The other engine with little to no ridge at all is an odd duck. Looks like there was a plate, the little nail rivet holes are barley visible, on the passenger side in a long rectangle. I think it is a Chrysler Industrial Block model 908A. Has anyone ever read anything on what, if any, differences there were between the Chrysler/Desoto blocks and the industrial blocks? James
-
Hi all, I need a head for a rebuild for the '49 Desoto. I found someone here in San Francisco that had a couple of core engines he wanted to sell. I looked them over and decided to buy them, mainly for some parts here and there and a couple of heads. Both of them are 25 inch long blocks. Both of them were rebuilt by a outfit here in California that used to be a bog chain of rebuilders called Automotive Engineering. My '49 has one of their rebuilds in it and it runs good except for the seeping of oil through the block into the water jacket! One of the things that Automotive Engineering did was to obliterate the original engine code on the blocks and replace it with the code from the engine coming out of the car. Well, that that means is the engine code does not tell you exactly which flathead short block you really have. In this case both of the blocks are somewhat different than the ones I have in the 1947 Desoto, the 1949 Desoto, and the one on my bench which is stripped which was a 1953 Desoto. I am posting photos of the oil filter lines pad on the block as this is the most distinctive. Anyone with any ideas please comment. On one of the engines it appears to be by engine code from a 1959 Dodge. However a typewriter note on a tag says it is a 265. I took the plug out over number six and stuck a rod down in and measured it at TDC and BDC. It measures 4.75 inches. Hip Hip Hurray! The other engine has a odd looking block casting. Not at all like I have seen on the other blocks. Anyone have any ideas? I got both for $500 and with a 265 crank and rods...not a bad deal. Thanks all, James.

-
Hi Guys, I am from over on the p15 side. I need a spare block and head for a project on Desoto. I local guy has an engine for sale that appears to be out of a 1959 Dodge truck. The block is stamped on the ID pad with M25 and then a star. I think this is a 251 flathead. Can anyone tell me what is different on these engines from the production 251 used in Chrysler and Desoto in the late '40's and early '50's? Thanks, James.
-
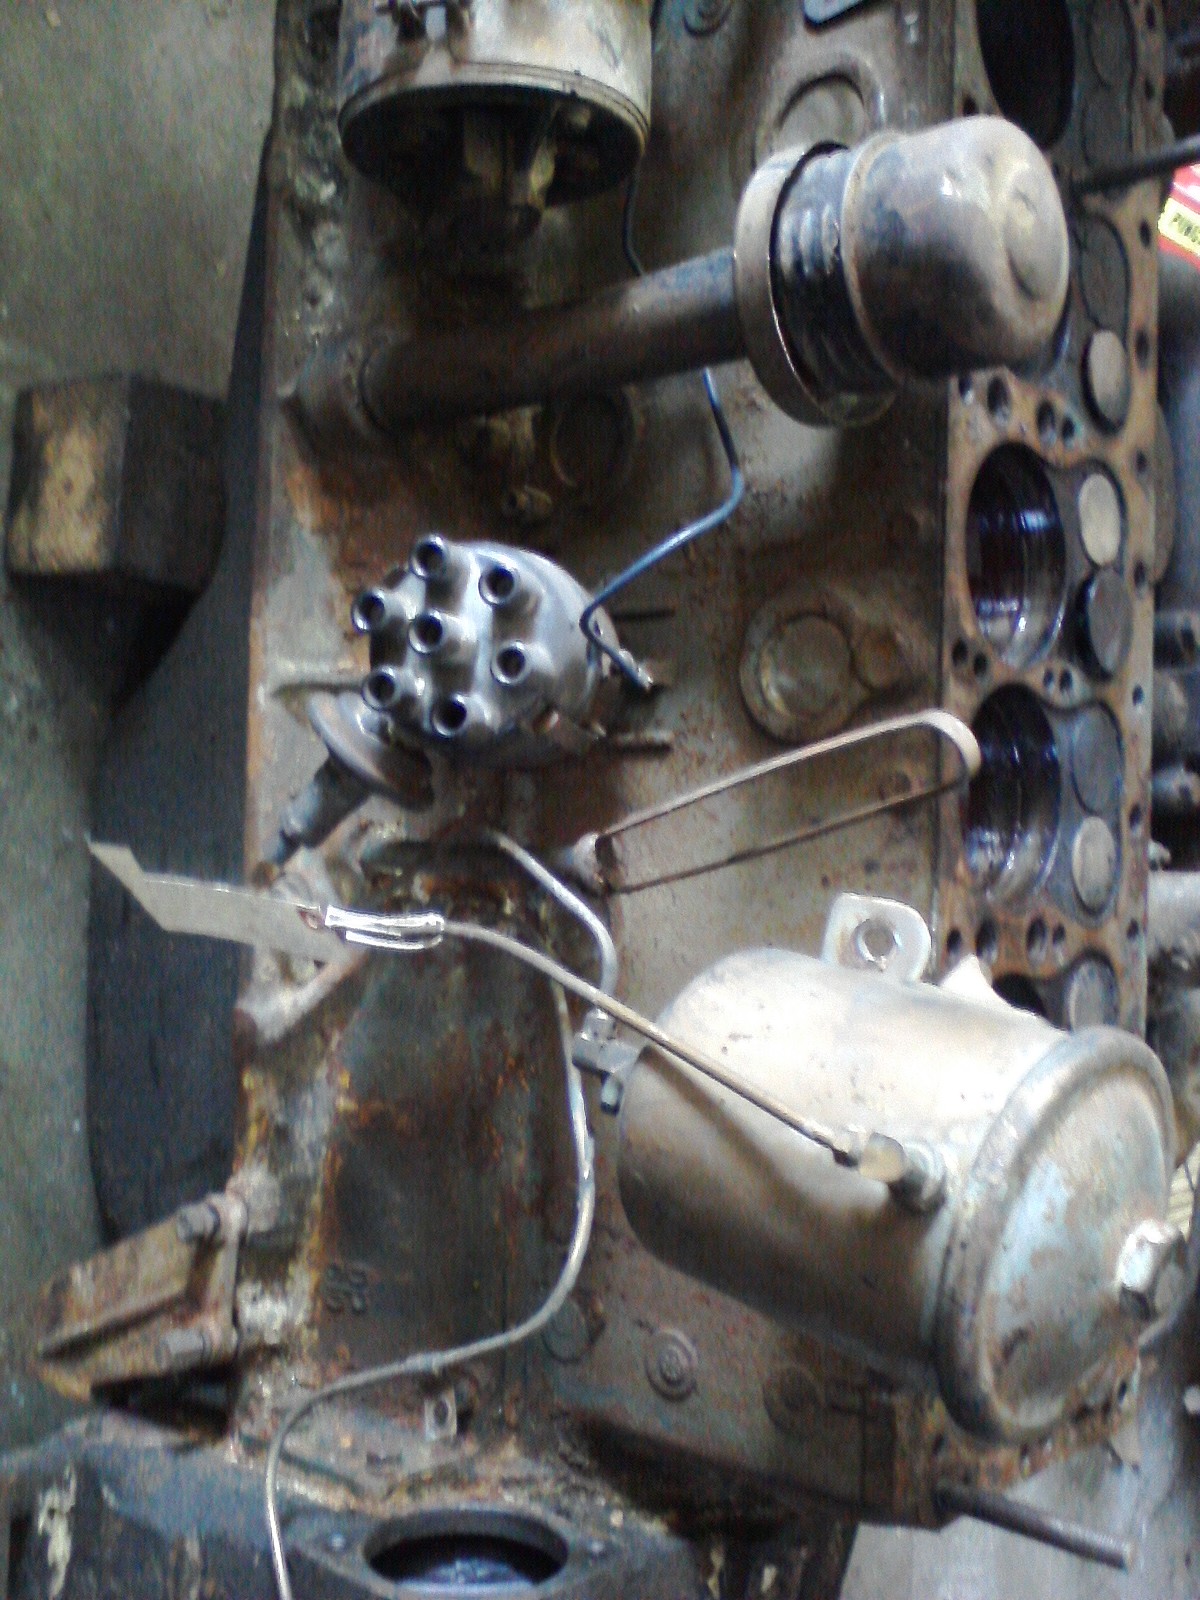
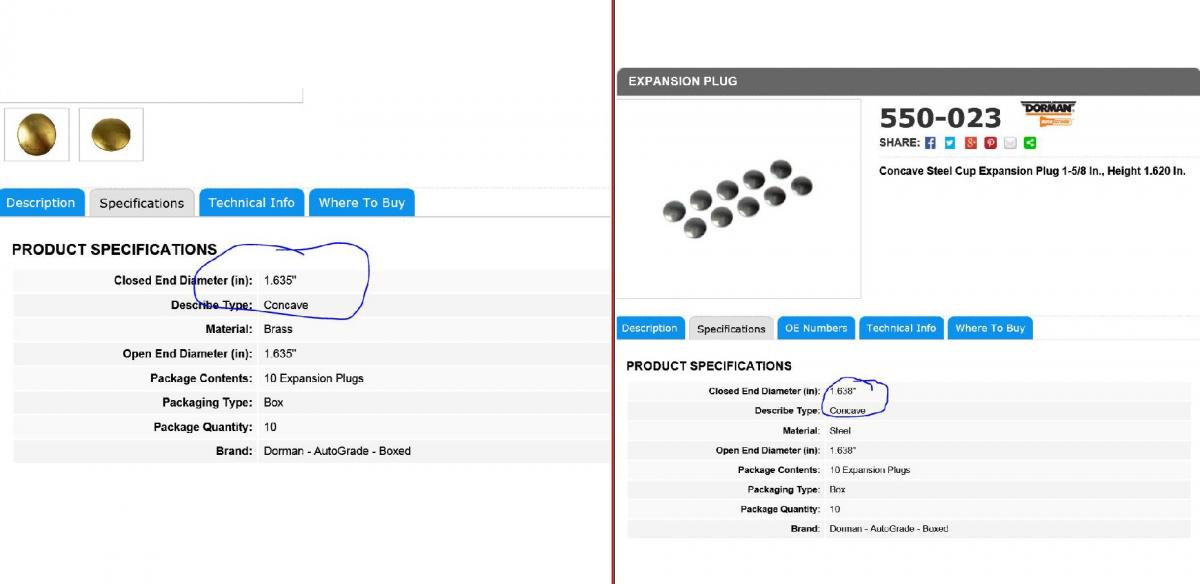
I am talking with a place in LA to make me a set of stainless steel core plugs. I went digging in the archives as I know that I posted some stuff on this about 10 years ago when I had the brass ones blow out....and yes they were installed correctly. Don measured a set he had and they were the same brass and steel. I have a set still that are about 10 Thou different. Also, in the Dorman Catalog they show as being slightly different in size. A cursory measurement of my block I am currently working on has the holes as 1.631. If I have them custom made, I can make up for rust/wear and I can get the "best" interference fit possible. I am going to measure all seven holes in three places and come up with an average for an order. I suspect I will end up with 100 of them... James.

-
I was just joking on the pray part. What I was alluding to was a benefit-cost approach to such a problem. A generally agree with the do it once do it right approach. However, sometime a simple fix that does not preclude a later proper fix is sometimes worth the effort. I have used the about system on blocks before and about 70% of the time it works. Also, in some cars welding in place is not an option due to the access. The above process is relatively cheap and if it works you are saving a lot of time and trouble. One can always pull the block and weld-replace if it does not work. We had a fresh rebuilt 413 in a letter series Chrysler years ago. Passed the mag check and ran great. About 1000 miles into using it, a slight crack developed in the block between two core plugs on the passenger side of the block. I used the above process and it went 25K and no leak. I sold the car many years ago and I never heard of a problem from the owner who I see from time to time. James
-
I think a lot of it has to do with the condition of the block. I the case of the 1947 that block was very clean in that it was acid dipped to remove all the rust. I think a previous owner had "cleaned" the holes and may have made them a hair larger. When I used the Dorman brass plugs everything looked very good. When I started to run the engine hard after break in the brass plugs started to blow out. After months of trying to figure it out we measured the brass plugs versus the steel one. All Dorman. What I found was that the brass plugs were a couple of thousands smaller in OD than the steel. The problem in my engine bay is there is no way to properly hit the plug with the fenders in. I got them in and I had to put a little JB weld on them to make sure they did not move. This has worked but it was a pain in the ass. Also, I have had one other plug leak a bit, but that one was OK to get to and I replaced it. The 1949 Engine bay is MUCH tighter than the 1948 and earlier models. Keller's smaller on the outside and more room on the inside 1949's! I know of some people that have never had an problem with the plugs and I know some people that have a lot of problems with them in the flathead's. I also have seen a LOT of casting differences in the flatheads as far as quality is concerned. This '49 block was not nearly as good a casting as the '47 block or the failed '49 it is to replace. So, I want to make sure that I do not have any issues. To that end, as I said above, I wanted to seek out the people who engineer the plugs and find out what is the engineering behind them as opposed to the "normal" conventional wisdom on installing them. I will make sure that the interference fit is right at the minimum block ID and the maximum plug OD before they are pressed down. Using the correct tool with the flange. Also, stainless steel plugs would be nice. James
-
There is actually two size king pins. Some 90% of the cars are the .797. The large Chrysler 8's and My 'Desoto Long Wheel Base cars have large king pins and everything else in the front end. I agree with the post about honing. I even purchased a Sanden hone for my larger size pin and gave it to my machine shop and they used it on my king pins. A good hone can sneak of on the pin size and the pin will fit perfect. James.
-
This is my 2 cents worth. 1. Drain the block. 2. Refill with REAL high concentrations of powdered TSP and water. Not the fake TSP hunt down the real thing. 3. Run engine for an hour driving it around. 4. Drain block. 5. Fill block and drive around. 6. Drain again. 7. Take a drummel and grind out the crack on the block a LITTLE bit. 8. Start engine for 3-5 minutes to warm up. Shut down and let heat soak for 5 to 10 minutes. This will open the crack a bit. 9. Mix and fill in with JB weld. Let sit for 24 hours. 10. Pour in jug of Ceramic Seal (See photo). Follow Instruction. The pray a little and see what happens. James

-
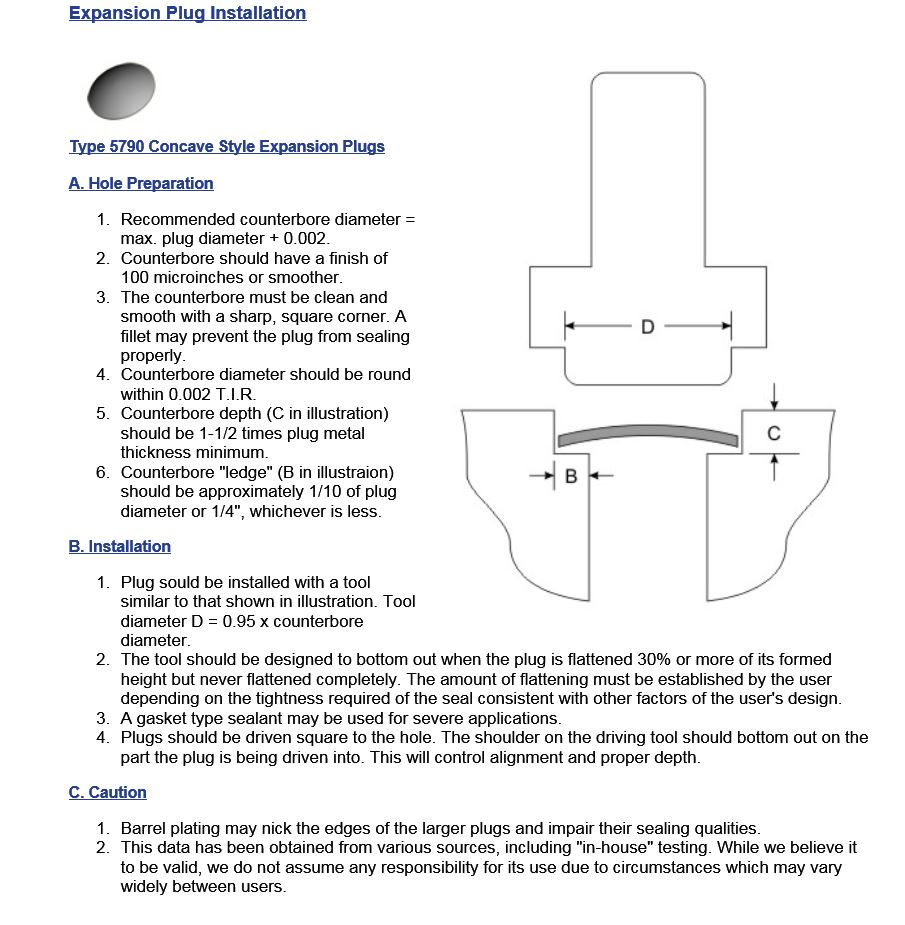
Hi All, Have been ill, then family death, then... I have not posted in a while. I am starting to work on a replacement block for the '49 Desoto. One thing I had trouble with, if you read the decade old archives, is the core plugs. On the '47 I used brass and they blew out. Turns out the Dorman brass plugs were 0.02 smaller in diameter than the steel ones. I also have had issues with the steel ones leaking over time and I am sure it is because getting a proper hammer blow on the plugs with the engine in place was not optimum. So, on the 1949 engine I want to do it once and never have to do it again. To that end, I contacted a company here in California that makes, among other things, core plugs. They have them in steel, brass, and stainless steel. They also have the engineering staff that knows the "correct way" to install them. I am going to have my general machine shop, not my auto machine shop, bore the core plug holes a few thousands over from their current size (1.631") to some larger and perfectly round size. I will also make the "correct tool" for installing them. That tool does not press directly on the center portion of the plug and it has a flange that bottoms on the outside of the block so you cannot pound them totally flat. One thing I learned from them is that you are NOT supposed to hit them in the middle if the hammer on the plug is anything less than the entire size of the plug! If the center is flat they will eventually leak at the outside. You are supposed to press them in to something like 30% of the original dome height and not depress the center of the dome. Once I get the done, I will post photos of everything for those that are interested. Also, I may have to spend $200 for 100 plugs if they are custom sized. I will use their stainless steel ones unless they tell me otherwise. I may have a couple left over... I hope everyone is well. Best, James
-
Hi all, I have been going to a car club event called Friendship Day for a long time. For several years now it has been going on in a nice parking lot of a business park at 1400 Seaport Blvd. in Redwood City, CA. It is always held on the 3rd Sunday in May. The people that run the show for the club (http://www.mpotac.org/history.php) have told us that the show may not take place this year. Why, because the "new" owners of the business park will not allow it. This business park is at the end of a long road with salt ponds and other industrial business which line the route from the highway off ramp to the park. On the other side of the business park is San Francisco Bay. Basically, this is the perfect out of the way place on a Sunday to have a car show. There is almost zero traffic in and near this business park on a Sunday. So, who is the new Ebenezer Scrooge who will not allow the car show? Google. I am posting this to let people know who love old cars that Google does not love you back. As a "tech" guy, that makes me mad. I have removed all Google software from my computers and I will not use their search engine. I use Duck Duck go now. In the event that you feel as I do, then send them a note telling them, like I did, that I will no longer support anything they do since they do not support my Hobby and passion. Thank you for the soap box. James. PS. If you really feel strongly about this copy and cross post this on other car web sites!
-
Well, I kept digging and found out the bore size was 0.6220 from the factory. Mine is 0.6240 but the bores could use a good polishing and that will open them up .001 to .002 at least. If I hunt around perhaps I can find some oversized lifters at a "reasonable" price.
-
There is no doubt that the new paints are more shinny. The real issue is single stage versus base-clear. I did my '49 Desoto a couple of years back and went with a base-clear even through I wanted single stage. Why? When you shoot a metallic paint in single stage if there are problems you cannot buff it out. If you try you get a leopard spots of metallic. You then have to sand and paint the car again. The labor costs are just too much. If I had a non-metallic color, I would have used a single stage. There is a "flattener" that can be added to the paint. We added some to the paint for shooting the dash so it would look more correct. The only thing is when you use a flattener, if you ever polish it, it stays polished. So, I just wipe the dash with a clean wet cloth. If used on the body, it would be hard over time to not "polish it".
-
My 1947 Desoto Suburban currently has a 3.9 in it. I also have, and drove it for years with the 4.11. With these gears I have had the car as high as 75-80 on the freeway. Usually, I have a hard limit of 70. With overdrive the engine noise and fuel use is less, but the engine could care less either way. One big thing is wind. If the wind is blowing, I have to keep it around 60 MPH. The car, even at 4500 pounds, moves around in a good wind and anything over 60-65 makes driving work. On the gear things. I have a friend with a '46 Chrysler T&C Convertible that was originally supposed to go to a diplomat to China. Mao won and he was stuck in the USA and the car was never shipped. It was an "export" car and has a 3.36 rear end from the factory. Lucky SOB!
-
I have rad the manual and the parts book and the thread on the forum... Does anyone have the factory specification for the bore size of the tappet's? Silly that it lists the oversize tappets but no place I can see it shows the bore size when new? I have some differences in the bores and I don't want to pay the overpriced extortion for oversized tappets. I may just bronze sleeve the bores, but I need the original size. Thanks, James
-
File Name: Carter Jet Chart File Submitter: James_Douglas File Submitted: 01 Jan 2014 File Category: Reference Information Carter Jet Chart Click here to download this file
-
Hi Guys, It has been a very busy year for us. I have not had that much time to sign in. My mother-in-law was put into a nursing home and have been going down hill all year. Being she is in LA and we are in SFO it has been trying. She is in hospice now and we are placing bets if she will see her 90th Birthday in February. I have not had time to deal with the Big Desoto plans for a new engine. In addition, the '49 Convertible has a bad block. A seep or a crack in the oil gallery is allowing oil into the water jacket. Confirmed. So a new engine is in the work for that car. ****** I have made some time to talk with a couple of experts in Rack and Pinion Steering. Although there are racks in cars that are of the weight class as the 47, the geometry is not correct for to make sure there is no Bump Steer. None of the markers of custom racks make anything for a car over 3000 pounds. So, no V8 of any kind unless I want to cut the front off and I do not. There is one thing I will be checking all that said. I know of a real rich guy with a big collection in the area. He got his hand on a Desoto Taxi Project some years ago. Same basic car as the Suburban. He has a rack in it and a 383. Roy Brizio finished the project for him as this guy spends a lot of money at Brizio's over the years. I need to take a real good look at that car and see if he will take it for a ride and if I can try it and see how it drives. If the rack is "theoretically" not up to the weight classification it is supposed to be...I talked with a specialist in heat treating that suggested that the parts could be treated to handle more load. Humm..... I will keep at it. If I cannot do a rack and a V8 then I will do a fuel injected six. Perhaps with turbo and perhaps not. I will also look into Don Smith's 1970 Pontiac station wagon steering box for his suburban and see how he is doing with that swap. I hope everyone is well. James ******
-
 The one thing I would like to find out in a definitive way is the information on the decline of the additives over time and the effects. Several of the engineers I have talked with on this subject all tell me that the anti-rust and anti-foam additives have a life of about 7 years. On the shelf or in a fluid coupling. It would take a lot more time and money than I want to spend to come up with hard numbers on the question. I can say that from a seat of the pants feeling that when I went from regular ISO to the "Circulating ISO" fluid that the off the idle performance felt much better up to 10 MPH. The anti-foaming agents I feel do make a difference in the fluid dynamics in the coupling. Of course is it worth the 3 times the cost? In any case, I use it and have been happy with it in the Big Desoto. It may well be in a smaller lighter car the difference would not even be noticed. I do wish that the web master would take the entire tech note and post it in the repair section as opposed to snippets of it. Once you understand how the thing works, the issues of lubrication all start to make sense. I have toyed with playing around with the stall speed by over or under filling the unit and see what it drives like. One of these days when I have time I may well do it. Best, James
 -
Do not use tractor fluid or ATF or... No, and no, and no. Here I will post again for the god knows how many times... ********** Technical Note on MOPAR Fluid Couplings (Fluid Torque Couplings are NOT covered by this Technical Note) By James Douglas – San Francisco Having run several types of oil in MOPAR “Fluid Couplings” over the years and heard many recommendations, I decided to see if I could approach the issue of what lubricant to use in one of MOPAR’s Fluid Couplings by a more scientific method. As is well known, Chrysler instructed all owners to use “MOPAR Fluid Drive Fluid” only in their Fluid Couplings. Problem is, MOPAR stopped making it decades ago. My first stop was Chrysler Historical. After a month of looking, I was told that they do not have any of the original engineering information as to the specifications of the fluid. Then I headed off into internet land to hunt down anything I could find on the subject from ORIGINAL sources. I managed to find an original Chrysler Question and Answer sheet from 1939 about fluid drive from Chrysler Engineering. In it they stated: “…The proper fluid is a low viscosity mineral oil, which also servers to lubricate the bearing enclosed in the coupling. The pour point is such that the oil will pour at the lowest anticipated temperature, and has no corrosive effect on the steel parts of the unit.” All well and nice, but not enough to figure out exactly what they used as fluid. Later in the same document they talk about the types of metal used and the carbon-graphite seal. Hum, carbon-graphite seal. I did some more digging for a few months and turned up a can of unopened original MOPAR Fluid Drive Oil. An analysis of that oil, and some more literature I ran across, stated that the original fluid was a pure-base mineral oil with a Saybolt Viscosity of between 100 and 150. The fluid had a Viscosity Index of greater than 80. The fluid had anti-foaming and anti-oxidation additives. It specifically did NOT have any seal swelling agents as these can attack the carbon-graphite seal and the copper in the bellows. This last specification eliminates most modern transmission fluids. After finding several formulas to convert Saybolt Viscosities to Kinematic Viscosities, it appears that the best match to the original specification is ISO 22 or ISO 32 oil. However, the ISO 22 is just below 100 Saybolt and the ISO 32 is much higher than 100 Saybolt. Based on a period (c.1947) Lubrication Industry article on fluid couplings that had the following admonishment: “Contrary to popular supposition any attempt to use a higher viscosity fluid would actually reduce the torque transmitting ability of the coupling since torque-transmission is dependent upon a high circulation of fluid between the impeller and runner and is not caused by any viscous drag between the two.” During my continued research on the history of the Fluid Coupling, I ran across the fact that the original company that licensed the fluid coupling technology to Chrysler is still in business and still making fluid couplings for industrial applications. After a couple of weeks of digging, I found a senior engineer from that company that would have a long technical talk with me on fluid couplings. In essence, he agreed with the period information I quoted above. He added that the lowest viscosity oil that would still provide for bearing lubrication is the one to use in theory. However, he did say that unless the fluid coupling bearing has been replaced and is know to be very high quality then err on the heavy side viscosity wise. Just don’t over do it, he stated. I was also told that normal hydraulic fluid does not have large amounts of anti-foaming agents in them as they usually do not have large amounts of air in the systems to foam in the first place. A fluid coupling is only filled to 80% and as such has lots of air in it. Therefore, when looking for fluid coupling oil, one must look for an oil that is a “Circulating Oil” which has a lot of anti-foaming additives in it. I was also informed that the additives tend to have a shelf life in the can, or in use, of 5 to 7 years and it should be changed at that time. I was also told that the couplings are actually somewhat permeable and water vapor will work its way into and then back out, when hot, of a steel fluid coupling. Very little amounts, but apparently is does go on. I was also told to never use engine oil or ATF as both would cause problems in the long run. Based on the research and discussions I have come to the conclusion that ISO 32 hydraulic oil with the proper additives and VI (Viscosity Index) above 80 is a suitable replacement for the original MOPAR fluid drive fluid. ISO 22 would be a better exact match, but only if the quality and condition of the bearing is know in a particular coupling. The oil I have identified that meets the specification, with a higher general viscosity to deal with the age of the bearings, is: Mobile DTE light circulating oil ISO 32. This oil is available at Granger. I have run this oil for about six months in San Francisco city traffic as well as up steep mountains on very hot days. The coupling works well. I have noticed, and other car people have as well, that the car seems to move out from a dead stop to 10 MPH better with the fluid. Only a before and after session on a dynamometer would tell for sure, but I feel that it moves out much faster. Classic car owners are advised to use this information at their own risk. I am not a fluid coupling engineer, a bearing engineer, or a lubrication engineer. I have done my best to find out what was in the original MOPAR Fluid Drive Fluid. This effort is in essence industrial archeology and should be carefully considered prior to use. As a post scrip in 2014. I ran across and old Gyrol book that talks about the filling of the fluid couplings. In short, how much you fill it affects the torque-stall curve. Chrysler set that by the position of the hole in the bell housing. However, if one is to fill it a little less or a little more one can change the curve. Do so at you own risk and never fill it past 90% so it has air in it to compress less you blow the thing up!. James Douglas San Francisco
-
DJ, I never thought of or heard that the shifter arms on the 3-speed and three speed with OD were different. Do you, or anyone reading this, have any photos or measurements of the different arms? James
-
OD transmission cleanup - oh what did I do...
James_Douglas replied to Mark D's topic in P15-D24 Forum
One last thought. The modern replacement rear seals... These seals are the correct ID/OD...HOWEVER they are micro edge seals. I have had problems with them over time in my 1940's cars. The reason is that they are designed for shafts that have a closer tolerance of movement than these old transmissions and rearends. The problem develops in that shafts walk around a bit more and this can wear the seal and it will start weeping. You noted, as I have, that the housing in the old leather seal is much more robust. Part of that is to account for the shaft movement and part of that is to hold the leather in-place in the seal. I have had better long term luck sourcing an original leather seal, often having to find several to find one good one, and soaking them in "Neets Foot Oil" for a week or two then "Rolling The Seal" as one is supposed to do with leather then installing it. The leather seals do tend to weep more than a modern seal, but they usually do not get worse over time either... Just a thought... James -
OD transmission cleanup - oh what did I do...
James_Douglas replied to Mark D's topic in P15-D24 Forum
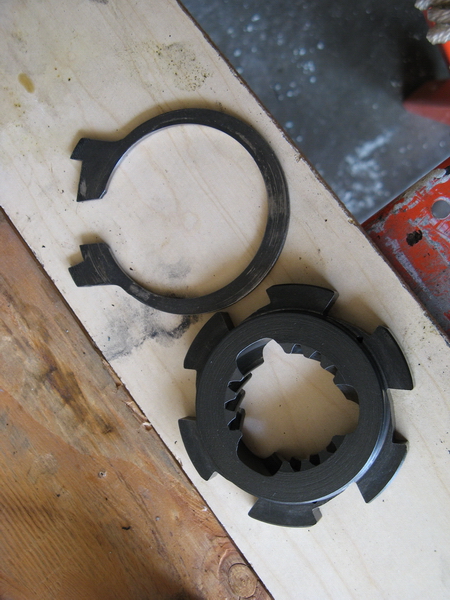
A couple of thoughts. 1. I assume you have downloaded all the MOPAR "How To" booklets from the Imperial Web Site. 2. There is a little 1/4" long shaft in the housing that slides into the shift rails. It is often overlooked and not cleaned and polished. Find it, clean it, polish it. 3. Take a look at my attached photo of the Sun Gear Control Plate and Balking Ring. The Balking Ring works by FRICTION. What happens is that is dig into the Sun Gear Control Plate over time leaving a groove. This can cause the friction to not be correct. I hunted down a new one for mine. You do not want to know what it cost. Now that I have a couple of used ones...I would consider have a good welder use nickel rod and fill in the groove and then have it machined back down to size. This does not NEED to be done, but the quality and consistency of the shifts are directly affected by these two parts. I had a trans, rebuilt, that I purchased that had issues in the car. One of the things that made it better was to deal with this part. I have a lot of photos and documents. If you want me to email them to you directly drop me a line and make sure you can get big attachments. Good luck. James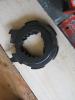


-
Greg, which part numbers are you using? I got a set some years back at NAPA and they had the same length as the factory shocks (with correct MOPAR part numbers on them) which I still have in a box. James
-
About a month ago a Woodies on the Warf in Santa Cruz I saw a very nice 1946 Chrysler T&C Convertible with a Viper engine in it. Walking up to and around the car it looked dead stock. It had a new frame and chassis with the Viper engine in it. I talked with the man for about 15 minutes. Very nice job. The man who owns it also owns "The Goodguys". I have been told by his upholsterer, who did the top for my '49, that the car ran about $250K. Anything can be done. Just depends on how much you can do and how much you have to pay for. James.
-
Hi Jeff, I did check the relief valve...nothing. I hate the thought of blowing a hole in a very good condition original honeycomb radiator or I would. I think draining the water and pressurizing the oil system would be a better test. I did some reading about pressure testing equipment for leaks. The rule is to always pressure test in the direction of the leak and not the other way around for various reasons. As long a every few days I clean the system out with TSP to get the oil out of the cooling system, I can take it for a drive. I just cannot let the oil build up in the water. It like to pool in the head with the result of a cracked head do to hot spots that do not show up on the temp gauge. James