

BobB
-
Posts
155 -
Joined
-
Last visited
Content Type
Links Directory
Profiles
Articles
Forums
Downloads
Store
Gallery
Blogs
Events
Classifieds
Everything posted by BobB
-
I have several diagrams collected from the site over the years. I've attached a couple that are under the 3Mb limit. I have one file that provides extensive text from the gentleman that did the harness build, but it is almost 14Mb. My e-mail is bobtdy@gmail.com if you'd like to give me an address to which I could send that one and I'll give it a try. I don't know if there is a common area/site where we can all drop things we've downloaded over the years, but that might be a way to reconstitute some of the information for everyone. thanks BobB B1B Wiring Harness Diagram Notes From David Erb.docx Pilothouse Harness Diagrams - 3.pdf
-
Would love to see additional pictures of dash and engine. Looks like a find if it is really in the shape it appears and you can swing it.
-
I'm on a PC and I can't get the photos to open either.
-
What is the 1951 version of the tie wrap?
BobB replied to bkahler's topic in Mopar Flathead Truck Forum
I've seen several instances on this forum of members getting together a group buy for items only available in large quantities. Seems like that might be worth a try here. BobB -
Great input! Thanks guys.
-
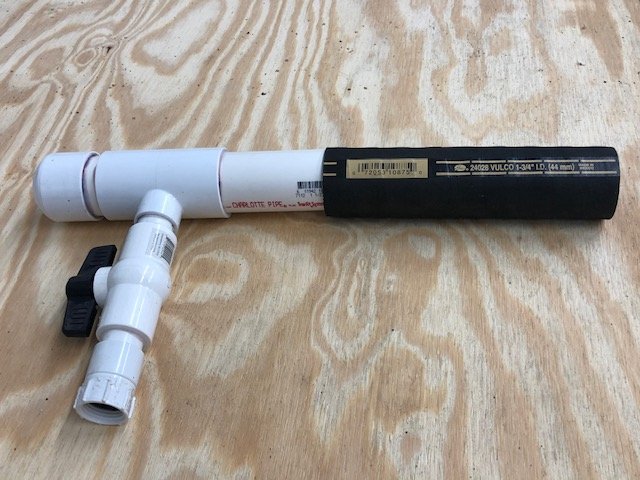
I'm a big fan of the adage: "if it ain't broke, don't fix it." My last trip into town in the '52 B3B required 3 stops to let the engine cool down. That's broke. So . . . I want to fix this problem properly and for the long term. I anticipate that the first step is to flush the engine thoroughly after disconnecting from the radiator. I also plan to replace the water pump, water distribution tube, and radiator in the process. My big question is what outlets should I open up and in what order in order to get the best benefit from flushing the engine? At what point should I remove the heater valve on the back of the head? Heater core is already disconnected. In what order should I remove the lower freeze plugs to flush the scale they are probably hiding? Would a shop vac be useful in getting the crud out of them? At what point in the flush should I remove the water pump and water distribution tube? Does any of this need to be done with a warm/hot engine? Are there any chemical products that help the flush produce a cleaner engine? I've rigged a way to connect my hose to force the water into the engine more forcefully (picture). All thoughts and insights appreciated. Thanks Bob
-
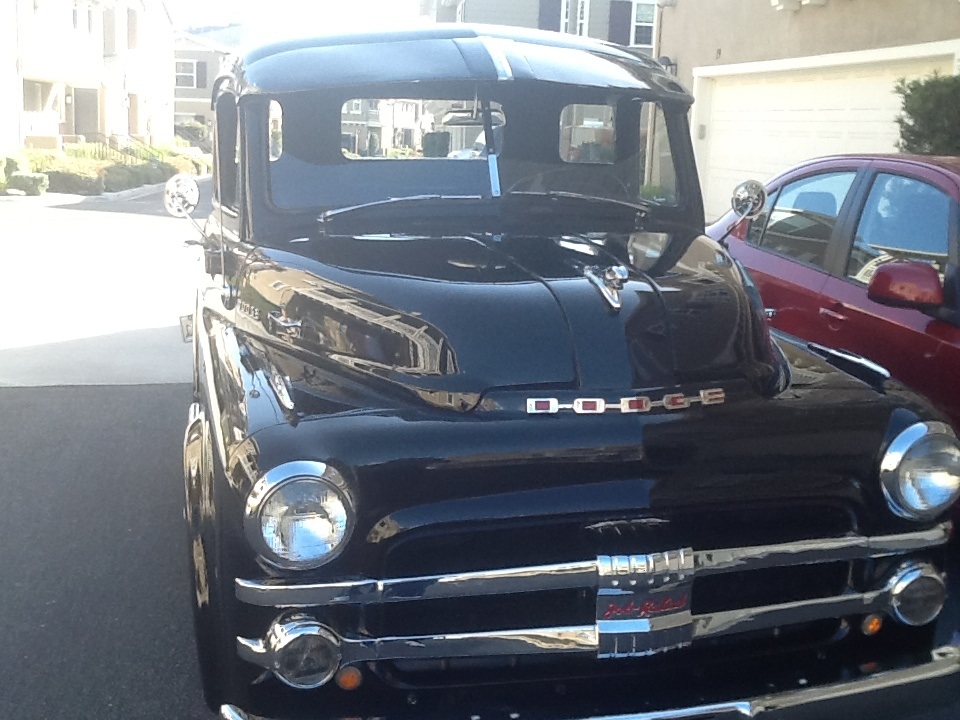
Been a member since 2013 when I bought my 1952 B3B. Got my 1947 WD21 a few years later. The terms “job rated” and “pilothouse” are used a lot, but don’t seem to enjoy consistent usage — probably due to us uninformed newbies? Just wondering if the more seasoned among us could provide a more definitive answer to a few questions. 1. Job Rated: I’ve seen posts that limit this term to the 1939-1947 years, but my ‘52 has a “job rated” badge on the front grill. Does the term properly fit both? 2. Pilothouse: does this term relate to all cabs in the 1948-1953 years due to the higher riding cab or just to the five window “delux” cab versions. I’ve seen pilothouse used for 3 window cabs too, but can’t tell is that’s proper use of the term. Thanks in advance for the clarity that those years of experience and wisdom can provide. Regards, Bob
-
Ready to Start the Engine Build (what am I missing)?
BobB replied to billrigsby's topic in Mopar Flathead Truck Forum
Water distribution tube? -
Know what would be really helpful? If we could compile a set of photos describing each heater model that we’ve found. Especially the location of the mounting studs and the tubes into and out of the core. If those of us who have restored a heater or two would prime the pump by sending information on a model or two, we could get a valuable resource together fairly quickly for the more common models. Then people could add rarer models as they are found. I’ll try to find the picture before I installed the heater in my B3B. I’m looking for a heater for my WD21, it both the mounting and the hose locations are completely different. if you think such a resource would be helpful, please add your contribution to the thread. When there is a good set of info, we can compile into a document that can go in the Pilot Knowledge section of DPETCA or some other suitable place. Perhaps should start another thread to avoid hijacking this one, though. Thanks Bob
-
There are a number of parts places that specialize in classic Dodges, but I find most of the parts I need on EBay. In fact, I found my 1952 B3B on EBay. A couple of the parts places to get you started: Andy Bernbaum/oldmoparts.com, DCMClassics.com, rock auto. There is also a part of this website dedicated to finding/selling parts. Welcome to a fantastic site.
-
B-Series Trucks Represented in Auto Museums....
BobB replied to 48Dodger's topic in Mopar Flathead Truck Forum
If you’re doing a truck rather than the panel, I’d recommend a five window even if it’s starting condition is not quite as good. Those corner window are just a defining characteristic IMHO. -
Recommend you watch e-bay for a while. The parts are out there. I found several as NOS. The ones that aren’t are survivors in great shape. Bob
-
WELCOME!! This forum has so many knowledgeable participants as well as a treasure trove of archived discussions. We’re looking forward to more pictures. Bob
-
If your hood is nice and shiny, you can see the light change without looking up. Guess that wouldn’t work for the patina folks.
-
Another thing to check since it is what took mine out: the bolt that holds the points in place can loosen allowing the points to rotate enough that they never open. That prevents proper firing for sure.
-
CHS Ricardo Cavallero S.R.L manual steering boxes
BobB replied to bkahler's topic in Mopar Flathead Truck Forum
Good Guess I’ve just seen too many requests for my bank info from obvious scammers. Thanks for setting me straight. Bob -
CHS Ricardo Cavallero S.R.L manual steering boxes
BobB replied to bkahler's topic in Mopar Flathead Truck Forum
I would be very concerned about their payment terms. Have my bank cut a certified check to them, yes. Give them access to my bank account, never. You could be out much more than the $500. Unless you have a burner account that doesn’t have any other funds in it, I wouldn’t do it. I’d rather drive to their location and hand them cash. Just my two cents. No part is worth that risk. -
Wow! Autotype can certainly make an interesting sentence. Mine is 85.25” to the outside of the treads. It’s more like 85.75 to outside of the tire body. Hope that helps. I look forward to making some progress this Spring/Summer on “Big Frank.”
-
Well, I’ve made exactly zero progress on the one ton, but I certainly get you a measurement. Mine has came with no bed, but the rear end doesn’t appear to have been modified. I’ll get out and check it once it stops storming here in north Alabama. Regards, Bob
-
1953 Dodge - What have I got into
BobB replied to peteandvanessa's topic in Mopar Flathead Truck Forum
Just a quick note to warn you about the line that connects the two rear cylinders. If you don’t get it tucked down flat enough, it will make contact with the drum. It it only takes half a mile to wear through the line and dump the fluid. Ask me how I know. Unless you’ve upgraded to a dual cylinder, that event will make your brake pedal useless. That’s when your emergency brake come in really handy - hope the T-handle is well oiled though it’s amazing how hard you can pull when you’re that motivated. This forum has a great supply of really knowledgeable people as well as those who can share lessons learned the hard way. Regards, BobB -
I'm having the same problem with my B3B. Can't seem to find the built-in short that causes it to go off all the time when I make the final connections at the horn. Pictures noting the place/connection that's tricky or a description of "the trick" would certainly be appreciated. Have to agree with the comment in the Additional Information that proper alignment of the spokes is quite difficult. I'll gladly give up on that, though, if I can get a working horn that doesn't work until called upon. Bob
-
Acquired a 1950 Pilothouse to go with my '50 Meadowbrook
BobB replied to mmcdowel's topic in Mopar Flathead Truck Forum
So that’s your definition of a dirty garage? Can’t speak for others, but I’m thinking more like “boy that’s a lot of space” than “ I spy something that’s out of place.” That looks better than mine after a good cleanin’. Congrats on the GREAT find. -
Someone has designed a removal tool for these nuts that fits the four indents and has a hole down rather center for the post that sticks out when you unscrew the knobs. The tool runs about $25 on EBay. Seems a bit high, but it works really well and I didn’t find a good alternative. Regards, Bob
-
Hi Just wanted to point out the member map that shows where members are located and gives access to their profiles which usually list what types of vehicles they have. Under “browse” the selection all the way to the right is “members.” Under that is a “members map selection. Just keep zooming inuntil you’re in the desired area. There appear to be around 20 members in the area. Many of them have car projects, though. If the menus don’t show up for you, you may have to join up to see those resources. Regards, Bob
-
There is a set screw accessible through a hole in the end of the door. I don’t mean to imply that it’s easy, though. After 65+ years these fasteners get pretty hard to dislodge. I’ve tried penetrating oil, shocking it with cold, and trying to drill it out. Nothing has helped so far. I did find a locksmith who was able to cut a key without removing the lock. That may be an option for you. There is quite a bit of discussion on the forum on this topic. Hope you find a way that works for yours. If you find a trick that works, please feel free to share. - Bob B
